4 sock filters.
two pairs of socks for your birthday. not too bad.

Posted 15 July 2016 - 02:07 PM
4 sock filters.
Posted 15 July 2016 - 07:23 PM
4 sock filters.
two pairs of socks for your birthday. not too bad.
hahaha - I wish i even got that
Posted 15 July 2016 - 07:27 PM
Spotted a potential very expensive mistake tonight.
I saw that the cam belt would have rubbed on one of the 'fins' on the water pump. I had removed one per the SC instructions but noticed tonight another needed grinding of.
Still tight (like everything else)
Also realized that i would not be able to fit a new fan belt in the future without removing some more metal from the engine mount/ radiator bracket. The trigger wheel would have got in the way .
Posted 15 July 2016 - 08:35 PM
"Custom" really means custom. doesn't it? ![]()
Posted 15 July 2016 - 08:54 PM

Edited by HUBBA.HUBBA, 15 July 2016 - 08:57 PM.
Posted 15 July 2016 - 09:46 PM
[quote name="minisilverbullet" post="3403545" timestamp="1468610841"]
Spotted a potential very expensive mistake tonight.
I saw that the cam belt would have rubbed on one of the 'fins' on the water pump. I had removed one per the SC instructions but noticed tonight another needed grinding of.
I like the thread marks on the pump housing. Been there.
Yip, it is my favorite feature! ![]() I did wonder for a second why the fan wouldn't turn.
I did wonder for a second why the fan wouldn't turn.
Posted 15 July 2016 - 09:47 PM
"Custom" really means custom. doesn't it?
lets just say it has been a steep learning curve
Posted 15 July 2016 - 10:40 PM
Posted 16 July 2016 - 11:58 AM
Edited by Northernpower, 16 July 2016 - 11:59 AM.
Posted 16 July 2016 - 06:17 PM
I have the same trigger wheel as you for my SC 7 port conversion and therefore had the same fan belt clearance issues. I did send you some pictures on post 145 of your build showing the clearance after fitting but given the large amount you have to do you may have missed them. The main problem I came across was when I removed enough of the mounting bracket to clear the fan belt the bracket was weakened just enough to make it flex in the vice. I was worried about the long term integrity of this due to the increased torque going through and whilst it may be over engineering it I welded a couple of fillets on the back of it to add back the strength. I used the genuine rubber engine mounts so it does make fitting the nuts to these a little difficult but I prefer these mounts to the ones with captive nuts. I still have to take off the sensor to change the belt but its better then taking off the bracket at the side of the road.
Yes I remember, but I overlooked the bracket description as I was too focused upon the damper pulley.
I haven't actually removed so much metal from the part of the bracket which takes the weight of the engine, more the top part where the radiator bracket sits.
Posted 16 July 2016 - 06:44 PM
Well the journey between my two garages with the engine began:
Even managed to get my girlfriend involved.
Dogs were as happy as I was.
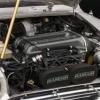
Ta Da:
Even the bonnet doesn't fit anywhere as near as bad as i thought. This is teh standard bonnet still with the brace etc. I do plan to lift the rear so , it should be fine with a bit of the bracing removed.
Posted 16 July 2016 - 07:04 PM
Posted 16 July 2016 - 08:09 PM
Posted 16 July 2016 - 08:26 PM
Great build !
Looks awesome in the car
Posted 16 July 2016 - 08:32 PM
0 members, 1 guests, 0 anonymous users