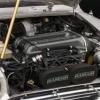
here you go,


Posted 30 June 2016 - 04:59 PM
here you go,


Posted 30 June 2016 - 08:19 PM
here you go,
Many thanks!
I got the guy who made the alternator adjuster to send me a alloy sleeve/spacer. So I will replicate how you have mounted yours.
Also got him to send 2 13mm spacers for the adjuster which will allow it to clear the alternator.
Highly recommend him - total cost 8 quid.
Posted 30 June 2016 - 09:03 PM
Posted 30 June 2016 - 10:44 PM
Note that th above set up is spaced differently due to different drives.
yip! it was more the method of mounting the alternator i was interested in.
Posted 01 July 2016 - 08:12 PM
Hello, I just read all 12 pages of this awesome project.
Well done and thanks for sharing. Looking forward to the updates.
Thanks for reading. I really enjoy reading other members threads, so just happy to share my own.
Posted 01 July 2016 - 08:28 PM
A little more progress tonight. I am not quick as I had hoped, but thats how it is with work and everything "getting" in the way.
A quick reflection: I used to smile at some builds on here and think that people enjoyed tinkering with and building their cars more than they did driving them. I am however starting too understand the appeal of taking time and enjoying the process. I am fairly enjoying myself, having never really done anything like this before (if you hadn't noticed) but I cannot wait to drive it.
Some little bits done tonight:
Alternator filled down to bring the pulleys in line. I did it with a hand file as i didn't dare screw it up with the grinder. Took ages. ![]()
There as a hole where the original crank sensor was, having looked for a blanking plate without success, i decided to buy a second hand sensor on ebay for the pricey sum of 99p. cut all the wires off etc:
Finally put together the two 90 degree hoses on the water way for the dry deck. after trimming I was left with about a 1/4 of the hose left. An alloy joiner in the middle and everything fitted - just. It is real tight for space. The steady bracket needed trimming to fit.
Posted 01 July 2016 - 08:41 PM
Posted 01 July 2016 - 08:57 PM
Mmmmm have a look as the DSN brackets they take up a lot less space.
I probably should have den that from the start. There complete steady kit with bracket is only a tenner more than i paid for the minispares steady and bracket.
Though, i have all of that now. It is all together and it does fit. The silicon hose does touch the bracket, but I guess it won't rub?
Posted 01 July 2016 - 09:06 PM
Posted 02 July 2016 - 08:14 PM
IT will rub. You should be able to get some sticky fabric anti abrasion tape.
If you are going to modify the bracket I would be looking to bend the return over rather than cutting it.
Reason. You are left with a friendly surface (wide and smooth) rather than a narrow knife edge. Even if smoothed.
Looking at it again with a little more daylight shining through the garage window and the hose does clear the bracket by about 4mm. As nice as the DSN steady is aI am happy to have saved 42 pounds plus 13 delivery.
Posted 02 July 2016 - 09:33 PM
Posted 03 July 2016 - 06:43 PM
While I wait of the hose and joiners for the oil feed.
I decided to have a look at the handbrake quadrants and pins. Last MOT the car actually failed ion these and i just sprayed with some penetrating fluid and it passed. SO today I replaced these. Was far form straight forward as out should have been.
Pins were totally seized on both sides, i had to drop the dampers from the inside the boot, remove the cones and hilos. and set about them with a hammer and a drift.
Eventually they came out. I took the opportunity to fit some good ridge braided hoses, Tidy everything up and give it a fresh coat of stone chip. This time I went for the most expensive i could find, since that last time it faded to brown/grey really quickly.
Happy with the result:
Posted 04 July 2016 - 08:00 PM
Hoses and joiners for the oil feed arrived.
I was concerned it would be complicated to put them together, took literally 1 minute.
Nice quality stuff from Torques.co.uk.
Spent some time sorting the arches out. Previously they were riveted on, it always bothered me. So i have decided to use stainless socket heads instead with rivnuts. So I have enlarged the holes for try rivets.
I will also add some arch rubber, while I am at it.
Posted 04 July 2016 - 08:26 PM
Posted 05 July 2016 - 07:23 PM
Spent the evening putting on the arch finisher/trim.
Was a bit fiddly but turned out alright, especially given it was the cheap trim and i was sure if it would be suitable for the "bullet" arches I have.
Held on by rivnuts and stainless socket heads.
You can see the "hurricane" in the background. I wish it lived up to its name but it is incredible slow.
0 members, 1 guests, 0 anonymous users