Jump to content


Photo

Replacing Complete Side Panel


  • Please log in to reply
10 replies to this topic

#1 thume95

thume95

    Just On Tickover

  • Noobies
  • Pip
  • 5 posts
  • Location: Berwick upon Tweed

Posted 28 December 2015 - 02:44 PM

Hi


my mini has a lot of rust on the side panel and decided it would be just as easy and not that much more expensive to replace the whole side panel instead of welding in repair panels.


I was wondering if anyone else had done this and so had any tips and advice on removing and fitting the complete panel.


#2 Daz1968

Daz1968

    Up Into Fourth

  • Members
  • PipPipPipPipPipPipPipPipPip
  • 2,058 posts
  • Location: Dudley

Posted 28 December 2015 - 03:42 PM

I presume you mean full panel with door post, if I was going to undertake this I would put a brace from crossmember to the roof cant rail and take accurate measurements from the opposite side to aid alignment, also ensure car is well supported and level,

#3 sonikk4

sonikk4

    Twisted Paint Polisher!!!

  • Admin
  • PipPipPipPipPipPipPipPipPipPipPip
  • 16,033 posts
  • Name: Neil
  • Location: Oxfordshire

Posted 28 December 2015 - 08:43 PM

I believe you are on about the rear quarter panel.


Very straight fwd to change, no bracing required, just make sure the car is nice an level.


The panel is spot welded so to start with remove the the quarter glass and rubber seal. Offer up the new panel over the old panel and mark two lines, one on the B post (the one directly behind the door) and one on the C post. DO NOT CUT TO THESE LINES.


Support the car evenly on axle stands on the side you are going to remove and then remove the rear wheel. 


Now on the rear seam between that joins th rear panel to the quarter panel carefully remove the seam strip. This will allow you access to the spot welds here. Now using a spot weld removal drill bit carefully drill out all of the spot welds on the rear seam up to the lines marked. Do the same to the window aperture up the B post and then along the bottom of the quarter panel and up and over the arch down to the small lip at the rear. You will need to remove the trim strip there as well.


Now back to the two lines you previously marked. Using a 1mm slitting disc on your grinder cut below these lines by approx 15mm. You can trim up to the cut line later.


Now very carefully using a good quality thin scraper or chisel gently pry the old panel away. You may have to redo some of the spot welds you have drilled. Right on the bottom just behind the door cutout there is a small angle to the quarter panel, there will be at least one or two welds there as well. remove these.


Now you should have the old panel off. Offer up the new panel and check your cut lines on the B and c post. Now you can do the final trim to allow the panel to butt weld to the pillars.


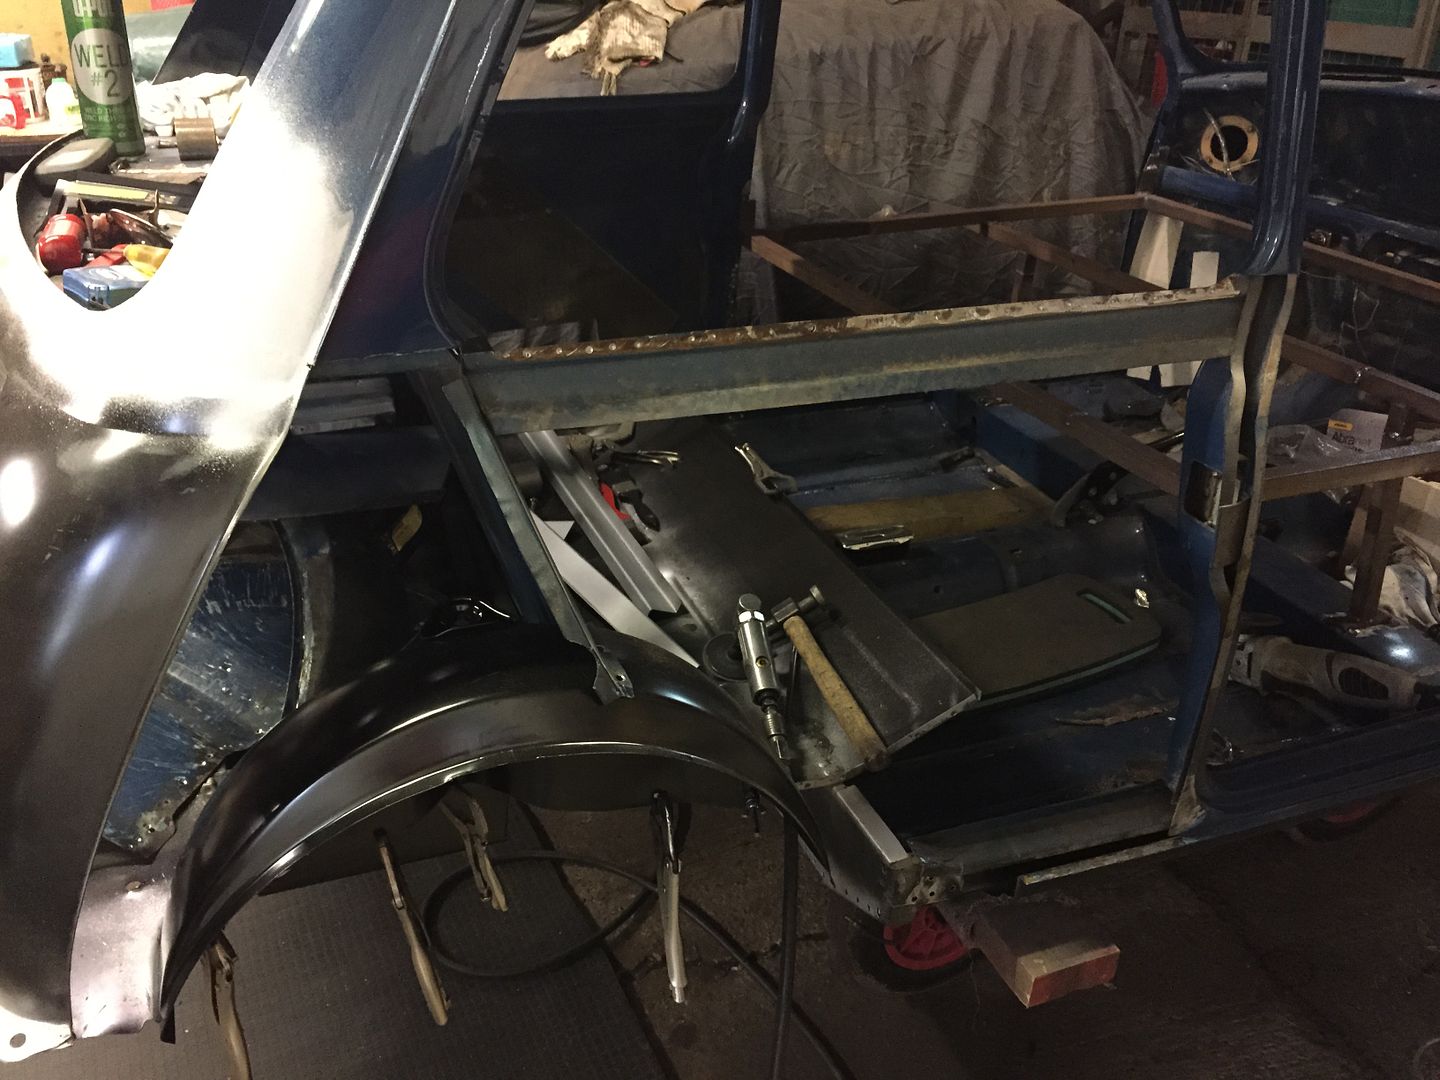
With it all off you will end up with this

IMG_4131_zps9aaxbd8v.jpg


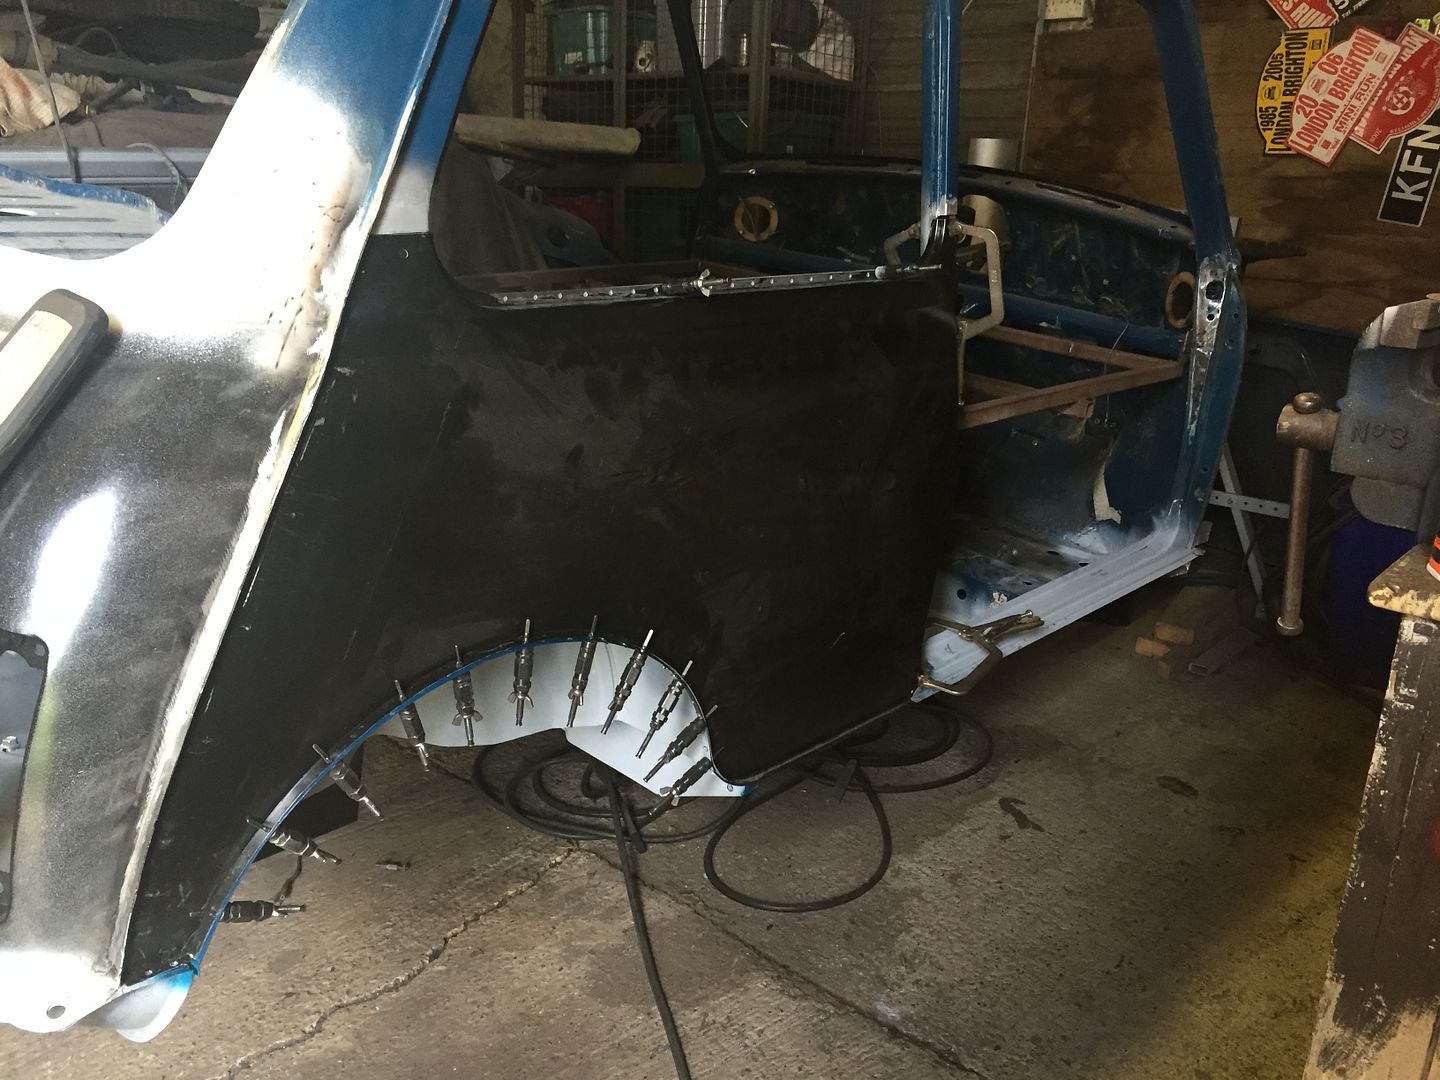
New panel clamped in place

IMG_4596_zpssarv16ve.jpg


#4 steeley

steeley

    Super Mini Mad

  • Just Joined
  • PipPipPipPipPipPip
  • 623 posts
  • Location: bournemouth

Posted 29 December 2015 - 10:22 AM

Thats the way to do it

by the way What panels haven't you replaced on paddy

#5 Carlos W

Carlos W

    Mine is purple, but I have been told that's normal

  • TMF+ Member
  • PipPipPipPipPipPipPipPipPipPipPip
  • 10,114 posts
  • Location: Sittingbourne, Kent

Posted 29 December 2015 - 11:23 AM

Before you remove the rear 1/4 check the condition of the waist rail.

I replaced this by using the old 1/4 as a reference

#6 sonikk4

sonikk4

    Twisted Paint Polisher!!!

  • Admin
  • PipPipPipPipPipPipPipPipPipPipPip
  • 16,033 posts
  • Name: Neil
  • Location: Oxfordshire

Posted 29 December 2015 - 11:40 AM

Thats the way to do it
by the way What panels haven't you replaced on paddy


The roof, rear bulkhead and front r/h inner wing. Everything else has either been replaced or repaired. Once I have finished messing around with the l/h inner wing it will be on to the returns on the front of the floor to toe board and then the returns around the bottom of the flitches up the side of the toe board.

#7 thume95

thume95

    Just On Tickover

  • Noobies
  • Pip
  • 5 posts
  • Location: Berwick upon Tweed

Posted 29 December 2015 - 08:51 PM

this is the panel i was going to get


http://www.minisport.com/czh430-genuine-side-panel-complete-rh-1970-2001.html 


#8 sonikk4

sonikk4

    Twisted Paint Polisher!!!

  • Admin
  • PipPipPipPipPipPipPipPipPipPipPip
  • 16,033 posts
  • Name: Neil
  • Location: Oxfordshire

Posted 30 December 2015 - 02:11 AM

Is there a particular reason why you need the complete side panel and not just the quarter panel.???

#9 Swift_General

Swift_General

    One Carb Or Two?

  • Members
  • PipPipPipPipPipPipPip
  • 871 posts
  • Location: England

Posted 30 December 2015 - 12:51 PM

That's a very big job to replace that as one peice. It's hard to comment without seeing pictures of your mini, but I am in the process of restoring my mini which is very rotten, and have replaced these panels which was quite manageable to do it separatly

http://www.minispare...|Back to search

http://www.minispare...|Back to search

#10 thume95

thume95

    Just On Tickover

  • Noobies
  • Pip
  • 5 posts
  • Location: Berwick upon Tweed

Posted 17 January 2016 - 05:42 PM

i haven't got any pictures but around the wheel arch is rotten and there is a dent between the window and the wheel arch, the top right corner above the door is rotten, the door sill is rotten and where the door hinges are is rotten as well. so i thought it would be easier to replace the whole panel instead of welding in lots of repair panels.


#11 sonikk4

sonikk4

    Twisted Paint Polisher!!!

  • Admin
  • PipPipPipPipPipPipPipPipPipPipPip
  • 16,033 posts
  • Name: Neil
  • Location: Oxfordshire

Posted 17 January 2016 - 05:48 PM

i haven't got any pictures but around the wheel arch is rotten and there is a dent between the window and the wheel arch, the top right corner above the door is rotten, the door sill is rotten and where the door hinges are is rotten as well. so i thought it would be easier to replace the whole panel instead of welding in lots of repair panels.


All of that is very easy to replace one part at a time. Take a look at the Project Paddy and Erm link in my signature. I have covered all of those several times now. The section above the door you could ask if someone is cutting up an old shell for that section or fabricate your own.


1 user(s) are reading this topic

0 members, 1 guests, 0 anonymous users