Jump to content


Photo
- - - - -

Mk2 Cooper


  • Please log in to reply
459 replies to this topic

#121 minimissions

minimissions

    Up Into Fourth

  • Members
  • PipPipPipPipPipPipPipPipPip
  • 3,427 posts
  • Location: North West
  • Local Club: M.M.O.C

Posted 17 January 2016 - 08:05 AM

Nice work that rear bulkhead has come out really nice. top work pal!


#122 Daz1968

Daz1968

    Up Into Fourth

  • Members
  • PipPipPipPipPipPipPipPipPip
  • 2,058 posts
  • Location: Dudley

Posted 17 January 2016 - 09:51 AM

Thanks, I haven't forgot about pictures you need, I just ran out of time yesterday but will probably pop down later today as I am keen to chop one of the quarters off.

Darren

#123 minimissions

minimissions

    Up Into Fourth

  • Members
  • PipPipPipPipPipPipPipPipPip
  • 3,427 posts
  • Location: North West
  • Local Club: M.M.O.C

Posted 17 January 2016 - 09:53 AM

Thanks, I haven't forgot about pictures you need, I just ran out of time yesterday but will probably pop down later today as I am keen to chop one of the quarters off.

Darren

Haha not worry mate in no rush what so ever. Just keen to have a proper look at them :) are you having to cut both rear quarters out during this resto then?


#124 Daz1968

Daz1968

    Up Into Fourth

  • Members
  • PipPipPipPipPipPipPipPipPip
  • 2,058 posts
  • Location: Dudley

Posted 17 January 2016 - 10:16 AM

Yes as they have had lower repair sections in before and quite a lot of distortion covered by filler so going to replace them, only using the magnum ones as looking at other peoples experiences these only give fit problems at the door post and as this area is being cut off to fit a mk2 shouldn't pose a problem. I did compare them to heritage at mini spares and didn't think it was worth the extra £150 to have two heritage ones, I may have to rework them a little but will be ok.
Another advantage with removing the quarter is I will have good access when fitting the inner rear bins and closing panels.

#125 minimissions

minimissions

    Up Into Fourth

  • Members
  • PipPipPipPipPipPipPipPipPip
  • 3,427 posts
  • Location: North West
  • Local Club: M.M.O.C

Posted 17 January 2016 - 11:40 AM

Yeah thats fair enough there is alot of advantages from doing those rear quarters then. Look forward to seeing the pics I will be having to go down this route as well with my mk1 so would be happy to see how you do it all :)


#126 James_eaton_thewholething

James_eaton_thewholething

    One Carb Or Two?

  • Members
  • PipPipPipPipPipPipPip
  • 1,063 posts
  • Location: Manchester

Posted 17 January 2016 - 12:31 PM

Magnum rear quarters aren't that bad to be fair I used them on mine and the B post fit was alright and didn't need much fettling.

Progress looks good mate

#127 Daz1968

Daz1968

    Up Into Fourth

  • Members
  • PipPipPipPipPipPipPipPipPip
  • 2,058 posts
  • Location: Dudley

Posted 17 January 2016 - 12:46 PM

Just looked at your resto and yes they appear to fit fine, which is what I thought. I have used some magnum panels before and also had no issues with the mk1 doorskins, needed a little adjustment on holes and alteration near b post but overall very good.
I am only using heritage panels on boot floor, scuttle, inner a panels rear panel wheel tubs and inner wings, possibly outer wings but still undecided, the rest are mainly m machine and I believe they modify a magnum front panel for their mk2 spec one.

#128 Daz1968

Daz1968

    Up Into Fourth

  • Members
  • PipPipPipPipPipPipPipPipPip
  • 2,058 posts
  • Location: Dudley

Posted 17 January 2016 - 04:52 PM

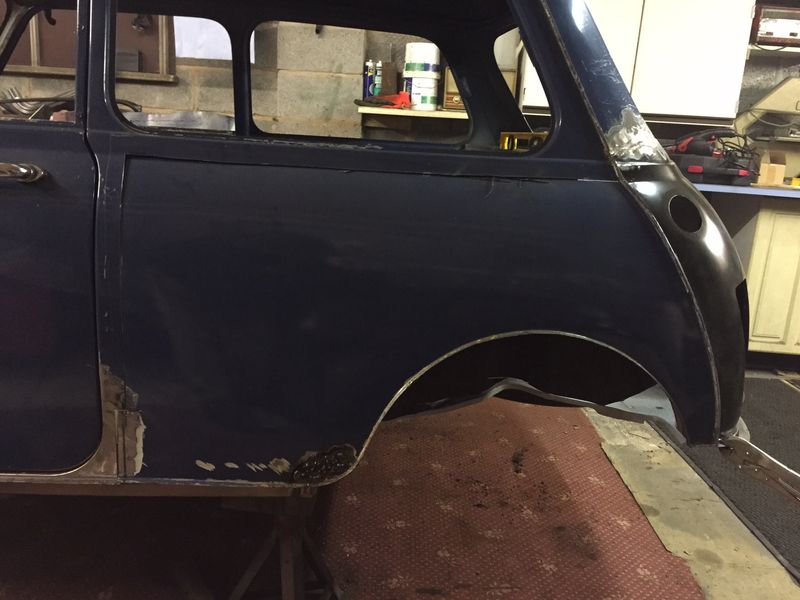
Managed to get an hour today to cut off a rear quarter, decided to leave section on near rail for now to leave a bit of strength in

d1750f5e32c4d353f357de78e21d3830.jpg

What was removed showing some of the dubious previous repairs
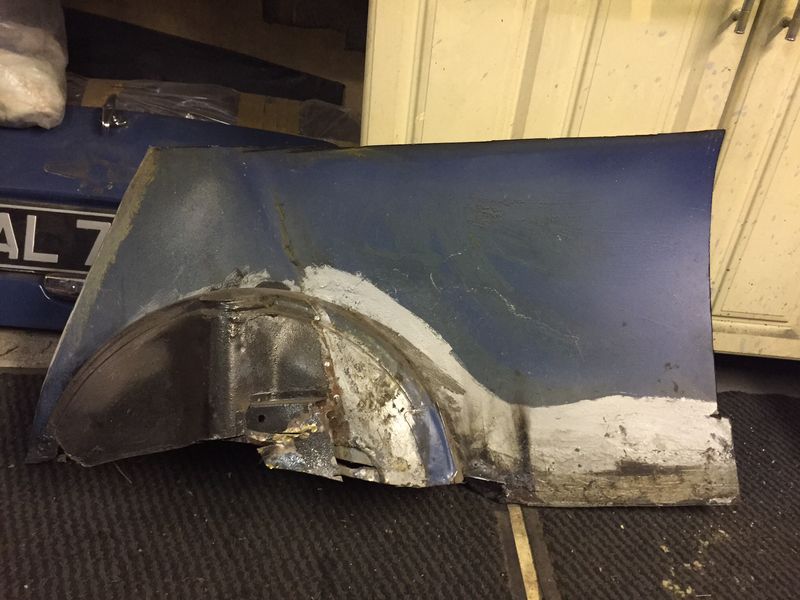
b3cd1cab7e2aa9346b513cc0134b6dfd.jpg

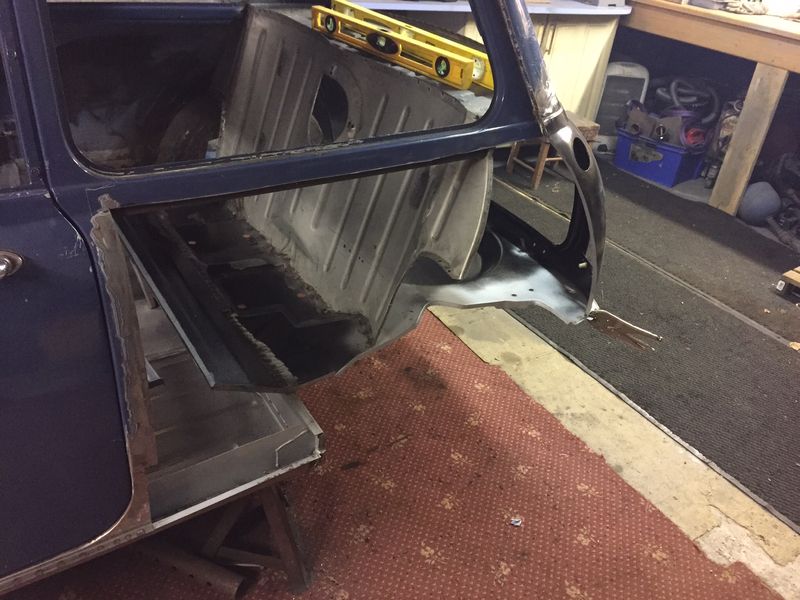
All ready to receive new metal now

06074595252d675079099c26d2c1e9be.jpg

Trial fitted the quarter, needs trimming on front edge but it will fit fine
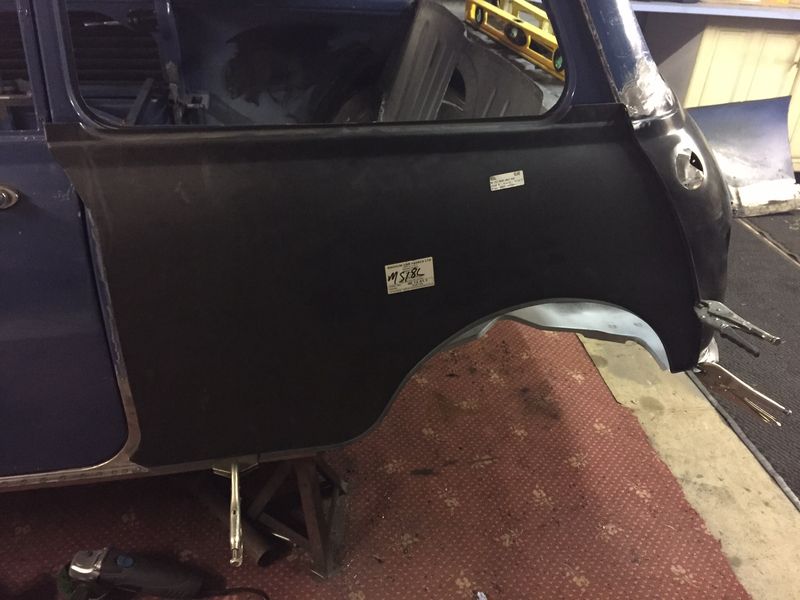
18c2d37cdc5508a3aafc2f0408309b28.jpg

After removing subframe I checked penetration on plug welds from seat back and pleased with them
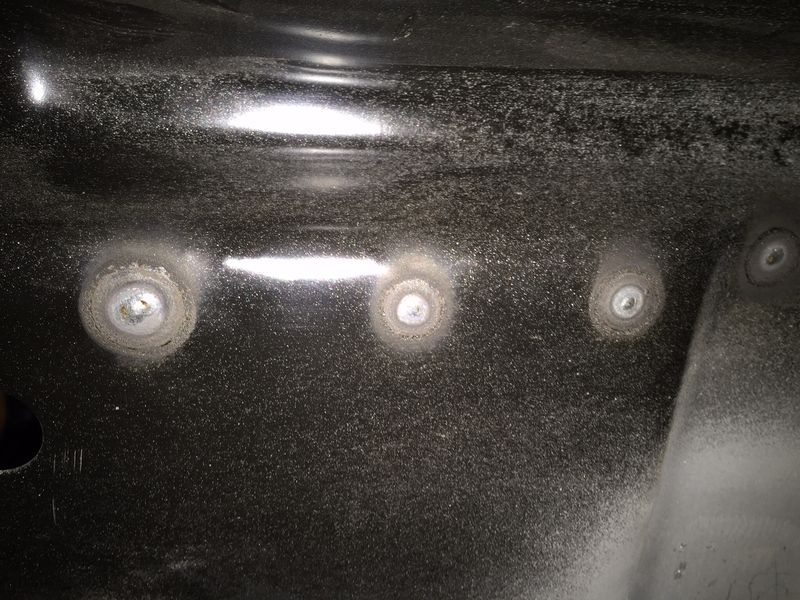
6b505e1b5a5f32e402edecdb50983bb1.jpg

Next weekend will try to fit bins, wheel tubs and brackets to boot floor, but am happy with fit of panels, pretty sure it will come together now.

A couple of pics of the m machine a panels complete with door post as requested by minimissions
They should really make alignment of doors and front end welding much neater as I should be able to spot weld them to inner wings as per original
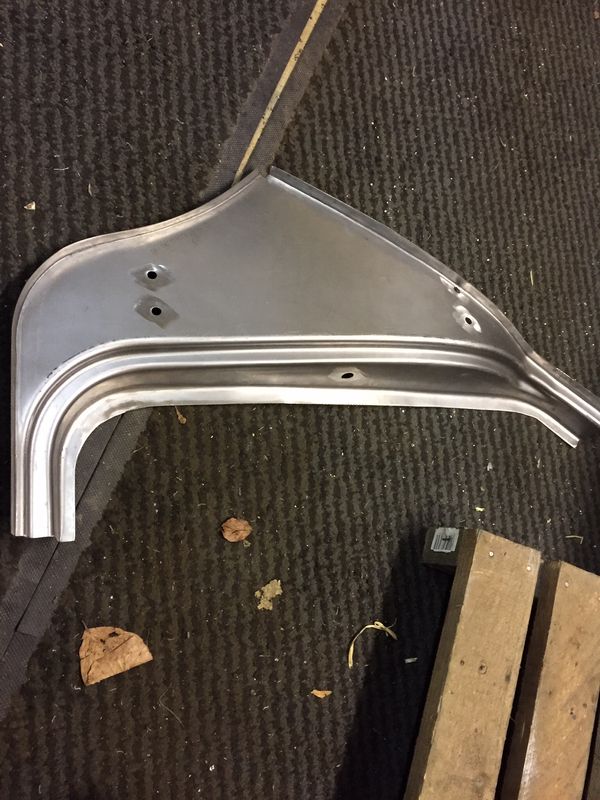
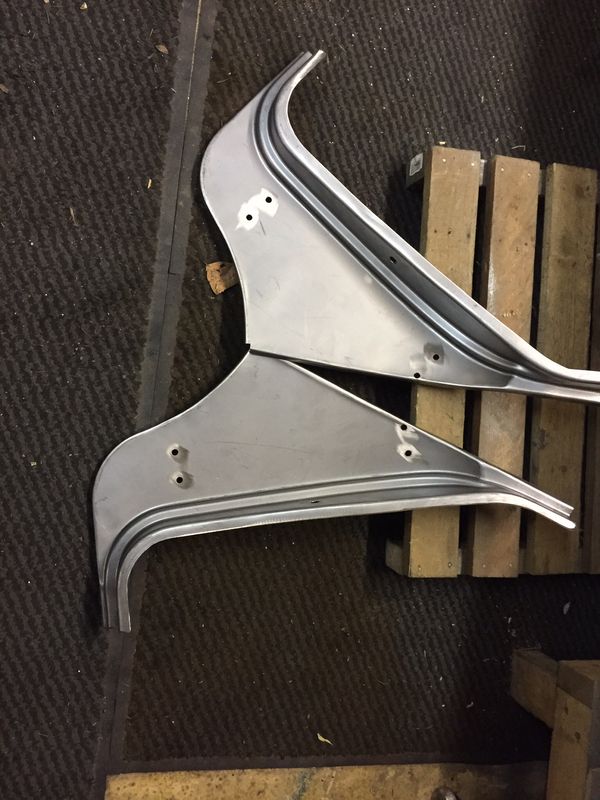
e2e497e95e5190a9efa10787db80a259.jpg

89c066c845e1b6718ac9e419d04d8fe0.jpg

Edited by Daz1968, 17 January 2016 - 04:57 PM.


#129 Luapno

Luapno

    Learner Driver

  • Just Joined
  • PipPip
  • 13 posts
  • Location: Birmingham

Posted 17 January 2016 - 05:01 PM

Daz1968


I am about to start the restoration of my MK2 and will have to do the same amount of work as you have done, one question I have is when you did the heel board and boot floor how did you make sure the subframe mounts were in the right place, to make sure the subframe was true and square?


Keep up the good work !


Thanks


Paul


#130 Daz1968

Daz1968

    Up Into Fourth

  • Members
  • PipPipPipPipPipPipPipPipPip
  • 2,058 posts
  • Location: Dudley

Posted 17 January 2016 - 05:47 PM

Thanks, there is probably plenty of different ways to keep the car square but what worked for me is as follows
Supported bare shell c/w doors and subframes on 4 axle stands and got level with a spirit level.
Braced the shell
Removed rear subframe and transferred support to under the boot floor near tubs, still kept level.
Then cut out and removed the main floor leaving old boot floor in place.
Offered up new floor assembly and bolted rear subframe onto heel board and existing rear floor mounts.
Bolted front of floor to front subframe mount
transferred support to rear subframe and checked level.
checked all measurements including important diagonals mine was bang on so no adjustment needed.
Now presume floor is correct and make body fit it not other way round
Weld floor to toe board repairing as required
Fitted door steps using doors and floor for reference, I cut off the front radius as using full a panels later.
Transferred support to floor jack points on back.
Fitted new back panel.
Removed rear subframe and boot floor.
Trial fitted new boot floor with rear subframe clamped in position.
Again check all dimensions and spotweld boot floor to heel board.
I then fitted new seat back and welded this to boot floor.
Have now removed rear subframe to begin rear quarter repairs.

My method may not be best or easiest but has worked fine so far. I have found keeping shell level very useful as everything can then be referenced with a spirit level.

Hope this helps

Edited by Daz1968, 17 January 2016 - 05:58 PM.


#131 minimissions

minimissions

    Up Into Fourth

  • Members
  • PipPipPipPipPipPipPipPipPip
  • 3,427 posts
  • Location: North West
  • Local Club: M.M.O.C

Posted 17 January 2016 - 09:31 PM

Thanks for those pics daz they look as those :) defo will be something I will invest in for my build.

Thanks for taking the time to show me.

#132 Daz1968

Daz1968

    Up Into Fourth

  • Members
  • PipPipPipPipPipPipPipPipPip
  • 2,058 posts
  • Location: Dudley

Posted 17 January 2016 - 10:05 PM

No problem just never got round to it yesterday. I think they are the best way to replace A panel especially if like my car it has been replaced before, but even if car is original these should fit better and easier than the usual panels. Just got to finish the back end before I can try them. Hopefully won't take too long though. Think I will use heritage inner A panels though.

#133 minimissions

minimissions

    Up Into Fourth

  • Members
  • PipPipPipPipPipPipPipPipPip
  • 3,427 posts
  • Location: North West
  • Local Club: M.M.O.C

Posted 18 January 2016 - 06:23 AM

No problem just never got round to it yesterday. I think they are the best way to replace A panel especially if like my car it has been replaced before, but even if car is original these should fit better and easier than the usual panels. Just got to finish the back end before I can try them. Hopefully won't take too long though. Think I will use heritage inner A panels though.

Yeah I can see that it will make the job of lining the doors etc up loads better. And one that is all in the place the inner a panels can be all clamped down together. Looking forward to seeing you fit all that up :)


#134 Elliskwleisk

Elliskwleisk

    Mini Mad

  • Members
  • PipPipPipPip
  • 250 posts
  • Location: Scottish Borders

Posted 18 January 2016 - 10:51 PM

This is fantastic, you're very modest about your fabrication ability, I'd pay good money for a finish like that! You make it look far to easy and I really like your approach of changing everything in big complete panels where available. Makes it look like a large jigsaw! My next mini will definitely be done this way, looks so neat and less hassle. Mind you, it must take some courage! I'm not sure id be confident in my ability to brace and align... If you don't mind me asking, where abouts are you based?

#135 Daz1968

Daz1968

    Up Into Fourth

  • Members
  • PipPipPipPipPipPipPipPipPip
  • 2,058 posts
  • Location: Dudley

Posted 18 January 2016 - 11:19 PM

Thanks for positive comments, I am near Dudley in the midlands, biggest fear was cutting the floor out as wasn't 100% sure about bracing as it doesn't look that substantial! once that cut was made and I realised it wasn't going to collapse it was much easier then. This is biggest project I have taken on as my previous mk1 needed little work. It was however a learning curve and I also spent hours looking at other peoples projects before deciding best course of action. I want this car as best as I can get it so decided from the beginning that a full floor would be required as old one had over sills and poor quality repair panels. At the time this was restored previous though it was all that was available. I spent a couple of years planning this, collecting tools and saving for the panels so at least now I can get on with it.
I am amazed how much metal can be cut out without problem. Only issue I have had is when removing rear bulkhead the quarter panels sprung about 6mm out so I put a ratchet strap under car and through rear quarter windows to pull it back before welding in position. I have found a spot welder invaluable though so well worth the investment.


2 user(s) are reading this topic

0 members, 2 guests, 0 anonymous users