Fair enough I will consider this with my mk1. I no what you mean by panels love seeing the new steel going in but sometimes can be texting you playing around with them.... Your work looks ace though :)


Mk2 Cooper
Started by
Daz1968
, Sep 20 2015 06:23 PM
459 replies to this topic
#151

minimissions
-

- Members
-

- 3,427 posts
Up Into Fourth
- Location: North West
- Local Club: M.M.O.C
Posted 04 February 2016 - 09:59 PM
#152
slidehammer
-

- Members
-
- 1,180 posts
One Carb Or Two?
- Location: Surrey
- Local Club: LSMOC
Posted 05 February 2016 - 02:16 PM
Looking good, really nice neat work. One good thing with something like this is the cost of the parts for the work you are doing will be worth it in the end as the values of earlier minis / Coopers are always on the up. If you forget your time / labour you would see a profit on paper. Keep up the good work.
#153
Daz1968
-
- Members
-
- 2,058 posts
Up Into Fourth
- Location: Dudley
Posted 05 February 2016 - 05:09 PM
Thanks, that was exactly my thinking as I could have just tidied it up painted it and got it on the road but i would have never been happy with it, the car I have had a long time and with purchase and first quick resto it owes me about £1500, so this resto may end up at about 5k - 6k so still won't lose out, although no intention of selling it. Trouble is after this one I don't have another to restore so will need another hobby as not enough room for any more cars. I am not one for shows unless a good auto jumble to go round. I have my mk1 for mini shows this year but will spend more time looking for parts for this one.
#154
Daz1968
-
- Members
-
- 2,058 posts
Up Into Fourth
- Location: Dudley
Posted 06 February 2016 - 07:17 PM
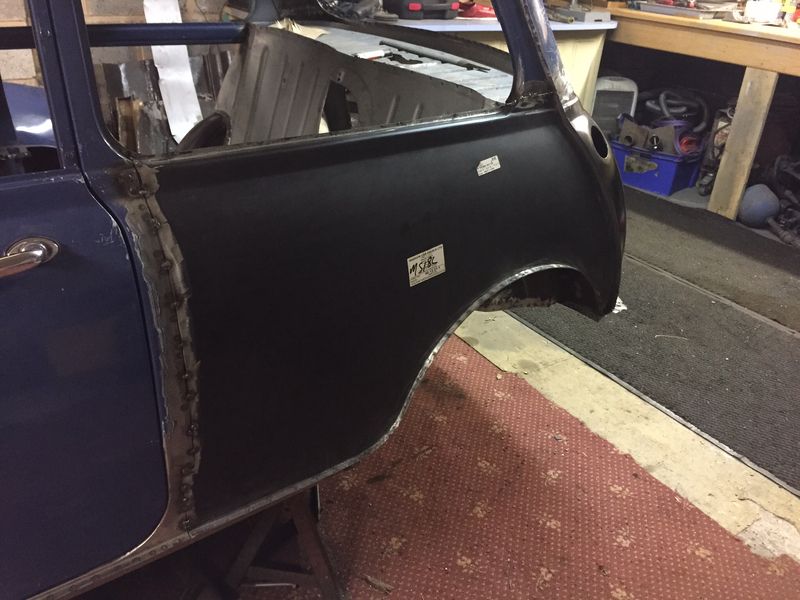
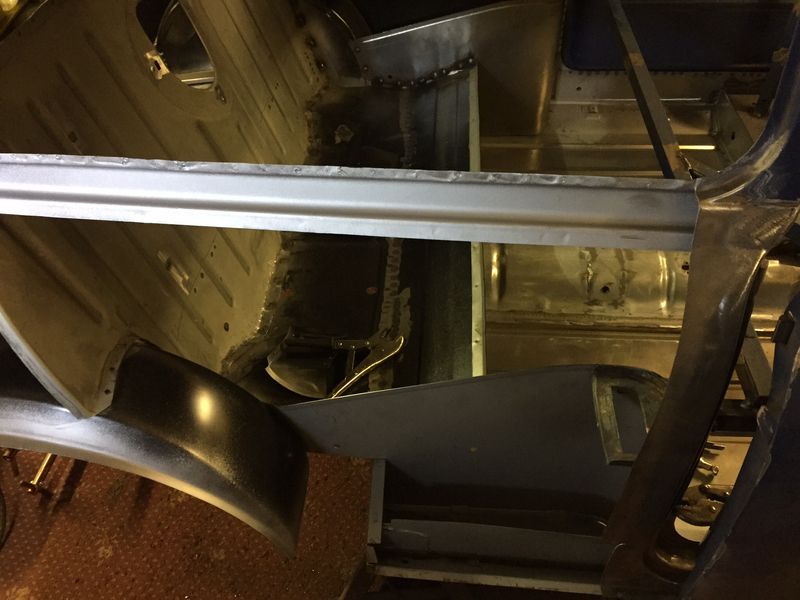
Took longer than I thought but I have the rear quarter spotwelded and tacked in position, I had a few issues with the rail as it had rotted out along top edge, so repaired that first. Fitted ok although needed a few tweeks
#155
ToM 2012
-

- Members
-
- 4,066 posts
Up Into Fourth
- Location: halesowen
Posted 07 February 2016 - 08:54 AM
Looking good daz 👍
#156
James_eaton_thewholething
-

- Members
-
- 1,063 posts
One Carb Or Two?
- Location: Manchester
Posted 07 February 2016 - 04:51 PM
Looks good mate coming along nicely now
#157
minimissions
-
- Members
-
- 3,427 posts
Up Into Fourth
- Location: North West
- Local Club: M.M.O.C
Posted 08 February 2016 - 06:54 AM
Looks good think i may go this route with the mk1 one day :)
#158
Daz1968
-
- Members
-
- 2,058 posts
Up Into Fourth
- Location: Dudley
Posted 08 February 2016 - 07:44 AM
Thanks for positive comments,
#159
mk3 Cooper S
-
- Members
-
- 5,569 posts
Crazy About Mini's
Posted 08 February 2016 - 08:08 PM
Looking good.
Out of interest why did you seam the panel in behind the B post? No mk1 qtr panels available?
#160
sonikk4
-

- Admin
-
- 16,021 posts
Twisted Paint Polisher!!!
- Name: Neil
- Location: Oxfordshire
Posted 08 February 2016 - 08:12 PM
Took longer than I thought but I have the rear quarter spotwelded and tacked in position, I had a few issues with the rail as it had rotted out along top edge, so repaired that first. Fitted ok although needed a few tweeks
Now i would be using Frosts Cold Front when welding that together otherwise you may end up with some distortion/ Looks good though.
#161
Daz1968
-
- Members
-
- 2,058 posts
Up Into Fourth
- Location: Dudley
Posted 08 February 2016 - 09:20 PM
Thanks, may leave seam welding till I have fitted other side, was going to use an airline to cool off but will look into the cold front stuff.
On the subject of panels, m machine do a mk1 type rear quarter but it doesn't have the upper lip near the waist rail so would still need a long joint, most fit the mk3 quarter cut down and joined as I have. I also didn't want to disturb the profile near the door as it's pretty good.
On the subject of panels, m machine do a mk1 type rear quarter but it doesn't have the upper lip near the waist rail so would still need a long joint, most fit the mk3 quarter cut down and joined as I have. I also didn't want to disturb the profile near the door as it's pretty good.
#162
mk3 Cooper S
-
- Members
-
- 5,569 posts
Crazy About Mini's
Posted 08 February 2016 - 10:47 PM
Thanks, may leave seam welding till I have fitted other side, was going to use an airline to cool off but will look into the cold front stuff.
On the subject of panels, m machine do a mk1 type rear quarter but it doesn't have the upper lip near the waist rail so would still need a long joint, most fit the mk3 quarter cut down and joined as I have. I also didn't want to disturb the profile near the door as it's pretty good.
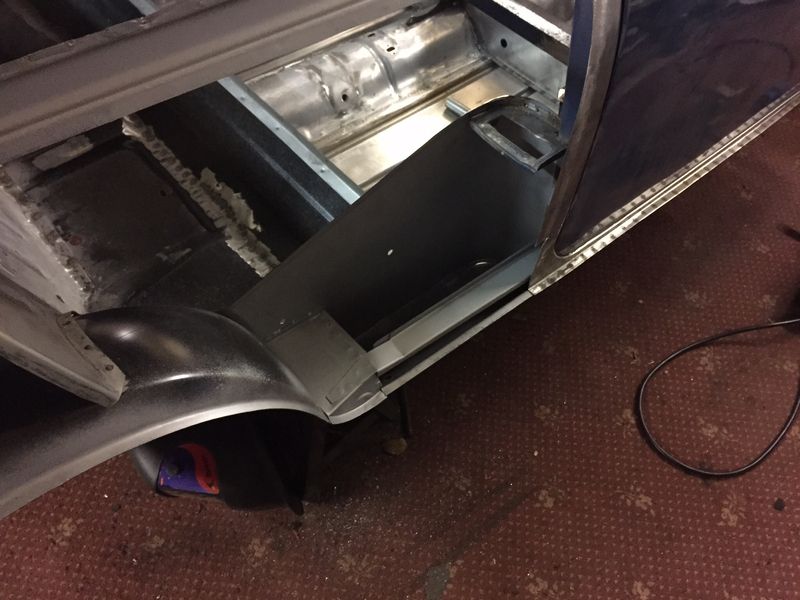
Thought that maybe the case as the door shut/fit does look good.
Keep up the good work
#163
Daz1968
-
- Members
-
- 2,058 posts
Up Into Fourth
- Location: Dudley
Posted 13 February 2016 - 06:00 PM
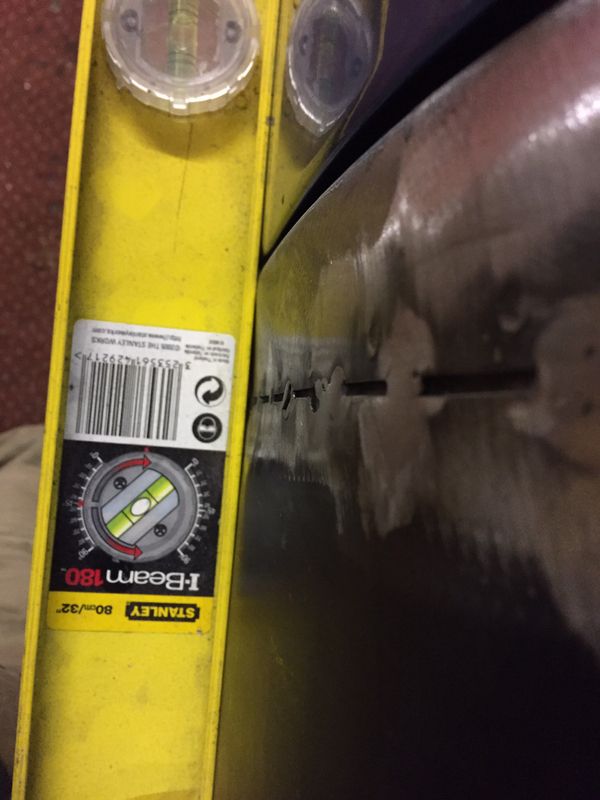
Got a little more done today,
Put some more tack welds on the quarter joint, hopefully will keep tacking in between until they all joined
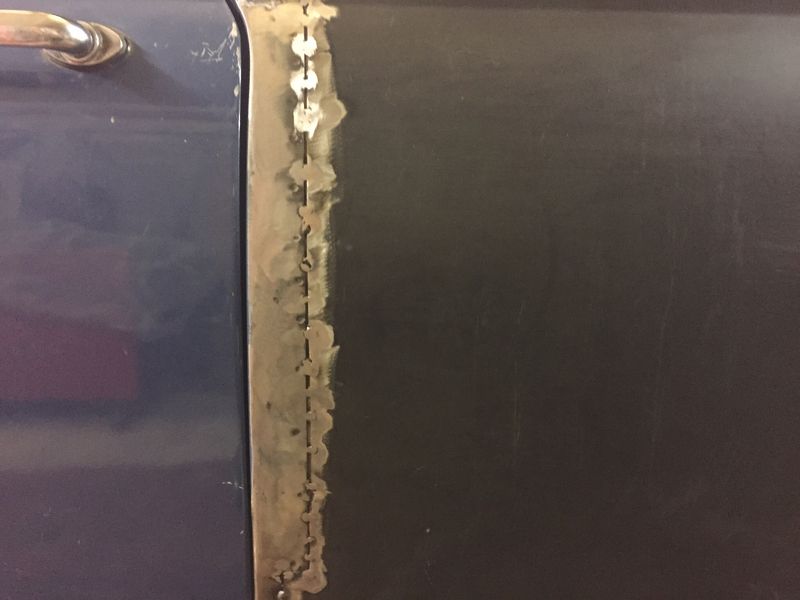
Pic showing distortion, not a lot really and should come out a little further with hammer and dolly
I then moved to other side and cut of remaining quarter and cleaned up waist rail
Welded in the bin and closing panels using new rear quarter to aid alignment
I then spent some time cleaning up all the faces for spot welding the quarter on, so hopefully get it trimmed and fitted next week.
Looks like I will need to order some more panels soon,
Put some more tack welds on the quarter joint, hopefully will keep tacking in between until they all joined
Pic showing distortion, not a lot really and should come out a little further with hammer and dolly
I then moved to other side and cut of remaining quarter and cleaned up waist rail
Welded in the bin and closing panels using new rear quarter to aid alignment
I then spent some time cleaning up all the faces for spot welding the quarter on, so hopefully get it trimmed and fitted next week.
Looks like I will need to order some more panels soon,
#164
James_eaton_thewholething
-
- Members
-
- 1,063 posts
One Carb Or Two?
- Location: Manchester
Posted 14 February 2016 - 01:13 AM
Looking good. I'm sure you will get the bit of warping sorted and you would never even know
#165
Stu.
-

- Members
-
- 912 posts
One Carb Or Two?
- Location: My workshop.
Posted 14 February 2016 - 10:40 AM
Good luck working out the distortion Daz. Ive found this is difficult to do well as the welded section is much harder than the adjacent panels so its hard to manipulate back into position.
Knowing you you'll get it perfect though 


1 user(s) are reading this topic
0 members, 1 guests, 0 anonymous users


