So completed it this weekend with little hassle following most of Spiguys tutorial.
Saying that getting the engine steady back on was a little tough but the rest was actually a little easier than I had anticipated.
Thanks again.
Great work and thanks for letting us know how you went.
Try it on a Moke - you need arms at least 6 foot long to reach over the side boxes to get to the bolts in the floor!
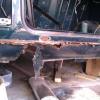
To be honest, we got lucky in a few places. We didn't have to removed the exhaust and I'm pretty sure I could of left the airbox on, although I did remove it as a precaution.
As you can sense the word 'WE', (I employed the use of my dad for the day with a couple of cups of tea as payment), so if you want a hand with the Moke and can travel some 10000 miles i'm sure we could get around you 6 foot long arm problem.