coming on, what's your plan for engine and final look?

1989 Mayfair Project
#31

Posted 21 August 2022 - 02:21 PM
#32

Posted 21 August 2022 - 03:42 PM
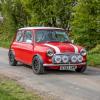
I've got a 1275 a series engine to go in which I'll rebuild and tune but not sure exactly what yet.coming on, what's your plan for engine and final look?
I'm going to keep the same blue and probably a metallic black roof and bonnet stripes.
#33

Posted 13 August 2023 - 06:50 PM
3 weeks after my last post we had to move house (buyer getting antsy).
The shell is currently in my parents garage, due to us having to move in to temporary accommodation for 6 months, and should be being picked up in a few weeks time.
In the meantime I've been collecting the remaining panels, decided to put heritage panels on the frontend rather than the aftermarket panels I had originally bought for it.
 PXL_20230801_174217599.jpeg 85.54K
2 downloads
 PXL_20230801_174221193.jpeg 79.24K
1 downloads
Also bought some of the parts for refurbing the rear arms and also the tool to fit the new bushes.
 PXL_20230801_174308066.jpeg 56.42K
1 downloads
 PXL_20230801_174258946.jpeg 66.8K
1 downloads
Picked up a parts washer and shot blasting cabinet
 IMG-20230812-WA0003.jpeg 25.47K
2 downloads
And started to strip down one of the rear arms, just inner bearing race proving a pita to remove. Gave it a bit of a clean up in the shot blasting cabinet as well - it needs more before painting.
 PXL_20230812_162027538.jpeg 103.61K
2 downloads
more parts awaiting refurb
 PXL_20230812_162036110.jpeg 94.54K
2 downloads
 PXL_20230812_162056070.jpeg 77.38K
2 downloads
#34

Posted 09 October 2023 - 03:32 PM
Ready for loading
 1000040635.jpg 65.01K
1 downloads
1000040635.jpg 65.01K
1 downloadsLoaded up
 1000040637.jpg 107.42K
2 downloads
1000040637.jpg 107.42K
2 downloadsOn the road
 1000040640.jpg 91.84K
2 downloads
1000040640.jpg 91.84K
2 downloadsArrived at it's new home
 1000040643.jpg 82.43K
4 downloads
1000040643.jpg 82.43K
4 downloadsIn the garage
 1000040645.jpg 79.16K
6 downloads
#35

Posted 19 November 2023 - 09:22 AM
Fabricated and welded on a repair piece for the top of the inner wing.
 1000041276.jpg 76.71K
5 downloads
1000041276.jpg 76.71K
5 downloadsCut off the bulk of the skittle.
 1000041278.jpg 91.83K
3 downloads
 1000041279.jpg 69.04K
2 downloads
 1000041282.jpg 40.57K
2 downloads
1000041282.jpg 40.57K
2 downloadsOriginally I was going to leave the skuttle on but seeing what's underneath and the poor repair to one of the corners and the closing plates, I'm glad I've cut it off.
Next up well be removing the remnants of the skuttle and then cleaning it all up. I also need to make a repair to the passenger side inner wing around the fresh air vent hole. It has a plate welded around it covering some corrosion.
Attached Files
#36

Posted 19 November 2023 - 07:30 PM
Good decision about the scuttle, the closing panels get very rusted and all around them... Doing mine now...
Victor.
#37

Posted 26 November 2023 - 05:44 PM
Scuttle cut away
 1000041389.jpg 91.94K
0 downloads
1000041389.jpg 91.94K
0 downloadsPut a bit of primer on.
 1000041390.jpg 74.26K
1 downloads
 1000041387.jpg 71.5K
2 downloads
1000041387.jpg 71.5K
2 downloadsFlitch cut out.
 1000041388.jpg 74.4K
1 downloads
#38

Posted 28 March 2024 - 06:47 PM
Removed the paint from inside the a pillar and treated it with deox gel
 PXL_20240327_121427957.jpeg 43.03K
1 downloads
 PXL_20240327_121435087.jpeg 45.77K
0 downloads
 PXL_20240327_121432557.jpeg 40.72K
1 downloads
Then applied some hydrate 80 and over painted with epoxy mastic primer.
 PXL_20240328_174132600.jpeg 42.86K
0 downloads
 PXL_20240328_174136322.jpeg 47.15K
0 downloads
Then got to work stripping the paint of the bulk head
 PXL_20240328_174200415.jpeg 87.42K
0 downloads
The plan for the bulk head is to strip the paint off to ensure there's no rust lurking under the old paint, then cover with deox gel to remove any rust before the new scuttle is put on and the front end.
#39

Posted 08 April 2024 - 10:58 AM
 1000044260.jpg 34.6K
2 downloads
 1000044261.jpg 60.68K
2 downloads
 1000044360.jpg 41.68K
1 downloads
1000044360.jpg 41.68K
1 downloadsThere are another couple of pieces that I'll need to fabricate.
Next, I started cleaning up the top half of the bulkhead.
 1000044262.jpg 82.53K
1 downloads
 1000044358.jpg 87.11K
0 downloads
 1000044359.jpg 68.18K
0 downloads
1000044359.jpg 68.18K
0 downloadsThen I applied some detox gel and left overnight.
 1000044373.jpg 52.38K
0 downloads
 1000044371.jpg 109.8K
0 downloads
#40

Posted 08 April 2024 - 03:43 PM
 1000044393.jpg 40.35K
2 downloads
#41

Posted 06 May 2024 - 05:38 PM
The Deox gel was left on for over 48 hours before it was cleaned off.
 PXL_20240414_145030888.jpeg 70.23K
0 downloads
 PXL_20240414_145027465.jpeg 64.85K
0 downloads
 PXL_20240414_145020737.jpeg 85.93K
0 downloads
 PXL_20240414_123842949.jpeg 81.7K
0 downloads
 PXL_20240414_123835958.jpeg 67.46K
0 downloads
Overall the results were good but there was still a bit of rust left on the left side, so I applied some more deox gel for a couple of hours to try to get the remainder.
 PXL_20240414_145038400.jpeg 63.08K
0 downloads
After this I prepped it for some epoxy primer.
 PXL_20240420_162730196.jpeg 52.51K
0 downloads
 PXL_20240420_180335049.jpeg 74.75K
0 downloads
 PXL_20240420_162723019.jpeg 74.93K
0 downloads
 PXL_20240420_162713683.jpeg 48.5K
0 downloads
 PXL_20240420_162708938.jpeg 39.47K
0 downloads
I did get a few runs in it but shouldn't matter as it will be flatted back before top coating and this is more just to prevent it from rusting.
#42

Posted 17 May 2024 - 10:15 PM
 1000045102.jpg 84.12K
0 downloads
1000045102.jpg 84.12K
0 downloadsThen the wings and front panel were clamped back on ready for welding.
 1000045101.jpg 85.49K
0 downloads
 1000045103.jpg 83.91K
1 downloads
 1000045111.jpg 42.47K
1 downloads
 1000045104.jpg 82.82K
2 downloads
 1000045105.jpg 43.93K
2 downloads
 1000045106.jpg 43.14K
2 downloads
 1000045109.jpg 38.85K
2 downloads
 1000045108.jpg 74.4K
3 downloads
 1000045107.jpg 41.68K
3 downloads
 1000045110.jpg 73.9K
3 downloads
1000045110.jpg 73.9K
3 downloadsOn the whole it has lined up quite well. The only real issue at the moment is the gap between the wing and bonnet increases to from the width of a £2 coin to the width of 2 £2 coins as it goes back towards the scuttle. Both wins are against the edge of the inner wing, so there's no way of moving them further in.
#43

Posted 10 July 2024 - 08:36 PM
 1000045248.jpg 75.99K
1 downloads
 1000045250.jpg 41.18K
0 downloads
 1000045249.jpg 41.34K
0 downloads
 1000045259.jpg 32.73K
0 downloads
 1000045258.jpg 43.76K
0 downloads
 1000045252.jpg 34.86K
0 downloads
 1000045251.jpg 39.14K
0 downloads
 1000045254.jpg 77.37K
0 downloads
 1000045255.jpg 78.97K
0 downloads
 1000045257.jpg 38.91K
0 downloads
 1000045253.jpg 36.5K
0 downloads
1000045253.jpg 36.5K
0 downloadsThis week, I'm focusing on grinding the welds back and tidying them up.
So far I've completed the o/s a panel seam and the two sides of the wings.
 1000045849.jpg 47.03K
1 downloads
 1000046007.jpg 45.21K
1 downloads
 1000046008.jpg 42.8K
0 downloads
Attached Files
#44

Posted 10 July 2024 - 11:00 PM
#45

Posted 25 August 2024 - 09:34 AM
I've ground back most of the welds on the frontend now; missed the ones under the drivers side front panel lip though, so still have to grind these back
 PXL_20240729_154422431.jpeg 63.75K
0 downloads
 PXL_20240729_154429066.jpeg 56.16K
0 downloads
 PXL_20240729_154435490.jpeg 69.06K
0 downloads
 PXL_20240729_154441769.jpeg 56.5K
0 downloads
 PXL_20240729_154448293.jpeg 64.22K
0 downloads
 PXL_20240729_154453383.jpeg 52.59K
0 downloads
 PXL_20240729_154508983.jpeg 42.78K
0 downloads
 PXL_20240729_154516692.jpeg 39.28K
0 downloads
Yesterday I spent welding on the upper engine arm steady bracket to the bulk head cross member and opened up the holes for the upper shock absorber mounts ready to weld on the captive nuts for the bottom of the mounts.
 PXL_20240824_172940509.jpeg 54.11K
0 downloads
 PXL_20240824_172958741.jpeg 49.94K
0 downloads
 PXL_20240824_173011621.jpeg 47.78K
0 downloads
I run a few welds across the top to help stop it from pulling away.
 PXL_20240824_172837118.jpeg 65.95K
0 downloads
 PXL_20240824_172845545.jpeg 76.92K
0 downloads
 PXL_20240824_172928805.jpeg 63.74K
0 downloads
Edited by Mito, 25 August 2024 - 09:35 AM.
1 user(s) are reading this topic
0 members, 1 guests, 0 anonymous users


