Hi
Just had an advisory on my MOT saying there's play on the steering rack. The tester showed me with the pry bar that it was on the passenger side.
Does this mean a new steering rack or can I replace bushes of some kind.
Sorry if I'm vague. Still learning. Thanks!


Play In Steering Rack
Started by
Jamierobertarnold
, Apr 27 2015 09:33 PM
11 replies to this topic
#2

sonikk4
-

- Admin
-

- 16,033 posts
Twisted Paint Polisher!!!
- Name: Neil
- Location: Oxfordshire
Posted 27 April 2015 - 09:34 PM
Is it the rack itself being loose in the clamps??
#3
spiguy
-
- Members
-
- 1,537 posts
Camshaft & Stage Two Head
- Location: UnderTheCar
Posted 27 April 2015 - 10:25 PM
Strange. Do you mean the actual rack to the body, or is it part of the moving part of the rack? Could it be track rod ends maybe? need more info to help diagnose.
#4
Dusky
-

- Members
-
- 5,322 posts
Crazy About Mini's
- Location: Belgium
Posted 27 April 2015 - 10:46 PM
There are nylon bushes in the steering rack, I replaced those and it was fine after
#5
Jamierobertarnold
-
- Noobies
-
- 121 posts
Mini Mad
- Location: Kent
Posted 28 April 2015 - 04:24 PM
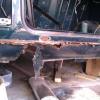
He levered the whole steering arm with his pry bar and showed me there was play from where the steering gaiter leads down towards the track rod end. The track rod end and track rod itself were both solid.
#6
Jamierobertarnold
-
- Noobies
-
- 121 posts
Mini Mad
- Location: Kent
Posted 28 April 2015 - 04:27 PM
Sorry if I'm not being clear! Never done a steering rack before. If I'm not making any sense (probably not) your suggestions so far are helpful enough. Thanks people!
#7
spiguy
-
- Members
-
- 1,537 posts
Camshaft & Stage Two Head
- Location: UnderTheCar
Posted 28 April 2015 - 05:41 PM
sounds like play in the steering rack bushes. It usually happens on the passenger side as the rack is a much longer supported length between the steering column / pinion and the bush, which sits at the end of the rack tube, than it is on the driver side. Best plan is to get a new steering rack. I believe on the older racks (not sure when) you could get the bush out and replace it - there was some kind of locking screw locating the bush, but on the later ones this is not the case. It certainly wasn't with mine, which I replaced a few months ago for the exact same issue as you are having.
#8
Spider
-

- Admin
-
- 14,836 posts
Moved Into The Garage
- Location: NSW
- Local Club: South Australian Moke Club
Posted 28 April 2015 - 06:36 PM
As the other guys have said, it will be the supporting bush for the rack inner.
You'll need to remove the rack from the car to repair it, not a hard job to do the rack itself if you can get the bits. I have looked in the past for parts for the UK Racks and no one seems to have them, so may end up being a replacement rack.
#9
Jamierobertarnold
-
- Noobies
-
- 121 posts
Mini Mad
- Location: Kent
Posted 28 April 2015 - 09:20 PM
Thanks so much people! Sounds like a new rack is the sensible answer. Haynes to the rescue!
Thanks again!
Thanks again!
#10
spiguy
-
- Members
-
- 1,537 posts
Camshaft & Stage Two Head
- Location: UnderTheCar
Posted 28 April 2015 - 11:12 PM
Not sure what haynes says about doing a rack, sometimes they are overkill about what to take off. This is how I did it - I am assuming you are using new track rod ends, I am also assuming your car is not an MPI and so has no airbag - warning, alot of info follows, it's quite an involved job! :
1. Raise car onto axle stands supporting the body (don't support it on the floor pans!) I usually support it at the bottom of the flitch panel on the part where the flitch panel turns round onto the floor pans, using a decent block of wood on each side - however if you can a full piece of timber right across this area which goes across the exhaust tunnel is even better, however this requires removal of the exhaust completely. If going for the full piece of timber, then remove the exhaust completely, if going for separate bits of wood each side, you can get away with just dropping it off the exhaust hangers at the middle and rear.
2. Just to be safe and since it easy to do, disconnect the battery.
3. Support the front subframe with a trolley jack (one at each side under the bottom arms and use some wood to spread the load)
4. Now, you will want to get your tracking setup properly after fitting the new rack, but you can get yourself close by using some measurements. I used a steel rule and took the straightest measurement I could between the track rod end taper pin and a point on the subframe - mark the point with a paint pen or something for later. Of course, do this with the steering in straight ahead position (I am assuming your steering wheel is straight when the wheels are straight).
4. Back off track rod end lock nuts and disconnect track rod ends from the steering arms (nut off and split the taper)
5. Disconnect top engine steady (at engine end)
5a (because I forgot and added this - disconnect the shocks - top or bottom, doesn't matter)
6. Loosen front teardrop mount bolts (the ones bolting through the subframe). Back them off a fair bit.
7. Undo front subframe rear floor mounts
8. Remove tower bolts
9. Remove steering column plastic shrouds and disconnect all connectors that come from steering column.
10. Remove steering column (can just keep steering wheel on, remove the column shear bolt, remove pinch bolt from the steering pinion and pull the column out). Getting the shear bolt out can be fun... I had to grind a slot in it and use a big screwdriver)
11. Remove nuts from the U bolts.
12. Lower jacks carefully which are supporting the front subframe. You are basically trying to get the engine / subframe assembly to drop down a bit at the back so that there is room to remove the rack / insert the new rack. A couple of inches clearance should do it, you just need to do it a bit at a time until there is room. Be careful - you may find the inlet manifold will foul on the front crossmember before you get it down enough to get the rack out, if so then I'm afraid it is inlet manifold off... I managed it OK without removing the manifold on my SPi, so I will assume that you will too. Oh- you may be better to remove your air filter housing too in case it is in the way...
You also need to keep an eye on the brake pipe which runs down to the banjo union on the drivers side on the subframe, as lowering the subby like this will put a bit of strain on it. There is a risk of cracking this pipe, so watch for that or any fluid leakage indicating you have disturbed the seal at the banjo union (I got away with it).
13. When you think there is enough room, try to manipulate the rack and the Ubolts clear of the floor (pinion also needs to come through enough to clear the floor/toeboard area) and then try to slide the rack out the side (out the drivers side is easiest).
14. Fit the U bolts to the new rack, remembering to use new anti slip plastic pieces, and fit a new foam pinion seal over the pinion. If you fit the U bolts so they are lying at a bit of an angle, they shouldn't get in the way as you maneouver the new rack in, and you can then straighten them up so they line up with the holes in the toeboard. It's a bit fiddly.
15. Slide the new rack into place and try to get the pinion through the hole in the toeboard and also the Ubolts through their holes enough that you can get the nuts on inside the car.
16. Pop the U bolt nuts on and run them up a bit evenly. Don't tighten them just yet though, just enough to locate the rack against the body without a gap. The rack needs to be able to move to align it.
17. Remove the rubber grommet on the passenger side toeboard so you can access the plastic bung which is screwed into the rack body. Think it is an allen headed bung.
18. Fit the steering column so you can turn the steering - align the pinch bolt clamp with the cutaway in the pinion where the pinch bolt goes, it can be fiddly and the bolt wont go in unless it's spot on. Trial fit the pinch bolt so you know it is right.
19.There is a hole in the inner rack (the bit that slides) which when the rack is centred, will be in the middle of the hole in the toeboard (passenger side) where you removed the grommet. You use a drill bit or similar (6mm I think) and put it in this hole. When it is sticking up central in the toeboard hole, the rack is centred. That's why you remove the plastic bung, so you can pop the drill bit into this hole which is accessed through the hole filled by the bung.
20. Hopefully with the rack centred, the pinch bolt clamp is horizontal and at the bottom, the pinch bolt will go in and the steering wheel is centred. Rotate the column / rack until the steering column bracket is in the right position in the lower dash rail bracket, and loosely fit your new shear bolt. Alternatively use a suitable nut and bolt in case you need to remove the column for any reason (if something is not right for example)
21. Nip up the pinch bolt and u bolt nuts - do the ubolt nuts up evenly a bit at a time. Don't need to torque them just yet, you can do that shortly. Just want to locate everything snugly so nothing changes position now.
22. Screw on the track rod ends (remember to put the lock nuts on first) and then pop the taper pins into the steering arms. Use trial and error to set the measurements you took earlier - in theory you can just put the track rod end pins into the steering arms, put the nuts on and rotate the track rods to adjust the track, but I found the track rods were very hard to turn due to the rack being new, so found it easier to just rotate the track rod end - fit to arm - measure then pop them out and repeat until it was right.
23 Once you are happy with the track settings, put the track rod end nuts on the taper pins and nip up. Nip up the track rod end lock nuts. Depending on your preference, torque them now, or go back at the end and torque everything / check everything, depends how you like to work- I'm a do it all at the end guy.
24. If everything is looking good, inside the car, torque up the U bolt nuts and the pinch bolt. If you are happy that the wheels and steering wheel are fairly straight, you can tighten fully the shear bolt. At this point I stil just used a normal nut / washer / bolt in case I found any issues, so I didn't need to try and get another damned shear bolt out as it is a pain... Note! - before tightening the bolt, position the outer column so there will be a couple of mm gap between the shroud and the steering wheel. Too far up and it will rub, too far down and the indicator cancelling ring will not engage with the tab on the underside of the steering wheel. Maybe easier to fit the shroud to be able to tell.
25. Now start the process of raising the subframe back into position and refitting the tower bolts (do them first as it aligns the subby), the floor mounts (do them second), tightening up the teardrop mounts (third), the engine steady, the exhaust (back on or back onto hangers depending how that was done), shocks.
26. Make sure everything is tight / torqued :
- U bolts
- pinch bolt
- Column shear bolt
- track rod end lock nuts
- track rod end taper pin nuts
- Tower bolts
- Subframe floor mounts
- teardrop mounts
- engine steady bar
- Exhaust fittings (if applicable)
- shock mountings
27. Remove drill bit from centering hole, refit plastic bung and toeboard grommet.
28. Connect up the wiring connectors around the column
29. Check that brake pipe and union are still intact and not split / leaking.
30. If everything is OK, relax! if not, post on here with details.
31. Get your tracking done.
Hopefully I have not missed anything, advice is given for use at your own risk, if in doubt consult a competent mechanic etc...
Edited by carlukemini, 28 April 2015 - 11:34 PM.
#11
Spider
-
- Admin
-
- 14,836 posts
Moved Into The Garage
- Location: NSW
- Local Club: South Australian Moke Club
Posted 29 April 2015 - 05:02 AM
Great guide there from carlukemini, well done!
Some 'tips' if I may;-
Often the U bolts won't slip through the floor easily and just about every one I've removed needed some help. While I do have a good range of Pin Punches for just such a job, I find the Big Phillips Screwdriver (No. 3?) is best as it only contacts the U Bolt in the centre of it and if it needs a tap, the handle acts as a cushion. Never damaged one yet doing them that way.
To get the column off the rack (once the pinch Bolt has been removed), turn the Steering Wheel such the the slot in the column if facing down (so the hole for the pinch bolt is horizontal) then wiggle the column a bit (~2") from side to side. This should spread it just enough to allow it to come free.
Before passing the new Rack in through the cavity between the Body and the Subframe, wrap a rag around the Passenger's side boot (gaiter) and then pass it through from the Driver's side. The rag is only to prevent damaging the Boot on it's way through.
Fit a new Pinch Bolt and Nut, These are a Grade 8 Bolt and Nut. I actually use In-hex Head Bolts here, they are Grade 12. Don't fit anything less than a Grade 8 and don't fit Stainless.
Before trying to re-fit the U Bolts, trial fit them from the Inside of the Car first. Often they spread a little as they come out, so may need a careful pinch together. You want them a nice easy hand slide fit through the Holes in the Toe Board.
When refitting the Column, I just drop the Column on at first, wind over to full lock one way, count the turns back to the other lock, then go back exactly half, Without disturbing the Rack position, remove the Column and re-fit in the straight ahead position.
For a MKI Rack, a good starting place for the Rod Ends is to wind them on 14 turns on each side. Sorry, I don't know how many would be appropriate for a MKII rack (which is most likely what you have), but I wouldn't loose sleep over this.
Have a wheel alignment done right away.
#12
spiguy
-
- Members
-
- 1,537 posts
Camshaft & Stage Two Head
- Location: UnderTheCar
Posted 29 April 2015 - 06:43 AM
Very good points Moke. I also put a small plastic lid over the pinion on the new rack to avoid damaging the splines, but have since read that they are hardened so didn't mention that as it is probably not really necessary.
Also good idea on centering as an alternative method. That should achieve the same ends without having to mess around with the pin in the hole method!


1 user(s) are reading this topic
0 members, 1 guests, 0 anonymous users


