that sounds so wrong lolGet plugging Percy's rear end!

Another Pickup Called Percy
#91

Posted 29 March 2017 - 02:51 PM
#92

Posted 29 March 2017 - 04:35 PM
Looking good
#93

Posted 19 April 2017 - 04:51 PM
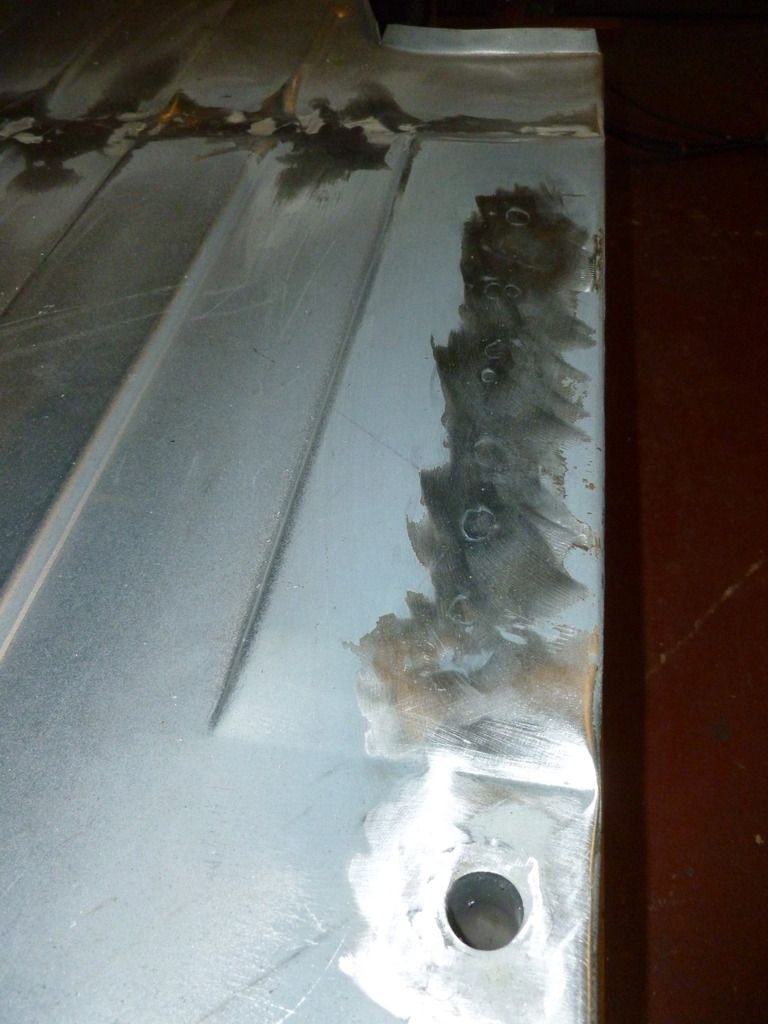
Welding the main floor and loadbed sections together has been completed during the few hours I've managed to snatch in the garage over the easter holidays. Its not pretty welding, and the grinding back certainly isn't invisible, but Percy is going to be a working pickup and a few ripples and dimples in the floor are going to add a certain patina.........
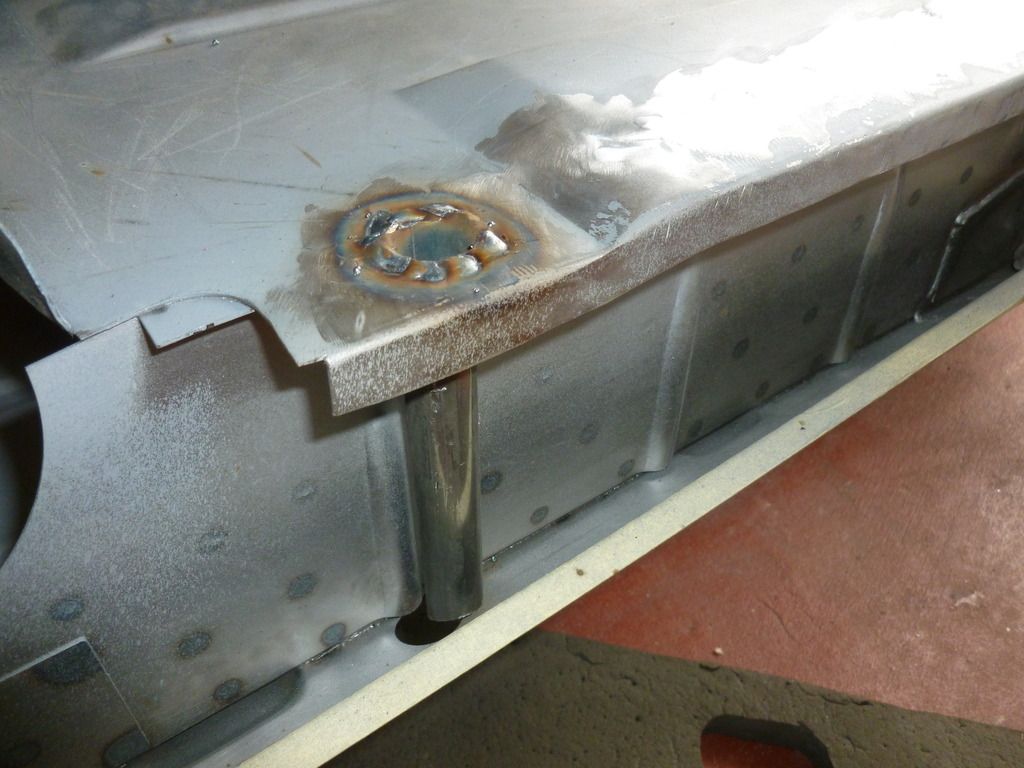
At the bottom of this picture you can see the drain tube which runs from the loadbed into the sill section. This isn't present on the M Machine floor so I got to try out a bit of minor fabrication ![]()
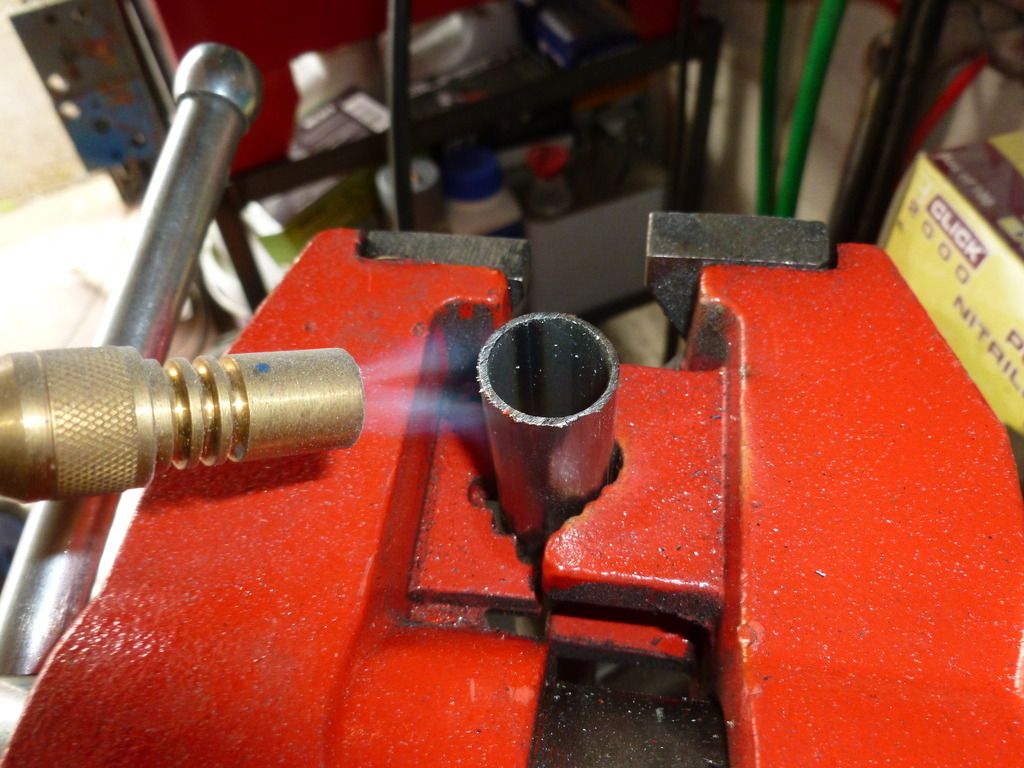
Here we are heating up the end of some 20mm tubing with a blow torch, when it was nice a red I walloped it with the curved end of a ball pien hammer to radius the end and cut a nice jaunty angle at the other end to match the profile of the outer cill.
After drilling a hole here it is welded in -
Its minor progress but progress none the less!
#94

Posted 24 April 2017 - 05:57 AM
That is some awesome nice tidy work! Keep going :)
#95

Posted 25 April 2017 - 03:33 PM
#96

Posted 26 April 2017 - 06:48 AM
shame the exit hole didn't line up on that drain - will you need to move it or will it be OK to just seal the overlapping edge to stop water going into the closed section?
That's how the original drain was, I think the idea is just to let the water into the sill section where it just drains out of the hole and the flutes. Could be wrong though ........ does anyone with a nice unmolested pickup know if that's how it's supposed to work?
#97

Posted 21 August 2017 - 11:35 AM
any progress on this?
#98

Posted 27 September 2017 - 07:14 AM
any progress on this?
Not as much as I'd like. In fact after finding even more rust under multiple layers of paint and filler I had to take some time off for a sulk and to question both if Percy was worth saving and my own sanity.
Fear not - I have maned up and carried on mainly because I'm already in for about 1k's worth of new floor and loaded panels. There's another big panel spend bill coming up and at present I'm almost in a position financially to press the go button on it.
I also need to figure out a different picture hosting site since the photobucket changes I guess even though all my pictures still seem to be visible.
#99

Posted 27 September 2017 - 09:35 AM
This is one of my favourite threads on the forum, and look forward to following your continued progress.
#100

Posted 27 September 2017 - 04:26 PM
Know the feeling there. I've downloaded a copy of the minis home catalogue, highlighted all the panels I need, but not been brave enough to add up the cost. I'll need the complete floor and load bed too, which add up to an expensive purchase, and was planning to tackle that first, but change of plans and going to start at the front passenger corner and get the door frame sorted and then work from there.
This is one of my favourite threads on the forum, and look forward to following your continued progress.
Thanks for the kind words, it's worth bearing in mind the waiting time if your going for complete floors and load bed like I did from m-machine, it was an almost 8 week wait for the loadbed when I ordered mine, but they don't charge till they ship it so it might be worth a call to see what the wait is at the mo
#101

Posted 01 October 2017 - 09:58 AM
Right - long time no proper update. Many apologies, work has continued but at a snails pace. I've found acres more undiscovered and really depressing rust in places I was hoping not to have to touch so had to take a couple of months off over the summer to have a think about how to carry on and recharge the mojo batteries.
i didn't take a lot of pictures of these stages as I was quite frankly far too fed up to bother and because it was in the middle of the photobucket wars there didn't seem much point. I'll describe my tale of woe as best I can.
The first problem was the rear bulkhead of the cabin. As usual with pickups the bottom edge was a trifle frilly and the more paint I removed the bigger the holes got. Now this is a nasty repair to get right, especially when the panel isn't attached to anything at the bottom. As the bulkhead is visible from both sides any repairs have to be reasonably neat. And neat welding is not my strong point.
The bottom of both of the rear side panels and the rear wheel arches were also toast, I'd known that from cutting the loadbed out, but I was gobsmacked at how far up Percy's sides the filler went. it was almost 1/2 an inch thick in places.
Drastic times require drastic measures so I promptly loped off Percy's entire rear end just behind the cab. This allowed me to inspect the inside of the upper channel section at the top of the rear bulkhead and see the bottom of the B posts properly.


Ohhhhhhh look more rust. As the eagle eyed will notice the rear bulkhead is entirely missing in these pictures. I did try and repair it honest. It really didn't go at all well and all pictures of my pathetic attempts at a seamless welded joint have been permanently erased.
I had to admit defeat and ordered a complete new bulkhead panel from M-Machine. This is a panel they only manufacture when they have enough orders so it took awhile to arrive so I shut the door of the garage and walked away over the height of the summer and did sensible family stuff like holidays and less sensible middle aged man stuff like crashing mountain bikes....

Heres the nice shiny new bulkhead in place and in the background you can see the bottom of the B post has been replaced as well. Actually looking at this photo properly it looks as if that B post repair is a bit wonky, but I'm sure thats just a photographic illusion ![]()
Stay tuned rust fans for further instalments later which will bring you hopefully up to date!
#102

Posted 01 October 2017 - 10:46 AM

OMG!!! Where's Percy's front bulkhead gone I hear you cry!?
Well I chopped it out because I was in a bad mood and it deserved it. It looked so solid till I stripped about 4 layers of different shades of blue paint off it and chipped away all the filler. I treated it with Deox-gel and ground it back. I thought about it and treated it again and ground it back again. I spent ages staring at it trying to dissolve the rust away by shear force of will.
After all my efforts it was still a rusty, pitted and thin in a lot of crucial places mess. Yes I'm sure some people could of repaired it. I could of started patching it and removed the cross member to treat the rust behind it, but I know my limitations. It was a time & effort expended versus cost call so I reached for the angle grinder again. I am getting rather good at chopping great mahossive lumps of structure out though.
Heres a nice random picture of the grot at the top of the inner wing / scuttle to keep you all amused.

The new bulkhead turned up surprisingly quickly from Bull Motif Spares and here it is clamped roughly in position

This led me to discover the next problem which you maybe able to see my solution to in that last picture.
To be continued.................... ![]()
#103

Posted 01 October 2017 - 06:47 PM
![]() and i thought I had a lot to do!
and i thought I had a lot to do!
You are a brave man and it will be worth it all to have a mint pickup in the end.
#104

Posted 01 October 2017 - 09:53 PM
#105

Posted 02 October 2017 - 06:20 AM
Goodness, that escalated quickly! Will seem like a really steep hill ahead of you, but will be worth all the effort in the end are you keeping much from the back end, of going for new sides etc when you get to that stage?
The sides and rear wheel arches will be replaced but hoping to reuse the rear lamp panels, tail gate and various brackets / stiffeners in a vain attempt to keep the costs down
1 user(s) are reading this topic
0 members, 1 guests, 0 anonymous users


