Jump to content


Photo
- - - - -

Keeping Another Mini Out Of The Scrappy


  • Please log in to reply
572 replies to this topic

#106 James_eaton_thewholething

James_eaton_thewholething

    One Carb Or Two?

  • Members
  • PipPipPipPipPipPipPip
  • 1,063 posts
  • Location: Manchester

Posted 21 September 2015 - 11:09 PM

Not had much time recently but got some time today.

E0E261BF-1C18-44D0-B087-AE85BE97F6B8_zps

Cut everything old out and then primed, drilled and punched holes in the scuttle.

E2B00366-D84B-40EB-AF7B-900295510734_zps

Then welded it in which went nice and quick.

5BD25625-F953-4E83-8700-5E128EE26FEA_zps

Since the scuttle was welded in, it left all of my clamps free do tested the fit of all the front panels. The pattern front panel lined up really wel with the genuine wings so don't have any worries about fitting it.

77AAF07E-716E-4697-A66C-100BE0D0F4EF_zps

Test fitted the A panel and will need to fettle the wing a little but it will fit easily enough. The part that is stopping it is where it folds down and wraps around the scuttle panel.
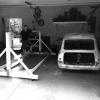
Before I can get on with any more mini stuff I had to move stuff out of the back of the garage in order to sell and create more space, hopefully it won't take long and I can get all the front panels on. All for now

#107 Ben_O

Ben_O

    Mill Road Garage

  • Paint Doctor
  • PipPipPipPipPipPipPipPipPipPip
  • 9,793 posts
  • Location: Isle of Wight

Posted 23 September 2015 - 09:02 PM

I hope the bonnet fits. they are usually rubbish and require a lot of cutting and shutting to get a decent fit.


Front end looks good though James. Makes me realize how far behind i am..


#108 James_eaton_thewholething

James_eaton_thewholething

    One Carb Or Two?

  • Members
  • PipPipPipPipPipPipPip
  • 1,063 posts
  • Location: Manchester

Posted 24 September 2015 - 12:33 PM

Been busy getting the garage cleared out which was not fun what so ever but at least I have loads of room.

5632160E-4AD7-4C76-982C-44A768098B2F_zps

Everything all piled up in front of the mini.

0E057E25-226D-4AB7-B681-B66CB067DF38_zps

Tonnes of space in front of the car now all the golf GTI parts have been moved out.

66B9BE00-71E3-4F6E-BD1F-67BA52EAC52F_zps

Test fitted all of the panels at the front and drilled a few holes in the wings to bolt them in position. Refitted the front panel and now all I have to do is do my best to get rid of a big gap on the passenger front corner then make holes and weld all the panels in. Then sort out fitting the A panels

#109 James_eaton_thewholething

James_eaton_thewholething

    One Carb Or Two?

  • Members
  • PipPipPipPipPipPipPip
  • 1,063 posts
  • Location: Manchester

Posted 28 September 2015 - 11:03 PM

No picture update but an update.

Currently been refitting the front subframe in order to get the panels to line up better, just struggling with the wings and A-panels as I wasn't 100% sure on how the A-panels fit but managed to find a picture of someone that had fitted the inner wings with the panels attached so should be ok with getting all the front end lined up and then set about welding it on will be a huge step forward to it looking like a mini again

#110 James_eaton_thewholething

James_eaton_thewholething

    One Carb Or Two?

  • Members
  • PipPipPipPipPipPipPip
  • 1,063 posts
  • Location: Manchester

Posted 29 September 2015 - 09:11 PM

So not been able to get much done, well it doesn't feel like much and doesn't feel like any progress is being made.

5BA78829-DD71-452B-BFB6-F6C2C40F0319_zps

Obviously with the subframe on I needed to re align all the front panels wich I have been doing then I thought I would test the door with the A-panel which after changing the shims the drivers door clears with a decent gap it will be better once the A-panel is folded round properley. Other than that I have welded in the drivers side scuttle closing panel and that's it. Feel a little disheartened with the progress but I think I'm just putting to much stress on my self. Going to drill all the holes needed to attach the front panel to the inner wings over the next few days so hopefully that will make it feel like I'm getting stuff done.

All for now

#111 Chappers

Chappers

    Mini Mad

  • Noobies
  • PipPipPipPip
  • 129 posts
  • Location: Columbus, IN

Posted 30 September 2015 - 01:54 AM

Just read through your thread James, your doing a great job, I like your thoroughness and quality of workmanship.

I'm getting ready to do a similar rebuild on my Mk1, and it needs all the same parts as yours.
If you don't mind I have a couple questions about your build.
Are all your panels Heritage?
Have you kept a tab on the total cost of the panels so far?

#112 James_eaton_thewholething

James_eaton_thewholething

    One Carb Or Two?

  • Members
  • PipPipPipPipPipPipPip
  • 1,063 posts
  • Location: Manchester

Posted 30 September 2015 - 05:36 AM

Just read through your thread James, your doing a great job, I like your thoroughness and quality of workmanship.
I'm getting ready to do a similar rebuild on my Mk1, and it needs all the same parts as yours.
If you don't mind I have a couple questions about your build.
Are all your panels Heritage?
Have you kept a tab on the total cost of the panels so far?


Thank you for reading through.

Not all of the panels are heritage not because I was trying to keep cost down, but more because a good friend of mine that has been working on minis for years let me know what I could and couldn't get away with using. Most things are though especially the important parts like the inner wings, floor, heel board, sills, wings, doorsteps and hinge panels, front scuttle, boot hinge panel and a lot of the closing panels. Things that aren't heritage are rear quarters, wheel arches, front panel, boot floor repair, floor crossmember, boot floor repair and rear valance. I did want to you all heritage but my friend said I didn't need to for those things and they haven't been any harder to make fit.
Buy the time I will have finished the shell I will have probably spent about £1200-£1300 on panels alone. I would say with everything I have left to do after I have finished the whole car will have probably spent £3000-£4000 but it's because I'm doing other things which are expensive. Hope that's what you were after

Cheers James

#113 Chappers

Chappers

    Mini Mad

  • Noobies
  • PipPipPipPip
  • 129 posts
  • Location: Columbus, IN

Posted 30 September 2015 - 05:29 PM

Hey James that's great info to know thanks, I've used some heritage and some pattern parts on mini projects before and definitely noticed the difference.

I'm looking at the whole floor assembly from M machine and it's £780 just for that, plus shipping to the US might be expensive.

Noticed you drill out the old spot welds, I'm planning to do that, what's your preferred spot weld drill bit?

#114 James_eaton_thewholething

James_eaton_thewholething

    One Carb Or Two?

  • Members
  • PipPipPipPipPipPipPip
  • 1,063 posts
  • Location: Manchester

Posted 30 September 2015 - 10:59 PM

Hey James that's great info to know thanks, I've used some heritage and some pattern parts on mini projects before and definitely noticed the difference.

I'm looking at the whole floor assembly from M machine and it's £780 just for that, plus shipping to the US might be expensive.

Noticed you drill out the old spot welds, I'm planning to do that, what's your preferred spot weld drill bit?


some panels need more persuasion with a hammer than others but still not too much. my heritage inner wings needed quite a lot of persuasion to fit but they eventually did. just had a look at M-Machine could you not use the complete round tunnel mk1 which is £130 cheaper i couldn't see what the difference could be. its a shame you can't get mk1 floor panels separate. i got my floor as the main panel, heel board, crossmember and outer sills separate. probably cost me about £400. but then again i do get a little discount cause of my friend and because when i used to drive the car i was in Moss-europe way to much


ive drilled out some of the old spot welds some i have just cut the lip off like i did when replacing the rear arch as was re making the lip. when i used to cut out the spot welds i used a special spot weld drill bit but it was a bit useless and was hard to use. now what i do is take a 6mm drill bit for the smaller spot welds and a 7mm for the bigger ones. then centre punch the spot weld and drill just enough to get through the first layer of metal and then split the seam with a chisel. just takes a bit longer and a bit of getting used to but its also not a problem if you drill right through the odd weld just weld the hole up grind flat and go from there.


i would say i really hate drilling holes and it is very time consuming but this whole project has been but at least it will be worth it when its finished.

anything else i can help you with ?


#115 James_eaton_thewholething

James_eaton_thewholething

    One Carb Or Two?

  • Members
  • PipPipPipPipPipPipPip
  • 1,063 posts
  • Location: Manchester

Posted 01 October 2015 - 09:52 PM

So I'm back to feeling like progress is being made although it's slow it's better than none. I got all the panels lined up today and retest fitted the bonnet and I've got equal gaps either side and I got the A panels in the right place.

C9CBEF69-A21B-4BB3-8277-12F76B7AD44B_zps

Pic of the drivers side scuttle closing panel which I put in yesterday.

D993CB09-966C-4B65-BFB5-7A079D51372F_zps

Drilled all the holes and covered in zinc primer ready to weld onto the inner wings.

AB8BF62B-05D4-4400-AB7F-46CF85137415_zps

Front panel welded on. First of the front panels and it's good to know that it is beautifully straight since using the subframe. My next plan of attack is to fit the passenger side scuttle closing panel and then fit the A panels before fitting the wings. But before I do that I need to grind some welds back on the plates I welded in to block off the air vents and also seam seal everything while I have a lot better access. Hopefully by the end of next week it will have the whole front end on and will look like a mini again. Then all I will need to sort is the passenger rear quarter and rear wheel arch. That will be the last of the rust removed

#116 James_eaton_thewholething

James_eaton_thewholething

    One Carb Or Two?

  • Members
  • PipPipPipPipPipPipPip
  • 1,063 posts
  • Location: Manchester

Posted 05 October 2015 - 04:11 PM

Have managed to get so really decent amount of time in the garage this morning before having to get to work.

First of all I cleaned up loads of welds which I should of done ages ago and then set about having fun with a paint brush.

0C2DCD0E-DE90-4899-89EE-9EA742279AFE_zps

127431F0-7DC9-470A-9BDA-62BFA3BAEE53_zps

FBFE33C3-3575-470E-BA1C-AED1D3DEB49B_zps

FB4371B1-9B31-4824-B9CC-36F185370EC1_zps

FF97A2F6-29CF-40A8-8426-48235125F369_zps

C53F6426-6B3C-4AE4-BCE4-A1689607B68C_zps

F942C932-FC7B-4C30-8A64-E4DB05F3EAF7_zps

DE912111-D34F-44DD-A308-6BF7D83BA010_zps

So since everything was covered in seam sealer including over all of the plug welds.

2FF157AC-F39F-404A-8E5C-A51BAB35A9B3_zps

The biggest achievement of today was getting the wing, A panel welded in and the wing welded to the front panel. With the front panel I did a few plug welds and then seam welded in one inch sections along the lip. The plan for tomorrow is finish off a few welds to finish off the A panel to the inner wing and then to attach the other wing and A panel so tomorrow it should have a full front end and look like a mini again. I'm feeling excited

#117 James_eaton_thewholething

James_eaton_thewholething

    One Carb Or Two?

  • Members
  • PipPipPipPipPipPipPip
  • 1,063 posts
  • Location: Manchester

Posted 06 October 2015 - 12:17 PM

I got up this morning raring to go. I put on my welding suit and proceeded to the garage. I punched all the holes in the wing cleaned back the paint on the lips and covered it in zinc primer. Waiting for that to dry I fitted the A panel. After about an hour well I shall let the pictures do the rest.

08F47C90-B8F5-44E6-A8D0-C3F30FE43596_zps

91A293B6-19E8-493D-858B-A15FAD63E7ED_zps

So it now officially looks like a mini again. I just need to grind down the welds and then spray some zinc primer. Let that dry then apply some seam sealer down the water channel. The bonnet has be cent gaps either side. Not show quality but then again it's going to be driven daily. The bonnet will need a bit of fettleing to get it to fit right in the middle but it will with some persuasion and definitely will once the bonnet pins are fitted.

8879B325-A3E5-4396-9C4E-3D94224959F3_zps

The last bits of rot in the car are this rear quarter, wheel arch and a patch on the boot floor. Will just need to fit the outer sills after this and then just a matter of fitting the rear valance and closing panels so the shell is complete. I think my aim for starting paint next month isn't going to be a problem.

All for now

#118 James_eaton_thewholething

James_eaton_thewholething

    One Carb Or Two?

  • Members
  • PipPipPipPipPipPipPip
  • 1,063 posts
  • Location: Manchester

Posted 08 October 2015 - 07:46 PM

Got home from work and got a couple of hours on the garage didn't want to spend all night in there so just did a few things.

FC00EAAD-5CD7-4BAF-B0E1-62C0D5B34348_zps

First thing was to cut the rear quarter back then remove the old rusted wheel arch. I also cut out the last two parts of the boot floor that were horrible.

27710659-CA75-47C4-9B05-9CB3DA81FF72_zps

94E5124B-9766-41AA-99B9-90FA719D25B3_zps

This is why I have to replace the waist rail but atleast it's easy enough.

4517CFC2-BD88-4F69-AF52-FDA1387A2931_zps

Small part of the roof gutter that has rusted through I'm probably just going to put a bit of weld in there to seal it up then grind it back and fill over it and you would never know.

When I get time within the next few days I shall put the boot floor sections, make new lips up so I can weld the arch in place. I shall then fit all the closing panels then make a start on the rear quarter. Wish I hadn't had to of gone to work today I would have probably got the rear arch in and be ever closer to having a solid shell again

#119 James_eaton_thewholething

James_eaton_thewholething

    One Carb Or Two?

  • Members
  • PipPipPipPipPipPipPip
  • 1,063 posts
  • Location: Manchester

Posted 13 October 2015 - 03:37 PM

Got plenty done over the past two days.

609B37DC-1FD1-4C8C-8C03-FDBA2530418F_zps

Cut out what was left of the lip and made a new one up just like the drivers side. Also fitted in the patches that were required

DF22701E-D00A-4AAA-ADC4-3A2736968791_zps

B1E756B7-E599-4964-84AA-1B2A22CCC31B_zps

E1C3712F-E45D-4E2E-AC6D-9F97C99F4B2A_zps

Welded up the new arch so it's stronger for fitting coilovers. Left it at that and went to bed

Got up this morning and well I let the pictures do the talking

F757472C-8B03-46D4-86BC-E6A3336030C4_zps

Drilled all the holes in the closing panel and strengtheners.

5B2EB83B-DFF8-476C-911C-3D46EFD5FE9F_zps

5BBB612F-1520-4516-8B48-47EAD1E11877_zps

Welded everything in. Made sure it was solid by lifting the car off the jack stands with the edge of the arch.

1597C69E-14DC-4A60-A11B-020BC38BBF6A_zps

Cut what was left of the old rear quarter out and clamped the quarter panel in place. Hopefully I will try and get this in tomorrow and then fit the waist rail.

#120 Ben_O

Ben_O

    Mill Road Garage

  • Paint Doctor
  • PipPipPipPipPipPipPipPipPipPip
  • 9,793 posts
  • Location: Isle of Wight

Posted 13 October 2015 - 05:09 PM

lightning progress!


5 user(s) are reading this topic

0 members, 5 guests, 0 anonymous users