


Another Cg13 Conversion
Started by
zebigfatman
, Feb 12 2015 06:00 PM
129 replies to this topic
#91

zebigfatman
-
- Just Joined
-

- 159 posts
Mini Mad
- Location: Gwynedd
- Local Club: Snowdon minis
Posted 12 January 2016 - 09:25 PM
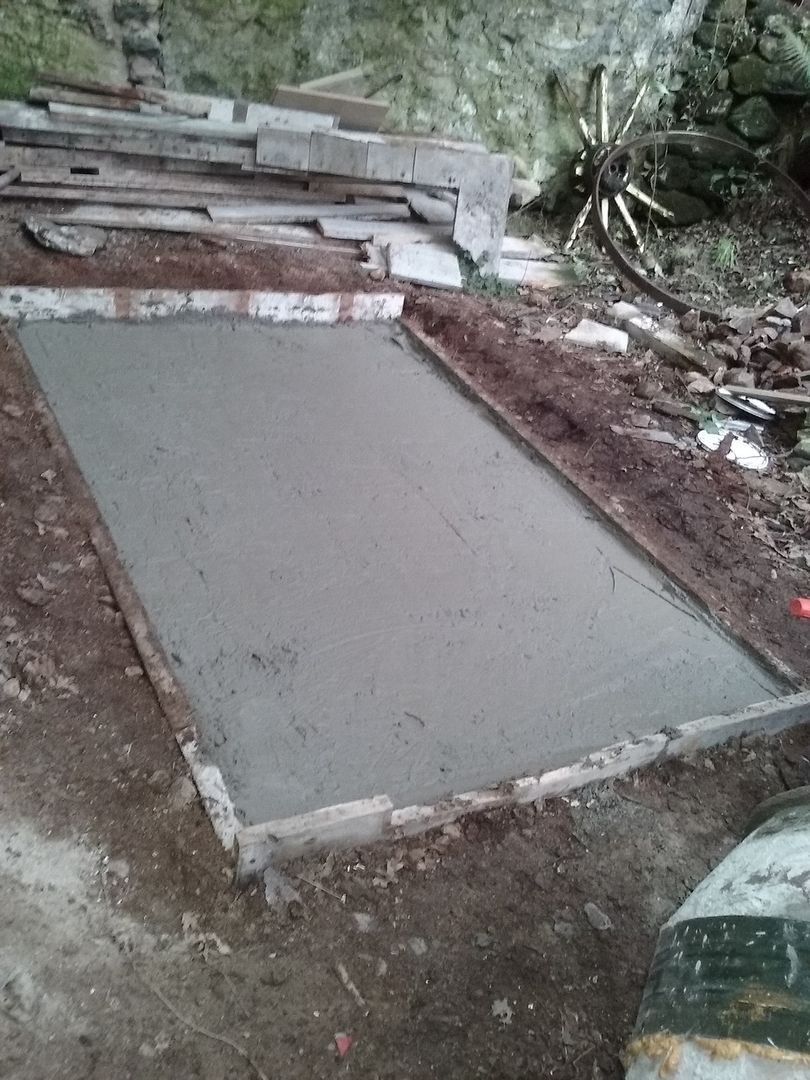
Got ma concrete in, (on my own which was bloody hard work). Got no idea how many days I should leave it before moving the car onto it though. Its 7-8cm thick and I am aching!
#92
vx220
-

- Members
-
- 419 posts
Speeding Along Now
Posted 12 January 2016 - 10:17 PM
...and I am aching!
Wait until tomorrow!
#93
thelegg
-

- Members
-
- 608 posts
Super Mini Mad
- Location: Forton
Posted 12 January 2016 - 10:17 PM
Not bad for your first attempt and on your own, well done :) personally I'd leave it about a week although you can walk on it within a few days
#94
zebigfatman
-
- Just Joined
-
- 159 posts
Mini Mad
- Location: Gwynedd
- Local Club: Snowdon minis
Posted 20 January 2016 - 08:42 PM
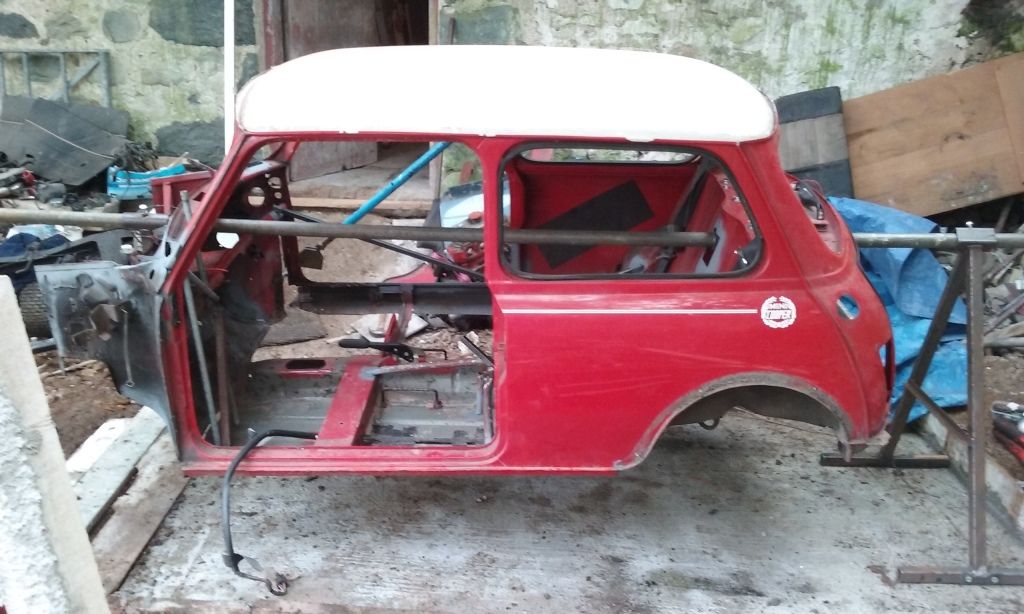
Got the car up!
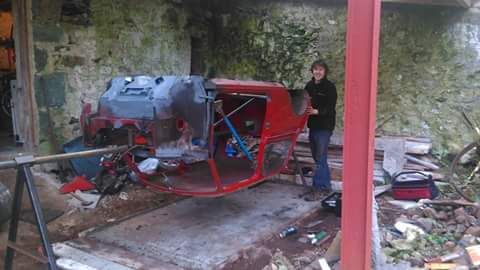
So I decided now the car is up and spinnable I would start from the back and make my way forwards, so I did this.
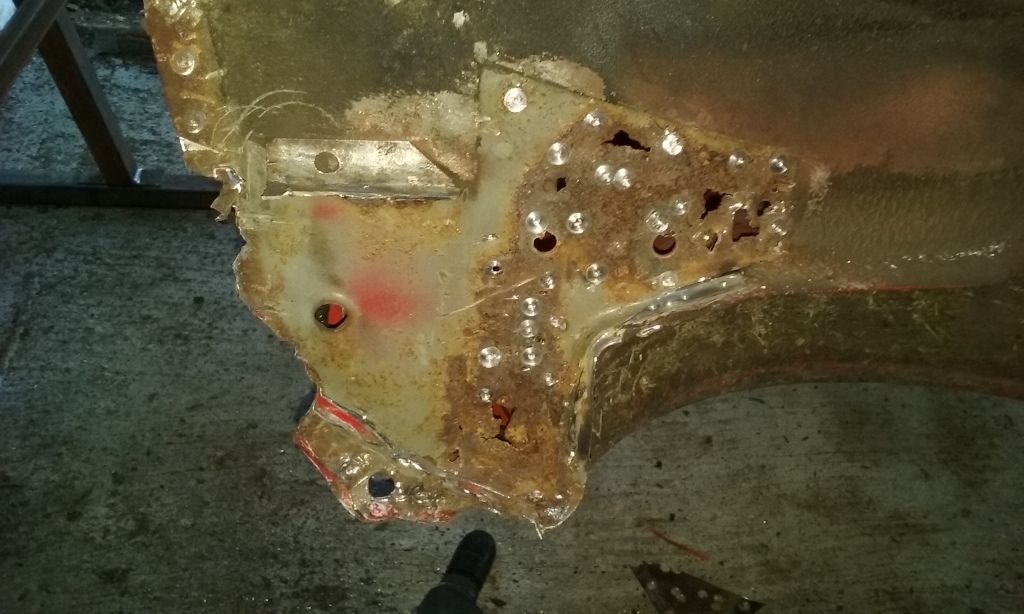
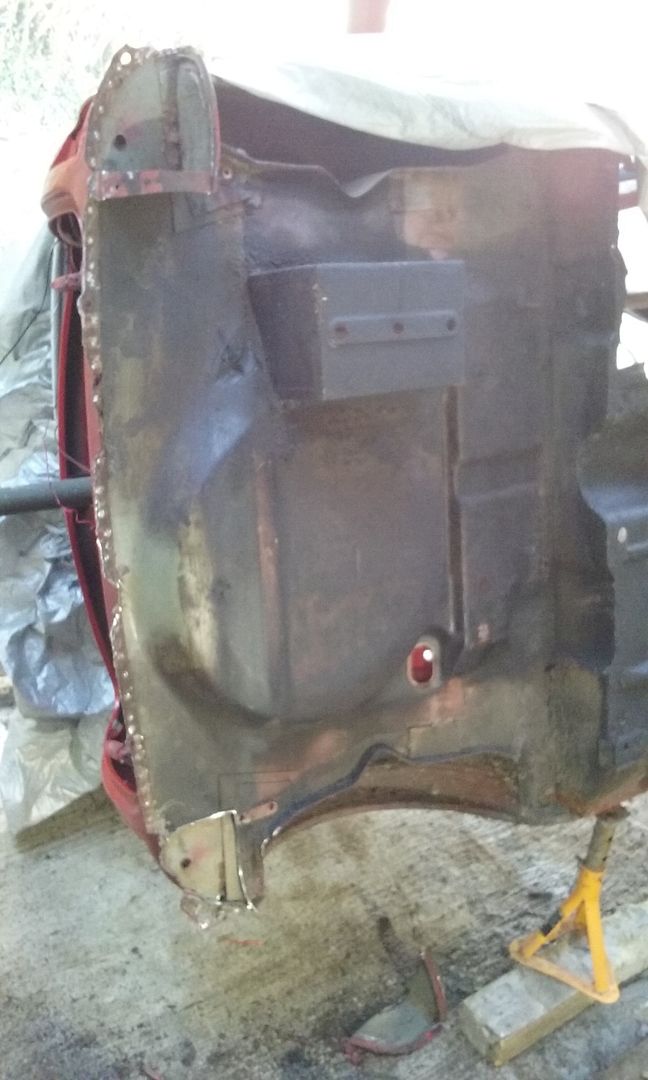
I don't understand why no seam sealer was used by rover on the valence brackety things..
So I have the rear of boot floor repair panel ready but I think I will replace the arches first. Will get started on that tomorrow.
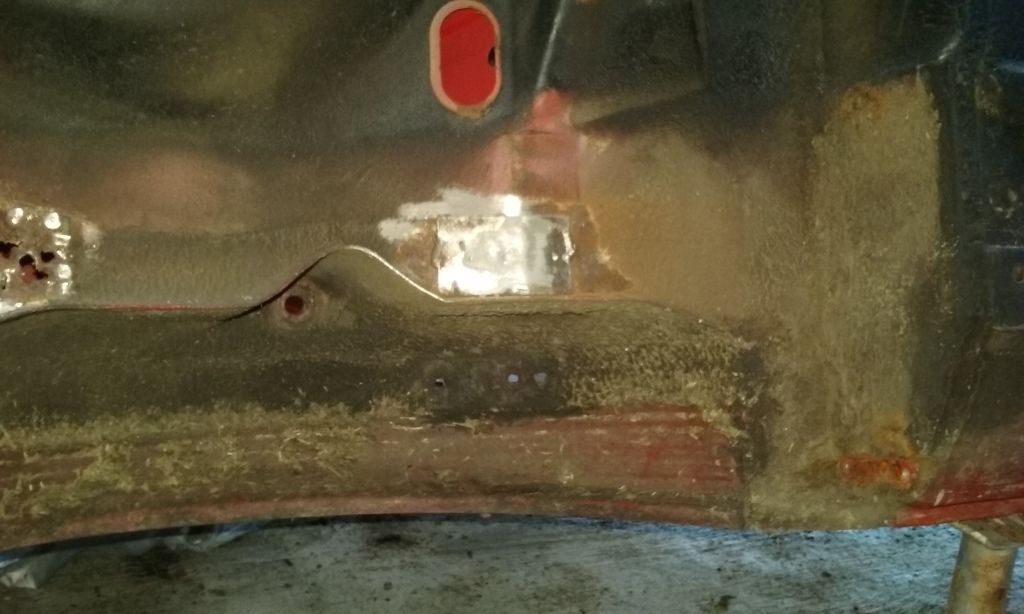
Also anyone know what this is for? not the best picture I know, it's just a little rectangular piece of metal mugged on either end. To me it looks like an unnecessary rust trap, there is one just like it on the other side.


So I decided now the car is up and spinnable I would start from the back and make my way forwards, so I did this.

I don't understand why no seam sealer was used by rover on the valence brackety things..
So I have the rear of boot floor repair panel ready but I think I will replace the arches first. Will get started on that tomorrow.
Also anyone know what this is for? not the best picture I know, it's just a little rectangular piece of metal mugged on either end. To me it looks like an unnecessary rust trap, there is one just like it on the other side.

Edited by zebigfatman, 20 January 2016 - 08:47 PM.
#95
zebigfatman
-
- Just Joined
-
- 159 posts
Mini Mad
- Location: Gwynedd
- Local Club: Snowdon minis
Posted 27 January 2016 - 02:59 PM
Ok, so trying to get hold of force racing but not having any success. Tried phoning a few times and sent an email about a week ago. Looking to buy one of the titanium rear beams before I fit the heelboard so I can modify it if necessary. Anyone know if something is happening with the company like moving address?
#96
clubman91
-

- Just Joined
-
- 137 posts
Mini Mad
- Location: North Wales
Posted 27 January 2016 - 06:46 PM
Hey mate,
Just seen this project, Great work =) And local to.
Where did you get the spit from?
Cheers,
Mark.
Just seen this project, Great work =) And local to.
Where did you get the spit from?
Cheers,
Mark.
#97
zebigfatman
-
- Just Joined
-
- 159 posts
Mini Mad
- Location: Gwynedd
- Local Club: Snowdon minis
Posted 27 January 2016 - 07:33 PM
Cheers! Spit was from a guy on ebay somwhere near rhyl I think. A frames are good but it looked like he had welded the brackets that bolt onto the car with no gas and there was no penetration, so I had to re weld those. :)
Edited by zebigfatman, 27 January 2016 - 07:34 PM.
#98
zebigfatman
-
- Just Joined
-
- 159 posts
Mini Mad
- Location: Gwynedd
- Local Club: Snowdon minis
Posted 30 January 2016 - 05:14 PM
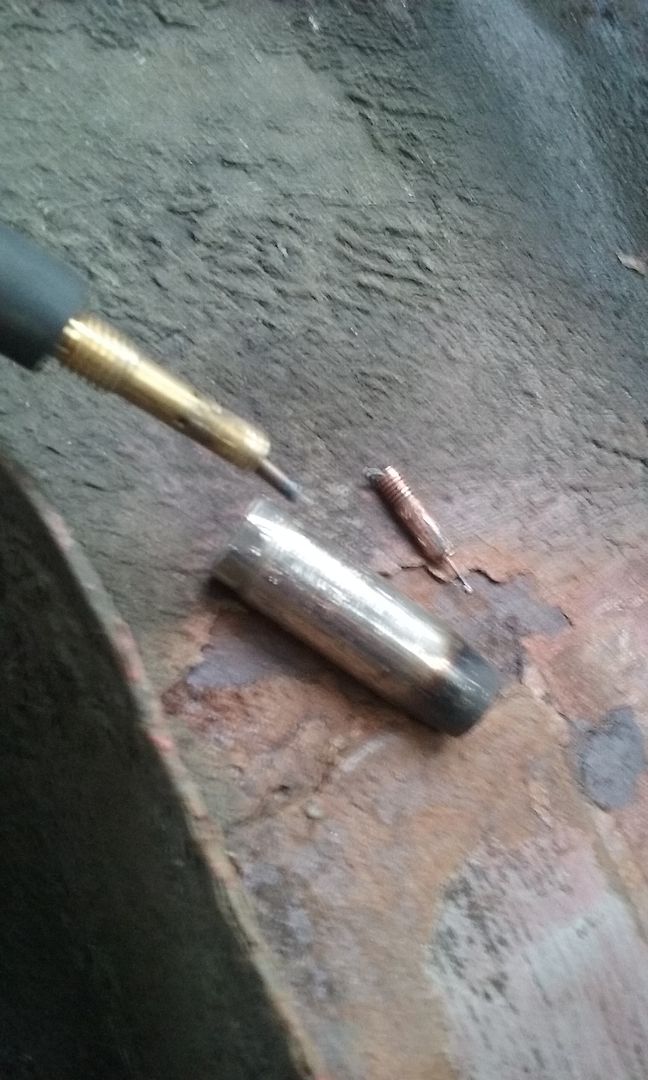
Just balls'd up my welder so I think I need a new torch.
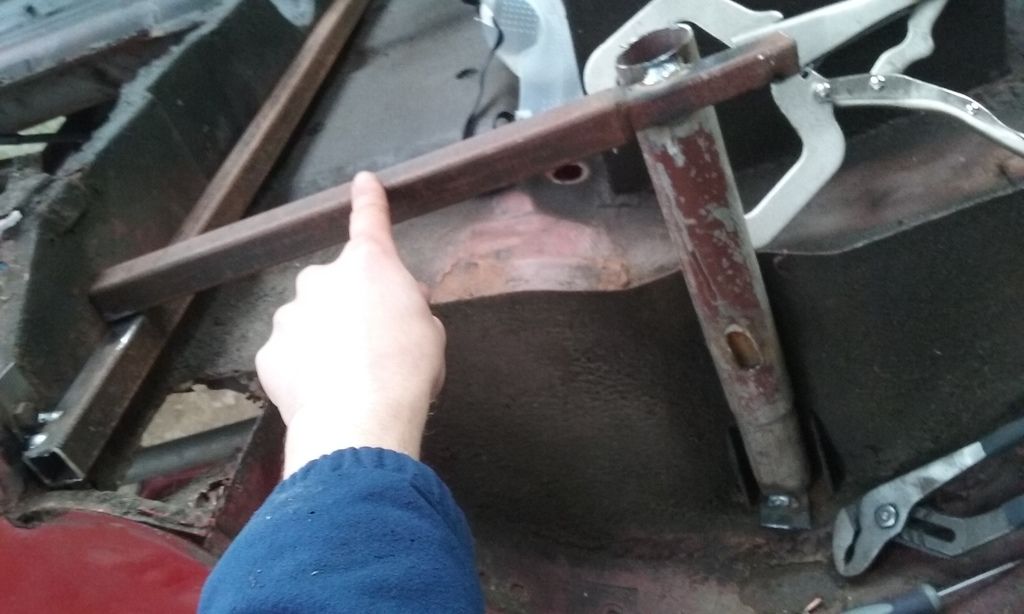
On a brighter note I have pretty much finished the rear arch positioning jig device. Just need to weld the last bits on.
I have also started my new job so progress will slow down again

On a brighter note I have pretty much finished the rear arch positioning jig device. Just need to weld the last bits on.

I have also started my new job so progress will slow down again
Edited by zebigfatman, 30 January 2016 - 05:15 PM.
#99
lawrence
-

- Members
-
- 1,340 posts
One Carb Or Two?
Posted 30 January 2016 - 05:25 PM
You can normally just buy the tip part bud as I did that to mine on my clarke welder but you have to take the handle apart to fit it
Spit looks great, show be so handled for alignment of panels!
Spit looks great, show be so handled for alignment of panels!
#100
zebigfatman
-
- Just Joined
-
- 159 posts
Mini Mad
- Location: Gwynedd
- Local Club: Snowdon minis
Posted 30 January 2016 - 10:40 PM
I will have to take it apart to find out if I can get replacement parts. There is some sort of liner made of a spring which I have also melted inside the brass tube.
#101
thelegg
-
- Members
-
- 608 posts
Super Mini Mad
- Location: Forton
Posted 31 January 2016 - 09:20 AM
Best bet would be to ring up the company who make them sure they would tell you straight away if it's fixable or not
#102
zebigfatman
-
- Just Joined
-
- 159 posts
Mini Mad
- Location: Gwynedd
- Local Club: Snowdon minis
Posted 05 February 2016 - 10:08 PM
Fixed the welder! went over after work. Took the handle apart, took the brass tube off and took the liner out. Cut the melted section out of the liner, re tapped the thread for the copper tip to go into and hopefully I will at least start getting the Os arch out this weekend
#103
zebigfatman
-
- Just Joined
-
- 159 posts
Mini Mad
- Location: Gwynedd
- Local Club: Snowdon minis
Posted 11 April 2016 - 11:17 AM
Over the last couple of months I've only really worked on the car for about an hour at a time but here is progress.


Next step will be to sandblast the bits I cant get to with the grinder, patch the floor around the arch and finally get the thing fitted! It will be a milestone because I will have a solid panel to build everything up around!
#104
zebigfatman
-
- Just Joined
-
- 159 posts
Mini Mad
- Location: Gwynedd
- Local Club: Snowdon minis
Posted 07 May 2016 - 11:44 PM
It was lovely and warm today so I was pretty productive. Made a patch and tacked it in, may not look like much but getting it the right shape in 3 dimensions was a nightmare.


More tomorrow hopefully
#105
clubman91
-
- Just Joined
-
- 137 posts
Mini Mad
- Location: North Wales
Posted 08 May 2016 - 06:47 AM
Great work mate =)
Mark.
Mark.


1 user(s) are reading this topic
0 members, 1 guests, 0 anonymous users


