Jump to content


Photo
- - - - -

Another Cg13 Conversion


  • Please log in to reply
129 replies to this topic

#76 thelegg

thelegg

    Super Mini Mad

  • Members
  • PipPipPipPipPipPip
  • 607 posts
  • Location: Forton

Posted 09 November 2015 - 11:43 PM

Get some bracing in the more the merrier and then take the rear subframe off if you feel it will make life easier besides then you can flip the shell over to make welding underneath easier ;)

#77 ninham

ninham

    Mini Mad

  • TMF+ Member
  • PipPipPipPip
  • 296 posts
  • Local Club: Anglian Mini Club

Posted 10 November 2015 - 10:12 AM

Get some bracing in the more the merrier and then take the rear subframe off if you feel it will make life easier besides then you can flip the shell over to make welding underneath easier ;)


Get a mattress and roof rack and put it upside down.
Like this
IMG_20150813_184937_zpspu8resxk.jpg

#78 CK's mini

CK's mini

    Mini Mad

  • Just Joined
  • PipPipPipPip
  • 113 posts
  • Location: Burton On Trent

Posted 10 November 2015 - 10:16 AM

That's a great idea, could even strap some casters to the roof rack.

#79 thelegg

thelegg

    Super Mini Mad

  • Members
  • PipPipPipPipPipPip
  • 607 posts
  • Location: Forton

Posted 10 November 2015 - 06:29 PM

Yep lol

#80 zebigfatman

zebigfatman

    Mini Mad

  • Just Joined
  • PipPipPipPip
  • 159 posts
  • Location: Gwynedd
  • Local Club: Snowdon minis

Posted 10 November 2015 - 10:35 PM

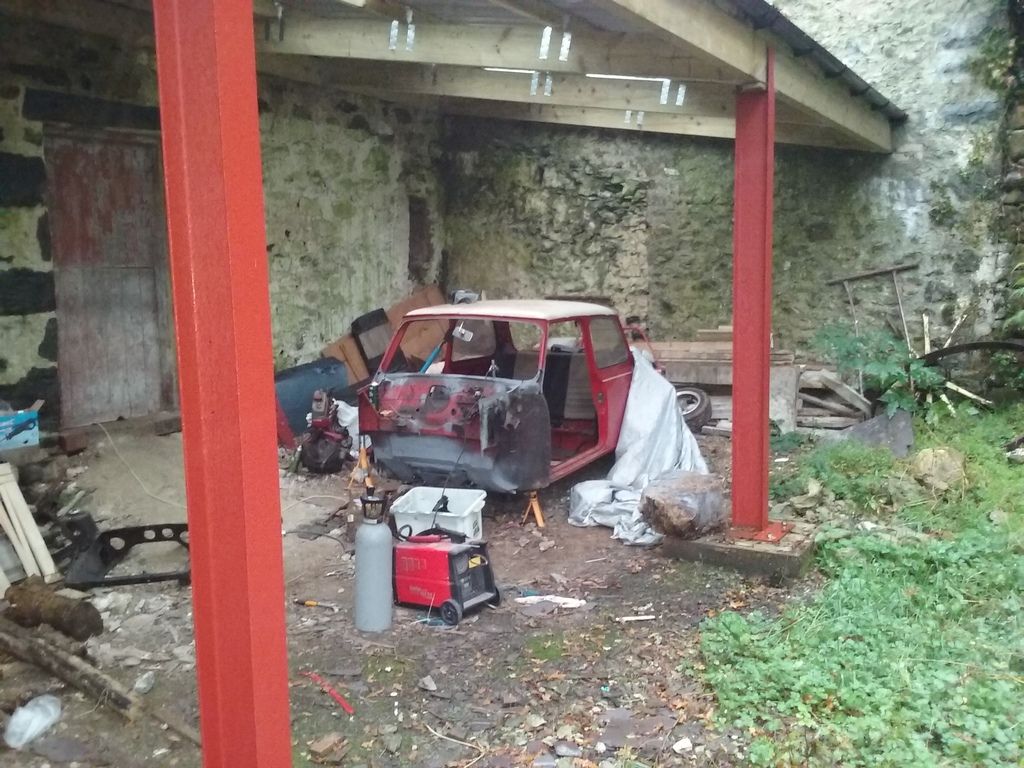
I would consider that if i had a level solid floor to work on but I have a mixture of wood shavings and very loose dry soil.

20151109_140307_zpswjhratm2.jpg

I have talked to the guys at work and they say get the floor in to restore some strength, then worry about that side of things when I take the rear subframe off and get repair panels for the heelboard. But before then I will be doing the passanger floor, sill and the flitch panels. Happy I now have a plan :)

#81 ninham

ninham

    Mini Mad

  • TMF+ Member
  • PipPipPipPip
  • 296 posts
  • Local Club: Anglian Mini Club

Posted 10 November 2015 - 10:40 PM

Sounds like a good idea. Then just replace the whole subframe panel at the end while your there. :).

#82 thelegg

thelegg

    Super Mini Mad

  • Members
  • PipPipPipPipPipPip
  • 607 posts
  • Location: Forton

Posted 10 November 2015 - 11:35 PM

As long as you've got something to attach the floor to then yeah that should be fine

#83 zebigfatman

zebigfatman

    Mini Mad

  • Just Joined
  • PipPipPipPip
  • 159 posts
  • Location: Gwynedd
  • Local Club: Snowdon minis

Posted 28 December 2015 - 04:44 PM

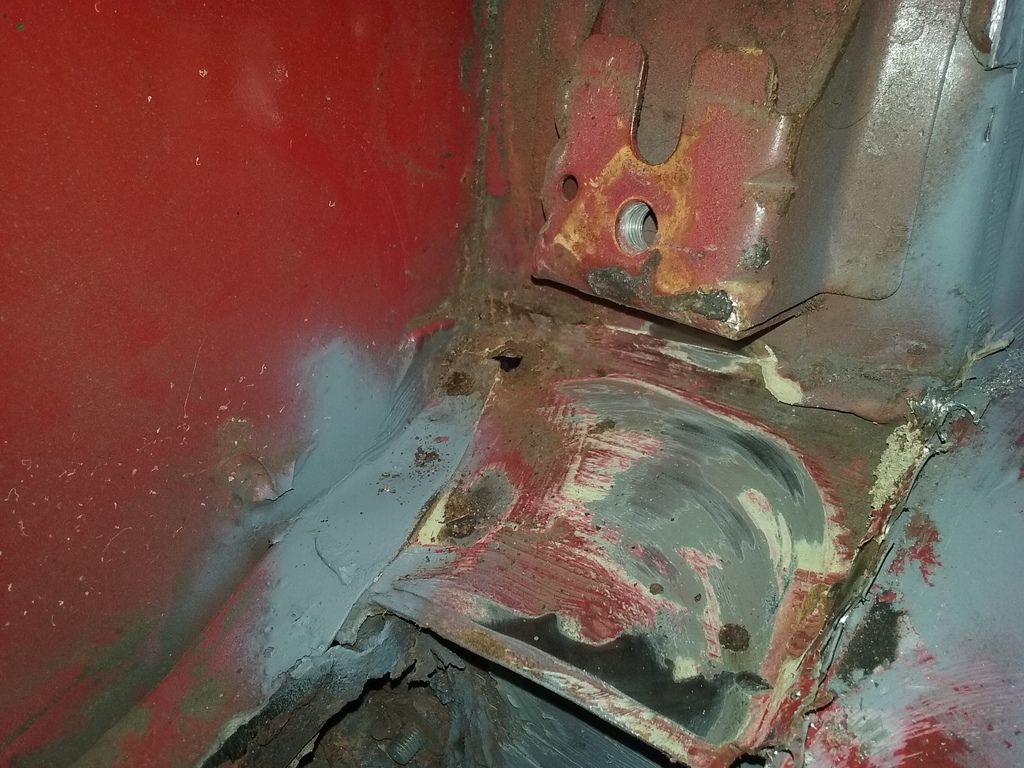
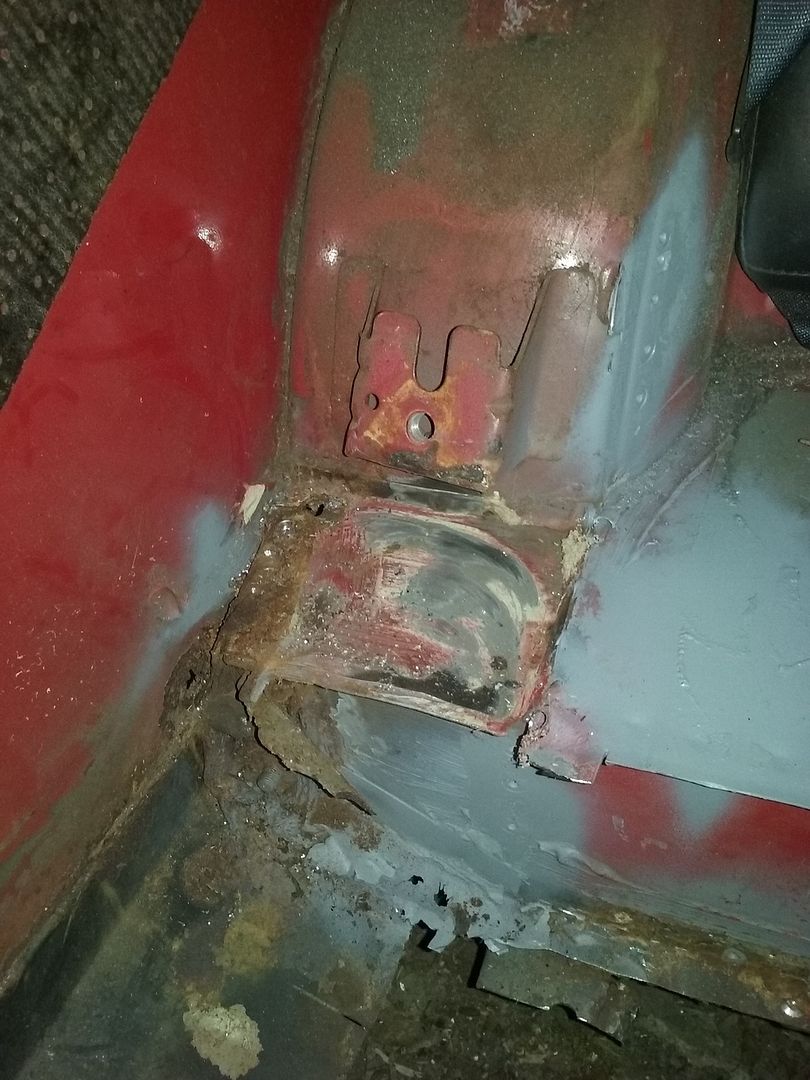
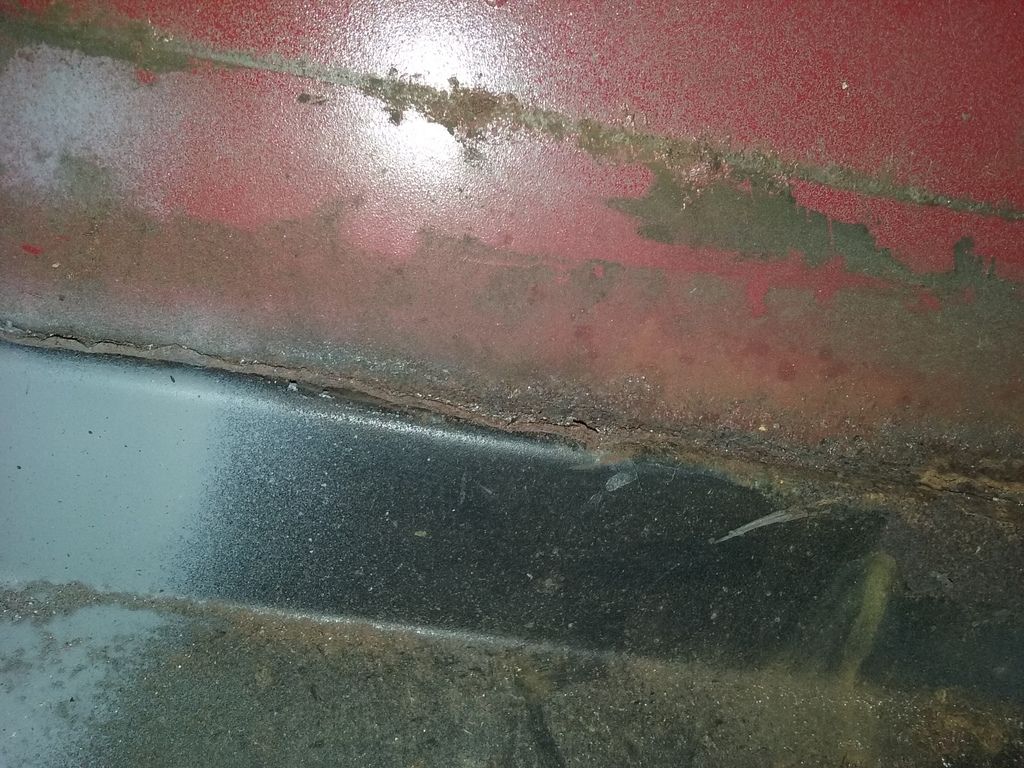
So those of you who live in the UK have probably noticed the weather has been a tad wet the last couple of months. Between that and the fact my free time after work is in the dark I have not touched the car until today. I have mainly been drilling out the spot welds around the edges of the floor, fixing my grinder every 5 mins and discovering more little patches of orange horror around the companion bin location. The inner sill stiffener plate could have been patched to be honest but I stuck a screw driver through the little square panel underneath it in front of the rear wheel arch so it had to come off anyway.


20151228_152847_zpseejkud4m.jpg


20151228_155013_zps5pfmb8iy.jpg


After removing it I could get a good picture of the original piece of outer sill that was left when the sills were replaced


20151228_154950_zpsktesghtd.jpg


Just finished ordering inner sill stiffeners, new heel board and the rear of the boot floor for when I eventually get round to doing it.

So tomorrow I am going to add a whole load of bracing and then drill out whatever the little square panel is called and make a new one.


Edited by zebigfatman, 28 December 2015 - 04:49 PM.


#84 zebigfatman

zebigfatman

    Mini Mad

  • Just Joined
  • PipPipPipPip
  • 159 posts
  • Location: Gwynedd
  • Local Club: Snowdon minis

Posted 29 December 2015 - 05:06 PM

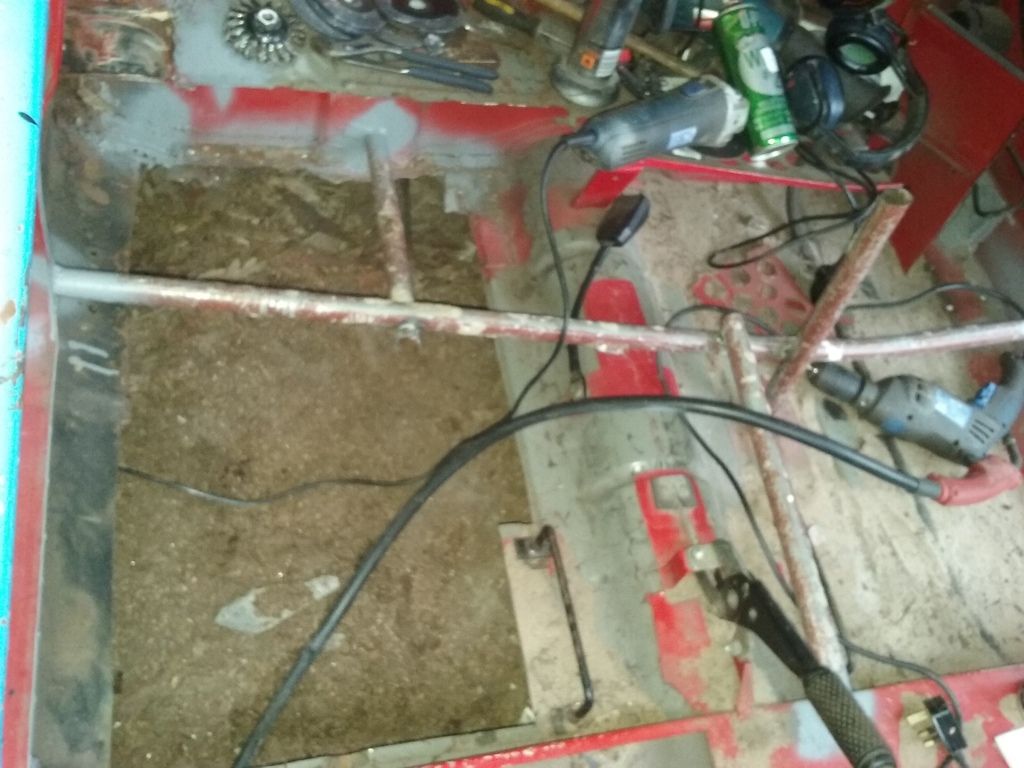
So got some poles welded in.
20151229_145418_zpsixs81ekk.jpg

Then kind of ran into another problem. The little square panel is more complex than I thought so after drilling out the spot welds I realised it was seam welded from the underside so I made this big mess.
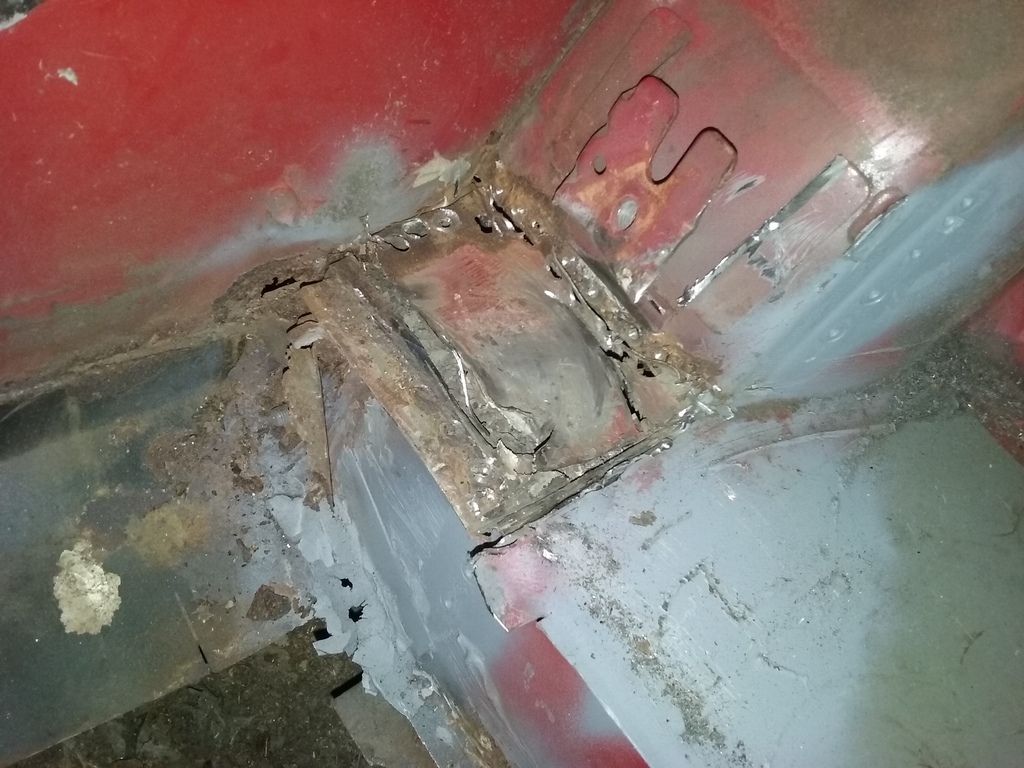
20151229_163019_zpsvpcreyec.jpg

This kind of loosened it but I found it joins the external seam of the car..
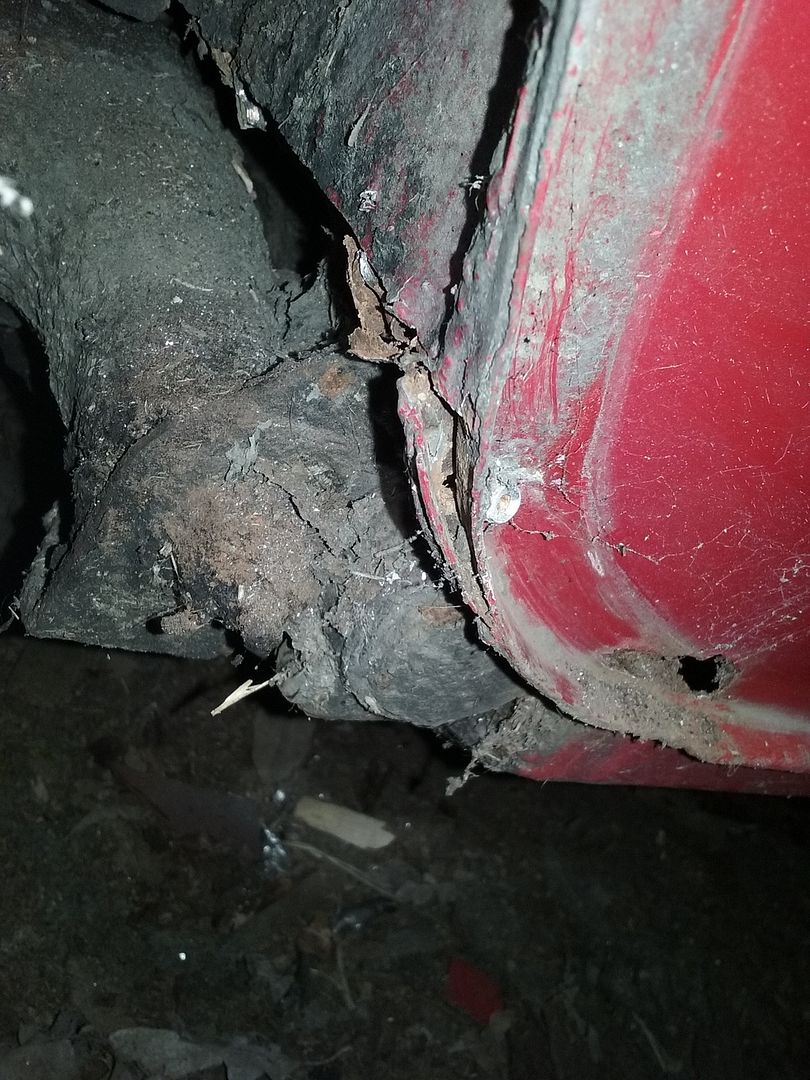
20151229_162935_zpsnxhhcwuq.jpg

Looks like I will need to add even more bracing, take the rear subframe off and flip the shell after all.

#85 zebigfatman

zebigfatman

    Mini Mad

  • Just Joined
  • PipPipPipPip
  • 159 posts
  • Location: Gwynedd
  • Local Club: Snowdon minis

Posted 30 December 2015 - 12:57 AM

Ok, alcohol has aided this decision but I have decided to brace the hell out of the shell, wheel it out of the way, dig a hole and pour a load of concrete into it to make myself a level surface. I will be picking up a rollover jig this week because I have found someone locally who makes them. Pretty sure it will be worth the extra work in the end.


#86 thelegg

thelegg

    Super Mini Mad

  • Members
  • PipPipPipPipPipPip
  • 607 posts
  • Location: Forton

Posted 30 December 2015 - 09:06 AM

Have you laid concrete before ? Lol

#87 zebigfatman

zebigfatman

    Mini Mad

  • Just Joined
  • PipPipPipPip
  • 159 posts
  • Location: Gwynedd
  • Local Club: Snowdon minis

Posted 30 December 2015 - 04:49 PM

Nope. Got an idea of what to do, something like dig out to level, put in some hardcore, sand, make wood frame, pour in concrete.

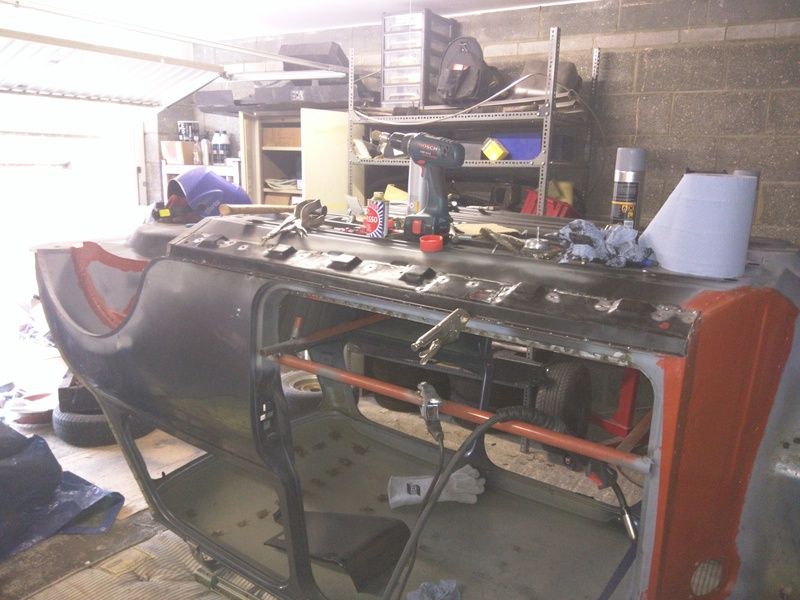
Today all I did was brace the shell and put the front subframe back on ready to move tomorrow. I can actually move the whole car on my own, weighs nothing!

#88 thelegg

thelegg

    Super Mini Mad

  • Members
  • PipPipPipPipPipPip
  • 607 posts
  • Location: Forton

Posted 30 December 2015 - 06:19 PM

You want your Concrete about 6" thick then get your wooden frame level but make sure you put plenty of pegs around else the weight of the concrete will push the sides out! Then once the concrete is in you need to get a piece of wood that's wider than your wooden frame and sort of drag it across the top of the concrete keeping it resting on your frame each side this will then show up any high/low spots. Hope that makes sense lol

#89 zebigfatman

zebigfatman

    Mini Mad

  • Just Joined
  • PipPipPipPip
  • 159 posts
  • Location: Gwynedd
  • Local Club: Snowdon minis

Posted 30 December 2015 - 06:59 PM

Thanks. Will let you know when something interesting happens

#90 zebigfatman

zebigfatman

    Mini Mad

  • Just Joined
  • PipPipPipPip
  • 159 posts
  • Location: Gwynedd
  • Local Club: Snowdon minis

Posted 07 January 2016 - 04:57 PM

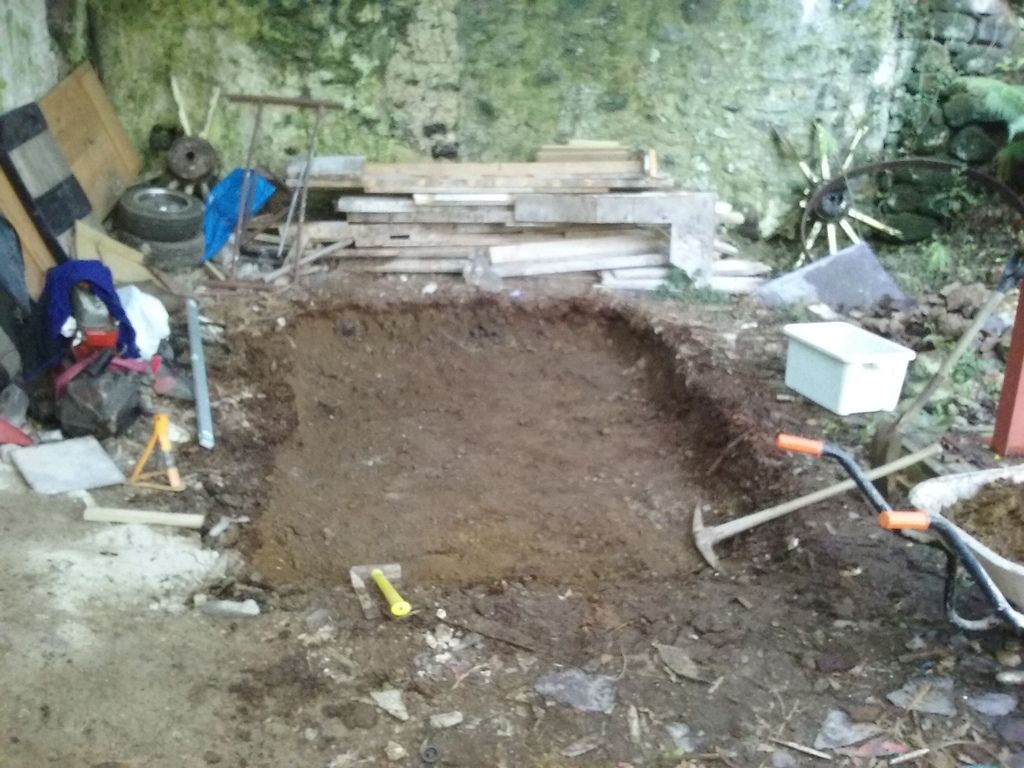
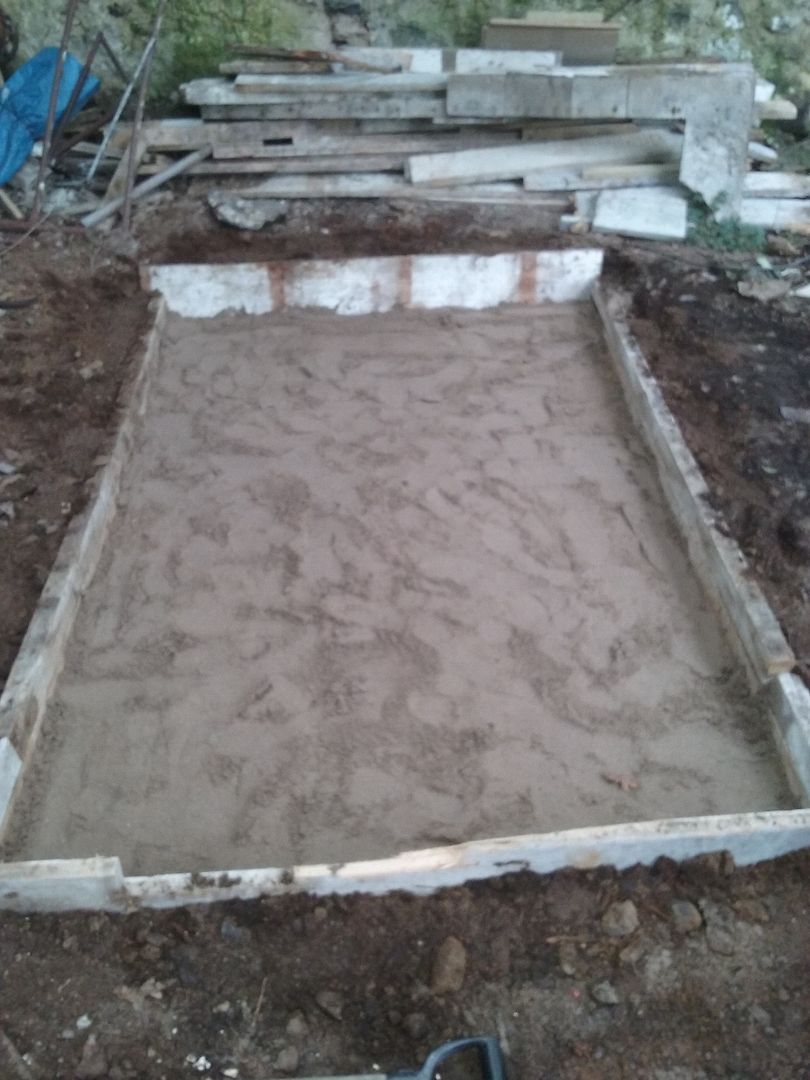
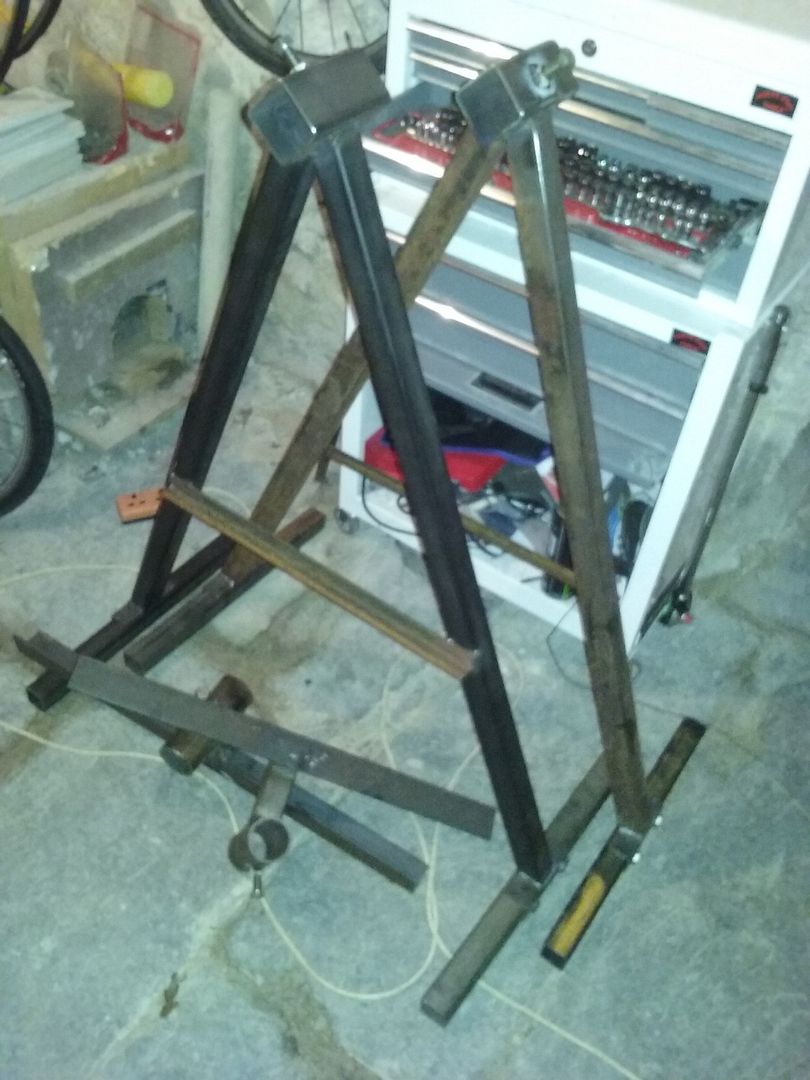
So Braced the car and moved it without it distorring,dug a big hole, base layers are in. Getting a 1T bag of gravel delivered on Saturday for cement and went to pick up the spit jig thing today. Things are looking good for getting back on the car next week!

20160104_153550_zpsihwgbss8.jpg

20160106_144257_zpsv7arvxpo.jpg

20160107_164035_zpstw69ca6e.jpg

Edited by zebigfatman, 07 January 2016 - 05:00 PM.


1 user(s) are reading this topic

0 members, 1 guests, 0 anonymous users