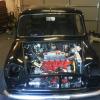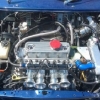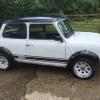
2000 Cooper Sportspack Turbo
#226

Posted 10 June 2017 - 04:33 PM
#227

Posted 10 June 2017 - 06:53 PM
Hope you know your gonna have to disassemble the shafts for fitting! Good project though
I didn't have to to remove them?
Edited by Steve220, 10 June 2017 - 06:53 PM.
#228

Posted 10 June 2017 - 06:54 PM
which brand did you use...?
UPOL etch, Halfords satin
#229

Posted 10 June 2017 - 07:31 PM
I didn't have to to remove them?Hope you know your gonna have to disassemble the shafts for fitting! Good project though
The cv doesn't fit thought the hole in the subframe iirc
#230

Posted 10 June 2017 - 07:42 PM
I didn't have to to remove them?Hope you know your gonna have to disassemble the shafts for fitting! Good project though
The cv doesn't fit thought the hole in the subframe iirc
It'd probably worth me checking as don't want to get caught out! The inner CV is a piece of piss to remove anyway ![]()
#231

Posted 11 June 2017 - 12:33 AM
You just need to leave the pot joints off is all.
I always install the pot joints onto the diff and then when installing the driveshafts, slide them through the subframe straight into the pots
Easy
#232

Posted 11 June 2017 - 07:27 AM
You just need to leave the pot joints off is all.
I always install the pot joints onto the diff and then when installing the driveshafts, slide them through the subframe straight into the pots
Easy
Thanks for the tip, Ben.
#233

Posted 02 July 2017 - 02:51 PM
So 'thanks' to photobucket, I've got the task of going through all my photos and changing the links to Imgur. However, they're all located here http://steve220.imgur.com/
The latest small update is the car is soon to be off to Cradley Heathen for some welding work! It is unfortunate that I haven't the time or knowledge to do the work myself, but as he was recommended so highly on here, and from my comms with him, he's been extremely helpful! So, the car is now on its belly again.


The only issue is it has a small crease in the front of the roof where it was lowered onto the mattress. I'm a bit gutted about this, but I'm sure it's fixable. The engine is still with Rob Walker, Turbo Phil is due to start my cylinder head soon and John @ Guessworks is probably sick of my gearbox already! Hopefully by August, and my new posting to Shropshire, there should be some large updates!
Steve
Edited by Steve220, 02 July 2017 - 02:54 PM.
#234

Posted 29 July 2017 - 10:36 AM

#235

Posted 29 July 2017 - 08:03 PM
Bet you can't wait to have shell done and get on with putting it back together
#236

Posted 29 July 2017 - 10:26 PM
How long is it going to be away?Bye shell!
#237

Posted 30 July 2017 - 10:03 AM
#238

Posted 01 August 2017 - 12:33 PM
Thought i'd do more of an update!
With the shell being off, I got onto some smaller bits. First off was the hinges! These were an absolute ball ache as the last part of the stud's weld is hardened, so went through a few drill bits.

Had a re-think on how i wanted to do brake pipes. I'm happy with the condition of the pipe that runs under the car. It was wire wheeled to remove any corrosion, sprayed and hung to dry.

Mentioned before getting a new brake servo, so with it all cleaned up and the new stainless fasteners arrived, I greased and assembled!

In other great news, my engine's ready from Rob Walker! Just trying to find a spare half day to go get it!
Edited by Steve220, 01 August 2017 - 12:36 PM.
#239

Posted 01 August 2017 - 07:55 PM
Bit late now but when i drill hinges, I take a grinding stone to the weld on the other side and grind it flush with the hinge body before drilling.
Makes it easier
Cheers
Ben
#240

Posted 01 August 2017 - 09:32 PM
1 user(s) are reading this topic
0 members, 1 guests, 0 anonymous users


