Jump to content


Photo
- - - - -

Leyland Clubman Resto


  • Please log in to reply
308 replies to this topic

#226 Vinay-RS

Vinay-RS

    Put's foolish ideas in peoples heads

  • Members
  • PipPipPipPipPipPipPipPipPip
  • 2,097 posts
  • Location: Cape Town

Posted 20 December 2014 - 08:21 AM

...Took them off and cleaned the up, rubbers and internals look OK, reassembled them and just about to put new shoes on, so we'll see how they go.


How would you clean up the rust inside the cylinders?


#227 colinf1

colinf1

    One Carb Or Two?

  • Members
  • PipPipPipPipPipPipPip
  • 989 posts
  • Location: Dundalk

Posted 21 December 2014 - 10:51 AM

There wasnt any rust on the insides, it was just on the inner edge where the piston comes out of the cylinder. 


Still cant seem to get them to bleed properly. Will have another go tomorrow, no signs of any leaks and no loss of fluid from the M/C.
 
Got the wiper motor and arms back on, put passenger side on a tad high. Just need to remove it and move it down a bit. Hooked it up to a battery to test it all out, works but I dont think I'd like to get caught in a heavy shower lol.
 
Added this to the dash top, its not the right colour but I cant get it apart without destroying it so just put a white roof on it.
16068032981_0ac47e01f9_b.jpg


#228 Jared Mk3

Jared Mk3

    Has a small thing but it does make a difference

  • Members
  • PipPipPipPipPipPipPipPip
  • 1,974 posts
  • Location: Kokstad, South Africa
  • Local Club: MOCKZN

Posted 21 December 2014 - 11:11 AM

Nice "little" addition there  ;D Bought one for my dad as well!


#229 colinf1

colinf1

    One Carb Or Two?

  • Members
  • PipPipPipPipPipPipPip
  • 989 posts
  • Location: Dundalk

Posted 22 December 2014 - 08:30 AM

Not alot done today, fitted a set of cheapy driving lamps. Was going to put them on top of the bumper, but couldnt get them to sit right, so under the bumper they went.
 
Took off the rear drums to inspect the cylinders again, plenty of fluid weeping out of them, so a new one each side is in order.
 
Filled the engine with oil, was filling quite fast then heard a terrible dripping noise, quick dash out to get the oil catch tray and a few f's and b's. Had a feeling it was coming from the half moon seal where the gearbox meets the engine, but it turned out to be the rocker cover gasket had slipped in a bit on the rear, so it wasnt sealing. Whipped it off and cleaned up the mess it made on the rear, bit of gasket sealant to glue it in place then reattached the rocker cover.
 
Got some 3mm MDF to cut up templates for the dash, easier to cut that and get it fitting right rather than trying the 9mm stuff straight up. All the plans I've see on the internet and none off them match the measurements I got. 
 
Got the passenger seat belt fitted, carpet under the door step fitted on both sides. 
 
15889827140_579f196327_b.jpg


#230 Jared Mk3

Jared Mk3

    Has a small thing but it does make a difference

  • Members
  • PipPipPipPipPipPipPipPip
  • 1,974 posts
  • Location: Kokstad, South Africa
  • Local Club: MOCKZN

Posted 22 December 2014 - 08:42 AM

Those lights look good underneath the bumper.

#231 colinf1

colinf1

    One Carb Or Two?

  • Members
  • PipPipPipPipPipPipPip
  • 989 posts
  • Location: Dundalk

Posted 23 December 2014 - 09:36 AM

Those lights look good underneath the bumper.


Thanks Jared. Dont know if they will be any good, but there subtle, not in your face.


Didnt do alot today, removed the lower dash pad that I had covered in vinyl. Accidentally ripped a bit, so decided to remove it completely. It was a pretty hard job to remove the contact adhesive. A combination of thinners and degreaser eventually got it off. I will refit it tomorrow.


Made an attempt to figure out the wiring in the engine bay. Lots of previous splices and twisted joins covered in PVC tape. Have a few loose wires that I havent found homes for yet.


Put the front half of the carpet in, lots of work needed to make it look neat!


#232 jt19

jt19

    One Carb Or Two?

  • Members
  • PipPipPipPipPipPipPip
  • 745 posts
  • Location: Hertfordshire

Posted 23 December 2014 - 10:23 AM

Looks lovely mate!!

#233 Jared Mk3

Jared Mk3

    Has a small thing but it does make a difference

  • Members
  • PipPipPipPipPipPipPipPip
  • 1,974 posts
  • Location: Kokstad, South Africa
  • Local Club: MOCKZN

Posted 23 December 2014 - 10:46 AM

I share your pain with the carpets.

#234 colinf1

colinf1

    One Carb Or Two?

  • Members
  • PipPipPipPipPipPipPip
  • 989 posts
  • Location: Dundalk

Posted 28 December 2014 - 08:07 AM

Havent touched the car since xmas eve, decided it was time for a break. But back out to it for a few hours today.
 
Got the front arch carpet pieces fitted and the upper front piece in also. Throttle cable and pedal fitted, just need 2 bolts for the pedal box and that will be that area finished. 
 
Got the gear selection issue sorted, was the 2 levers on the rear of the engine misaligned. Took them off then put the stick in neutral and gearbox in neutral too then reattached the 2 levers. It goes into all gears now. 
 
Is there a cup that should be on top of the lever ball, under the big washer?
 
15937903988_0cf68a768e_b.jpg
 
Under this washer
 
15937891468_8bbf727894_b.jpg
 
Have the front part of the carpet ready to fit, just need to find out if theres is anything to go between the above then I can put carpet in.
 
Have sorted out some lose ends in the wiring, still a few wires there without a home, like a white wire with black tracer that runs to the instrument panel for the temp sender, I have a mechanical gauge now, was already a mechanical gauge on it when I got it, do I just tuck the wire in somewhere and tape it up?
 
Waiting for my rear cylinders to come, hopefully get them soon so I can finish bleeding the brakes and get the wheels back on.


#235 GraemeC

GraemeC

    Crazy About Mini's

  • TMF+ Member
  • PipPipPipPipPipPipPipPipPipPip
  • 7,418 posts
  • Location: Carnforth

Posted 28 December 2014 - 09:09 AM

White with black is more likely to become for the tacho (Rev counter).

#236 colinf1

colinf1

    One Carb Or Two?

  • Members
  • PipPipPipPipPipPipPip
  • 989 posts
  • Location: Dundalk

Posted 30 December 2014 - 06:43 AM

Wiring almost completed. Got all the main things up and working. Headlights Full and dipped, side lights, rear lights, indicators, reverse light (just using a small switch to simulate the actual reverse switch atm)
 
Horns, washer bottle, fuel gauge all wired and working.
 
Oil pressure and Water temp wires isolated.
 
A few quick questions if anybody can answer...
 
Stalk pull back to flash lights, doesnt do anything at the minute
 
Also got a purple wire coming from the indicator stalk, guess this is for hazards?
 
At the minute, the side lights and headlights can work without the ignition being on, can I run an ignition switched wire to this so they turn off when the key is off?
 
The wiper wiring, theres a black/green wire.
On my new switch (Hella 4056 http://hella.com.au/...iew&flmaint=213) there is only 3 contacts where as original switch had 5 contacts, using 1,2,4,5.
 
I have wired it up with earth, red/green & blue/green. This gives me wipers off,wipers slow and wipers fast but they stop where ever they are and dont self park. Is the black/green for the self park? 
 
Im also gonna fit some relays for the switches, just to avoid the big load going to the switch.
 
Need to test my instrument panel, getting some lights working but not much on the left hand side. Gonna check over the circuit board and test the bulbs.


#237 colinf1

colinf1

    One Carb Or Two?

  • Members
  • PipPipPipPipPipPipPip
  • 989 posts
  • Location: Dundalk

Posted 30 December 2014 - 08:51 AM

Took the instrument cluster in to see if I could fix the missing lights. Decided to strip it all down and rebuild it up again, cleaning the dial faces as I went. Last time I used a bit too much expanding foam glue to hold the metal tabs in place, which hold the front face on. Spent a bit of time chipping it off.
 
The stop for the needle on the speedo had moved out of position, the piece of tape holding in on had dried out, so disassembled it to get to that. 
Came across this on the back face, 
 
15959117637_424243be70_b.jpg
 
Im guessing the 55436 is the km's done at that stage in 1983, says 22k on it now so might have been around once.
 
As I was taking out the bulb holders, heard something fall inside, turns out to be this
 
16142970131_aba25220cd_b.jpg
 
One reason why there was no light on the right hand side, but I'll test all the bulbs and the printed circuit board tomorrow.


#238 colinf1

colinf1

    One Carb Or Two?

  • Members
  • PipPipPipPipPipPipPip
  • 989 posts
  • Location: Dundalk

Posted 31 December 2014 - 07:58 AM

Got some of the wiring tidied up today, got some conduit tubing to keep it nice and neat.
 
Before,
 
16153230172_8db6dc290e_b.jpg
 
After,
 
16153726615_92a486fef9_b.jpg
 
Need to make up a gasket to go behind the fuse box, just as an insulator, or I was thinking of making up a bracket to come off the bulk head, allow the fuse box to sit level, then return fold back down to bulk head.
 
Have all the interior wires sorted into groups, just need to put them in the conduit. 
 
15531387514_56858380dd_b.jpg
 
Its getting pretty dusty sitting there!
16153766005_bde7a0c3f1_b.jpg
 
Also put the heater fresh air intake scoop in, and the pipe that sits above the drivers wheel. It fouls the bottom part of the aerial, think its just hitting slightly on the plastic part, so gonna take it back out, heat it up a bit and push it in to give it a bit of clearance.
 
I think the wiring for the instrument panel is a bit off, cant get the light to come on on the right side, no light for beam but have the light on left side and ALT light and fuel gauge. Something was shorting out when the panel was sitting in the holder, stop everything from working and took a while to figure out that it was that causing it.
 
Still havent found out what that black/green wire coming from the wiper motor does, just blows the fuse no matter what way I try to wire it in, so I think I'll just have to go without!
 
15967689369_3b8dd479d8_b.jpg


#239 colinf1

colinf1

    One Carb Or Two?

  • Members
  • PipPipPipPipPipPipPip
  • 989 posts
  • Location: Dundalk

Posted 01 January 2015 - 10:05 AM

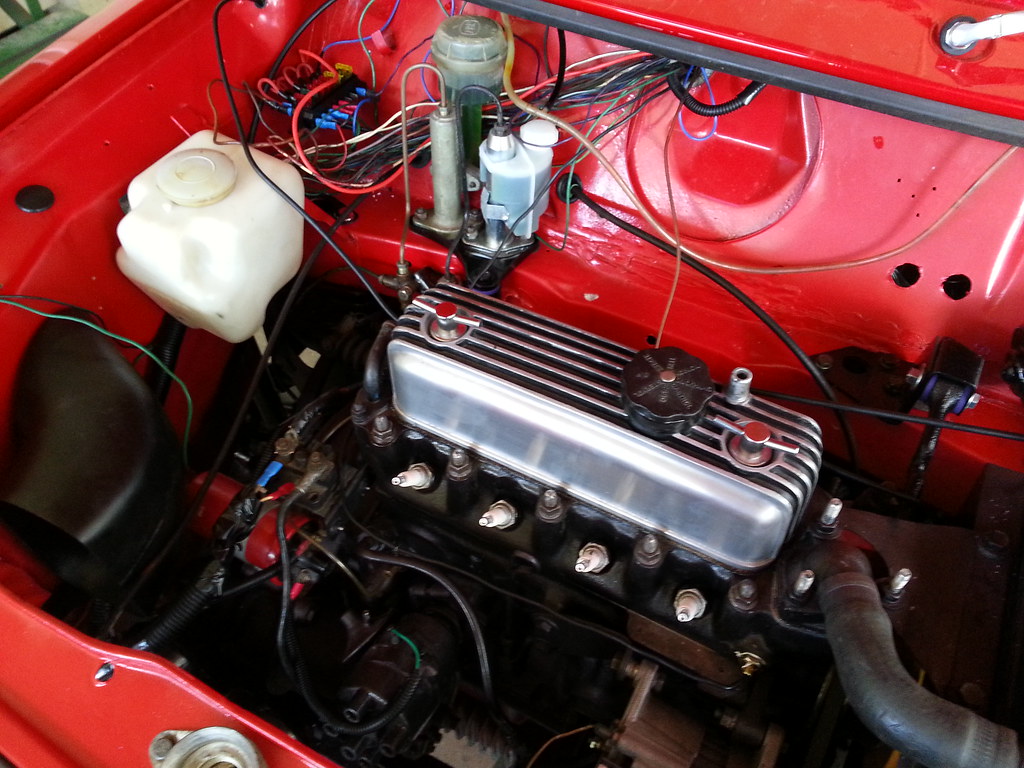
Got the rest of the engine bay wiring done today, routed the water temp capillary pipe and the oil pressure hose nice and tidy.
Wired up the reverse light, was already a wire spliced into the loom in the middle of the boot and already a hole just above the bumper. Just need the switch to complete it now.
 
All wires around dash are grouped and routed to there needed positions, lower dash pad is back on, just needs fixing in place.
 
Choke cable ready to install, removed the dash dimmer switch as it only works full on, doesn't dim at all. The bracket it was mounted on is the same hole size as the choke cable housing, so will use that for mounting it under the dash.
 
Washer jets were blocked, removed and cleaned, then aimed them at screen so there is even coverage. Washer bottle motor was still leaking even with sealant around the join, so it must have had another crack inside. Replaced it with another motor, cable tied in place, works good! Washer hose also tidied up and hidden.
 
Had a look at the printed circuit board on the back of the dials while trying to get them working, most of the connectors are worn and a fair few have cracks. Will be ordering a replacement tomorrow instead of trying to fix it.


#240 colinf1

colinf1

    One Carb Or Two?

  • Members
  • PipPipPipPipPipPipPip
  • 989 posts
  • Location: Dundalk

Posted 03 January 2015 - 09:42 AM

Got the rest of the engine bay wiring done today, routed the water temp capillary pipe and the oil pressure hose nice and tidy.
Wired up the reverse light, was already a wire spliced into the loom in the middle of the boot and already a hole just above the bumper. Just need the switch to complete it now.
 
All wires around dash are grouped and routed to there needed positions, lower dash pad is back on, just needs fixing in place.
 
Choke cable ready to install, removed the dash dimmer switch as it only works full on, doesn't dim at all. The bracket it was mounted on is the same hole size as the choke cable housing, so will use that for mounting it under the dash.
 
Washer jets were blocked, removed and cleaned, then aimed them at screen so there is even coverage. Washer bottle motor was still leaking even with sealant around the join, so it must have had another crack inside. Replaced it with another motor, cable tied in place, works good! Washer hose also tidied up and hidden.
 
Had a look at the printed circuit board on the back of the dials while trying to get them working, most of the connectors are worn and a fair few have cracks. Ordered a replacement instead of trying to fix it.


15985450168_2b1dde54c9_b.jpg
 
Dunno what car this gear lever boot is from, doesnt look original.
 
16147095676_1451d17a25_b.jpg
 
Engine bay, just need to tighten the throttle and choke cables, and put on the air filter housing.
 
16172145312_5eb545d645_b.jpg


Got some carpet out of the boot of a vs commodore, moulded around the wheel well. Fits pretty good to the rear wheel well.
 
15993246028_11de6073ca_b.jpg
 
Bit of trimming required of course,
 
15993193928_160b02deb8_b.jpg
 
Transferring the shape to the other piece. Could only get 2 left hand pieces, so got the drivers side fitting good, then flipped it upside down and drew around it on the other piece. Wasn't too sure if it would fit, but it does and looks good.
 
16179864652_4f2d312f07_b.jpg
 
Obviously washed down before fitting them. Some spray adhesive and there nice and snug.
 
Also picked up a high mounted brake light from a mk3 Astra. It was a roof mounted one, so a bit of modifying required.
 
16156377506_1eb14dd888_b.jpg
 
The legs were too short, so had to rummage around the house for something to make them longer. Found something, haven't a clue what it was, but it was just long enough to lift the light higher than the window seal.
 
Just need to tidy the wire with a piece of conduit, then splice into the brake light feed.
 
Fuel filter secured to the bulkhead, then ran the hose to the carb. Need to drill a hole in a small bolt for the choke cable to go into.


1 user(s) are reading this topic

0 members, 1 guests, 0 anonymous users