Jump to content


Photo
- - - - -

92 City, My First Rebuild.

roundnose

  • Please log in to reply
670 replies to this topic

#421 big-jay

big-jay

    Super Mini Mad

  • Members
  • PipPipPipPipPipPip
  • 518 posts
  • Location: Birmingham
  • Local Club: British Mini Club

Posted 24 November 2014 - 05:27 PM

Update,

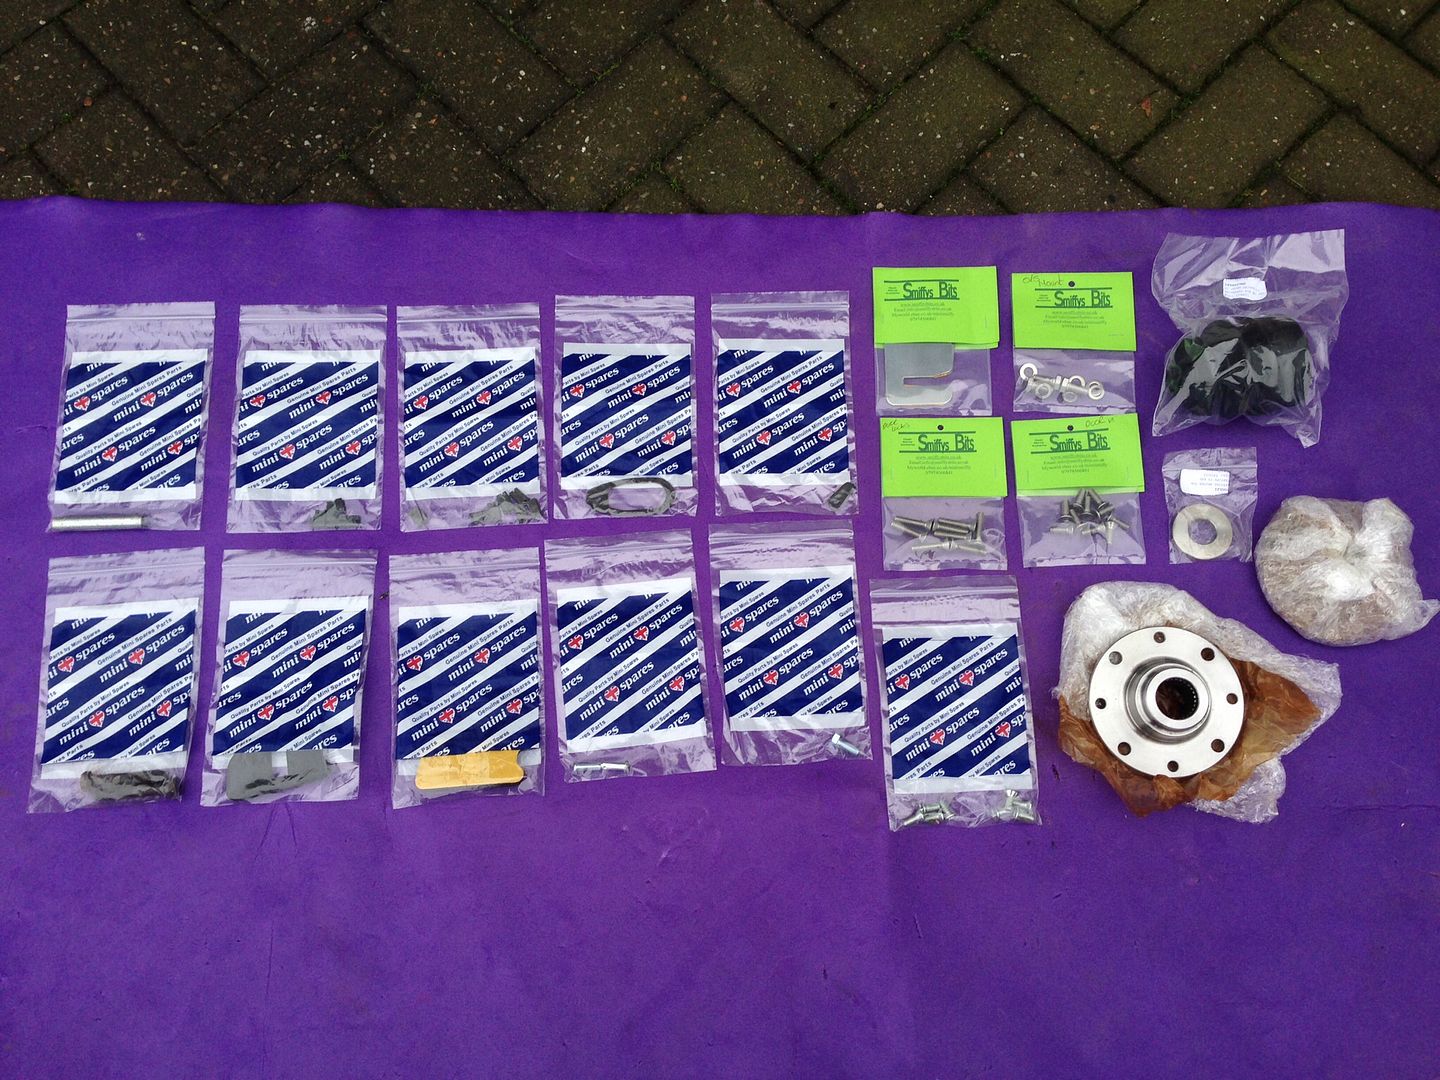
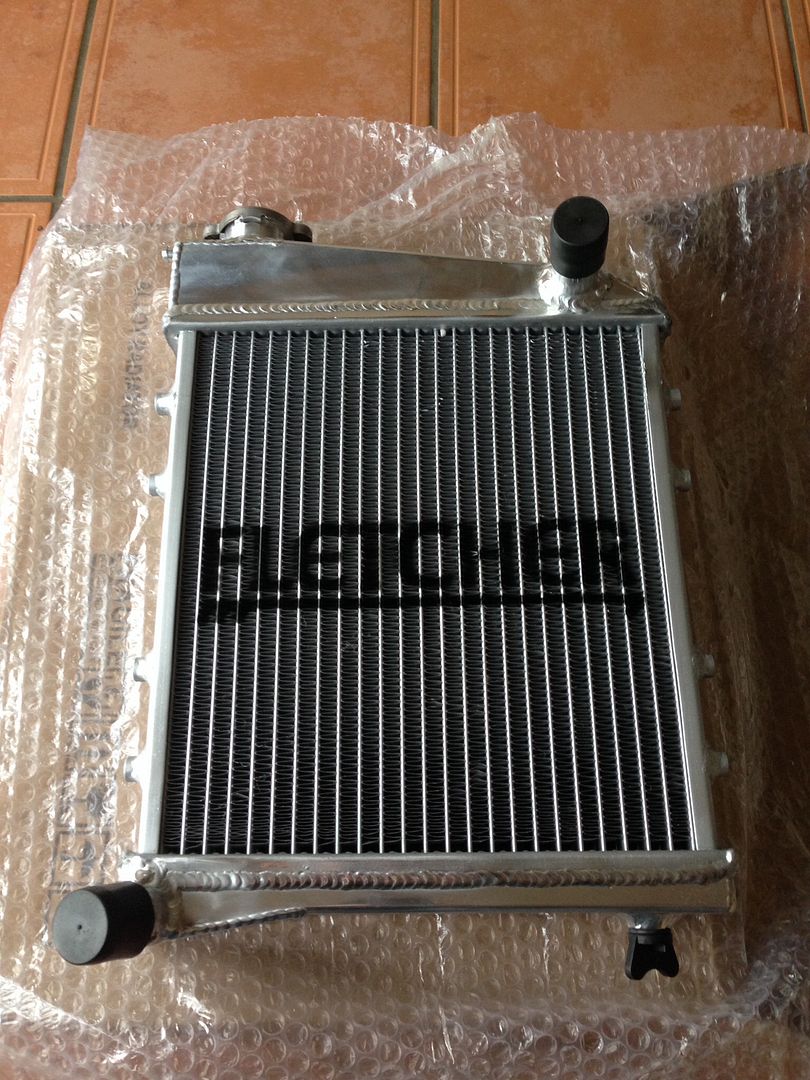
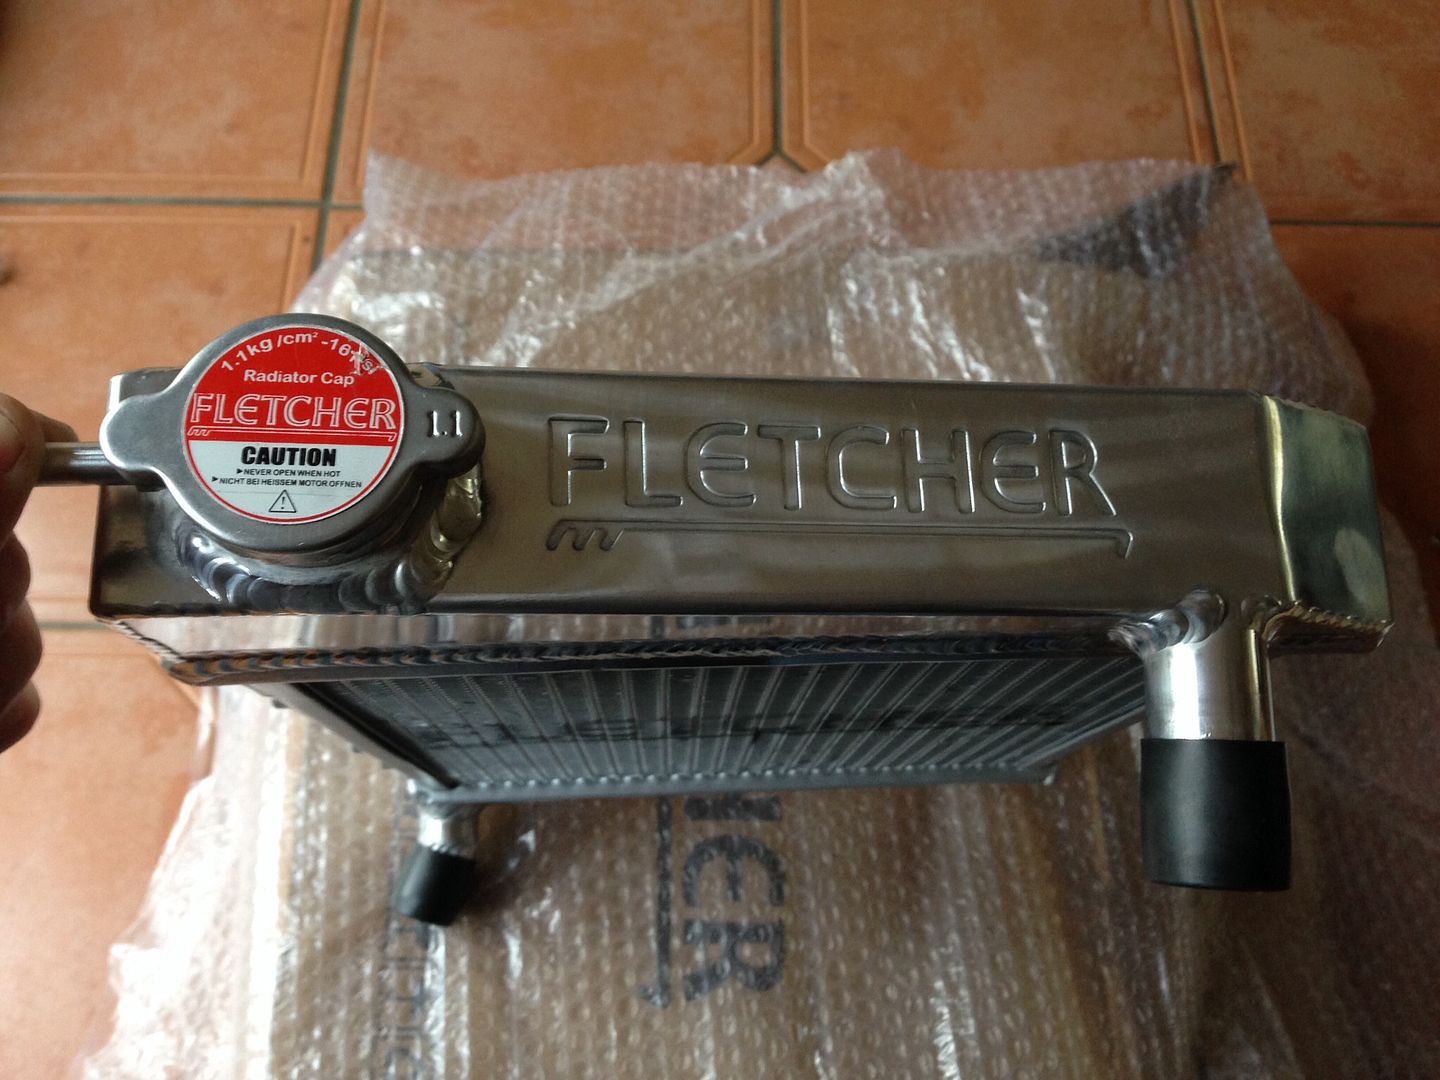
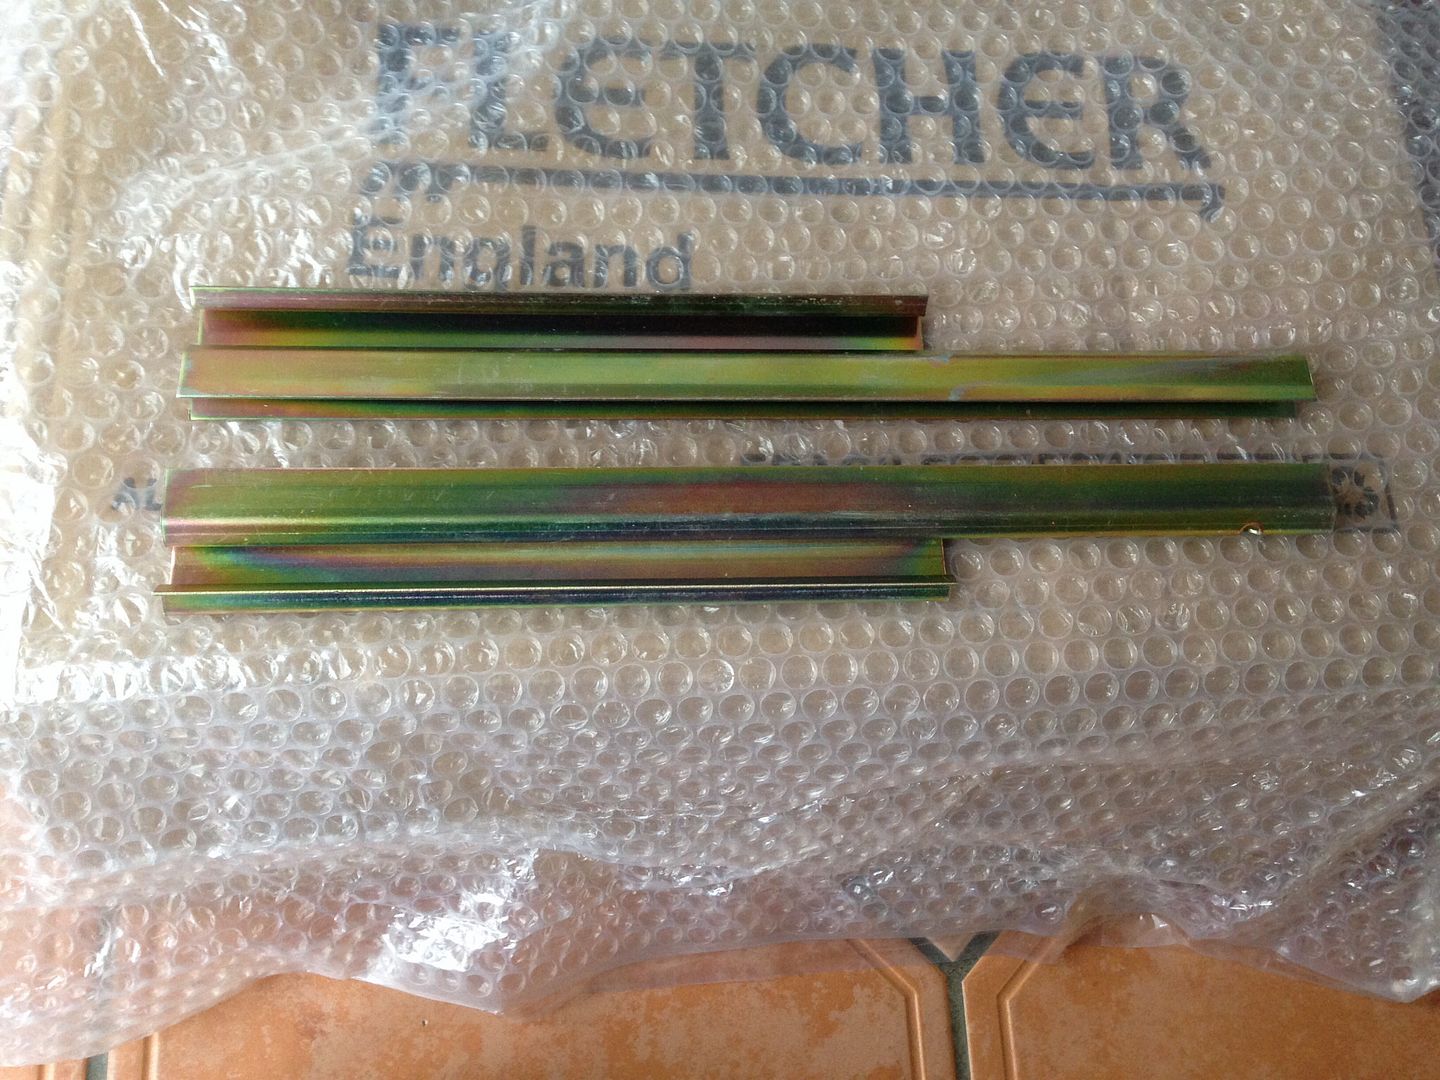
After what feels like an eternity, I've finally received my 7.5" brake kit from Minisport. Here's a few pictures -

b7391d3dc4b680b42aa003dfa980dbc9_zpscdcf

a5287b868a9cbd96e383ce922e5b7ecc_zpsdda1

7843cfe9fcc0f16b01049d7a3697864e_zpsf683

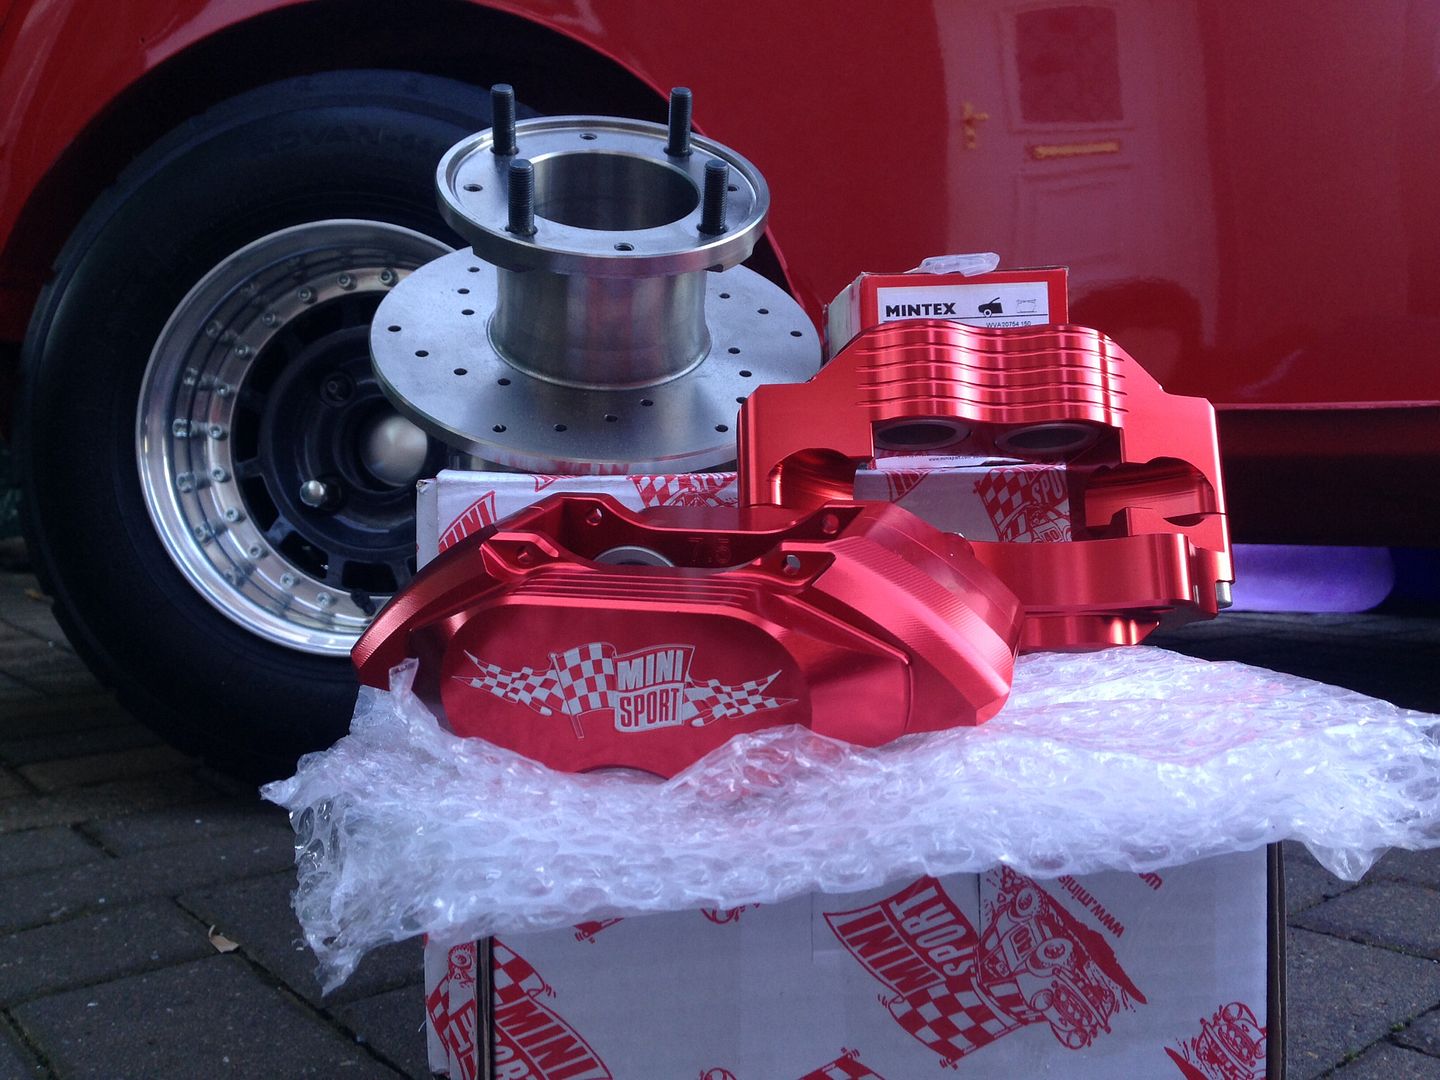
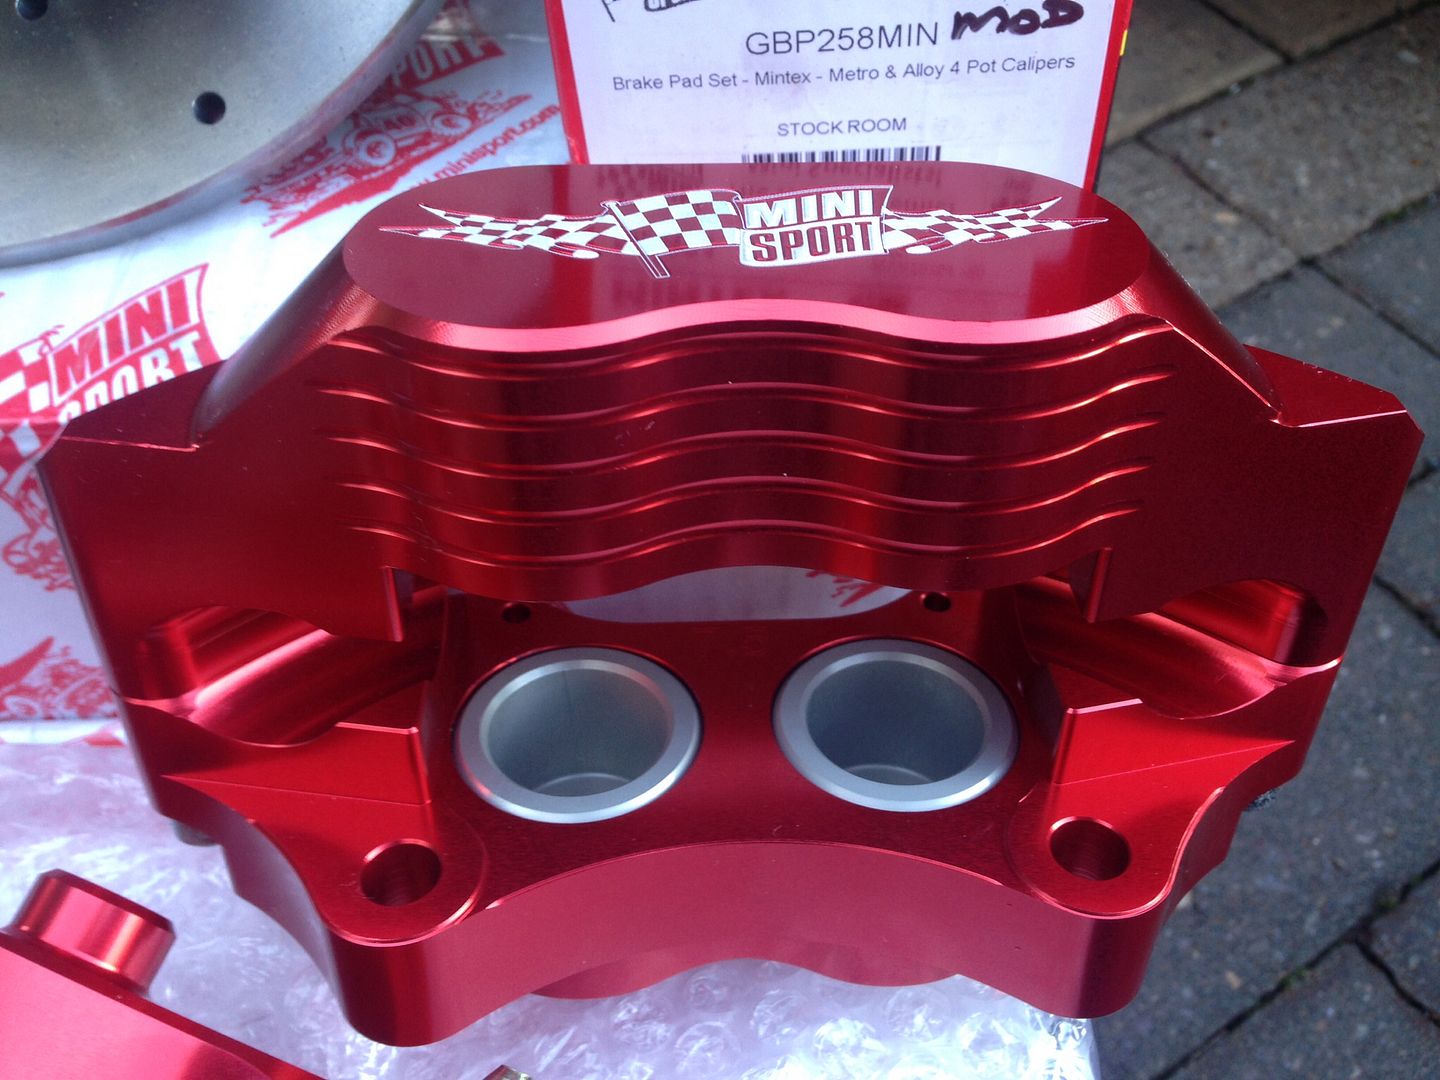
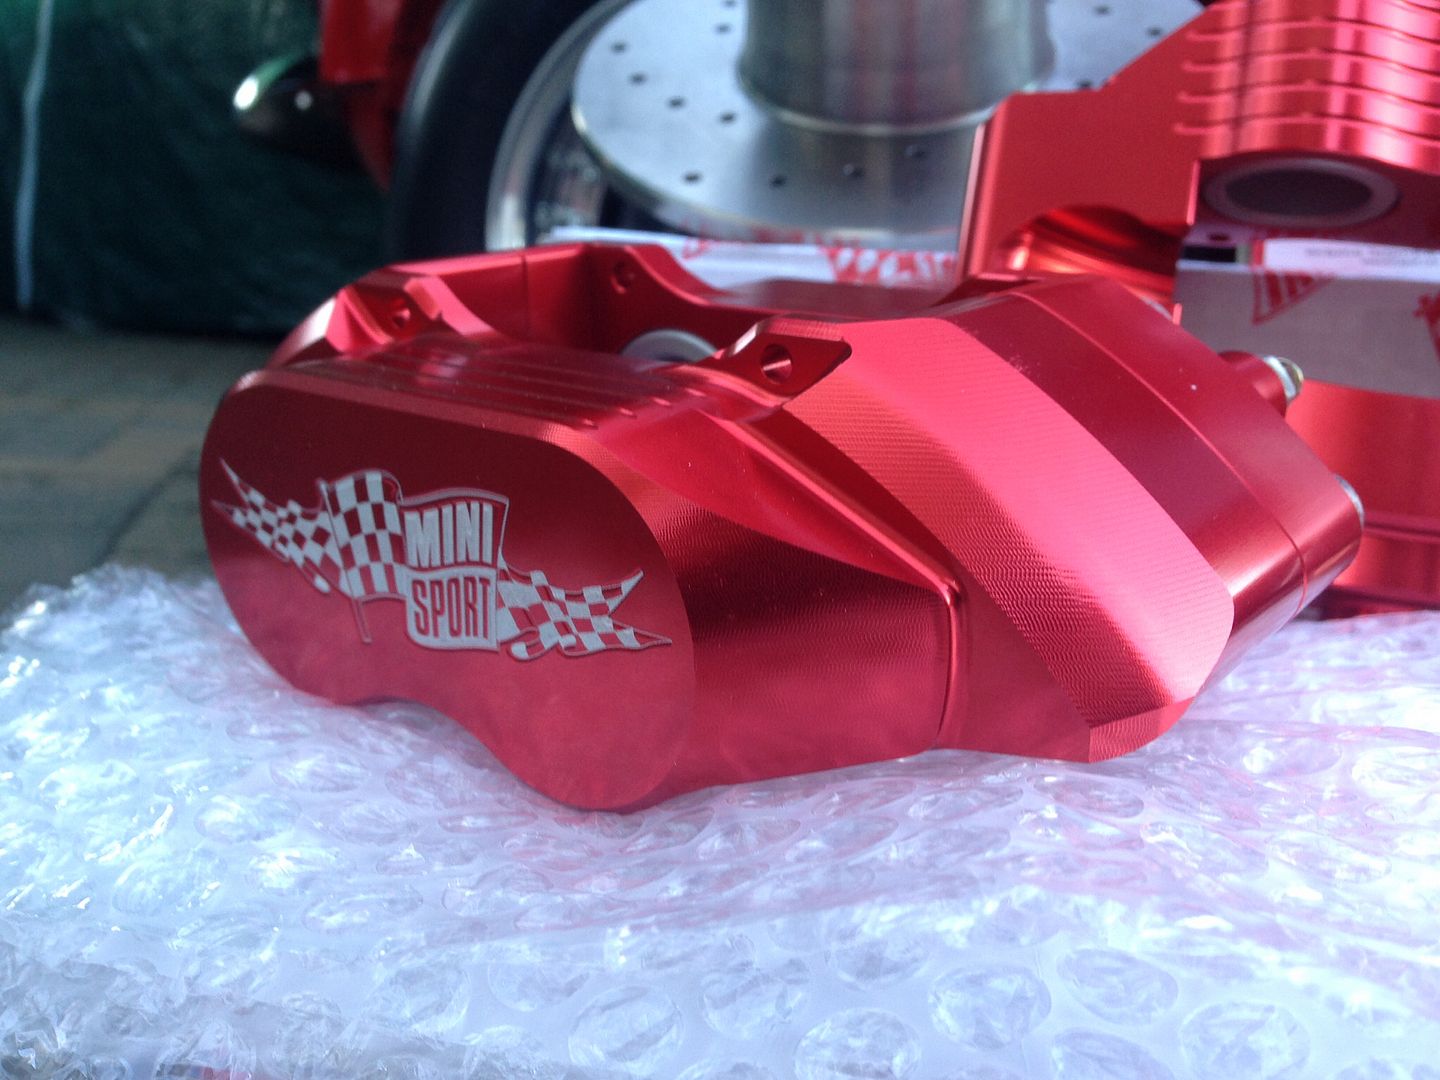
They're a gorgeous bit of kit, it's amazing how light the Calipers are, so glad I went for this kit in the end !

Anyway, I've been laying down sound deadening over the weekend, it's taken three days of laborious labour but it's came good in the end. Here's a few pictures -

75b9fc1f9b76fe5349c11937fda4ca81_zps7e2b

1c2a94cdb5eea7ecbc44a0088dcec9fc_zpsc422

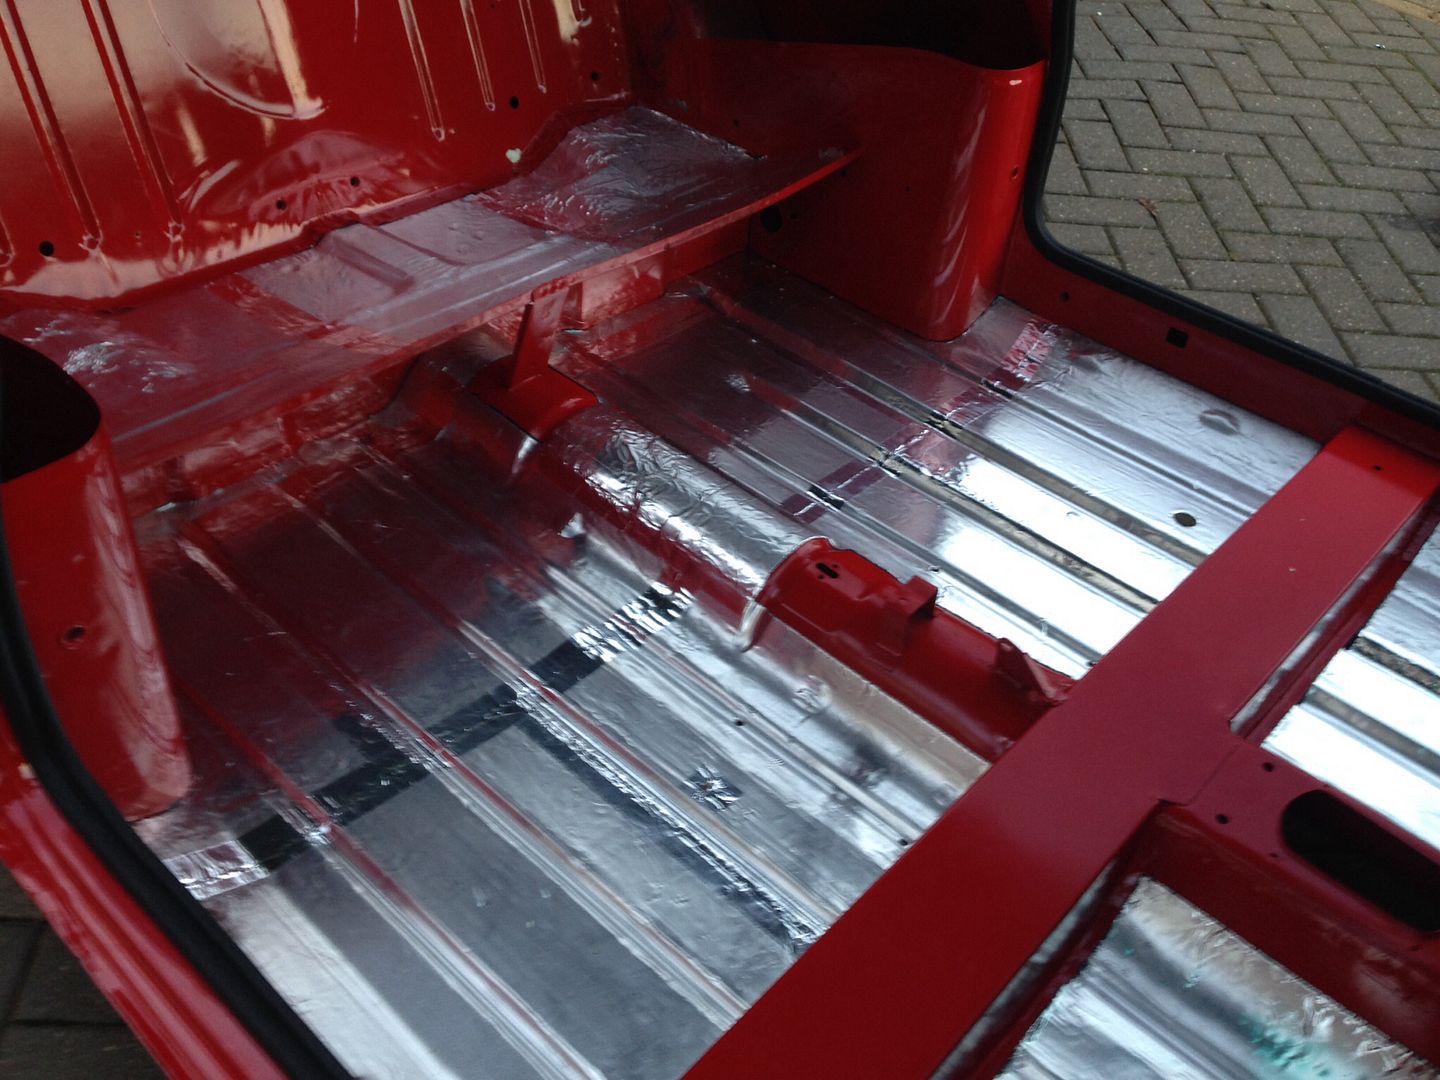
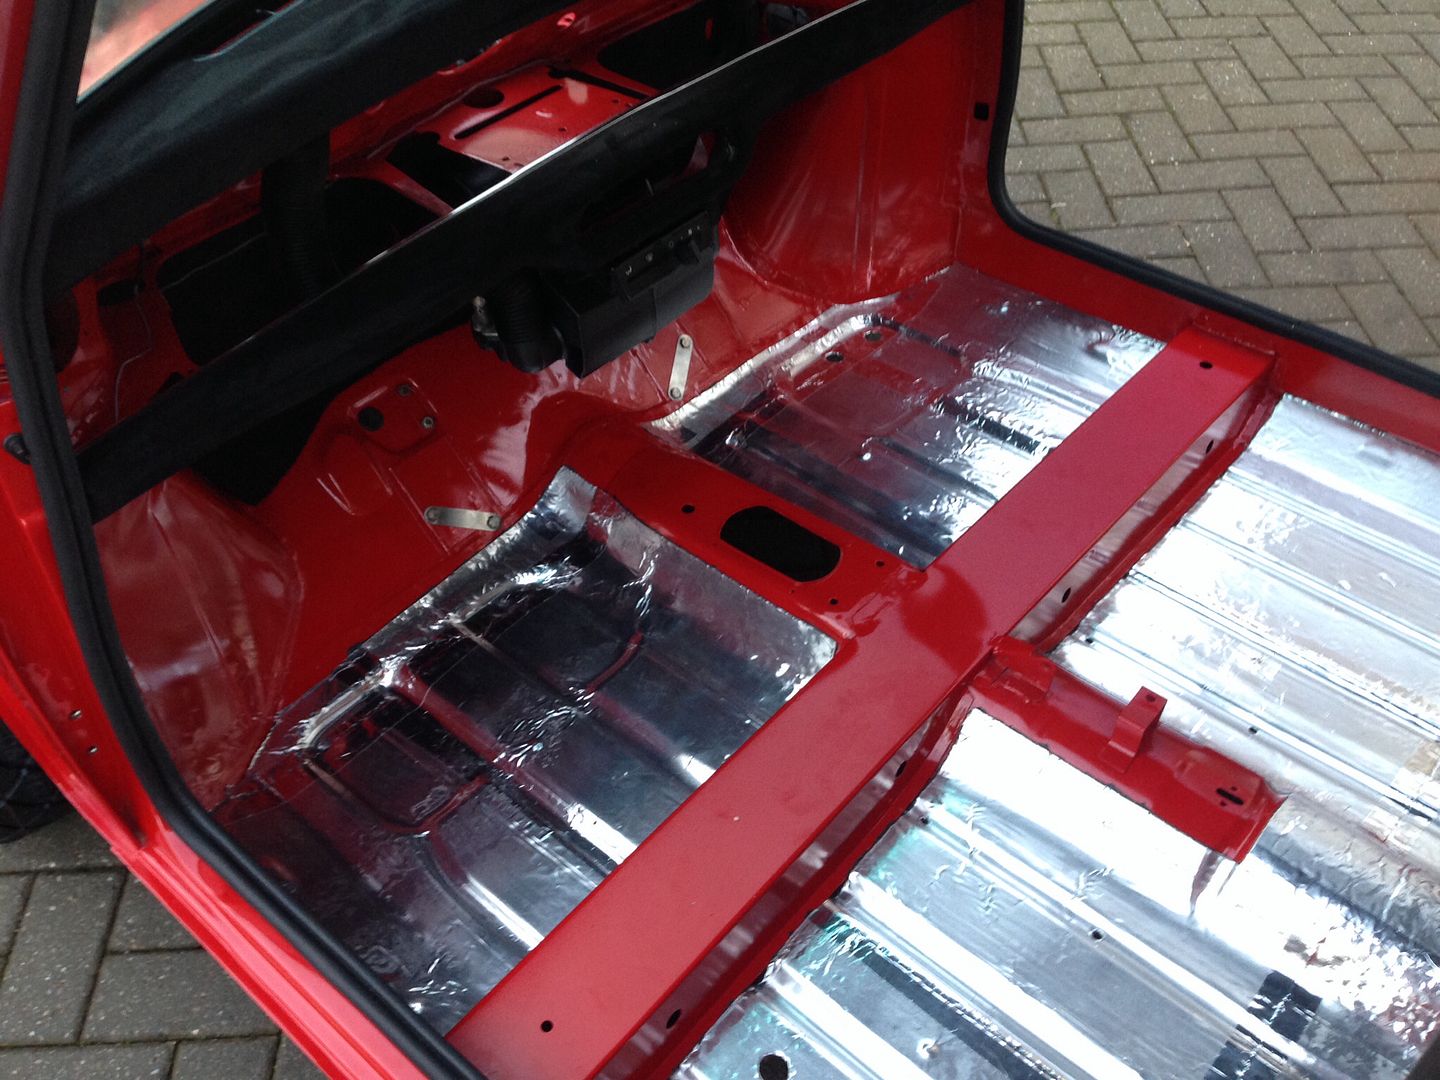
It was a case of warming it up with a heat gun, then laying it down and making sure to push it into all the indentations in the floor, then once I had it all layed down I went over the seams with aluminium tape. It does look like a fairly straight forward job, or so I thought it would be, it's so hard to work with unless it's warm, and even then it's a pita. I've definitely got sore fingers now !

I've pretty much copied where it was put in the factory. I know you can go crazy with it and cover every interior surface but I don't feel it's necessary, and you'd be surprised how heavy the stuff is ! If it was good enough in the factory then it's good enough for me !

#422 Jared Mk3

Jared Mk3

    Has a small thing but it does make a difference

  • Members
  • PipPipPipPipPipPipPipPip
  • 1,974 posts
  • Location: Kokstad, South Africa
  • Local Club: MOCKZN

Posted 24 November 2014 - 05:57 PM

Looking good Jay. I really like the choice in brakes, especially the colour. I might need some now.


#423 MattMiniS96

MattMiniS96

    Half pint guy in a half pint car

  • Members
  • PipPipPipPip
  • 196 posts

Posted 24 November 2014 - 05:57 PM

Looking good man.

#424 big-jay

big-jay

    Super Mini Mad

  • Members
  • PipPipPipPipPipPip
  • 518 posts
  • Location: Birmingham
  • Local Club: British Mini Club

Posted 24 November 2014 - 06:20 PM

Looking good Jay. I really like the choice in brakes, especially the colour. I might need some now.


Looking good man.


Cheers lads.

#425 Steve220

Steve220

    Crazy About Mini's

  • TMF+ Member
  • PipPipPipPipPipPipPipPipPipPip
  • 5,044 posts
  • Location: Shropshire
  • Local Club: BMC

Posted 24 November 2014 - 06:31 PM

Those callipers look the business! Try and get some high temp wax on them before installation to help against the build up of brake dust :)

#426 big-jay

big-jay

    Super Mini Mad

  • Members
  • PipPipPipPipPipPip
  • 518 posts
  • Location: Birmingham
  • Local Club: British Mini Club

Posted 24 November 2014 - 07:12 PM

Those callipers look the business! Try and get some high temp wax on them before installation to help against the build up of brake dust :)


Thanks mate,

I've never heard of high temp wax before, I'll be sure to take a look !

#427 Steve220

Steve220

    Crazy About Mini's

  • TMF+ Member
  • PipPipPipPipPipPipPipPipPipPip
  • 5,044 posts
  • Location: Shropshire
  • Local Club: BMC

Posted 24 November 2014 - 07:46 PM

I use it on callipers and the inside of my alloys then a good quality wheel wax on the outside. Makes a massive difference!

#428 Ben_O

Ben_O

    Mill Road Garage

  • Paint Doctor
  • PipPipPipPipPipPipPipPipPipPip
  • 9,794 posts
  • Location: Isle of Wight

Posted 25 November 2014 - 01:07 AM

Good job with the sound proofing Jay!


What did you use?


Ben


#429 big-jay

big-jay

    Super Mini Mad

  • Members
  • PipPipPipPipPipPip
  • 518 posts
  • Location: Birmingham
  • Local Club: British Mini Club

Posted 25 November 2014 - 06:14 AM

Good job with the sound proofing Jay!
 
What did you use?
 
Ben


Cheers ben,

It's called silent coat, I got it from eBay a good while back. It's 2mm thick and around £15 for a pack of 10 sheets. I bought 2 packs to do mine and still have most of the second pack left !

#430 Ben_O

Ben_O

    Mill Road Garage

  • Paint Doctor
  • PipPipPipPipPipPipPipPipPipPip
  • 9,794 posts
  • Location: Isle of Wight

Posted 25 November 2014 - 01:18 PM

That's great Jay. I have seen silent coat fitted before but yours looks very different which is why i asked.


Probably due to how you have fitted it i think.


I am considering using a sound proofing by Wurth as it is over paintable but looking at yours, i am in two minds now.


Cheers


Ben


#431 skmulvany

skmulvany

    Learner Driver

  • Noobies
  • PipPip
  • 19 posts
  • Location: Dublin

Posted 25 November 2014 - 08:24 PM

Hi, would you mind putting up a link for that dynamat. Great thread by the way.

Thanks

Seán Kevin


#432 big-jay

big-jay

    Super Mini Mad

  • Members
  • PipPipPipPipPipPip
  • 518 posts
  • Location: Birmingham
  • Local Club: British Mini Club

Posted 25 November 2014 - 08:53 PM

Hi, would you mind putting up a link for that dynamat. Great thread by the way.
Thanks
Seán Kevin

Hi mate,

I've had a quick search through eBay, but as I purchased this stuff around 8 months or so ago it seems the original listing of this product no longer exists. I have however found an alternative which is pretty much the same thing, here's a link -

http://m.ebay.co.uk/...1044?nav=SEARCH

You'll also probably want to use some aluminium tape to stick over the seams as well, it just tidies it all up really. Here's what I used, one roll should do the trick -

http://m.ebay.co.uk/...8498?nav=SEARCH

Hope that helps,

Jay.

Edited by big-jay, 25 November 2014 - 09:01 PM.


#433 skmulvany

skmulvany

    Learner Driver

  • Noobies
  • PipPip
  • 19 posts
  • Location: Dublin

Posted 26 November 2014 - 07:07 PM

Cheers, time to get the visa card out!


Sean Kevin


#434 big-jay

big-jay

    Super Mini Mad

  • Members
  • PipPipPipPipPipPip
  • 518 posts
  • Location: Birmingham
  • Local Club: British Mini Club

Posted 30 November 2014 - 06:18 PM

Update,

Git a bit more done today, I'll start with the purchased items though. Ordered a few items from Minispares and Smiffy's Bits during the week, mostly nuts and bolts needed to finish a few things off -

eee6ee6745a54ffe11b12882476d9466_zpsc4d4

I also picked up this little beauty, couldn't say no really as I got it for a great price -

74b4eaab3904c51ae0fd480c2b926ef3_zps3a6a

e36a7ae7ce0c8575dd07a1b7d3ece1ea_zpsddf8

And a pair of window runners too -

97c7a0dec1062fe3a94827a6a6d669bb_zpsc5ea

Now, onto today's progress. I wanted to get the doors back onto the car this weekend so the first thing on the list was to sort the hinges out. I took them all down to bare metal using a wire wheel on a drill, like this -

b2320fb4fb51916c4a1001c7b247b521_zps229c

Once I had them all like that they got a good coating of zinc primer -

19c33539075d63b65c90783777ddffe5_zps147c

And then a few coats of gloss black -

c521b7728a3aa09605ebbcebd39aeee6_zps9f95

Next job was to knock the pins through the holes in the hinge, but first I sanded a small flat into each pin using a Dremel with a metal sanding wheel so the grease would have some where to sit whilst the pin is inserted. Then I heated the pins up on a gas hob until glowing red, like this -

a4213a0bab53a029c6fe4fef41934866_zpsc40a

And then dunked them in some ice cold water whilst still glowing. This will harden the steel and increase the life of the hinge.

Here's the hinges built up and ready to go back onto the doors -

571272d838da3c9a8a6bb772abe47174_zps804a

Next, I partially built the doors back up. Handle cleaned, polished and refitted back to the door -

df653025176a503bb239781c76f8cdc7_zps62cd

And the inner workings bolted back on -

78931fbf30ac83dad45bbf26c668fc16_zpsbdc6

The optional Smiffy's bling ;-) -

2b244f9a5991611371989fe30300306c_zpse577

Same applied to the other door, no glass however, its on the 'to purchase' list.

I enlisted the help of my dad to hang the doors, please excuse the pictures as it was getting dark at this point.

Drivers door -

c2766076052c27d67f997e1707d2f183_zps3e88

Passenger door -

7d7d480503fd7d044f3b4cad6dbe4f60_zps0141

Their not in the final positions yet, I've still got a bit more fetteling to do as it was getting difficult to see and I didn't want anything getting damaged !

Anyway that's all I managed today but I'll upload some better pictures of the doors fitted tomorrow :-)

Edited by big-jay, 30 November 2014 - 06:22 PM.


#435 Jared Mk3

Jared Mk3

    Has a small thing but it does make a difference

  • Members
  • PipPipPipPipPipPipPipPip
  • 1,974 posts
  • Location: Kokstad, South Africa
  • Local Club: MOCKZN

Posted 30 November 2014 - 07:54 PM

Regardless of the quick fitment, those gaps are still great!


Also tagged with one or more of these keywords: roundnose

1 user(s) are reading this topic

0 members, 1 guests, 0 anonymous users