
Looks so good underneath that front fender, great job!

670 replies to this topic
#346

Jared Mk3
-

- Members
-

- 1,974 posts
Has a small thing but it does make a difference
- Location: Kokstad, South Africa
- Local Club: MOCKZN
Posted 12 October 2014 - 07:42 AM
#347
big-jay
-
- Members
-
- 518 posts
Super Mini Mad
- Location: Birmingham
- Local Club: British Mini Club
Posted 12 October 2014 - 09:11 AM
Looks so good underneath that front fender, great job!
Thanks Jared !
#348
jamesquintin
-

- TMF+ Member
-
- 1,017 posts
One Carb Or Two?
- Location: Harlow
Posted 12 October 2014 - 10:05 AM
Great work! Where's the front/rear brake pipe though..?
Q
#349
big-jay
-
- Members
-
- 518 posts
Super Mini Mad
- Location: Birmingham
- Local Club: British Mini Club
Posted 12 October 2014 - 10:32 AM
Great work! Where's the front/rear brake pipe though..?
Q
Thanks,
I was planning on fitting it yesterday but unfortunately it's split, so another will have to be made up and fitted at a later date, probably next week !
#350
rounders
-

- Noobies
-
- 23 posts
Learner Driver
Posted 12 October 2014 - 01:19 PM
Lovely work so far,but are the front damper mounts on upside down?
#351
big-jay
-
- Members
-
- 518 posts
Super Mini Mad
- Location: Birmingham
- Local Club: British Mini Club
Posted 12 October 2014 - 02:12 PM
Lovely work so far,but are the front damper mounts on upside down?
Cheers,
The damper mounts are for lowered cars, as are the Gaz Dampers. This just means that the shock Is smaller and has less travel, so the pin in the damper mount is positioned lower down, to avoid 'over stretching' the damper.
#352
domdee
-

- Members
-
- 1,183 posts
Formally known as dominicdee
- Location: hull
- Local Club: hull clubs on FB
Posted 13 October 2014 - 11:16 AM
it looks absoulutely superb!
Edited by domdee, 14 October 2014 - 11:09 AM.
#353
big-jay
-
- Members
-
- 518 posts
Super Mini Mad
- Location: Birmingham
- Local Club: British Mini Club
Posted 13 October 2014 - 11:44 AM
i looks absoulutely superb!
Thanks buddy !
#354
big-jay
-
- Members
-
- 518 posts
Super Mini Mad
- Location: Birmingham
- Local Club: British Mini Club
Posted 19 October 2014 - 06:31 PM
Update,
I haven't been able to get as much done as I would have liked this weekend, due to me having a bout of man flu.
ill start with what I bought throughout the week, some more smiffys bits and stainless p-clips -

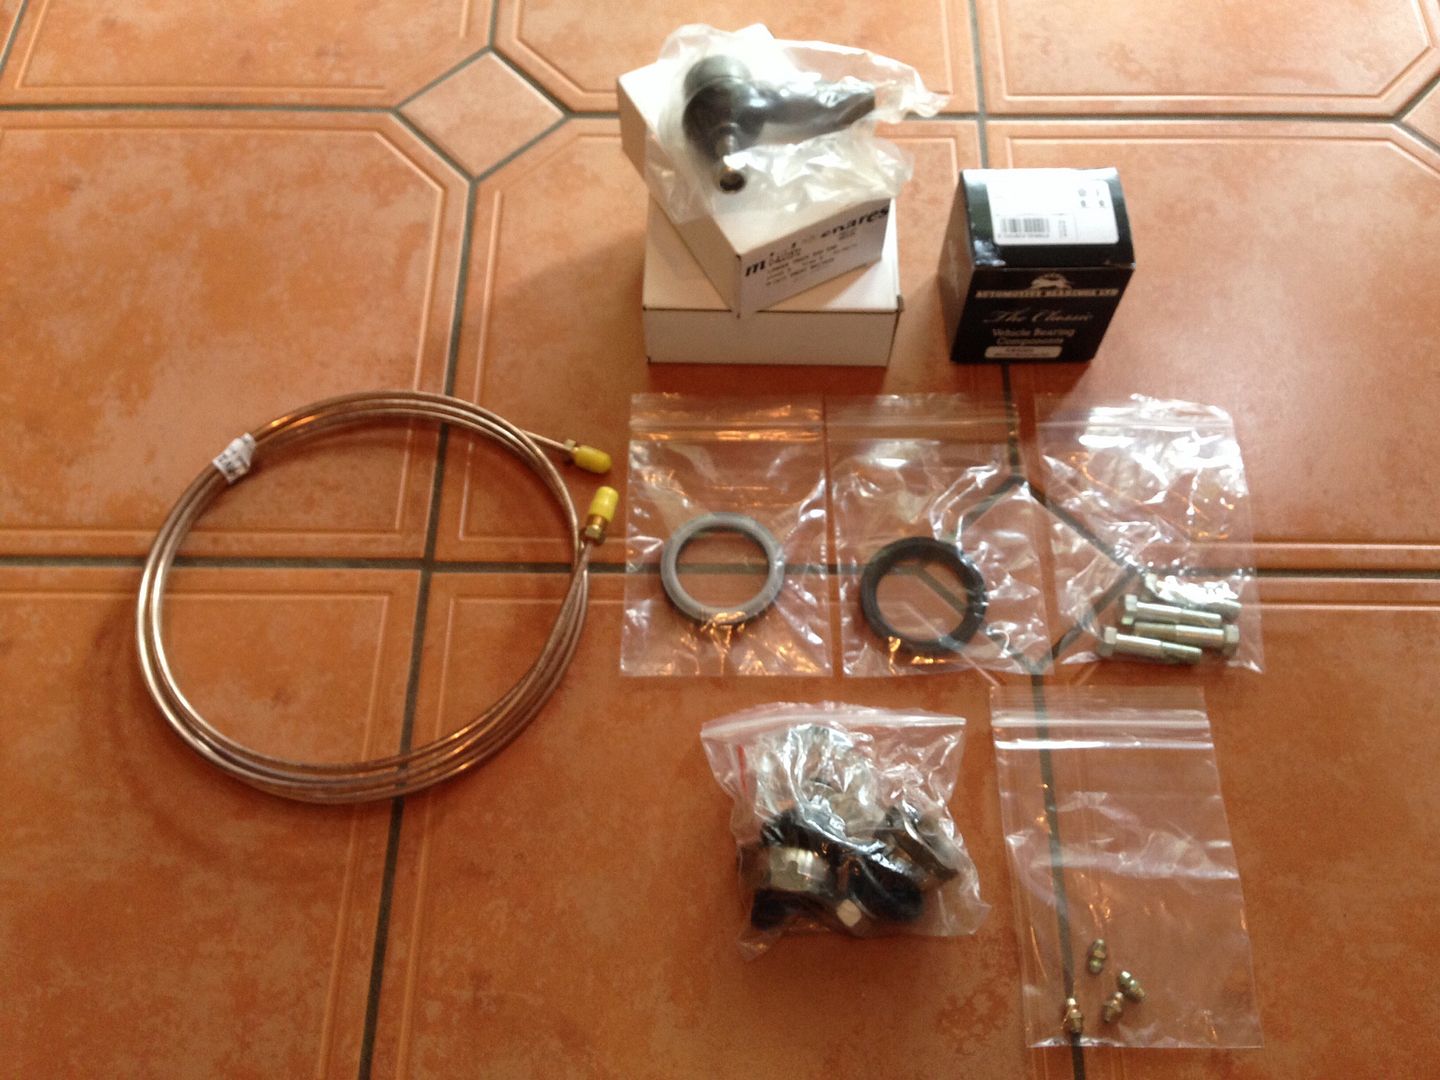
Went down to minispares on Friday and picked this lot up, the wheel bearing kit is genuine timken, the cheaper ones looked a bit dodgy in my opinion -
First job of the day was to get the fuel and brake lines in place using the p-clips, here's the fuel pipe -
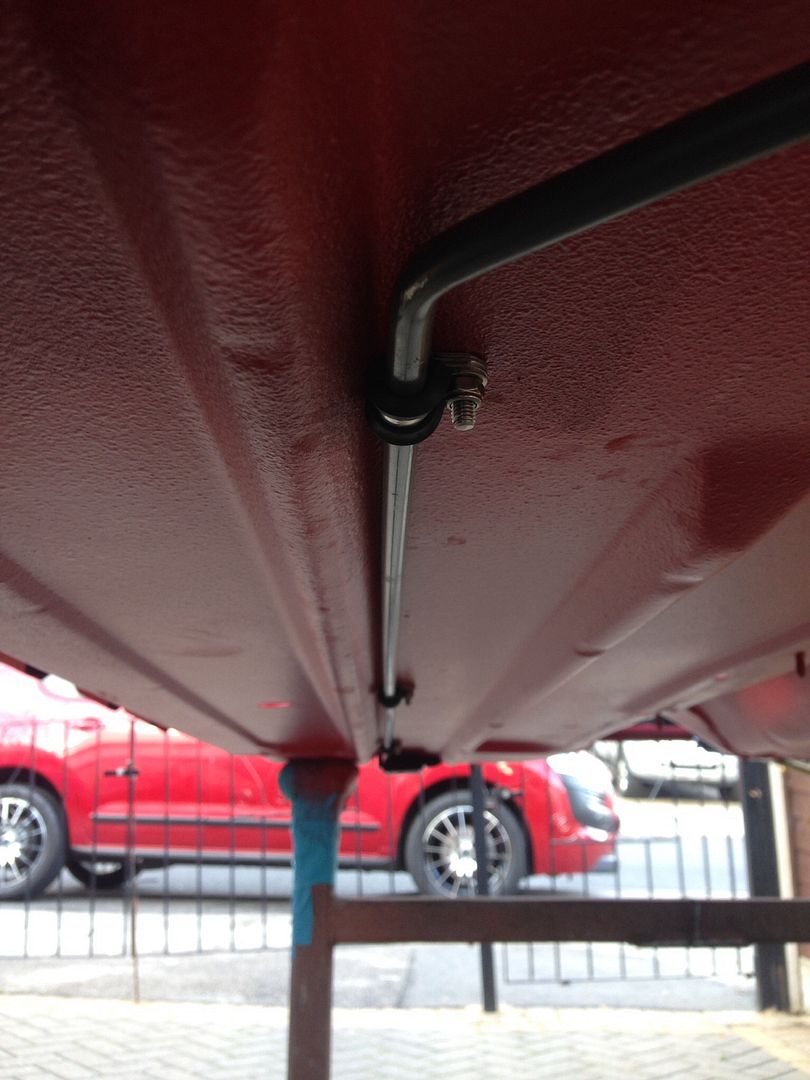
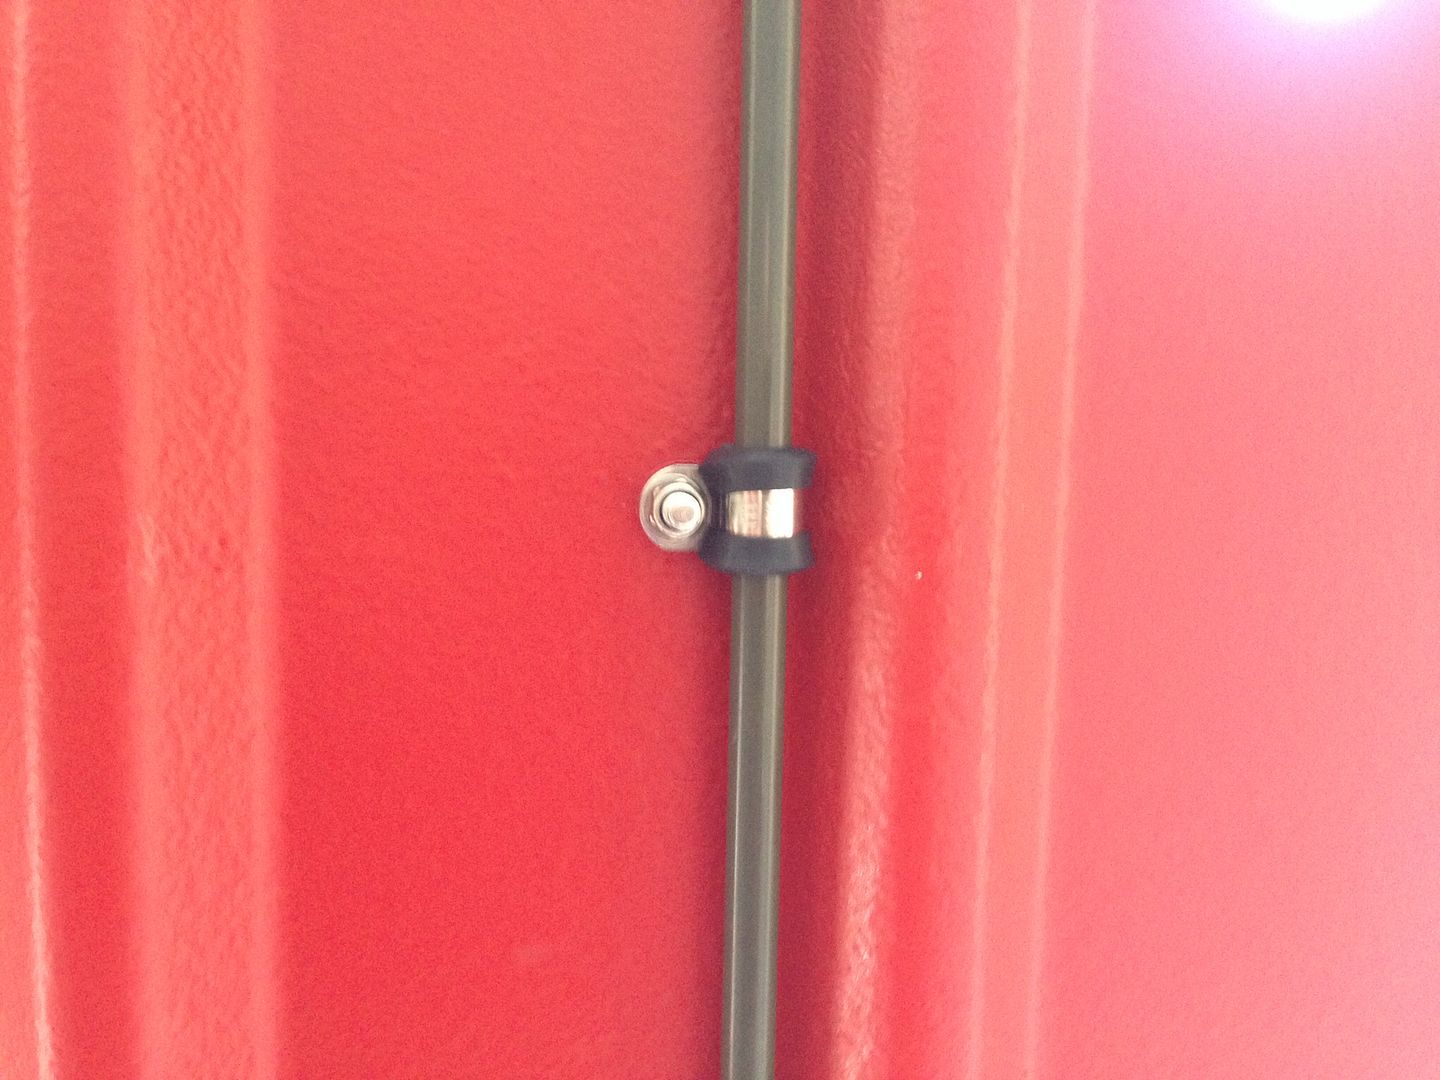
And the brake line -
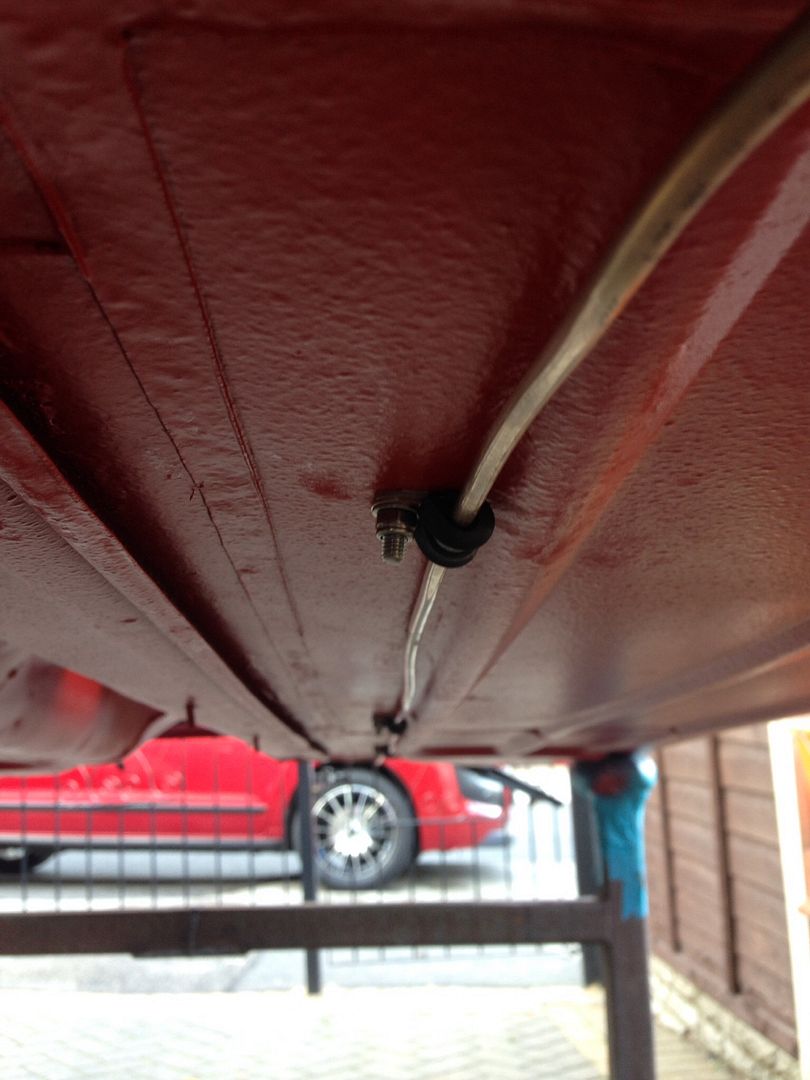
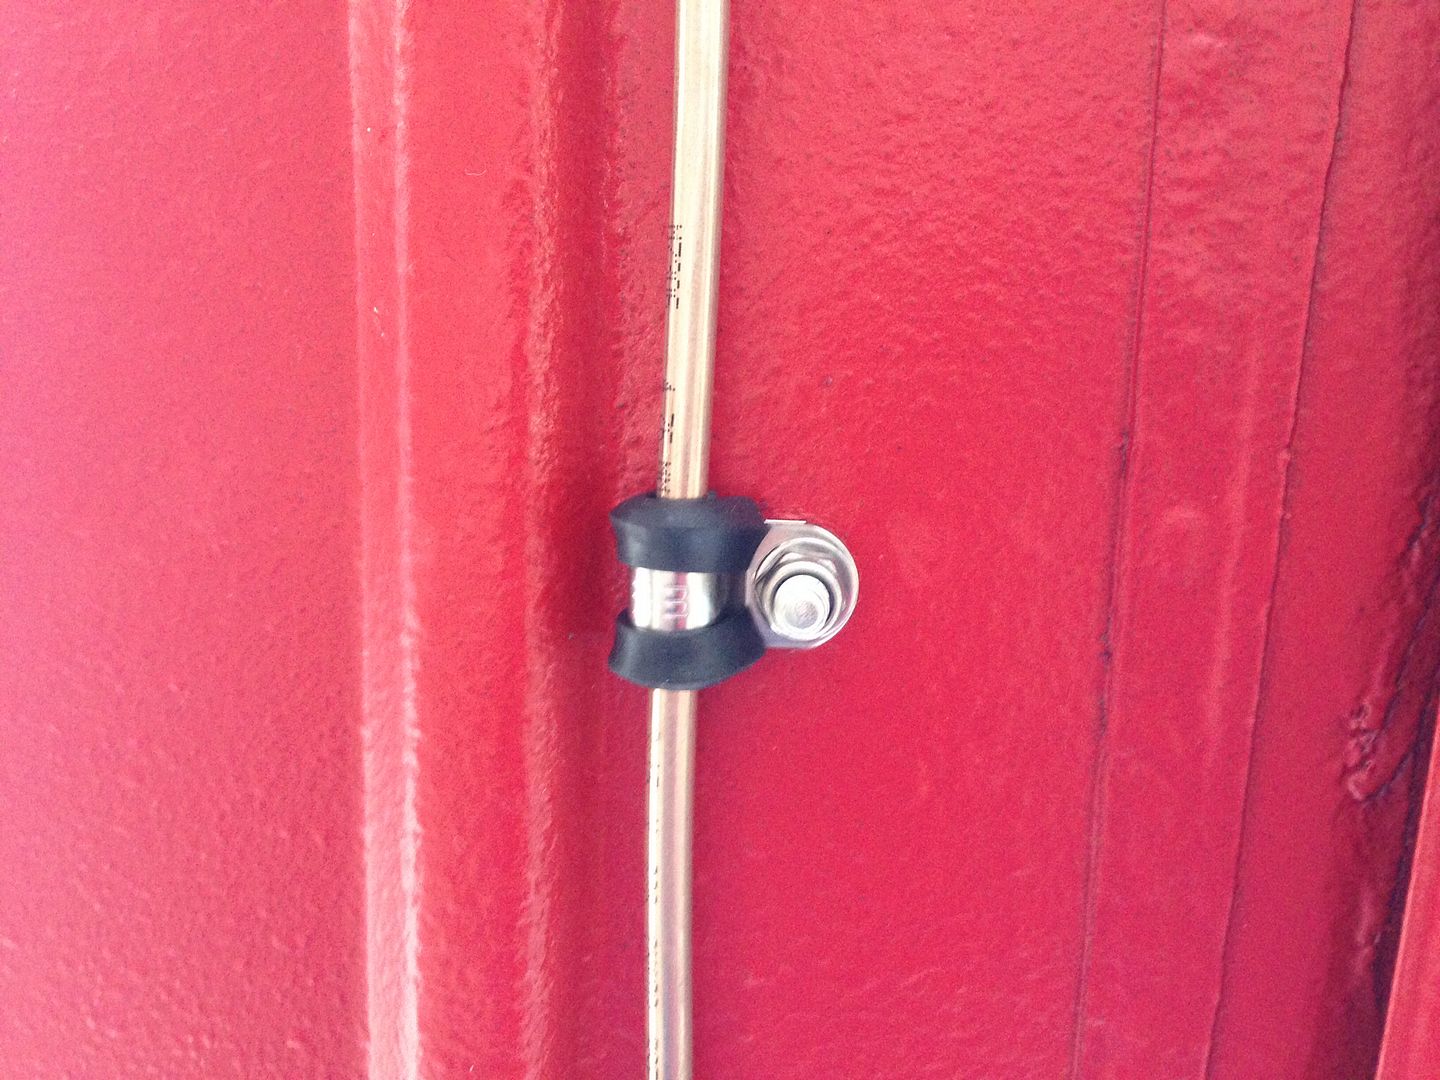
The p-clips look great and are a lot more substantial than what the factory used to hang the lines.
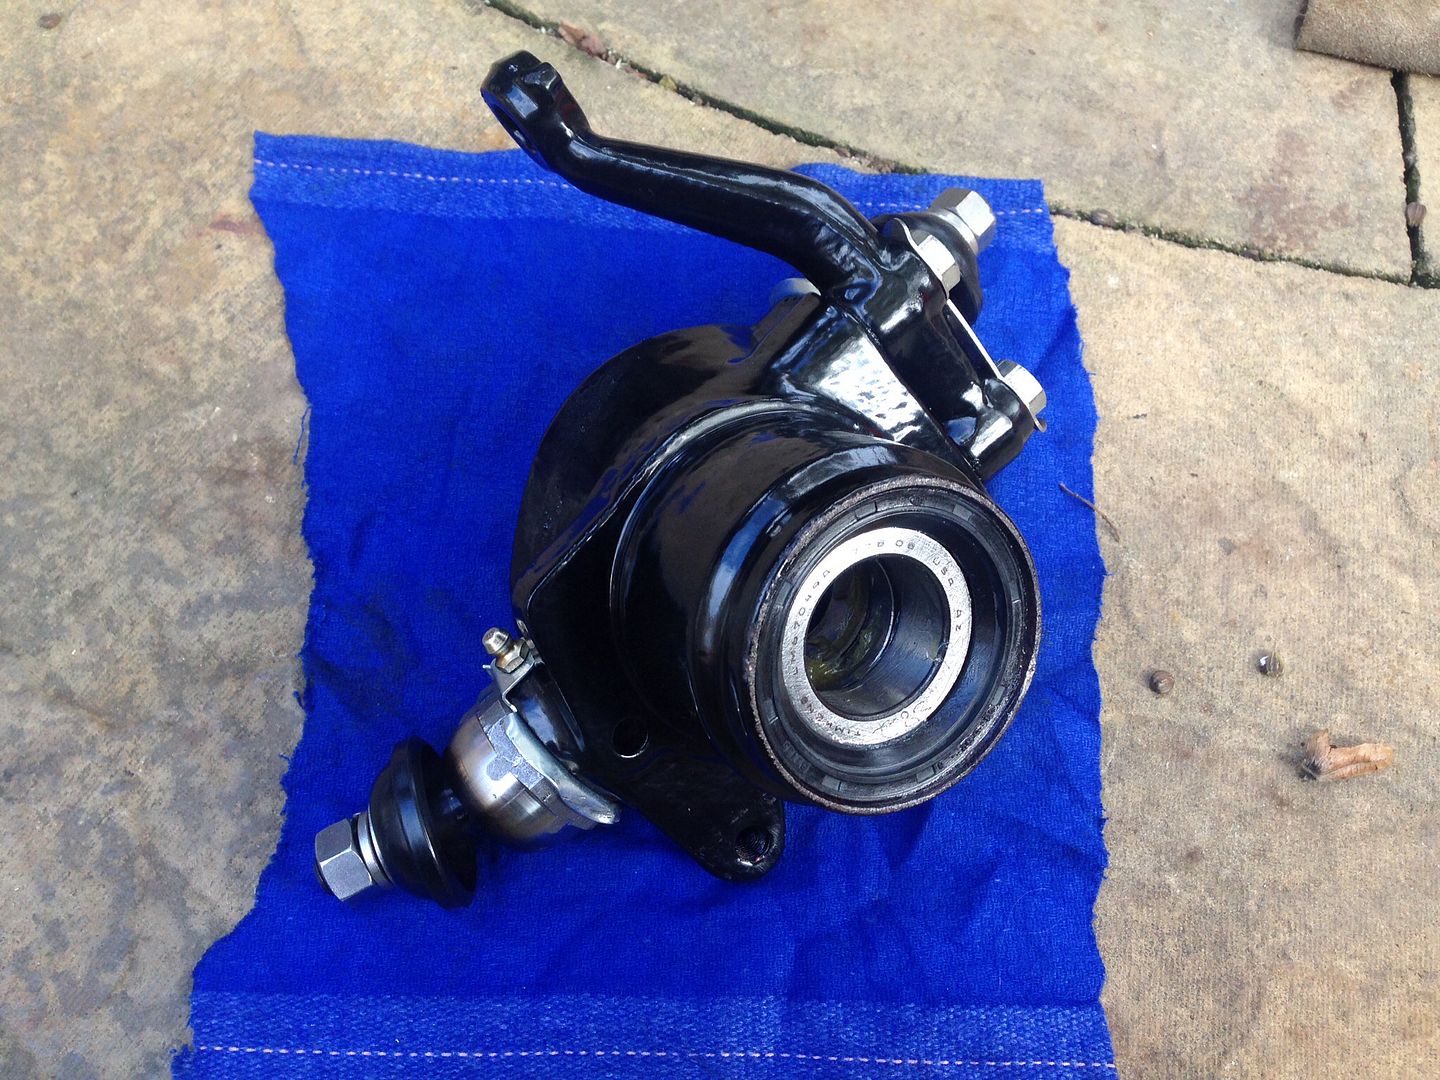
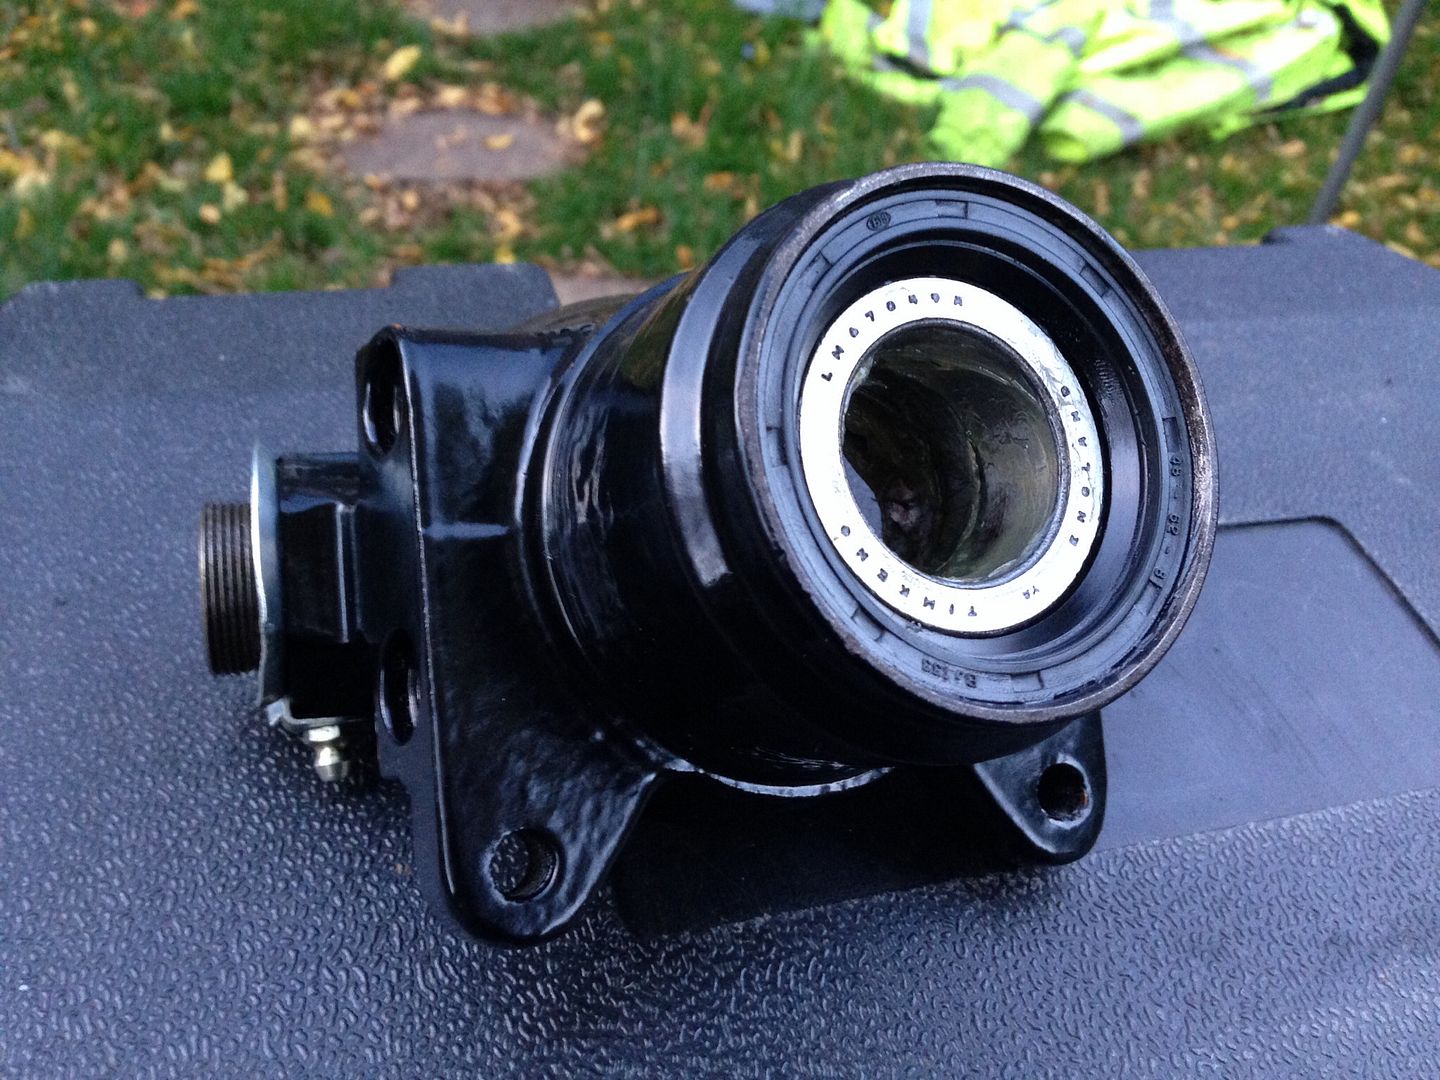
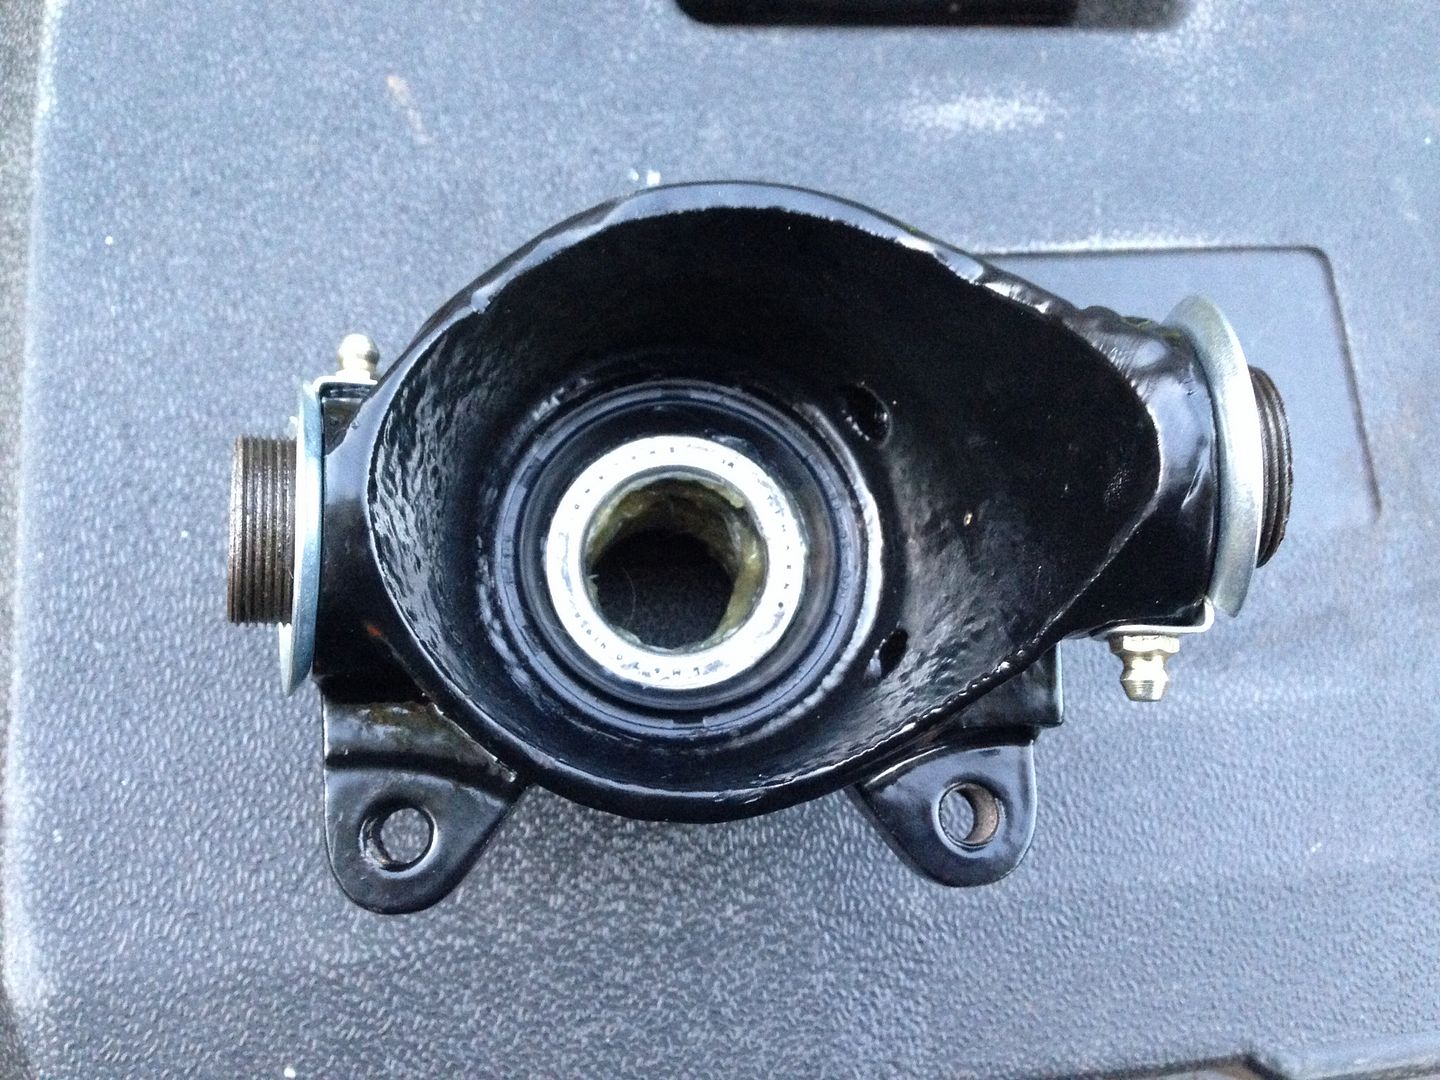
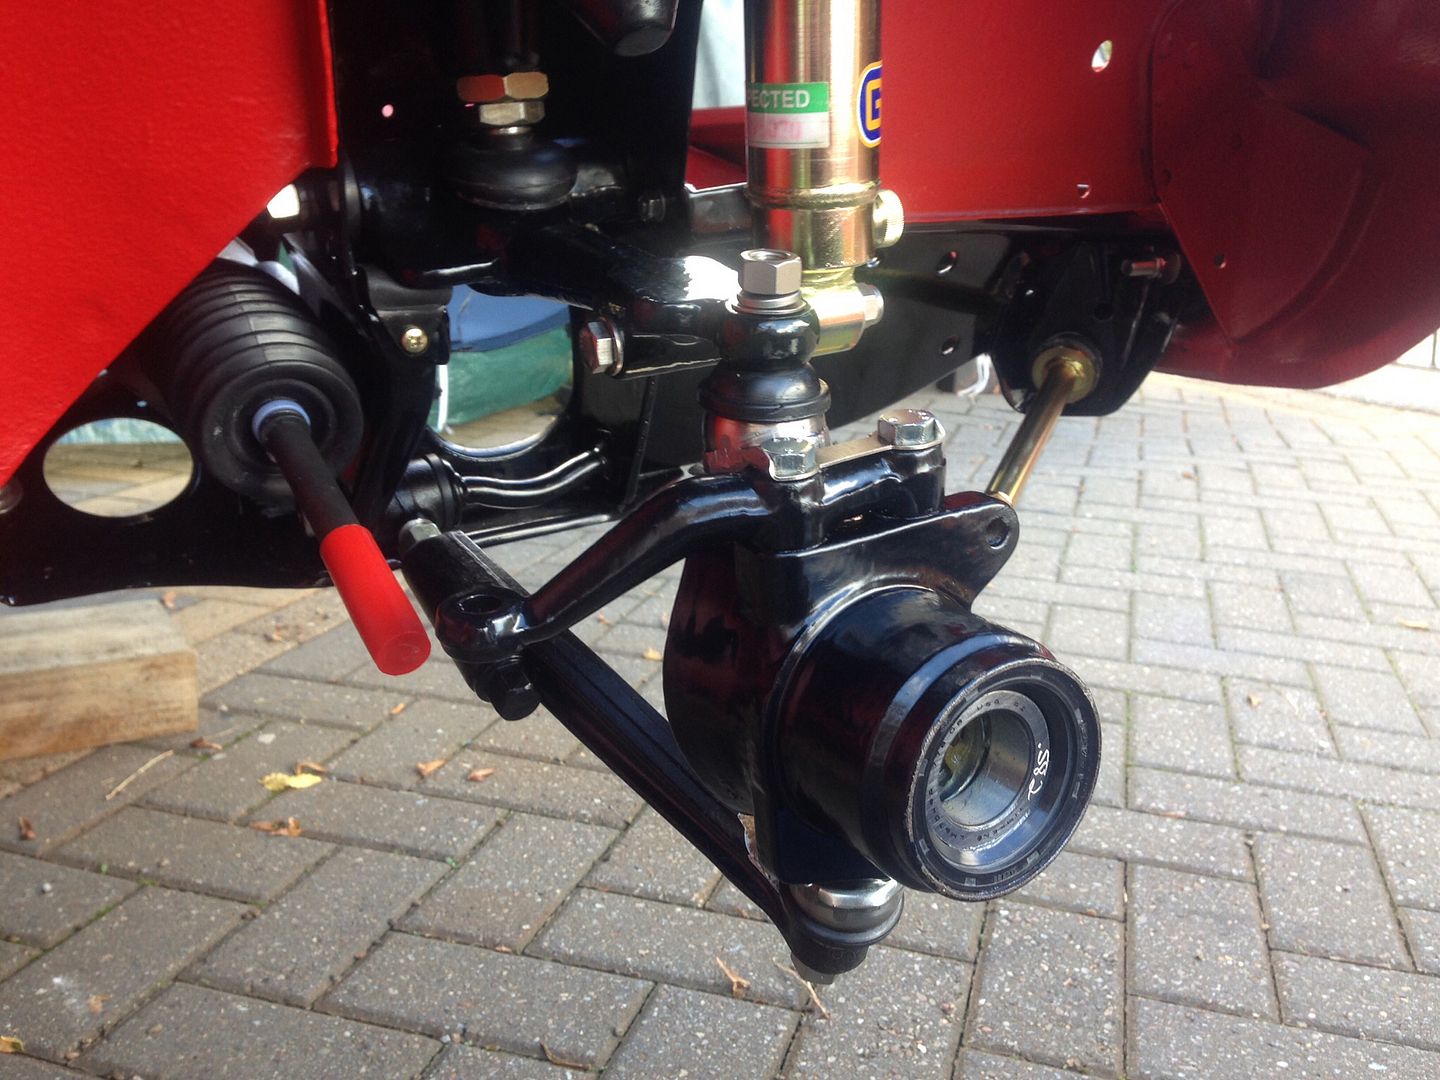
Happy with that, we moved on to the front hubs. We started with the drivers side hub and fitted the new bearings, ball joints and stainless bits and pieces onto it, here's the finished hub -

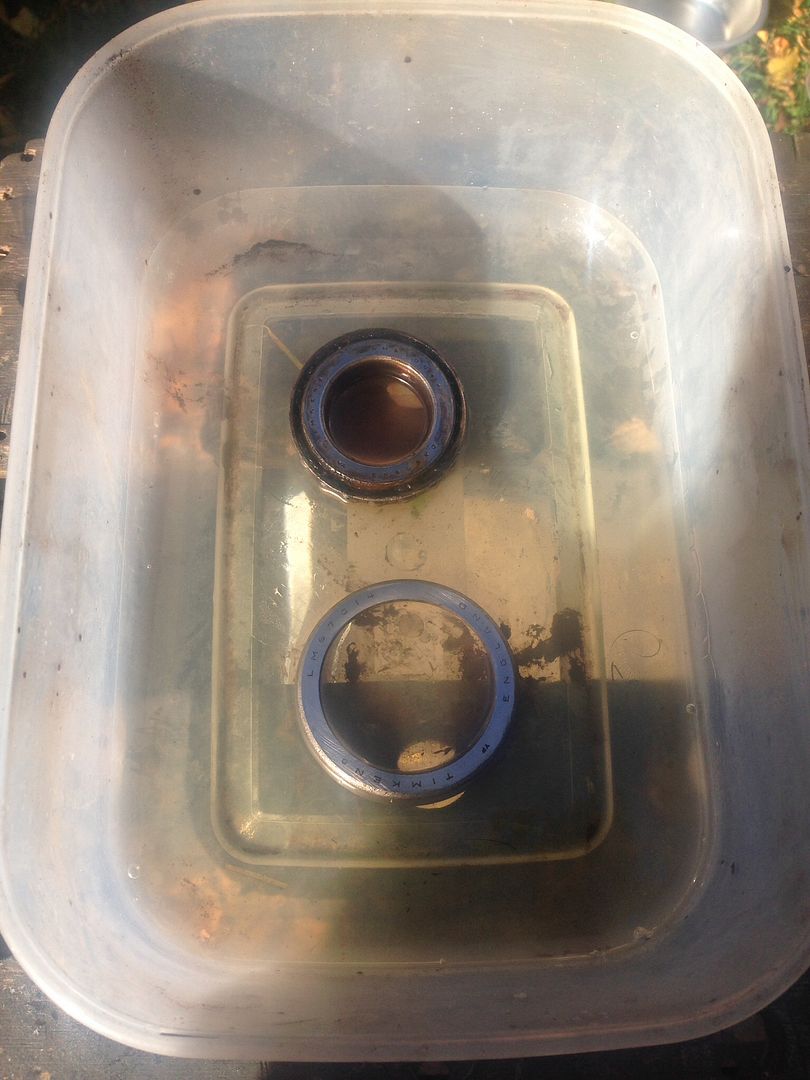
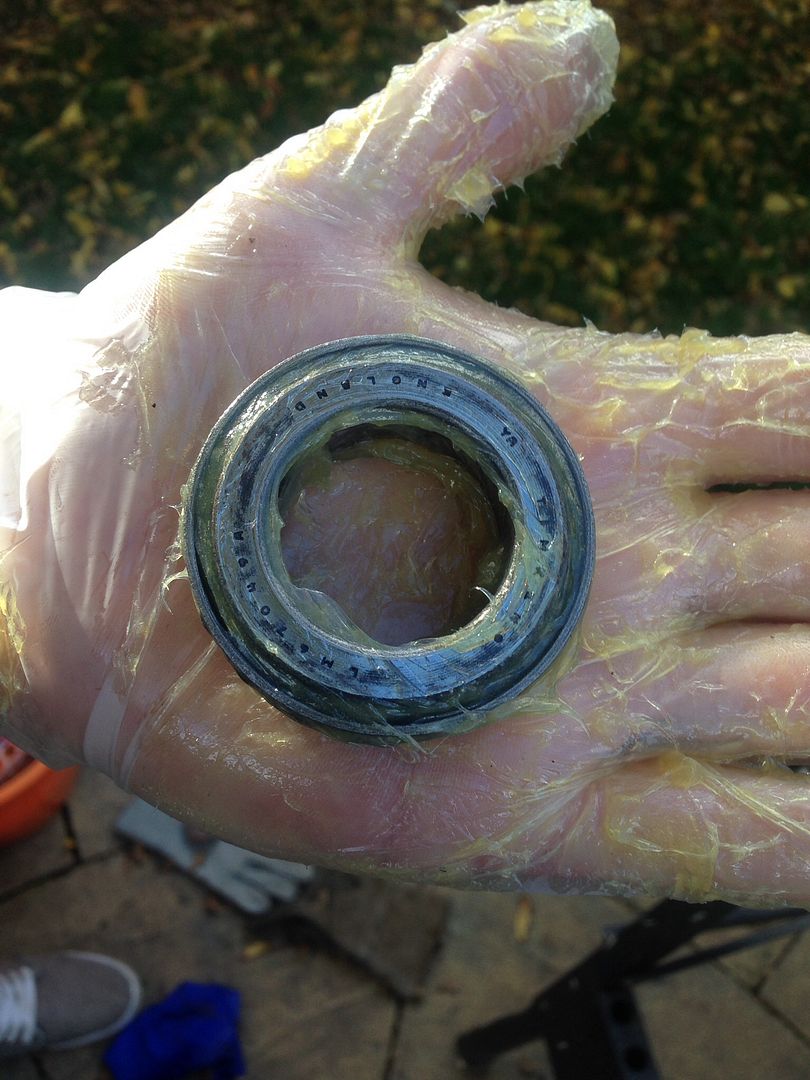
I degreased and cleaned up the original timken bearings that we removed from the passenger hub. There in really good condition as I would expect seeing as my car had a relatively low milage before the rebuild.
Degreasing the bearings -
Cleaned up and awaiting to be fitted -
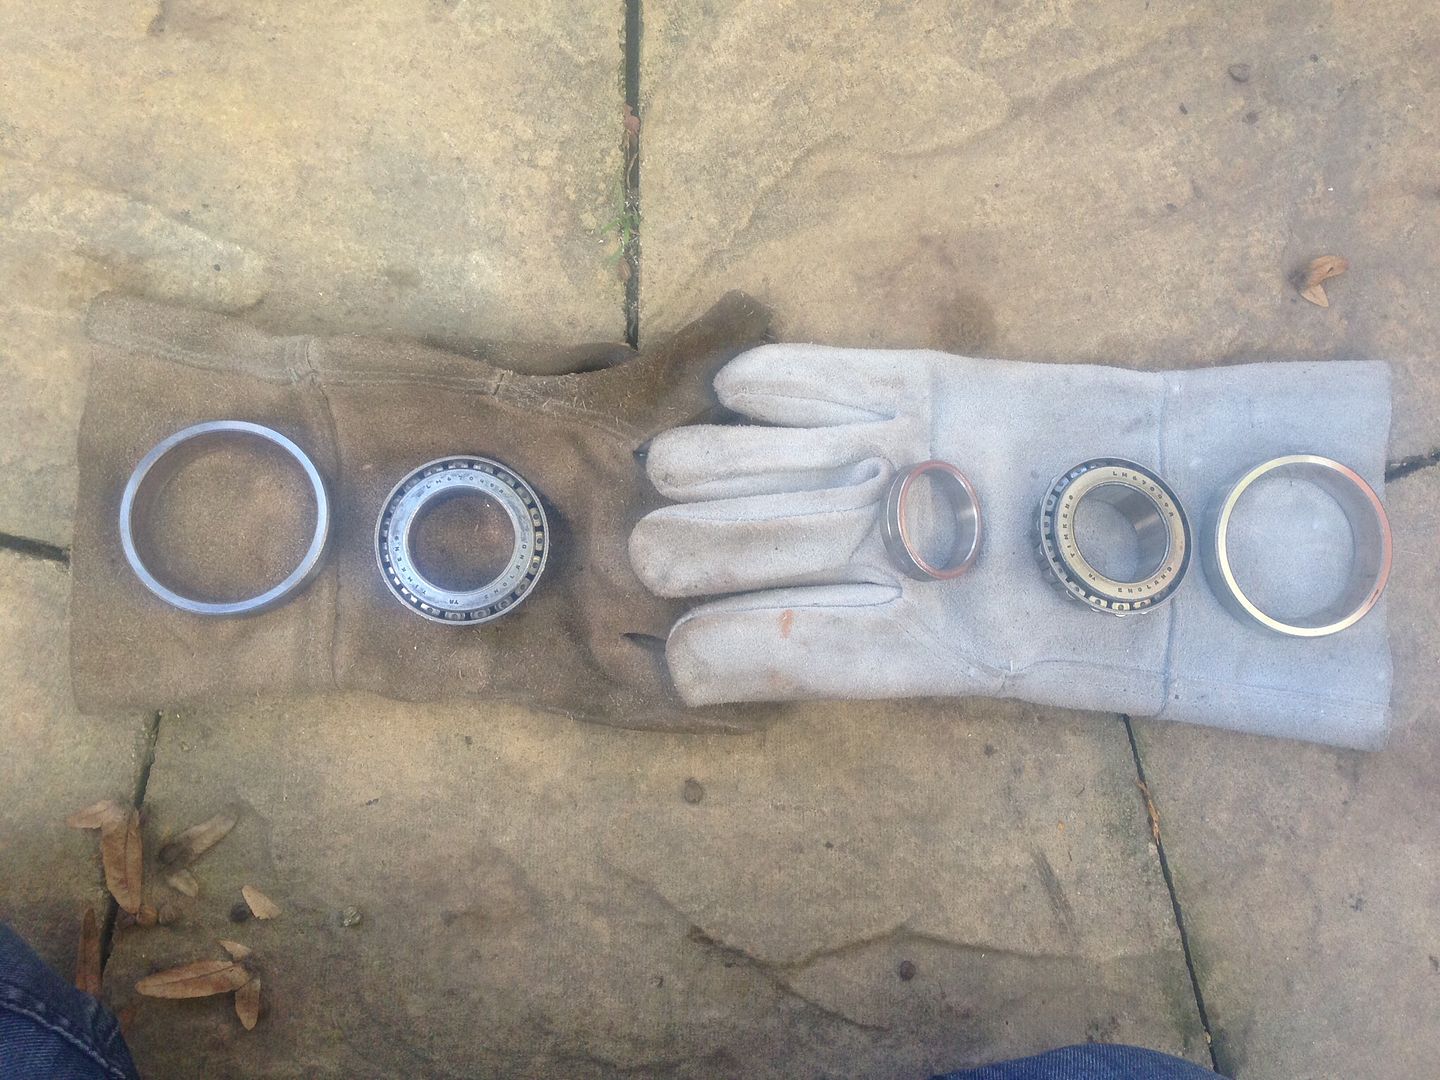
Packed the bearing full of high temperture, automobile grease -
And fitted into the hub with new dust seals. I couldn't fit the ball joints unfortunatley due to me running out of shims -
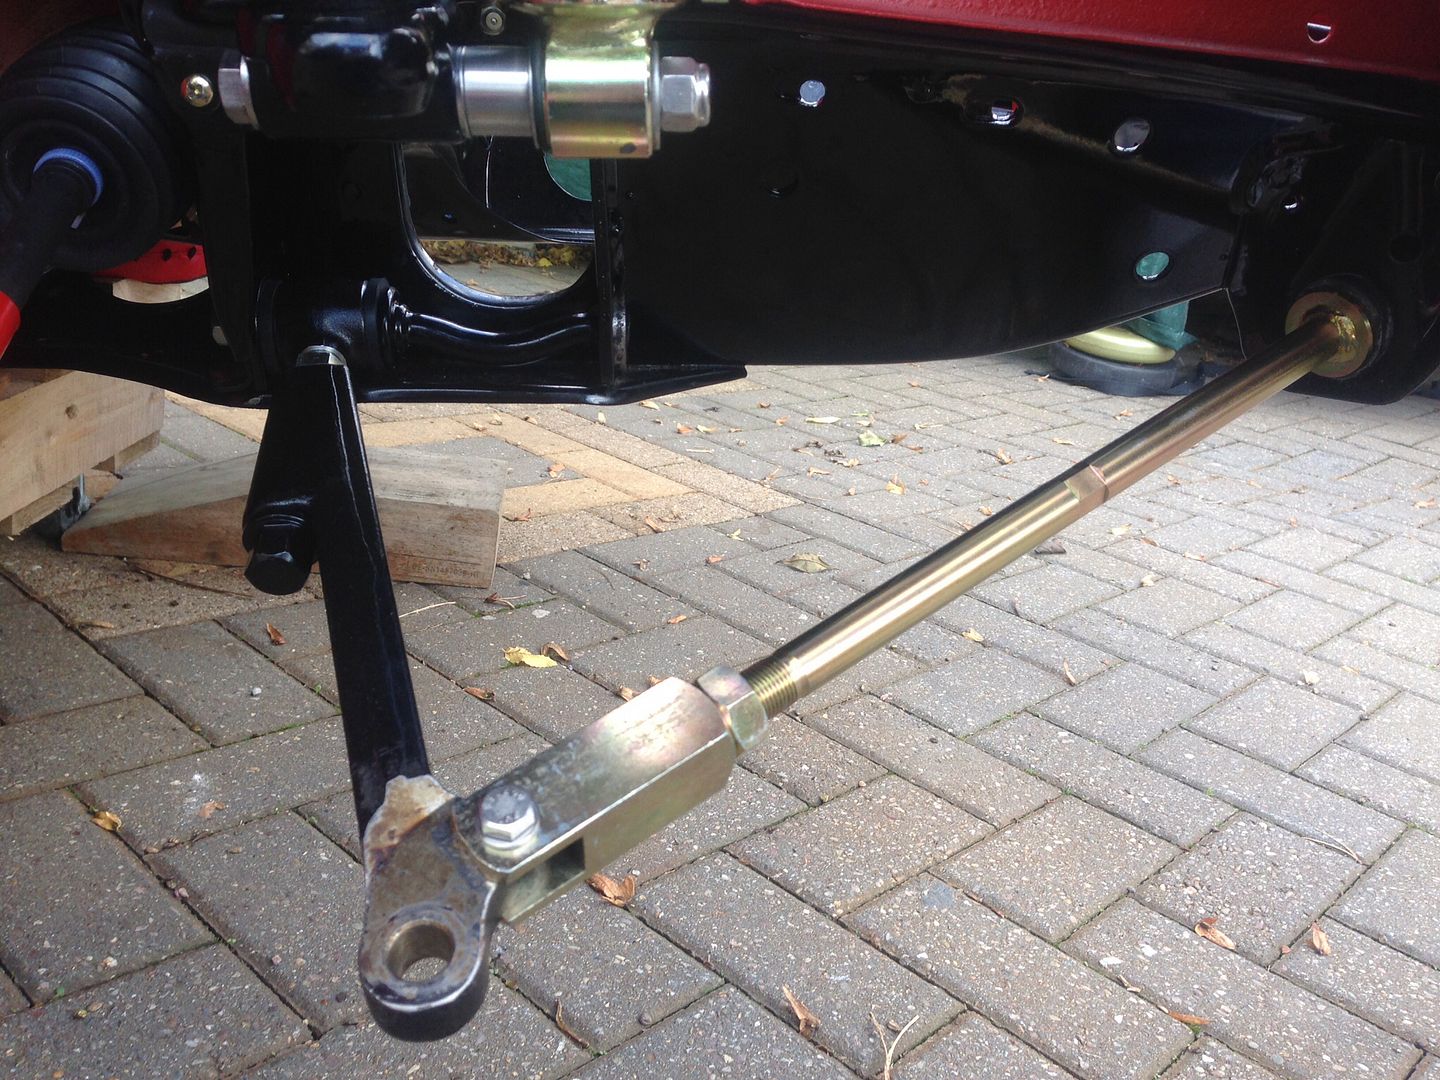
Fitted the adjustable tie rods and adjustable bottom arms to the drivers side, their set to the standard lengths at the moment -
And fitted the hub into place -
We've also temporarily fitted the doors back onto the car as they where getting in the way and I don't want them damaged.
Here's how the door gapping's are looking on the drivers side -

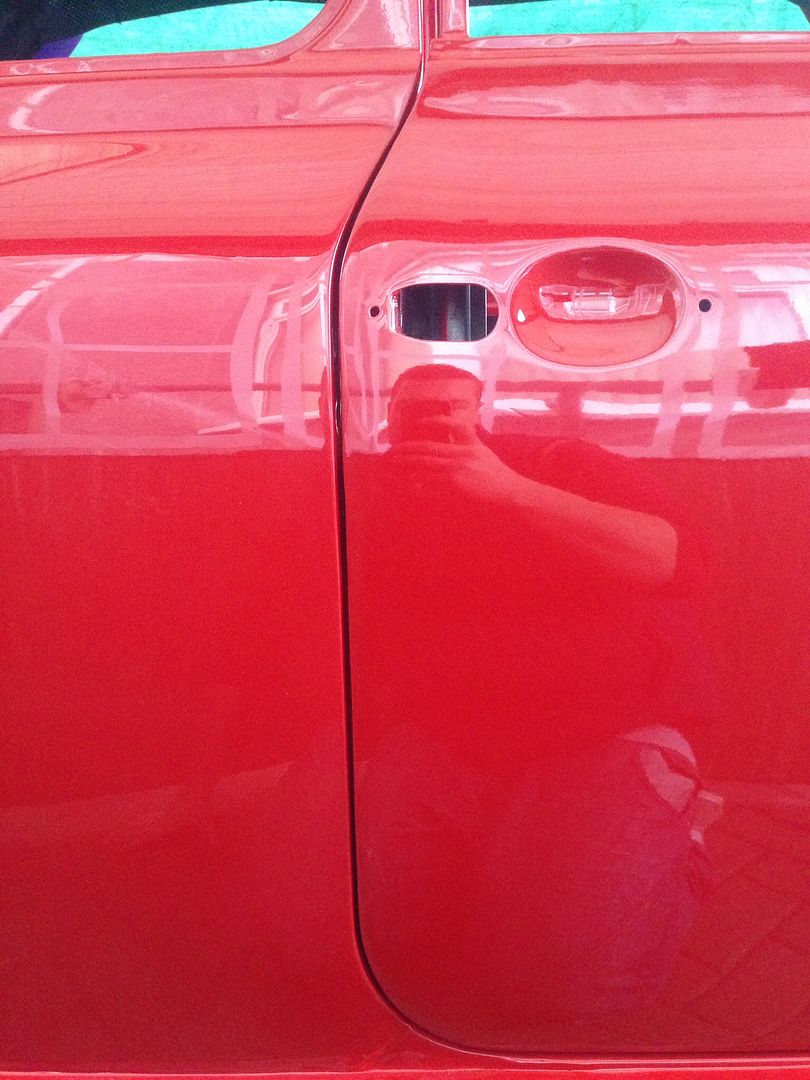

It was definitely worth that extra weekend getting them right, it's really paid off !
Couldn't get a decent picture of the passenger door as the space is tight that side, I'll pull her out tomorrow and take some though !
I haven't been able to get as much done as I would have liked this weekend, due to me having a bout of man flu.
ill start with what I bought throughout the week, some more smiffys bits and stainless p-clips -
Went down to minispares on Friday and picked this lot up, the wheel bearing kit is genuine timken, the cheaper ones looked a bit dodgy in my opinion -
First job of the day was to get the fuel and brake lines in place using the p-clips, here's the fuel pipe -
And the brake line -
The p-clips look great and are a lot more substantial than what the factory used to hang the lines.
Happy with that, we moved on to the front hubs. We started with the drivers side hub and fitted the new bearings, ball joints and stainless bits and pieces onto it, here's the finished hub -
I degreased and cleaned up the original timken bearings that we removed from the passenger hub. There in really good condition as I would expect seeing as my car had a relatively low milage before the rebuild.
Degreasing the bearings -
Cleaned up and awaiting to be fitted -
Packed the bearing full of high temperture, automobile grease -
And fitted into the hub with new dust seals. I couldn't fit the ball joints unfortunatley due to me running out of shims -
Fitted the adjustable tie rods and adjustable bottom arms to the drivers side, their set to the standard lengths at the moment -
And fitted the hub into place -
We've also temporarily fitted the doors back onto the car as they where getting in the way and I don't want them damaged.
Here's how the door gapping's are looking on the drivers side -
It was definitely worth that extra weekend getting them right, it's really paid off !
Couldn't get a decent picture of the passenger door as the space is tight that side, I'll pull her out tomorrow and take some though !
Edited by big-jay, 19 October 2014 - 06:46 PM.
#355
HarrysMini
-

- Members
-
- 3,352 posts
I do not have short legs!!!
- Location: .
Posted 19 October 2014 - 06:39 PM
Everything looks perfect as usual, Jay 
#356
big-jay
-
- Members
-
- 518 posts
Super Mini Mad
- Location: Birmingham
- Local Club: British Mini Club
Posted 19 October 2014 - 08:05 PM
Everything looks perfect as usual, Jay
Thanks a lot mate

#357
StefanPieter
-

- Noobies
-
- 131 posts
Mini Mad
- Location: Farnborough
- Local Club: FDMC
Posted 19 October 2014 - 08:08 PM
That is just beautiful!
Man you put the bar very high.
Well done.
#358
big-jay
-
- Members
-
- 518 posts
Super Mini Mad
- Location: Birmingham
- Local Club: British Mini Club
Posted 19 October 2014 - 08:44 PM
That is just beautiful!
Man you put the bar very high.
Well done.
Thanks mate,
We do try to make things the best they can be, I'm glad it shows !
#359
Jared Mk3
-
- Members
-
- 1,974 posts
Has a small thing but it does make a difference
- Location: Kokstad, South Africa
- Local Club: MOCKZN
Posted 19 October 2014 - 08:45 PM
Those gaps look even better with paint!
#360
big-jay
-
- Members
-
- 518 posts
Super Mini Mad
- Location: Birmingham
- Local Club: British Mini Club
Posted 19 October 2014 - 08:49 PM
Those gaps look even better with paint!
They certainly do Jared !
Thanks buddy


Also tagged with one or more of these keywords: roundnose
Projects →
Mini Saloons →
Mini Cooper Project - Finally StartsStarted by piphatch , 08 Jan 2025 |
|

|
||
Projects →
Mini Saloons →
1965 Austin Mini Restoration - Canadian Mk1Started by DoubleEh , 14 Nov 2022 |
|

|
||
Projects →
Mini Saloons →
Project Joe - 1991 Mini Mayfair 998Started by Eggers , 02 Jun 2022 |
|

|
||
Projects →
Mini Saloons →
Mpi Dashboad ProblemStarted by mikeprez , 22 Dec 2021 |
|

|
||
Projects →
Mini Saloons →
1978 Oew - Willy The MiniStarted by smalltreegrower , 11 Nov 2021 |
|

|
1 user(s) are reading this topic
0 members, 1 guests, 0 anonymous users


