That looks fantastic! Tim, quick question, where do you plumb the breathers from the rocker cover and crankcase into and does the 850 have the timing chain cover breather and tappet cover breathers too? I quite like that braided cover on the temperature sensor.

1964 Mk1 Morris 850
#586

Posted 14 September 2019 - 09:14 AM
#587

Posted 14 September 2019 - 05:10 PM
Nicely done ![]()
#588

Posted 15 September 2019 - 08:17 AM
That looks fantastic! Tim, quick question, where do you plumb the breathers from the rocker cover and crankcase into and does the 850 have the timing chain cover breather and tappet cover breathers too? I quite like that braided cover on the temperature sensor.
Hi Vinay,
At the moment both breathers will probably join together and go to a small filter. I can get a little fitting to join the breathers to the air filter backing plate which I might do later. I don't think we didn't get the timing case breathers here, and currently I don't have a tappet cover breather. I will probably add the tappet cover as I just couldn't get the extra top engine steady to fit.
Nicely done
Thanks Jared!
#589

Posted 16 September 2019 - 10:55 AM
I've just read through all this, what a wonderful topic and car! I'd love an old Mk1 like that. Absolutely super. Keep up the good work!
#590

Posted 21 September 2019 - 10:19 AM
I've just read through all this, what a wonderful topic and car! I'd love an old Mk1 like that. Absolutely super. Keep up the good work!
Thanks!
A big day in the garage today - plenty of progress but still more to do. The parts to refresh the clutch came in during the week.

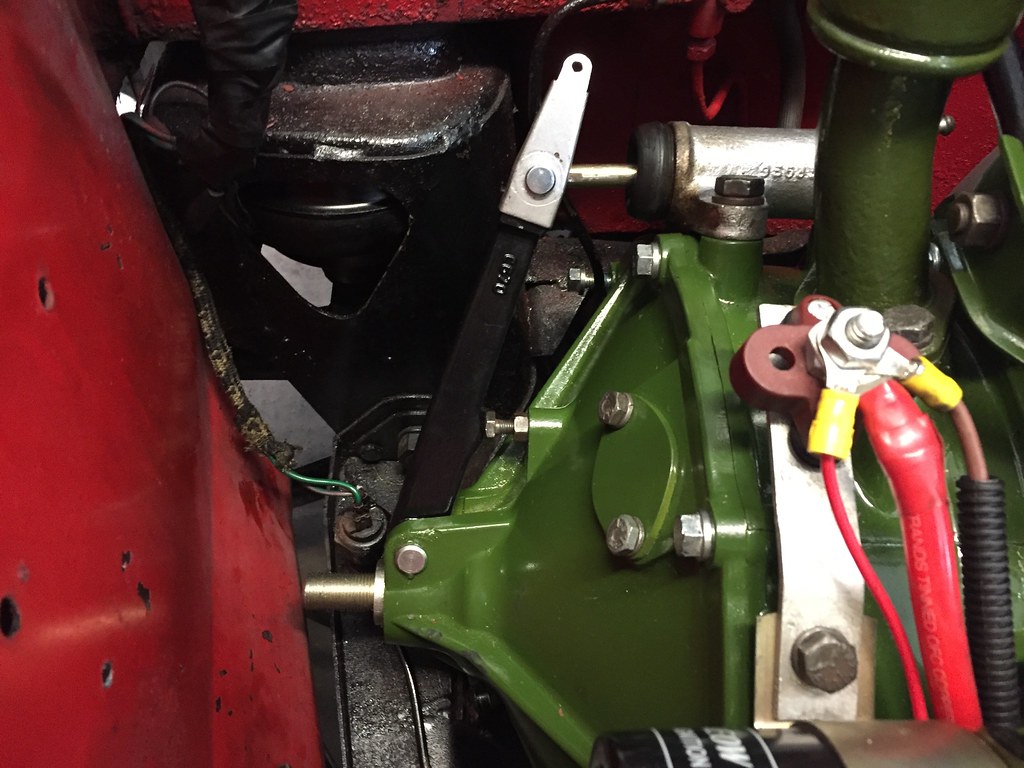
The new plunger had a hard sleeve installed as the new ones can be very soft and can wear out quickly

I'm not sure if you can tell from the photo, but the new clutch arm is thicker, the ball isn't worn and there is a small difference in angle - the new one is angled up slightly which will give a better angle on the clutch arm.

The new clutch arm is now installed. The clutch pedal feels fantastic now, it doesn't feel any stiffer than the old setup

It's immediately obvious the improved angle of the clutch arm, and also the reduced amount of clutch pushrod visible

After that I greased up the pot joints and used my new CV banding tool to fasten the ties

With the pot joints and new sump plug installed the engine was theoretically ready to fill with oil. I removed the oil feed pipe and filled it while pushing the car back. This should bring oil into the pump to prime it.

After a couple of cranks there was oil pressure!

Still left to do is grease the CV joints and install the new boots. I'm also regreasing the front hubs and checking the ball joints while I'm at it. I also need to check the base timing and see if I can get the engine to start - there's also a huge mess to clean up in the garage...
#591

Posted 22 September 2019 - 09:56 AM
Another long day of car stuff with some help from a friend we knocked out most of the remaining jobs. First thing in the morning was checking the base timing, I had the suspicion I'd put the distributor drive in 180 degrees out. I checked it and I think I'm one tooth out as the distributor is rotated all the way to the left. After sorting that out the engine started right up!!

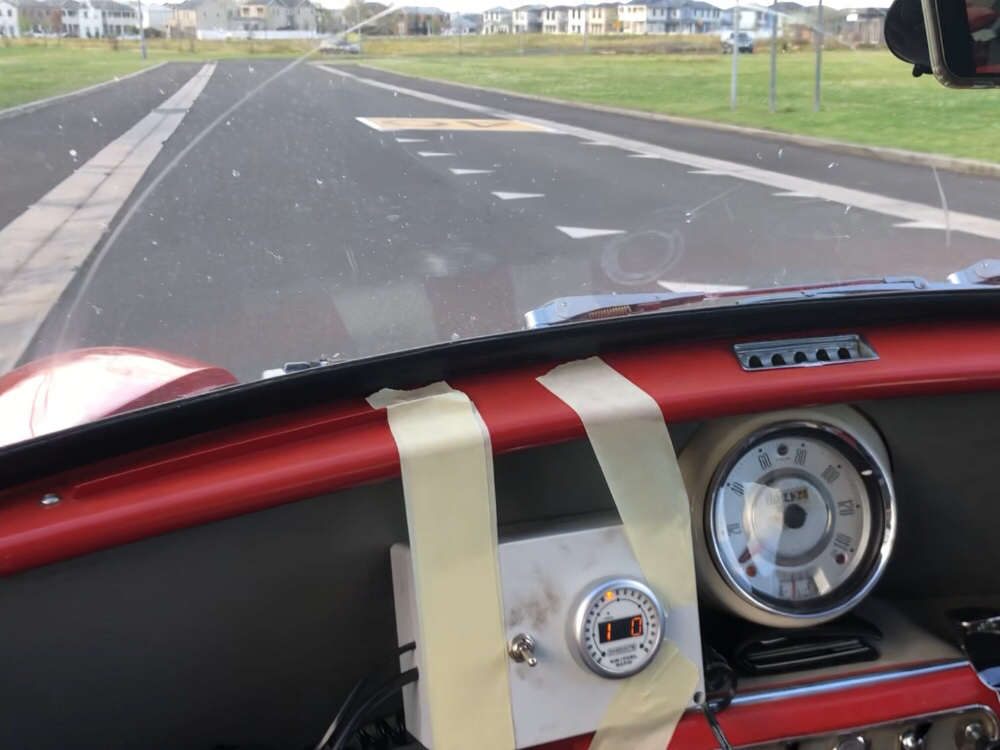
After a couple of little teething problems (loose distributor and then loose throttle linkage) we did a couple of laps around the estate and some uphill pulls under load. It absolutely rips along now, clutch is great, gearbox has 4 synchros which is awesome for me ![]() (car still needs a wash from Rylstone as you can tell from the windscreen)
(car still needs a wash from Rylstone as you can tell from the windscreen)

#592

Posted 22 September 2019 - 10:10 AM
That clutch arm position looks perfect now. It's great having a clutch that clears properly once you've sorted all the little wear point issues.
#593

Posted 22 September 2019 - 11:24 AM
Can't beat that type of cv boot strap, nice and secure and plenty of clearance with the hub carrier.
That clutch arm position looks perfect now. It's great having a clutch that clears properly once you've sorted all the little wear point issues.
The CV boots and ties were a real fun job... glad it's done now though!
#594

Posted 22 September 2019 - 03:50 PM
Side draught and a magic wand gearbox - not a common combo ![]() You sound pleased with everything, which is good!
You sound pleased with everything, which is good!
#595

Posted 23 September 2019 - 01:22 AM
Yep, it’s certainly a strange combo, but after experiencing different things in cars over the last few years I wanted something that’d suit me. The magic wand was a bit weird to start with, but after a few laps around it’s not too bad. Soon it’ll be hard to tell any modifications by looking at the outside of the car, and only the carb will be the big giveaway under the bonnet. The twin SU carbs will be used at some stage which will give a real OEM look, for now the Dellorto is pretty well tuned but will need a few tweaks to get it perfectSide draught and a magic wand gearbox - not a common combo
You sound pleased with everything, which is good!
I was so excited yesterday morning when it cranked and started and couldn’t get the smile off my face all day. The first drive was a bit nerve wracking, but thankfully nothing major to sort out! Now there’s lots of little things to check over and I’ll need to get the engine number updated on the registration
#596

Posted 23 September 2019 - 10:59 AM
Here is a little video - first crank over to get oil pressure, first start up and then the first drive down the street. A friend took a couple from inside the car - my phone doesn't deal with vibrations very well so the sound and video can be a bit shaky
#597

Posted 28 September 2019 - 09:42 AM
I spent most of the day working on the car, I changed the oil to get rid of the assembly lubricant, retorqued the head and checked all the valve clearances. The rear tappet cover was swapped to a breather type one and both sides had been leaking pretty badly. The cork gaskets just seemed to be the wrong profile. I had one of the rubber/silicone ones from the old engine and it has sealed really well now, so I'll get a new one for the other cover. I also put the bonnet and grille on, now I don't get so many funny looks when I'm driving around ![]()
I did about 50km on the road and slowly got the tune a bit closer to where it should be. In the engine bay I still need to finish the engine breathers and install the heater - it gets in the way of the clutch so I wanted to make sure it was all working fine first.


Edited by timmy850, 29 September 2019 - 07:07 AM.
#598

Posted 11 October 2019 - 12:44 AM

I went out to a car show at the Motorlife museum in Sunday, there was a nice selection of cars and a couple of minis.


I also bought a Moto Lita leather wheel. It was a bargain on ebay ($41) and the seller said it'd come off his ex works Renault R12 rally car. The steering wheel boss I bought a few years ago for the 6 bolt Mountney wheel was also drilled for 9 bolts for a Moto Lita so it went straight on.

It has an extra layer of leather around the outside of the rim and the seller told me it'd been on since he bought the car. So possibly underneath it's mint condition, or needs a retrim... either way it has a nice look and feel

#599

Posted 11 October 2019 - 07:12 AM
Those mats are nice, as is that steering wheel! Do you prefer the larger diameter and thinner steering wheels or the smaller diameter thicker steering wheels?
#600

Posted 11 October 2019 - 09:32 AM
Thanks Vinay.Those mats are nice, as is that steering wheel! Do you prefer the larger diameter and thinner steering wheels or the smaller diameter thicker steering wheels?
I think the stock Mk1 wheel is pretty close to my favourite. I’ll see how this new Moto Lita goes as it’s a bit thicker grip than the other ones I have
I’ve found the weight of the wheel to be important as the light wheels tend to buzz a bit in your hands and the heavier ones are smoother.
2 user(s) are reading this topic
0 members, 2 guests, 0 anonymous users


