Wow fantistic project.....great work done so far........will keep an eye on this............. ![]()
My Mk1 Resto , My First Ever Project......... Wish Me Luck!
#61

Posted 16 October 2013 - 11:21 PM
#62

Posted 17 October 2013 - 07:36 PM
Wow fantistic project.....great work done so far........will keep an eye on this.............
Thank you !! Not going to be quick, but I will get there in the end, especially with the help of this rather spiffing forum!
#63

Posted 17 October 2013 - 08:07 PM
First thing that looked intriguing was a thingymajig wotyacallit
( I think it's a twin carb?). Told you I am a complete newb to this sort of thing.

I wanted to see if the pair of boobs would sparkle again, so I whipped it inside as it was a clean(ish) job, and sat at the dinning table doing it. It became evident that sparkle sparkle was not going to happen on the round top bits, as there is pitting etc, ( unless any one has got any top tips? )

So, in proper man style, I decided I would take it to bits instead
A few pics of strip down


Took it to bits, then put it all back in the box, for a challenge later on, if required.
I have a 1000 engine, which is currently wrapped up in stretch wrap in my garage. I wrapped it up the day the car was delivered, and I haven't looked at it since. I'm confident it isn't the original engine, so wasn't to concerned on what it actually was if that makes sense, as I plan to learn how to do a complete engine rebuild, once I've found out how to do it! Like I said, this is all a big learning curve for me, so I'm going to need guidance hehe.
So, would anyone be able to tell me if this above piece of kit would be suitable for a 1000 cc engine?
Thanks in advance
Edited by Minilegs, 17 October 2013 - 08:09 PM.
#64

Posted 18 October 2013 - 08:29 PM
they are a set of twin hs4's would be a bit over kill for a 998 there more for 1275
#65

Posted 20 October 2013 - 05:37 PM
they are a set of twin hs4's would be a bit over kill for a 998 there more for 1275
Thanks Steven. Another part I've got to get then !! This list is growing very quickly hehe
#66

Posted 20 October 2013 - 05:42 PM
they are a set of twin hs4's would be a bit over kill for a 998 there more for 1275
Thanks Steven. Another part I've got to get then !! This list is growing very quickly hehe
No worries, i know the feeling
#67

Posted 20 October 2013 - 06:18 PM
Firstly, boot floor. I used the hinge panel repair and the boot floor panel as my first reference point. I lined the 3 fixing holes up on these panels, and then took measurements to see how square it was sitting in regards to the front toeboard. It all came in within 3mm, so I was happy with that as a starting point.


Next I offered up the wheel arches, closer plates and heel board panels.

The wheel arches well my first non gen panel, and to be honest, the fit was ok but not great. However, with a little bit of manipulation, they soon fitted ok.
Once I had all this clamped in place, I again got out the tape measure to check original measurements were still the same, and to check the toeboard position also. Again, all measured up good, so fingers crossed heheh
Rapidly running out of clamps, but I had to get as much in a possible to check that everything was going to go in square and parallel. Next I clamped in the centre tunnel and seat crossmember , to tie up the front toeboard door lower steps into the equation.


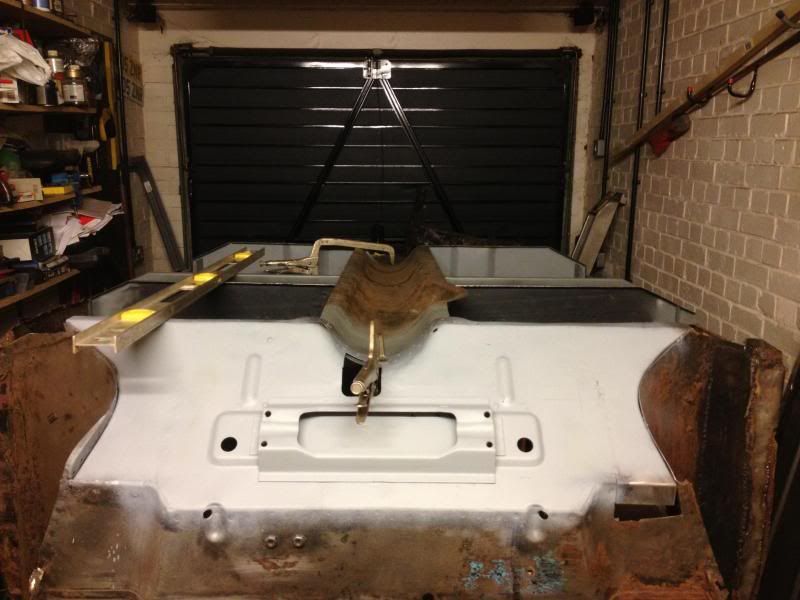
Guess what next? Yes tape measure lol !! Check check n treble check, always been my motto lol
Still happy that the floor is going together square and true, and the measurements are backing it up.
As this shell had been through a rough life, I didn't trust how good she was for all the battering she had been given. That was why I cut all the floor out with no bracing, as I didn't see the point of bracing something that could well be in the wrong position . My theory is that if I build the floor pan nice and square, I should be able to use this floor then as my datum for lining up the rest of the shell when fitting the floors etc, and thus having a good starting point. This Is all a theory though, so we will see!
Next I wanted to offer up the floor pans as well, to check the fit, and being governed by the heel board and seat tunnel edge, where the front floor pan edge would finish in relation the the front flinch panels.


Again, the tape measure came out, and lots of measurements taken in various places, and all seemed good still, so it was time to take the plunge and actually start welding some panels on.......
#68

Posted 20 October 2013 - 06:41 PM
nice nice nice! get that welder out tack it all in place! and maybe get that tape measure out again? ![]() good work mate.
good work mate.
#69

Posted 20 October 2013 - 07:12 PM
Some fantastic progress, well thought out. Keep going!
#70

Posted 20 October 2013 - 09:19 PM
nice nice nice! get that welder out tack it all in place! and maybe get that tape measure out again?
good work mate.
Thanks Tom! Problem is, every time I get the tape measure out, I have to get the chill out chair out, as I have to plan where I'm gonna measure next! And when I sit down, I need coffee' so it's a viscous circle ! Hehe
Some fantastic progress, well thought out. Keep going!
Thanks mike! Thinking is a great excuse to put your feet up, so I do it a lot
#71

Posted 21 October 2013 - 05:57 PM
Great work being carried out here - keep it up!
#72

Posted 21 October 2013 - 09:40 PM
Great work being carried out here - keep it up!
Thank you
#73

Posted 21 October 2013 - 10:04 PM


You may notice I got carried away with the spot welder, but I think this may have been a boo boo as I read somewhere there should be a minimum distance between each one, any help on this would be great
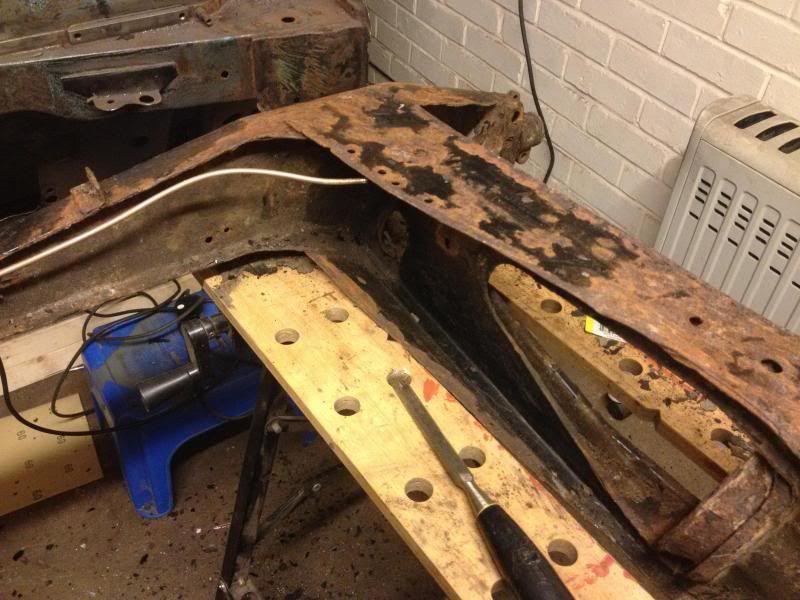
Once the boot floor , wheel arches and closer plates were in, next up was the heel board . When I first fitted the floor panels to test the fit , I never included the rear and front subframe into the equation, as there wasn't enough strengh in the shell to take the weight IMHO, so I left them till later. Now the boot floor etc is solid, it can easily take the weight of a rear subframe, so I dug mine out.
I hadn't looked at it closely at all until now, as it had been wrapped in tarpaulin in the back garden for a year.I Kept all the bolts on the subframe soaking for a few days to free them up, and then stripped it down to bare subframe with only trunnion mounting points etc left.
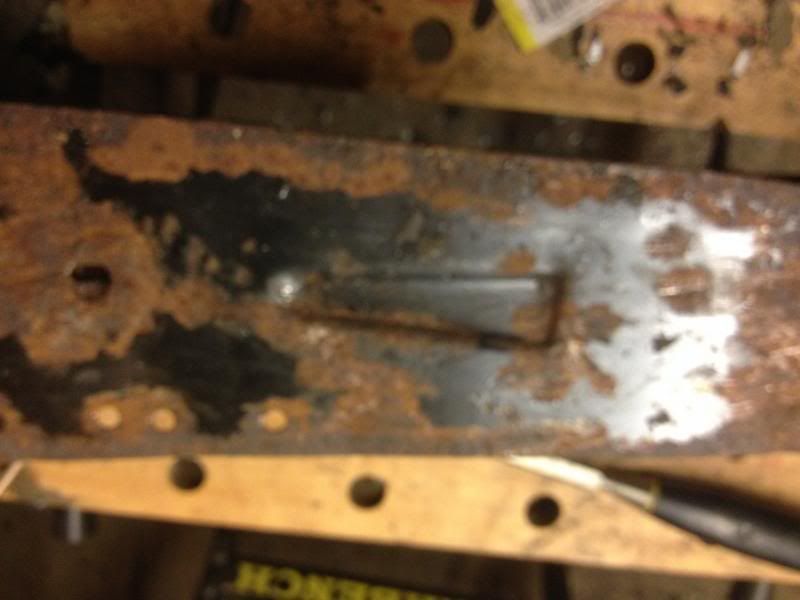
Now I need some advice on the condition of this frame. Once I had got all the mud, straw, general crap from it, I could see what it was like.
The main frame is square, however it has had a few dings here and there, but I'm sure these will straighten out if required, and there is no visible holes anywhere. Most of it looks pretty solid, but I don't have the confidence my self to say whether it is worth using. I don't want to pay to have it shot blasted and then find out it is useless. So here are some pics , all comments welcome




#74

Posted 22 October 2013 - 09:08 AM
Welding looks "spot" on to me !!
Back corner near the brake bias valve looks a bit suspect in the last picture, and the Cone mounts probably look worse than they really are. Why have you got two engine mounts (well one and a half !!) fitted to the back of the rear subframe ?? Exhaust mounting ??
Phil.
#75

Posted 22 October 2013 - 12:01 PM
I think the remains of the cones, well the metal band is still attached to the sub frame, doesn't look to bad otherwise IMO but check into the corners as Phil has mentioned above
1 user(s) are reading this topic
0 members, 1 guests, 0 anonymous users


