Jump to content


Photo
- - - - -

My Mk1 Resto , My First Ever Project......... Wish Me Luck!


  • Please log in to reply
188 replies to this topic

#16 Minilegs

Minilegs

    Mini Mad

  • Members
  • PipPipPipPip
  • 242 posts
  • Location: Norfolk

Posted 09 October 2013 - 06:34 PM

looks cracking mate whats your plans back to original? im loving that little air scoop on the scuttle never seen one like that before. is there much rust on the floor panels like mine? cheers tom


Thanks Tom! Plans still undecided really mate, going back to 90 %standard at a guess , but that is subject to change as always.:-)

She was quite rotten Tom, but you've definitely won the rustiest car challenge !. Ive had to replace basically the whole bottom of the car, (managed to salvaged the centre tunnel though ) and various other repairs etc from rust and modifications people have done over the years ..............you will see what I mean when I get the 'paint sanded off' photos on here !

#17 Minilegs

Minilegs

    Mini Mad

  • Members
  • PipPipPipPip
  • 242 posts
  • Location: Norfolk

Posted 09 October 2013 - 06:49 PM

D you know the history of the car?


Unfortunately no, all I know is she sat in a barn for 20 years after being rallied ( quite hard by the looks of it, she's definitely been in the air a lot , with some big bumpy landings as the floorpans was an interesting shape , and she's quite possiblly been on her roof a few times to, judging by roof, a pillars etc. I do have some pictures of her when she was in the barn, but I'm struggling to get them in the right format to post up on here

She defiantly isn't an original example with all mots service receipts etc going back, all I got is the v5, and correct fe and body plates to the best of my knowledge. However, that was never important to me for my project. My main goal was to return a classic car to the road, and be proud of the fact that I did it with my own hands ( and access to a very helpfull mini forum of course!). I plan to keep this car long term, in fact forever hopefully. I plan for my 2 young boys to learn to drive in her, and for her to be part of my family for a long time to come.

I would love to know the history of it though, but I don't think I will ever find out for sure....

But hey ho, it's still good lol!

#18 ToM 2012

ToM 2012

    Up Into Fourth

  • Members
  • PipPipPipPipPipPipPipPipPip
  • 4,066 posts
  • Location: halesowen

Posted 09 October 2013 - 06:54 PM

it is nice to see them standard and as original as possible but some times its nice to see something different. mines not that bad mate just a few patches to fill  O_O  :lol: at least you have the tunnel in place and will help you line the floor pans up better and to work of. you going to malvern mini show sunday? and there is one on the week after to. 


#19 ToM 2012

ToM 2012

    Up Into Fourth

  • Members
  • PipPipPipPipPipPipPipPipPip
  • 4,066 posts
  • Location: halesowen

Posted 09 October 2013 - 06:56 PM

if you want history go to the post office and ask for the v62 form i think its that and fill in and put a £5 postal order in and ask for the history on the car and they will send you the history back of so much what they have on there records. i just got mine back and the first owner was a doctor from wolverhampton 


#20 Minilegs

Minilegs

    Mini Mad

  • Members
  • PipPipPipPip
  • 242 posts
  • Location: Norfolk

Posted 09 October 2013 - 07:22 PM

Interior time.

First things first, get rid of that dash!!!

Didn't have a clue what I was gonna find behind it , but I knew whatever was back there wouldn't be pretty , as I wasn't disappointed !!!

IMG_0527.jpg

IMG_0526.jpg

As you can see, lots of chop chop to move the heater box, self tappers and welds everywhere, and pretty much most wires in the loom spliced into and frigged about with.. So snip snip time again for the wires


IMG_0558.jpg

IMG_0545.jpg

IMG_0541.jpg

The rest of the interior strip was quite quick, as there wasn't much there and even the carpets where out of someone's front room by the looks of it !,,

Nothing wrong with these floor pans is there?

IMG_0561.jpg

The crossmember has been seriously beefed up with some steel and an arc welder. again not pretty. Not sure why, perhaps for the handbrake of even a cup holder ?lol

IMG_0524.jpg

IMG_0525.jpg

Spiders taking the mick!

IMG_0591.jpg

Boot next. She had a lovely rear window wiper , bastardised to the parcel shelf and wheel arch pretty much.

IMG_0501.jpg

IMG_0502.jpg

IMG_0503.jpg

Soon ripped it all out, but I forgot to take a photo of it out, but nothing interesting really

#21 Minilegs

Minilegs

    Mini Mad

  • Members
  • PipPipPipPip
  • 242 posts
  • Location: Norfolk

Posted 09 October 2013 - 07:28 PM

it is nice to see them standard and as original as possible but some times its nice to see something different. mines not that bad mate just a few patches to fill  O_O  :lol: at least you have the tunnel in place and will help you line the floor pans up better and to work of. you going to malvern mini show sunday? and there is one on the week after to.

Can't make this weekend, as it's my eldest lads b day and he want to go to the national car museum as a treat. He's as mad a bout cars as me lol!

I am aiming for a pretty standard exterior I'm pretty sure on that, but it hopefully will be accessorised with age sympathic mods,spots n stuff


Oooooo and centre tunnel was gonna stay in, but I decided it would be easier to work on on my bench, so I cut it out lol, as it was severely bent length ways and needed some straightening !


if you want history go to the post office and ask for the v62 form i think its that and fill in and put a £5 postal order in and ask for the history on the car and they will send you the history back of so much what they have on there records. i just got mine back and the first owner was a doctor from wolverhampton

.

Never knew that mate, that's a great bit of info , I will have a go and see what that troughs up :-)

Edited by Minilegs, 09 October 2013 - 07:32 PM.


#22 ToM 2012

ToM 2012

    Up Into Fourth

  • Members
  • PipPipPipPipPipPipPipPipPip
  • 4,066 posts
  • Location: halesowen

Posted 09 October 2013 - 08:05 PM

i think the right decision would of been leave it in and put you new floor to it and then take the tunnel out after and weld your new one in but if you can weld your new one in now then put your floors to it and etc that would be best mr cliff will give you hes best thoughts on this. i think if you get a grinding disk on that metal and see how good your metal is as i dont think it will look to bad once you start cleaning it up. ile be awaiting for you next update.  :highfive:  cheers tom 


#23 Minilegs

Minilegs

    Mini Mad

  • Members
  • PipPipPipPip
  • 242 posts
  • Location: Norfolk

Posted 09 October 2013 - 08:16 PM

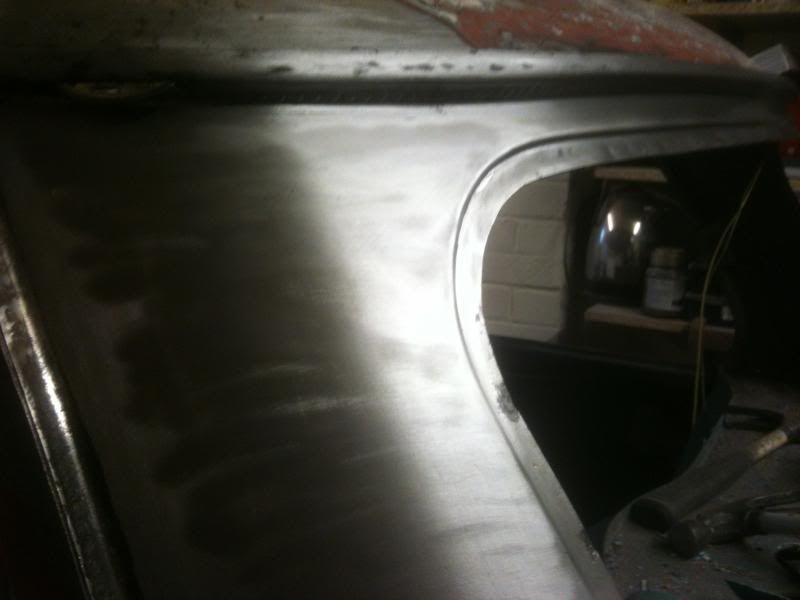
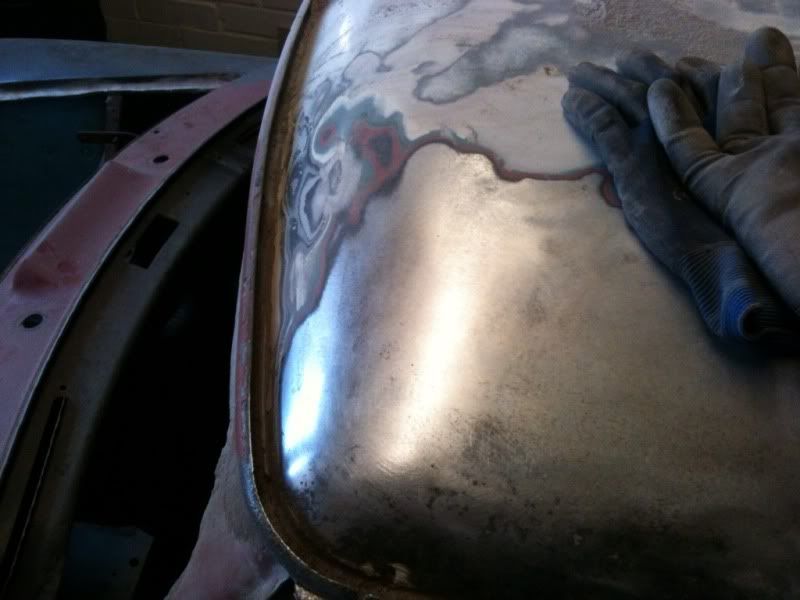
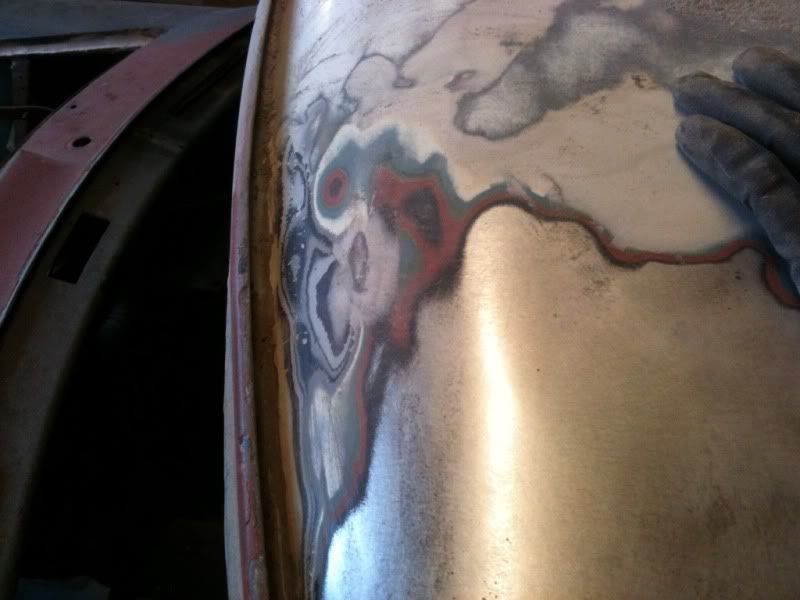
Now most of the easy bits were done, it was time to see how far all the rusty stuff went.

Main tools for removal of paint and filler, electric da, wire brushes for my drill and and chisel and hammer for the large sections of filler!!!

Wanted to start with some smile factor, so picked some areas to clean up which I hoped would be ok.

Upper rear window area

IMG_0614.jpg

IMG_0613-Copy.jpg

Really happy with the metal under here :-)

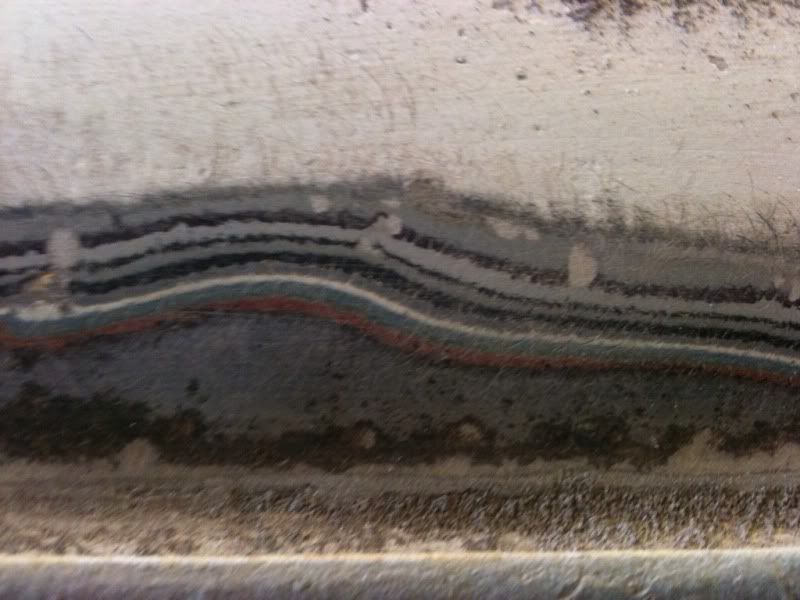
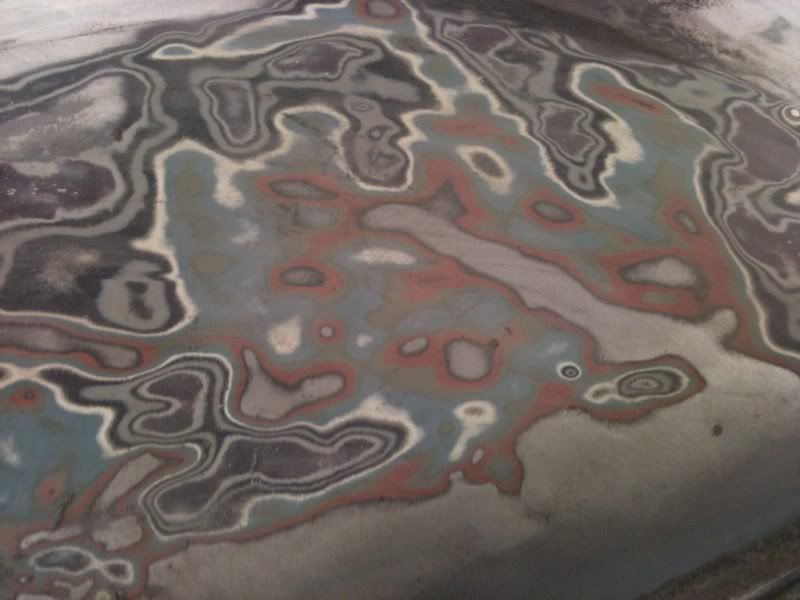
Roof next

Obviously a few colour changes over the years :-)

346f6bae.jpg

The front corners of the roof had some rust and there was some pin pricks visible in some places. Can't really see on the picture though

98a7b3fa.jpg

1f4fc10a.jpg

Patchwork quilt anyone ?

86430d50.jpg

Generally the roof is solid, but it has got a LOT of dents in it, and a big one that has been pushed out badly. When my panel beating skills are up to scratch, I will be having a go at straightening it.

Next a look at the rear quarters, which turned out to be pretty good considering. Loŵer few inches need replacing, and repairs to lower rear quarter light section are required, but pretty happy with what was underneath :-)

IMG_0590.jpg

Other side was in similar condition , with a little bit more work required around the latch plate mounting area, as the was a half tidy repair been done there, but it wasn't quite right. No pic of that sorry!

#24 ToM 2012

ToM 2012

    Up Into Fourth

  • Members
  • PipPipPipPipPipPipPipPipPip
  • 4,066 posts
  • Location: halesowen

Posted 09 October 2013 - 08:24 PM

looks good! a lot more solid then mine. cheers tom 


#25 Minilegs

Minilegs

    Mini Mad

  • Members
  • PipPipPipPip
  • 242 posts
  • Location: Norfolk

Posted 09 October 2013 - 08:27 PM

i think the right decision would of been leave it in and put you new floor to it and then take the tunnel out after and weld your new one in but if you can weld your new one in now then put your floors to it and etc that would be best mr cliff will give you hes best thoughts on this. i think if you get a grinding disk on that metal and see how good your metal is as i dont think it will look to bad once you start cleaning it up. ile be awaiting for you next update.  :highfive:  cheers tom


I spend a lot of time pondering this one to be honest Tom, considering what were my options. My main prob was I had to replace the main crossmember also, as it was shot and modified to be beyond saving , so it had to come out. Also as the car was bent in all the wrong places, I had no faith that I could use existing panels as reference points , as they were all misshaped and lining up proved impossible, no matter what I tried, so I made a rather big decision at that point, which I am probably gonna get battered for, but at the time and in my mind it seemed the only way...

I was going to weld braces in, but I didn't see the point of holding things in the wrong place, and I needed to be able to manipulate things back to where I deemed they should go :-) after deciding not to brace it, I then pretty much cut the whole bottom of the car off.......

Fingers crossed, it's all good so far :-)

#26 Minilegs

Minilegs

    Mini Mad

  • Members
  • PipPipPipPip
  • 242 posts
  • Location: Norfolk

Posted 09 October 2013 - 08:32 PM

looks good! a lot more solid then mine. cheers tom


Thanks Tom, she was pretty solid to be honest in a lot of places, in some cases to solid! The boot for example had been plated many many times, record amount I found in the boot was 7 plates thick, each with a nice rust layer between etc. the weight of the boot nearly killed me when I cut it out!

#27 ToM 2012

ToM 2012

    Up Into Fourth

  • Members
  • PipPipPipPipPipPipPipPipPip
  • 4,066 posts
  • Location: halesowen

Posted 09 October 2013 - 08:43 PM

both in the same boat mate and will keep an eye out and hopefully can get some good ideas of you just dont sell it as i have wanted to sell mine 3 times as i was looking at it as all the time and money i need to spend on it but in the end and i have been told this by other members just do a section at a time and it will all come together. i have never done welding and this work before so abit hard for atm but i seem to be picking it up and enjoying it more cheers tom 


Edited by ToM 2012, 09 October 2013 - 08:44 PM.


#28 Minilegs

Minilegs

    Mini Mad

  • Members
  • PipPipPipPip
  • 242 posts
  • Location: Norfolk

Posted 09 October 2013 - 08:48 PM

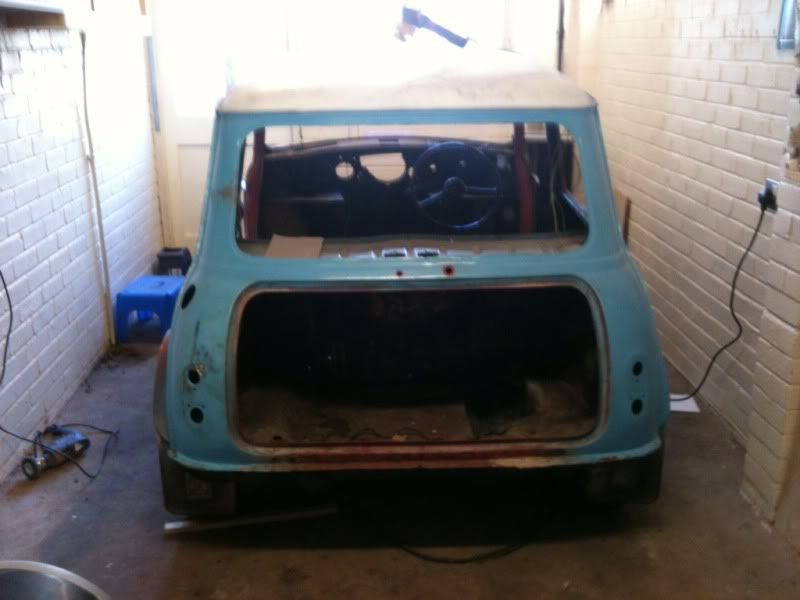
Time to have a good look at what is under all the filler on the back panel .

She looked like this before I started, not great, but not bad in fairness

0f7d0b2c.jpg

I was already aware that this car mad been modified to take mk3 rear lights, and then modified back to mk1 , as it was apparent from inside the boot.

DA time again

Nice couple of holes to start with. After a bit of research, it would appear that this car had a load extender / luggage rack thing added at some point. (technical description I know ) I did do a little research at the time, and found that these holes did suit a certain add on for the boot. But I looked at that last year, and this is this year and my memory is rubbish at the best of times!

IMG_0607.jpg

IMG_0608.jpg


Lower section of the rear panel is fubarred, and you can see all the holes put in for the rear wiper. Also there was a bad dent around the fuel cap area, but that beat out pretty easy. The lower rear window section is also very ropey, and I will need to fabricate a repair panel for that as I haven't seen anything available just to do this specific area,

IMG_0667.jpg

Rubbish photo sorry.

#29 Minilegs

Minilegs

    Mini Mad

  • Members
  • PipPipPipPip
  • 242 posts
  • Location: Norfolk

Posted 09 October 2013 - 08:56 PM

both in the same boat mate and will keep an eye out and hopefully can get some good ideas of you just dont sell it as i have wanted to sell mine 3 times as i was looking at it as all the time and money i need to spend on it but in the end and i have been told this by other members just do a section at a time and it will all come together. i have never done welding and this work before so abit hard for atm but i seem to be picking it up and enjoying it more cheers tom

two heads are deffo better than one!!!!! I have done a little bit of welding before, but not on a great scale. I did a year course at college when I was younger, but that only covered stick and gas welding. We did briefing do some brazing, soldering, spot welding etc also, so got a brief insight into things regarding what is need for a good weld ie penetration etc. we briefly did mig, but that was still new when I was at college and sets were expensive I guess so there was only one and rarely used lol. They also had a tig set from what I remember, but looking back it was a very basic scratch set, as I distinctly remember there was no amp control pedal for it.

I do the very occasional weld at work, but its usually just bits of box section with a scabby old ac inverter stick set.

So I should be able to weld, but often in practise that doesn't happen lol!!!!

I find the best thing with welding is you can grind it off and start again if ya ain't happy:-)

#30 ToM 2012

ToM 2012

    Up Into Fourth

  • Members
  • PipPipPipPipPipPipPipPipPip
  • 4,066 posts
  • Location: halesowen

Posted 09 October 2013 - 09:01 PM

wow that da sander does a good job. as for the lower window on mine i will be drilling the spot welds out and cut the rust out level all the way accross and then tack in a new piece all the way across and then reshape with the angle grinder and then redo your spotwelds job done. might have to get me a da sander they look really good cheers tom 


2 user(s) are reading this topic

0 members, 2 guests, 0 anonymous users