My Mk1 Resto , My First Ever Project......... Wish Me Luck!
#1
Posted 08 October 2013 - 11:13 PM
There really are some truly dedicated people on here putting a lot of effort into keeping a classic alive. I commend you all, and all your hard work!
After reading through toms great mk1 resto tonight, it has spurred me on to get my back side in gear and share with you all my little ongoing project its not gonna be a quick one though, as I work full time and also have a young family, so finding time to work on her is tricky. However, I do get in there now and then, so progress is slow but steady so far.
like I say, I started this project earlier last year, and have taken quite a few photos throughout . However, my camera skills are lacking at the best of times so bear with me please hehe. I won't be able to get this thread up to date in one evening , so I will try and do it as soon as I can .
Like I say, roll back the clock to spring last year, and I got my hands on my first ever car project.
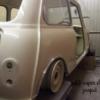
When I went to look at her
As you can see from the pictures, there was no doubt it needed a lot of work, but I wanted a challenge, and just love the mk1's, so I done the deal !
The guy I bought it from, intended to restore it his self, but I'm not sure if funds/skills were available to him for the amount that needed doing, so he decided to sell. And judging by what work he had completed on the car, he made the right decision. but he did supply me with some pictures of when he got it. It was it a barn apparently for twenty years in Yorkshire, (can't remember exactly where) where it had been left after being rallied. The engine had been removed, ( turbo lump by looks of bulkhead) and she was left to rot :-(
I have the pictures somewhere, ,,,,,,,,,,,,,but I will need to dig deeper to find them lol (I did find these ones though Tom so Im getting there!)
Obviously it was a rolling shell, so I had to get it home. Luckily, the guy I bought it from had a very large van, so it went in the back of that and got rolled out again at mine. And I forgot to take a picture of it! I was so caught up in the fact it was here as I was like a kid at Christmas!!!
Safely in her new home for the next few years I reckon
She's a 1961 Morris, and it's my challenge to get her back onto the road!
#2
Posted 08 October 2013 - 11:22 PM
great project ! that dash is propper retro good luck !
#3
Posted 08 October 2013 - 11:23 PM
Good luck :)
#4
Posted 08 October 2013 - 11:25 PM
Luckily, that dash is long gone now, as it was making my eyes bleed every time I looked at it!! Did get some nice gauges in there though so it ain't all bad
#5
Posted 08 October 2013 - 11:28 PM
I need all the luck I can get so thanks
#6
Posted 08 October 2013 - 11:29 PM
whats your plans for it ? standard ?
#7
Posted 08 October 2013 - 11:54 PM
whats your plans for it ? standard ?
Nothing's set in stone yet, and ideas are constantly changing, but I do want to try and keep it as original as possibly, especially from the outside. However, I am a complete noob to the mini world really, and I am learning and discovering more each day, which all adds to the confusion of what I want at the end! My main aim at the moment is the shell, and getting that back to original as possible. My theory is, start from scratch, and I can always modify later if I need to . If that makes sense!
#8
Posted 09 October 2013 - 12:14 AM
#9
Posted 09 October 2013 - 12:20 AM
Engine bay to start with.
The wiring loom in this car has seen lots of splicing and bodges, so executive decision, snip snip. I plan to look into making my own loom as wiring schematics seem readily available, but I will have to research a bit as ready made looms seem pretty fair price wise from a fleeting glance. Anyone's input on that would be great !
Once wiring loom was out, reservoir tanks and pipes removed
Starting to be able to see things in there a bit better now
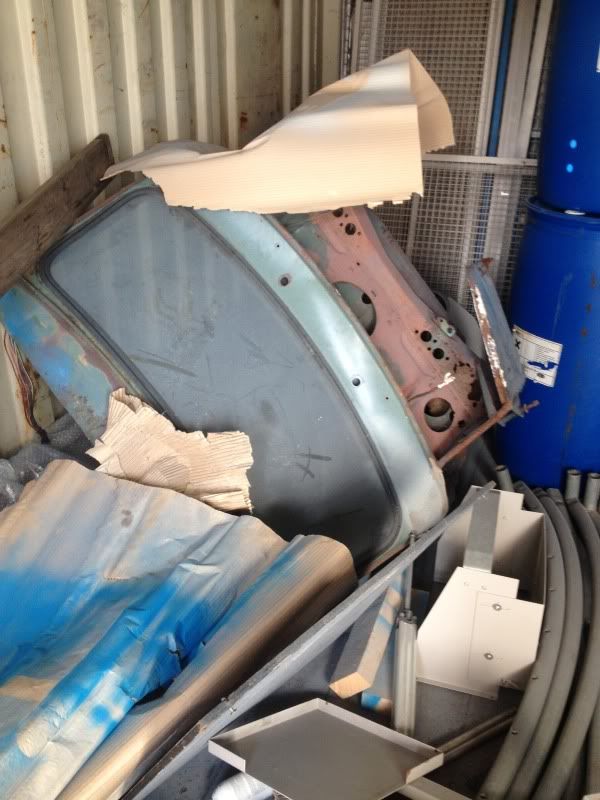
The bulkhead really has been attacked over the years. With cut outs for turbo boxes , various extra pipes, cables and even airflow from what I can see, its going to have a lot of repair work needed . I have edged my bets on this one, and managed to get hold of a very rotten early 1960 woody for peanuts, and there are a few parts on there that I may be able to use, such as lower front shelf,a pillars and firewall. Luckily these parts seem to be in fairly good condition on the woody, so I've cut the front end off, and dry stored it in a container at work. (I've got a nice boss )
Now time to move on to the cabin........
Edited by Minilegs, 09 October 2013 - 12:22 AM.
#10
Posted 09 October 2013 - 12:24 AM
Sounds like a great plan to me ! Everyone's got to start some where you've come to the right place to learn
Hopefully, I think I really am gonna need a lot of help on this one!!
#11
Posted 09 October 2013 - 12:40 AM
Hopefully, I think I really am gonna need a lot of help on this one!!Sounds like a great plan to me ! Everyone's got to start some where you've come to the right place to learn
Anything can be fixed it's just metal at the end of the day
#12
Posted 09 October 2013 - 04:45 AM
got any pics of that woody, sounds interesting :)
freaker
#13
Posted 09 October 2013 - 04:40 PM
looks cracking mate whats your plans back to original? im loving that little air scoop on the scuttle never seen one like that before. is there much rust on the floor panels like mine? cheers tom
#14
Posted 09 October 2013 - 06:11 PM
#15
Posted 09 October 2013 - 06:26 PM
Lol , no sorry, but I have a picture of what's left of the woody though..........got any pics of that woody, sounds interesting :)
freaker
Edited by Minilegs, 10 October 2013 - 08:56 PM.
1 user(s) are reading this topic
0 members, 1 guests, 0 anonymous users