Jump to content


Photo
- - - - -

My '72 998 Canadian Mini Rebuild


  • Please log in to reply
51 replies to this topic

#31 roughneckin

roughneckin

    Mini Mad

  • Noobies
  • PipPipPipPip
  • 109 posts
  • Location: Calgary

Posted 31 March 2015 - 04:18 AM

Thanks guys!
We've got a bit more room to move over in Canada so everyone like big garages for some reason. This one has heat now too so even better than ever!! Keep it at a mild 45 which keeps the chill off when it's 0 outside or worse. It also keeps all the paint cans and such from getting fubarred!!!

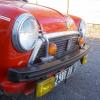
Onto the car again...

9D140EE4-D17D-4D4D-9647-70D1D716697D_zps
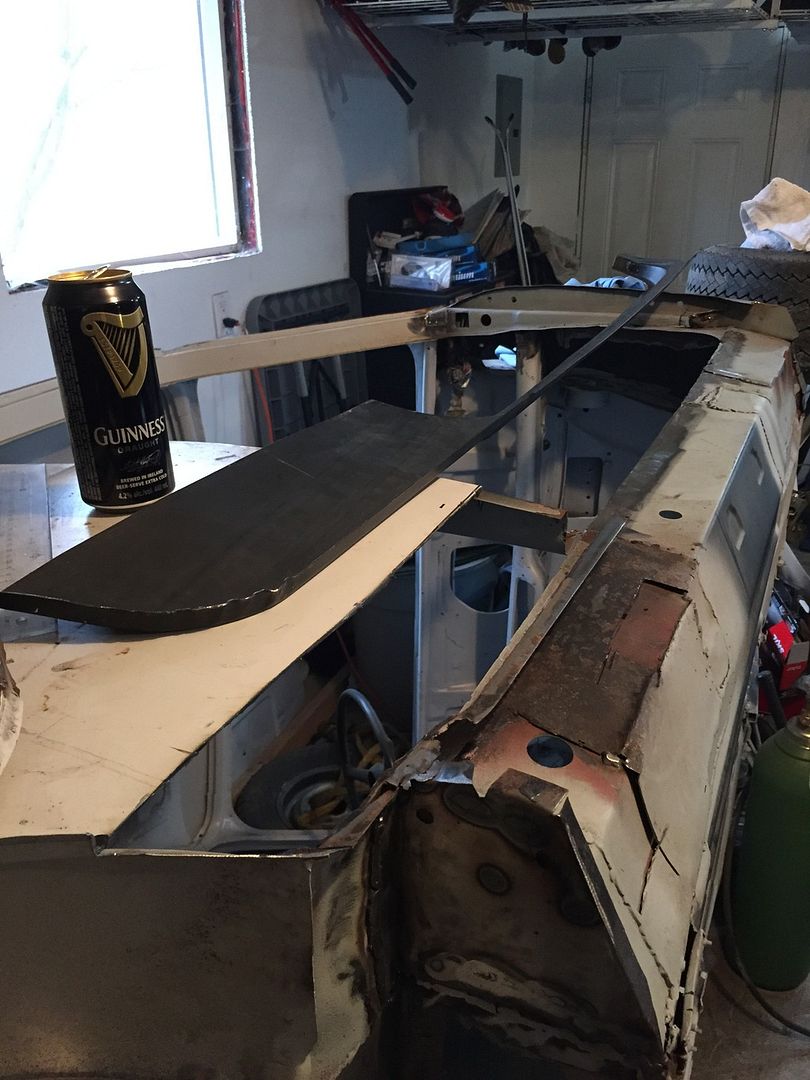
Pulled off some old rust and got the sill and rear bottom quarter panel ready for replacement. And some Guinness just because

Then set up some practice pieces for doing up some plug welds. The last ones I did were terrible and had to pick up a new piece. This is the old one!! I didn't take any pics of the finished product but figured they were good enough!
6FC8B399-EE92-43A9-A70E-2EB5C6555141_zps

Then off to doing it on the actual piece I guess....
5D0E92C6-888F-4492-A0AE-AE615EAEDD8D_zps
Not too shabby for first go and a bit of the grinding on the bottom of the pic too worked out ok.
Then off to the body welding...not as good
C3FEFFF6-1B9E-4A1C-A859-129B235914EB_zps
It will require some bondo but it will work out once the grinder has a good go at it. Also need a bit of grinding on the inner sill joints too.
DC6E8FB6-CE52-4832-84F0-5203C3A6D58D_zps
This will take time but it will hopefully only get better on each go around.

#32 roughneckin

roughneckin

    Mini Mad

  • Noobies
  • PipPipPipPip
  • 109 posts
  • Location: Calgary

Posted 08 September 2015 - 03:34 AM

Wow has it been a while since my last post. This kid thing takes up a lot of time but well worth it. I figure if the mini is ready by the time the little one can drive I will be in a good place.

On to the other little one... Found some time this weekend to say bugger it and put on my own captive nuts for the front of the real subframe. I grabbed onto it a few different ways and reefed and tugged and it seems to be pretty solid. I'm cheap and this seemed to be the best way to get it done. It follows my cheap heel board fix too.
EFC6BC27-74F5-4EBA-8BC5-13A3C5419763_zps
Got some engine parts painted up too in between my fiddling and such.
8F22A3D4-4E95-4780-AD65-2781AB72867B_zps

Then onto the never ending task of prepping the sills for plug welds. Always my favourite task.... Really it is honest.
8D9E320C-BB1B-4D2E-A937-6FF35AEB63BA_zps
Half done and then ran into some more fiddling. Lots of this to be done it seems when matching up the M Machine parts to the genuine stuff.
A49D4740-1010-4829-A956-A03DF7E32BEA_zps
And
114F37E9-B828-4800-B399-2FC5A73CAF42_zps
Then complete! Just need to finish up the grinding on the top bit
36E76EBF-C9DD-49B1-BCBD-517F20588D4E_zps
I know the drain bits aren't lined up but that's what I get with leftover parts from the last owner. No show pony here just trying to make it look decent and get it running.
Feels good to be working on her again. I do need to remember to wear better footwear though. I burnt my toes with some hot bits flying all over that made there way through my shoes. Dang that hurts.
Hoping to be updating this a bit more now.

Edited by roughneckin, 08 September 2015 - 03:37 AM.


#33 roughneckin

roughneckin

    Mini Mad

  • Noobies
  • PipPipPipPip
  • 109 posts
  • Location: Calgary

Posted 10 September 2015 - 02:56 AM

Got a bit more grinding done today but tried something new. Hit the plug welds with a cutting disc on an 90 degree angle. It worked fairly well and kept 99% of the original metal intact. Good thing really considering I put so much weld on it usually I rub it right now to nothing.
79F49448-6E44-4BF2-B454-0E3BB231D50B_zps
Have to do a bit more but dang it worked well for me.

#34 roughneckin

roughneckin

    Mini Mad

  • Noobies
  • PipPipPipPip
  • 109 posts
  • Location: Calgary

Posted 15 September 2015 - 04:37 AM

So got back out there and ground down some more plug welds at the rear end of the sill. Turned up quite nice for me.
E0793AC1-DCF0-43E9-9975-9D4A93DD5CF8_zps
Have a bit more fiddling to do to clean it up but it will come along.

And a few spots now that need to be filled and cleaned up.
One near the rear subframe and sill joint...
9C9199B7-0F11-4D9C-B762-91C520809ADB_zps
And one up underneath as well
DAA85340-4FAD-4F77-802C-8434DBFEC127_zps
And a bit more on the edge with the new knowledge from one of BenOs posts I'm going to fix these spots with a copper backer and fill them with weld but not till I get some more time.
FB168BF5-8082-468C-A76F-B22E93F94F7B_zps
Booyah! Loving this again!

#35 roughneckin

roughneckin

    Mini Mad

  • Noobies
  • PipPipPipPip
  • 109 posts
  • Location: Calgary

Posted 11 March 2016 - 05:55 AM

Got some time out in the garage again and made some big moves on the car. I sealed up all the fiddly holes along the RH side and decided it was time to see her back on the right angle for a bit so I can start working on attaching the new half wings and rear boot work that was thrown together like a mad man with a rivet gun.

So here she is right side up
B627255F-6CAE-4797-976F-CAC57B5B3C6B_zps
I picked up some free pallets at the nearby industrial park to set it on while I tore the front subframe out for rebuild.
3D8050E7-2363-4185-96EB-EDFEA168E7B0_zps
Then it was onto fixing my pop rivet good times in the boot
5C7A1C90-7A15-4699-9998-E8031A59C182_zps
But first cutting the rot from the boot lid opening area
AE8AB3A2-A689-4C6C-A5A1-80A760C0D5BF_zps
And then as the guy before had seam welded or something along those lines on the valance it took a bit of work to get it off without destroying it in the process
8F100BEF-8BFD-4614-AF9E-B8ADC6E4BCDA_zps
4710D772-C2EF-479C-B2C0-5C3E2623746C_zps
Good times but got it off and can salvage it I beleive. Hoping to remove those pop rivet areas this week before heading north again to the oil patch. Gotta take the work when it's there these days. Rough being in this industry right now. Hope any other oil patch folks are getting by these days.

#36 lawrence

lawrence

    One Carb Or Two?

  • Members
  • PipPipPipPipPipPipPip
  • 1,340 posts

Posted 11 March 2016 - 10:54 PM

Nice to see some work being done again. Oil prices are said to be going no lower so fingers crossed your work will pick up
Hope to see more work soon :)
L

#37 roughneckin

roughneckin

    Mini Mad

  • Noobies
  • PipPipPipPip
  • 109 posts
  • Location: Calgary

Posted 26 April 2016 - 04:25 AM

Hey Lawrence thanks for the good wishes. It's a tough go out there these days but there is a bit to scoop up.
Got back from the north country a week ago and fired up on the mini again but not too much.


In a failed attempt to remove the nuts on the ball joints I destroyed another ratchet.
18ABB11C-C66F-455A-9034-06B9A6EA821C_zps

Pulled out my good one finall and all came undone but haven't figured out how to split the joints.
892057B9-2DA8-4E14-B960-5D6A171B14F0_zps

I assume with a pickle fork but usually I just smash it a few times and she lets go but no dice. Might be heading to Princess Auto tomorrow to see if they have a cheap one lying around.

#38 roughneckin

roughneckin

    Mini Mad

  • Noobies
  • PipPipPipPip
  • 109 posts
  • Location: Calgary

Posted 27 April 2016 - 12:37 AM

Got out to the garage while the little one was napping today. It's nice working on her while I can open the overhead door and get some natural light it. It really makes the primer pop. 😜

Anyways on to the boot. Removed the crappy sections of pop rivet welding in the boot corners first.
5BF2C7EC-A2AE-46A8-AAA0-327D68BB0489_zps

Not sure if this is normal or not...I assume not but there is only 4-5 layers of metal and gasket maker on the boot corners.
4F95187D-5B16-466D-B7E7-4024989B33BF_zps
It just adds to the learning curve really.

And then cut the boot lid edge and fit it. Realized I've ran out of welding gas though so it will have to stay like this for now.
BAD33E3B-86ED-479C-8FDB-8864823C2D6B_zps

I have a small piece that I will cut down to to fill the boot floor but no sense in it yet I figure without the gas. Hopefully I won't lose too much of the form that way.
92E54E70-B0AE-4150-B986-585AD1BED844_zps

#39 roughneckin

roughneckin

    Mini Mad

  • Noobies
  • PipPipPipPip
  • 109 posts
  • Location: Calgary

Posted 28 April 2019 - 11:15 PM

Well it's definitely been some time since my last update.  After all the Photobucket issues I kinda stopped posting but realized it's been repaired so why not get back on it.  Also, my kids are finally of an age I don't have to keep both eyes on them so it makes doing some work easier.  


I got a pile done on my front end, replaced all brake pads, rebuilt the drums and redid the ball joints.  This was quite the endeavor, but happy to have this place as a resource.  Everything related to the front end, including the subframe, has been taken apart, ground down and then repainted, but no photos right now. 


What I got done recently was rebuild the rear end and boot.  Got the rear valance put on today.  A lot of little rust spots I worked around as I am worried about moving too much of the frame support holes.


1B4E8796-89A2-4392-B8E9-BA8ACF564F45_zps


048D5499-AFE1-4266-8AD6-37C0E9776AE0_zps


Hoping to spend a bit more time on it now that it is summer.  Decided a couple years ago to upgrad to a degree from my diploma and it has taken a beating on this project.  hopefully it can be completed before my daughter is old enough to drive...


#40 dasupersprint

dasupersprint

    One Carb Or Two?

  • Members
  • PipPipPipPipPipPipPip
  • 848 posts

Posted 01 May 2019 - 06:33 PM

Just found your project, and it seems you go through the same challenges as me. Kids, new house, and no time, am I right?


Good luck!


#41 roughneckin

roughneckin

    Mini Mad

  • Noobies
  • PipPipPipPip
  • 109 posts
  • Location: Calgary

Posted 16 June 2020 - 03:23 AM

Just found your project, and it seems you go through the same challenges as me. Kids, new house, and no time, am I right?


Good luck!

Definitely.  It slows the process down a lot, but this COVID has pushed my mini into overdrive.  Being laid off once more and then proceeding to break a vertebrae, although has slowed the process I've found easier things to do that still need to be done.  One big large update coming, once I work out Imgur...


#42 roughneckin

roughneckin

    Mini Mad

  • Noobies
  • PipPipPipPip
  • 109 posts
  • Location: Calgary

Posted 16 June 2020 - 03:55 PM

Oh how time flies...


Here we are again and acually cracking along now.


Flipped the car on its side to hopefully maintain some sort of structural integrity and started cutting cancer out...


uLHXU4d.jpg

and along the front


IBgPNzQ.jpg

Made a replacement piece


lSD7mrs.jpg

welded up a new floorboard...

xJ5GWDu.jpg

and as the rear heelboard was blown out I determined it best to repair it with a proper piece this round, installed the rear subby and lined it all up.

FRZXbwC.jpg


#43 roughneckin

roughneckin

    Mini Mad

  • Noobies
  • PipPipPipPip
  • 109 posts
  • Location: Calgary

Posted 16 June 2020 - 04:04 PM

Then got caught up in an accident with a tree and broke my back so had to do things that were a little less strenuous for a bit...this is where the bondo comes into play!!


JxLA7Cf.jpg

Had a nice sharp dent I just couldn't get out of the boot so we did a bit of filling


z8iqhiE.jpg

Ol038J8.jpg

did the hood (bonnet) too, which was an absolute nightmare.  Not sure if a Samsquanch was sitting on it or one of our random crazy hailstorms but it needed some work.  I pounded out what I could get it to then used some filler.  If it fails I will get a new one, but for now we will run what we brung...


KqSFEOx.jpg

tXw8jfD.jpg

and then some epoxy primer and high build after


2Y7RKp9.jpg

c1pPitU.jpg


#44 roughneckin

roughneckin

    Mini Mad

  • Noobies
  • PipPipPipPip
  • 109 posts
  • Location: Calgary

Posted 16 June 2020 - 04:11 PM

Then onto doing some work on the front subby...


Ripped out the tie rods which took some work due to old corrosion and that one was bent at the front point.


A4bZDj3.jpg

gZM0J5e.jpg

Going to replace it I believe with the adjustable ones.


Then ripped out the lower arm to replace the rubber.  One came out beautifully the second not so much.


oNsWcGV.jpg

Thinking that will be replaced too as the sleeves just wont come off.  Possibly grind it down?  Thinking it might be off kilter then...


Finally finished the rebuild on the steering rack too, filled it up with some 75-140 gear oil.


lECGGOt.jpg

Now to convince the wife we need more car parts imported... :gimme:


Hope everyone is doing well out there.


#45 roughneckin

roughneckin

    Mini Mad

  • Noobies
  • PipPipPipPip
  • 109 posts
  • Location: Calgary

Posted 16 June 2020 - 04:13 PM

Also, just because cleaning was fairly easy on the back I washed down, scrubbed and painted the engine too.


Put it on a moving dolly for now to get it off the ground and easier to move around too.


i5gpDf7.jpg

Have to clean up the runs but the tape just wouldn't stick.


1 user(s) are reading this topic

0 members, 1 guests, 0 anonymous users