
I suppose if you could get a clubby estate ribbed roof, and trimmed out the centres from both the smooth roof, and the clubby roof, you could make it good again as repairing that roof will be tricky

Morris Mini Minor Traveller (Louisa)
Started by
leaky
, Jul 23 2013 02:39 PM
131 replies to this topic
#47
: post #47")
leaky
-
- TMF+ Member
-

- 6,890 posts
Iv never hit a penguin in the face with a casserole
- Location: Costa Del Tadley
- Local Club: Basingstoke Mini Club
Posted 28 July 2013 - 07:21 PM
Roof is being delt with! Have spoken to someone about a replacement!
#48
GusRox
-

- Members
-
- 163 posts
Mini Mad
Posted 29 July 2013 - 10:28 AM
What's the state of the wood, leaky? Is much salvageable?
#49
leaky
-
- TMF+ Member
-
- 6,890 posts
Iv never hit a penguin in the face with a casserole
- Location: Costa Del Tadley
- Local Club: Basingstoke Mini Club
Posted 29 July 2013 - 10:33 AM
Some of it at the back is not too bad although I think it may all be riddled with wood worm. I think the easiest option will be to just go with a full new set. Long way off that point yet though. We are gonna start a lost of bits we need and in an order so we know when to buy stuff but also what else we need incase I find some bits cheap at an auto jumble. I'm quite good at finding bargains!
#50
GusRox
-
- Members
-
- 163 posts
Mini Mad
Posted 29 July 2013 - 10:49 AM
Some of it at the back is not too bad although I think it may all be riddled with wood worm. I think the easiest option will be to just go with a full new set. Long way off that point yet though. We are gonna start a lost of bits we need and in an order so we know when to buy stuff but also what else we need incase I find some bits cheap at an auto jumble. I'm quite good at finding bargains!
What I'd do with the wood sections is get that work in progress as soon as you can - it will take some time. Get them removed asap (especially in this weather so the air can get all around the wood and dry it a bit - you'll have a better idea of which bits are salvageable, and stops any more rust where the wet wood is pressing against the metal) However, I'd approach a local carpenter / chippy. If you use the ones that are on the car as a reference for the woodworker, it'll make things so much easier. I've seen the prices of Traveller wood, and I reckon you could get a proper custom job for Louisa done more cheaply.
Most of the shapes are pretty simple, and would just take a wood thicknesser, a bit of planing, and a little shaping. For a proper carpenter / woodworker, the work is pretty straightforward. The most complicated being the arches - but woodworkers usually have equipment for that stuff..
Just had a look around, and a full set of Traveller wood is £1100 +VAT. Worth ringing around a few woodworkers and see if you can get some quotes. :)
Hope that helps, and good luck!
#51
leaky
-
- TMF+ Member
-
- 6,890 posts
Iv never hit a penguin in the face with a casserole
- Location: Costa Del Tadley
- Local Club: Basingstoke Mini Club
Posted 29 July 2013 - 11:15 AM
The chippy up the road from me used to have a mini sidewalk as it goes so it may well just be something he is up for doing. I'm off on holiday wednesday this week for a week and when I get home my dad leaves to go on his holiday a few days after so I dont think much will be done for a few weeks yet. Removing the wood will be the first thing to do though.
#52
Hunter2
-

- Members
-
- 211 posts
Mini Mad
- Location: Vancouver
- Local Club: Vancouver Mini Club
Posted 11 August 2013 - 04:04 PM
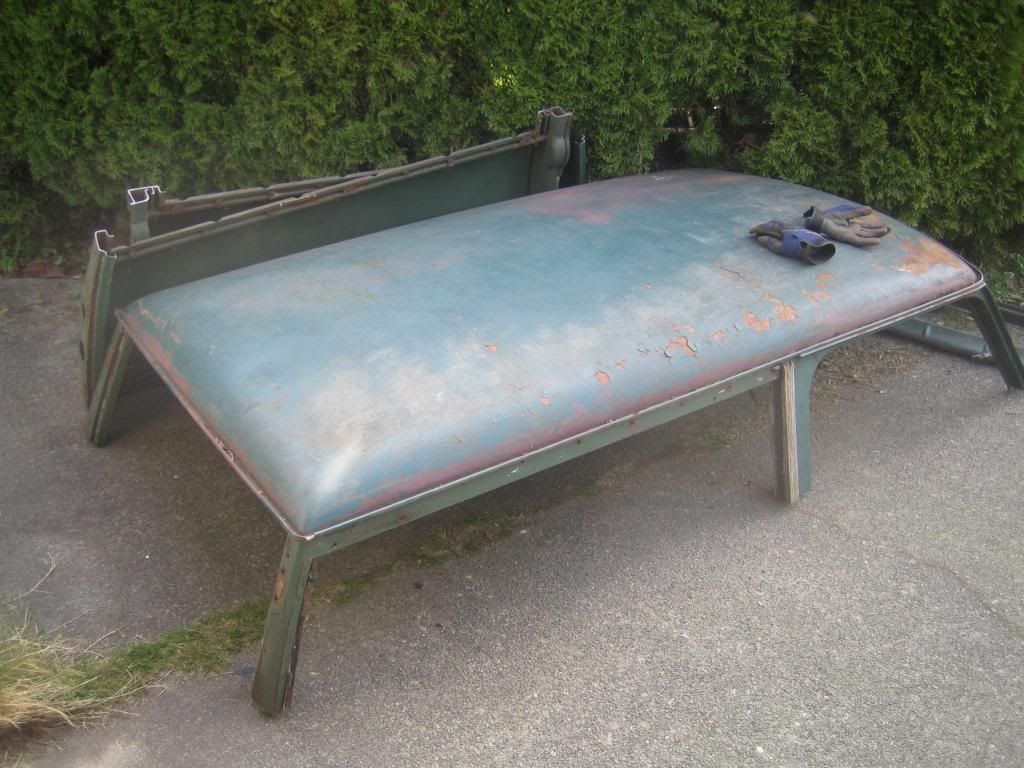
Looks like a Traveller I picked up earlier this year...GOOD roof...NO floors, sills or doorsteps. Too bad you are across a largish pond. Roof is available for a smooth top.
#53
java gt
-

- Just Joined
-
- 120 posts
Mini Mad
- Local Club: Irish Mini Owners Club
Posted 11 August 2013 - 09:38 PM
Well worth saving and I like the idea of period mods as well.I managed to pick up a roof for my 61 van when I was restoring it a couple of years ago and not really a difficult job to change it.Just lots of grinding.
#54
Shep76S
-

- TMF+ Member
-
- 543 posts
Super Mini Mad
- Location: Kent
- Local Club: L&SMOC
Posted 12 August 2013 - 05:34 AM
Sweet, scary, but sweet!
#55
leaky
-
- TMF+ Member
-
- 6,890 posts
Iv never hit a penguin in the face with a casserole
- Location: Costa Del Tadley
- Local Club: Basingstoke Mini Club
Posted 12 August 2013 - 02:53 PM
Looks like a Traveller I picked up earlier this year...GOOD roof...NO floors, sills or doorsteps. Too bad you are across a largish pond. Roof is available for a smooth top.
Dam it those bits would have been so handy haha. My dads stripped a few bits off it now. Once its all stripped down we can take a look at it and see if its really worth saving.

#57
leaky
-
- TMF+ Member
-
- 6,890 posts
Iv never hit a penguin in the face with a casserole
- Location: Costa Del Tadley
- Local Club: Basingstoke Mini Club
Posted 31 August 2013 - 05:40 PM
Well update time!
I needed to to the engine steady bushes on the clubby and while I was out there my dad decided to crack on with this!
Here a pic at the start of the day.

As you can see in the first pic my dads taking the wood off. Sadly non one it was saved. It all just crumbled from being to riddled with wood worm.
Next up came stripped off the rear doors and cleaning all the crap out the back.

Then rear bumpers and fuel tank were removed.

Urrrm yea we are gonna need new fuel tank ha.

Then after that the remainder of the subframe was taken off.

This is all that was left of it. The rest had just rotted away. Never seen such a bad rear subframe in my life!

So yea thats about it for todays work.
Next task will be engine and front subframe.
#58
rally515
-

- Members
-
- 3,848 posts
Up Into Fourth
- Location: ask!
Posted 31 August 2013 - 05:45 PM
Definatly keeping my eye on this build, looks like you might need a new rear subby then haha unless you're planning on using that one as a beam axle setup  just a few plates here and there like
Keep it coming,
Cliff
#59
FlyingScot
-

- TMF Team
-
- 2,664 posts
Up Into Fourth
- Location: Inverclyde Scotland
- Local Club: Mini Cooper Register
Posted 31 August 2013 - 05:55 PM
You're a brave guy that subbie is shocking ! A bit of bracing might be in order.....
Looking forward to this thread.
FS
that subbie is shocking ! A bit of bracing might be in order.....Looking forward to this thread.
FS
#60
rally515
-
- Members
-
- 3,848 posts
Up Into Fourth
- Location: ask!
Posted 31 August 2013 - 05:59 PM
Do you not think you could save the roof Leaky ? only looks like the edges that need replacing so could butcher a estate roof so the edges and weld in one section at a time making your way round ?


1 user(s) are reading this topic
0 members, 1 guests, 0 anonymous users


