Jump to content


Photo
- - - - -

Comprehensive Cooper Restoration & Rebuild


  • Please log in to reply
112 replies to this topic

#1 HarrysMini

HarrysMini

    I do not have short legs!!!

  • Members
  • PipPipPipPipPipPipPipPipPip
  • 3,352 posts
  • Location: .

Posted 03 July 2013 - 06:25 PM

There's been a bit of a change of plan. Originally, I was going to try and restore a shell that had had two of its seams cut off. However, I (with the help of others) have decided that it's going to be more trouble than it's worth as the shell could have been twisted etc.

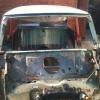
So, roll on the new project; a 1993 Cooper. This is a slightly more rusty but more complete shell. It started life as an SPi, however I plan on putting a carburettor engine in it, and most likely a 1275.

It was an absolute bargain, everything you see in the pictures came with the shell for £175.


null_zpse9357b0d.jpg

null_zpsfaaca301.jpg

photo_zpsbc85bea0.jpg


null_zpsc0d7a3fd.jpg


The work that needs doing to this is much more within my capabilities than the previous shell, so I'm much more confident that I'm actually going to finish this within my deadline of a year.

I have a couple of months off now so I hope to get all the bodywork done in this time before it gets too cold. I will then get it sprayed (probably by myself) to get a nice coat on it and get some WaxOyl underneath it ready for storage over winter.


For those interested, here's a picture of the shell I was going to fix

null_zps46a6f5b8.jpg

This shell won't be wasted though, any panels that are decent will be salvaged but the seam work done to it really has written it off. Sorry Down&Out :-(


The order I plan on doing things is:

Bodywork 

Paint

Bodywork that couldn't be done before paint (First three should be done by December)

Mechanics (Finished and fitted by no later than February)

Electrical (Fitted by end of March)

Interior (Finished by early June)


Let me know what you think guys. All comments are welcomed. Work will commence tomorrow providing whether is going to play ball, although Sod's Law says it won't.


PS. Sorry about the large pictures in this thread. There's not much I can do about it.


Edited by HarrysMini, 14 November 2013 - 01:52 PM.


#2 alex-95

alex-95

    I am THE CLAMP MAKER

  • TMF+ Member
  • PipPipPipPipPipPipPipPipPipPip
  • 6,019 posts
  • Location: l

Posted 03 July 2013 - 06:36 PM

Look's alot better condition than the other one and all the parts you got with it, What panels need doing on it? 

Have you thought about getting something like this to put it in? http://www.ebay.co.u...=item257871b5c7


#3 HarrysMini

HarrysMini

    I do not have short legs!!!

  • Members
  • PipPipPipPipPipPipPipPipPip
  • 3,352 posts
  • Location: .

Posted 03 July 2013 - 06:57 PM

Thanks, after a quick inspection I have found these things:

  • Bottom of A post on both sides is rotten
  • Needs a complete front end
  • Rear valance
  • Off side door skin and possibly n/s
  • Sills (I would imagine)
  • Possibly rear subframe
  • Rear quarter panels need patching or replacing
  • Scuttle

There's bound to be more once I get it all stripped but I think that'll do for now :-)

That tent looks like a good idea, I may look into that.


#4 Ben_O

Ben_O

    Mill Road Garage

  • Paint Doctor
  • PipPipPipPipPipPipPipPipPipPip
  • 9,785 posts
  • Location: Isle of Wight

Posted 04 July 2013 - 04:16 AM

Glad you managed to get the other shell mate.

That was a bargain!

I look forward to seeing more.


Ben


#5 HarrysMini

HarrysMini

    I do not have short legs!!!

  • Members
  • PipPipPipPipPipPipPipPipPip
  • 3,352 posts
  • Location: .

Posted 04 July 2013 - 09:04 PM

Small Update


So, the first day of work. I began by stripping it down to more of a shell. Wiring loom removed, all extra bits boxed and stored, carpet removed. I'm having trouble removing the bitumen soundproofing as it is quite hot today so it's extremely sticky, I will try again when it is colder.

I also found lots more rot.


Engine bay went from this

null_zps5dafa017.jpg

To this

null_zps506faa43.jpg


I will probably replace the whole front half of both inner wings as well as wings, A panels, front panel etc.

null_zpsa9c58769.jpg

null_zps2c9a7477.jpg


The car has obviously been jacked up on the floors so I will replace both front floorpans, also, they are quite rotten. But that's okay because I can salvage these from my old shell.

null_zpsb51e786b.jpg


Inner sills have just crumbled to dust, it also has oversills fitted so they will need replacing

null_zpsafd042c7.jpg

null_zpsd9f768c5.jpg


The o/s has obviously been repaired previously, I may still replace it with a whole inner sill section just so I know it has been done properly

null_zpsacf70036.jpg


Now I know exactly what I'm tackling, I'm much happier. Sills are nice and easy as are floorpans so that's not an issue. The only bit I'm worried about is the rot on the windscreen surround, I'll get some pictures up tomorrow to show you what I mean.

It's slow progress at the moment but once I get some welding gas and an auto dimming mask, it's full steam ahead.


Thanks for reading


#6 chrisj

chrisj

    Mini Mad

  • Members
  • PipPipPipPip
  • 283 posts
  • Location: Leicestershire

Posted 04 July 2013 - 09:51 PM

That looks in much better condition, and what a bargain!

Congrats!

#7 Down&Out

Down&Out

    The King Of Retro Cool

  • Traders
  • PipPipPipPipPipPipPipPipPip
  • 4,847 posts
  • Location: -

Posted 04 July 2013 - 11:08 PM

No offence taken!
 

Some use has come of it, it only would have rotted in my garden anyway, ive got four cars to completely restore as it is.

None of the dodgy work was done by me so ive got nothing to worry about.

Best of luck with this one, anyway.


#8 Davethepioneer

Davethepioneer

    One Carb Or Two?

  • Members
  • PipPipPipPipPipPipPip
  • 944 posts
  • Location: Bolton Greater Manchester
  • Local Club: S.U.N.M.C

Posted 04 July 2013 - 11:13 PM

This looks like its going to be an awesome project!

#9 HarrysMini

HarrysMini

    I do not have short legs!!!

  • Members
  • PipPipPipPipPipPipPipPipPip
  • 3,352 posts
  • Location: .

Posted 06 July 2013 - 09:47 PM

Thanks for the comments guys. I have a small update, I still haven't really done much actual work on the car as I am awaiting delivery of my welding mask and am still sorting out the gas.


I got the car up on some tyres my local fitter gave me, now I can actually look at the underside properly

null_zpsb8caea43.jpg


I also found lots more rot


null_zpsa5befb7f.jpg

Wheel arch needs patching/replacing


null_zps40b6f6eb.jpg

I will probably patch this bit


I will also probably completely replace the o/s quarter panel

null_zps575ea757.jpg

null_zps9bc41182.jpg


I hope this can be patched as I really don't want to replace both whole inner wings

null_zps3133199a.jpg

(it's even worse on the other side, completely rotten through in that area)


Windscreen surround rot

null_zpsf6bb08d2.jpg

null_zps38ceb50e.jpg


Driver's door needs reskinning. Hopefully I can reuse the aftermarket skin that has been put on incorrectly... thoughts?


null_zps02ed32da.jpg

null_zps3ca9227a.jpg

null_zps8da4efd8.jpg


As you can see it's bowed.

null_zps065d711c.jpg

Still got the Magnum sticker on it


Now my first real worry. We did this while trying to winch the car onto the trailer. Fixable/usable/scrap? 

null_zps315dcedc.jpg


Also, stupid moment coming up... Where does this attach? I presume it does?

a779b022-c193-456b-b376-3f2fdf8155dc_zps


Thanks for reading... if you still are, after all those pictures :-)


Edited by HarrysMini, 07 July 2013 - 10:46 AM.


#10 Twilton

Twilton

    Stage One Kit Fitted

  • Noobies
  • PipPipPip
  • 57 posts
  • Location: Up North

Posted 06 July 2013 - 10:04 PM

That's your top ball joint mate, its snapped off inside the top arm. On that picture its 2" to the left haha


#11 HarrysMini

HarrysMini

    I do not have short legs!!!

  • Members
  • PipPipPipPipPipPipPipPipPip
  • 3,352 posts
  • Location: .

Posted 06 July 2013 - 10:56 PM

Thanks for the info mate.


For those interested, here are the results of my first welding practice. 

null_zps99480127.jpg


At first, it looked like pigeon sh*t. However, after I cleaned the metal and got a better earthing point, it started to look better. 

null_zps85a5ceec.jpg


My best piece of welding was on some sheet metal a little bit thicker than a Mini's panels.

null_zps5065fc2e.jpg


It's still pretty rubbish but as I haven't got an auto dimming mask, I can only use one hand on the torch so I can never get it to go in a straight line, I also keep welding in the wrong place.

I need to get a bottle of gas as the crappy disposable one that came with the welder ran out very quickly. I will probably use Hobbyweld as recommended by AVV IT. 


That's all for today, a more exciting update will follow very soon.


#12 Petrol

Petrol

    One Carb Or Two?

  • Members
  • PipPipPipPipPipPipPip
  • 967 posts

Posted 07 July 2013 - 10:24 PM

You won't need to buy inner wings, they can be repaired by re furbing the shock absorber mounting areas. Flitch panel repair sections are available that will sort out the areas around the plastic vent ducts. This shell looks in pretty much the same shape as mine, rear arch rot is common. Have a look at my thread for full details of what I did with the front end. I havent sorted the boot floor / rear arches yet but that will come later.


Rear subby looks fubared to me as the back rail is that distorted


Could I ask a favour? In this pic is the bumpstop.....


a779b022-c193-456b-b376-3f2fdf8155dc_zps


It's the cone shaped rubber part on the top right of the pic. Does it have a thick washer about 6mm between it and the front subframe? Thanks.


As far as the welding goes, I am no expert but it looks to me like it needs more amps. Seems you are just blobbing it on which is what I did when I first started. You know it's good when the penetration is OK

Hope my comments were helpful


Pete


#13 HarrysMini

HarrysMini

    I do not have short legs!!!

  • Members
  • PipPipPipPipPipPipPipPipPip
  • 3,352 posts
  • Location: .

Posted 07 July 2013 - 10:29 PM

Thanks for the comments Petrol, I will take a look at your project thread. I've decided that I probably will replace the subframe. Do you think I'll be able to patch the front sections of the inner wings?

I will have a look at the bumpstop in the morning and PM you with my findings :-)


#14 Petrol

Petrol

    One Carb Or Two?

  • Members
  • PipPipPipPipPipPipPip
  • 967 posts

Posted 07 July 2013 - 10:47 PM

Those front wings can deffo be repaired. I'm a bit anal about things being done properly and have shown how it assembles on page 16 in my thread. If you read it, it will show how the inner wing stiffener fits, also the X member to inner wing stitch welding.


Look forwards to your PM about the washer under the bumpstop


Best regards


Pete


Edited by Petrol, 08 July 2013 - 09:20 PM.


#15 HarrysMini

HarrysMini

    I do not have short legs!!!

  • Members
  • PipPipPipPipPipPipPipPipPip
  • 3,352 posts
  • Location: .

Posted 12 July 2013 - 08:38 PM

Very small update

Sorry for all the small and boring updates, but I'm not going to start proper work on the car until I'm back from holiday but I want to keep this thread going.


Anyway, I got some welding gas today. I used Hobbyweld as it was recommended and it wasn't too expensive. I got it from Wellington Welding Supplies, and I can highly recommend them, very knowledgeable with competitive prices.

null_zps45bb97cf.jpg


I do have a small question though. On the regulator gauge, it only shows that the cylinder is half full, is there a valid reason for this? Also, I when I turn the gas on, I can here hissing from the pipes, I've sprayed soapy water over the connection and that didn't show up any leaks, is this normal?

null_zps9d1470e8.jpg


I have also got a Sealey auto dimming welding mask on order but the company (AHC Direct) are being a pain so I'm trying to cancel the order and place it with another company.


I also built my garage today!

null_zps84e8e3d9.jpg


Inner sills have also arrived from Minispares, nice and quick :-)


Thanks for reading, comments are welcomed.


1 user(s) are reading this topic

0 members, 1 guests, 0 anonymous users