what an absolute beast!


The Otters Bx
Started by
The Otter
, Jun 10 2013 09:41 AM
66 replies to this topic
#46

domdee
-

- Members
-

- 1,183 posts
Formally known as dominicdee
- Location: hull
- Local Club: hull clubs on FB
Posted 06 August 2013 - 05:21 PM
#47
paul_s
-

- Members
-
- 415 posts
Speeding Along Now
Posted 07 August 2013 - 07:47 AM
Since you've started this thread, I've been noticing a navy blue BX passing me most days on my way home from work. Different reg though I think.
Strange coincidence!
#48
The Otter
-
- Members
-
- 620 posts
The artist formally known as j322overthetop
- Location: Midlands
Posted 23 August 2013 - 07:50 PM
About due a large update I think, I've done quite a bit on the BX in the past few weeks! Firstly, to finish off on the rust issue I left you with last time:
Old rusty french tin removed:
New tin of unknown origin installed:
Plenty of paint/underseal/waxoyl in varying layers - job done.
After doing a bit of metal grafting I felt like doing a slightly less intense job, so decided to get the dash clocks out to a) fix the broken trip counter, and b) change the bulbs that were blown (only one half of the speedo was illuminating, for example...).
So I got the clocks out and then realised that whatever mechanism that was meant to control the trip counter is long gone, and seeing as I had no ideas on how to make anything new to work it, I just wound all the wheels back to 0 so I didn't have to look at the counter being stuck on 105.6 miles all the time. Not used to having a trip counter in the Mini anyway, so no big loss. Ended up swapping 7 broken bulbs in the end, as you do. Also did the bulbs for the heater/fan controls and the cigarette lighter, as none of those lit up either, so I now have all working clock/control lights!
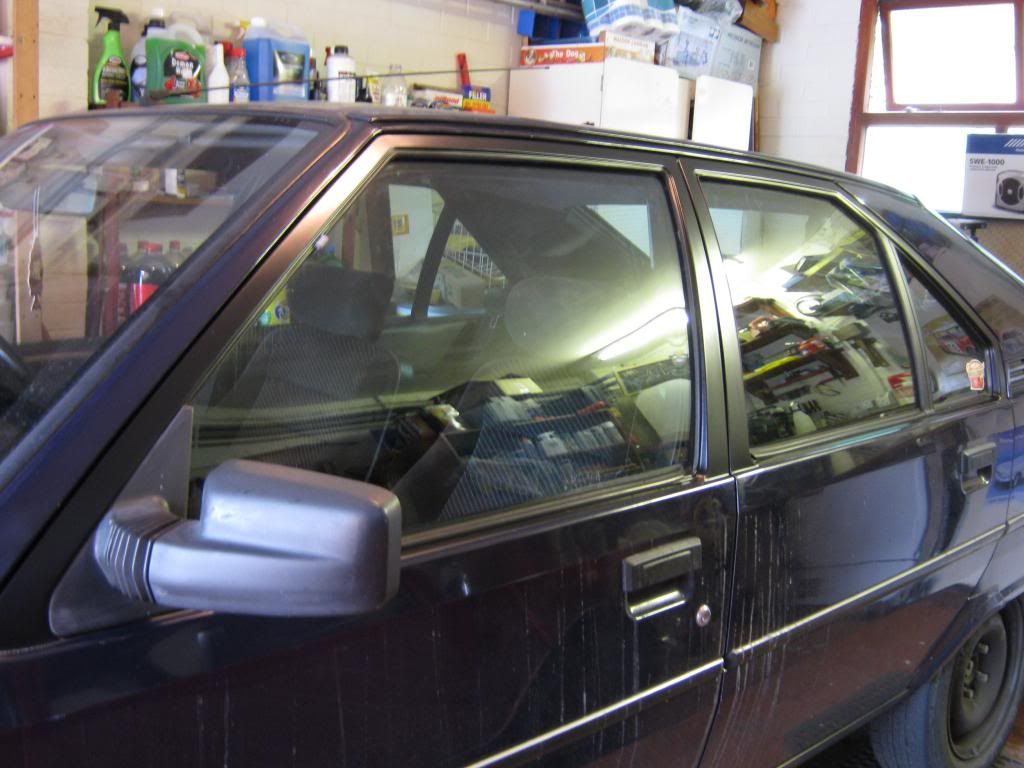
I then set about sorting a decent stereo system for the car - I'm no audiophile but even I couldn't stand the 90's cassette player playing bad FM radio through slightly shonky front speakers only. So I went all "boy racer" and cut some lovely big holes in the parcel shelf for some 6x9s I had lying around, and bought a decent Philips DAB radio from Halfords to play some tooooons through them.
Hopefully the wiring can stand up to the job...
New head unit - with changeable LCD display colour, so I can have green to match the dash clocks 

The flip down cover for the radio was also only going halfway down before getting stuck, possibly due it being stuck up for so long with the old radio that didn't fit, not allowing it to close. So I took the assembly out and simply twisted the torsion springs on the hinges round another coil and now it works like a charm!
Went about cleaning up the interior a bit as well, firstly with a fairly thorough hoovering and dusting session, and also sorting little things like getting a bit of linseed oil on the faded old ash trays in the back - no before photos but I'm sure you could imagine what faded 20 year old plastic looked like. It was pretty much perfect in here anyway but it's the little things that stand out when the majority is as it should be.
Also ordered some "tailored" floor mats from eBay - I must admit I was pretty sceptical that they'd actually fit, but credit where it's due I think they look lovely and fit pretty well too!

Then I had a de-rusting session at the back of the car, which is where I've been told BXs can suffer very badly and can make or break the car in terms of whether it's worth keeping on the road. I was pleasantly surprised at how solid it is under the bumper, I was expecting worse to be honest!
Got a couple of bits that have just about rusted through to the inside behind the bumper brackets.

Plus, of course, the slightly larger hole in the corner of the boot floor to weld up.
All in all, not too bad compared to the front end rust. No more photos of it, but I welded up that hole and then liberally covered the rear end with waxoyl before putting it back together.
Then a week or so later I got this in the post:

A black glovebox lid! The lid fitted to the car when I bought it was light grey and stained with some sort of brown stuff (I don't even...) and it was hanging on with one hinge. Knowing that BXs have a reputation for having useless glovebox lid hinges that snap for fun (hence the wrong colour replacement in there already), I planned ahead and bought one with already snapped hinges:
Hang on in there, there is method in my madness... a trip to Toolstation got me some cheap hinges, so after drilling a few holes and screwing a few... screws, I ended up with this:

Some black modelling paint then got me this:
It's tidied up the interior nicely, and has given me a working glovebox lid with (I would imagine) stronger than original hinges, which is nice! So, I went from this:
To this:
Another thing I wanted to do in the interior of the car, was to add something important that was missing from the BX - cup holders. One of those little things the designers left out, but I need somewhere to put a drink or two! I decided to make something out of bits of wood and stuff, which always ends up with me creating something nicely functional, but very badly finished - my BX cupholders would be no different!
Firstly I had to work out how I'd mount them and where they'd go. I decided to try and use these holes (usually covered by blanking plates) in the centre console.
I then found some wood that was a perfect tight fit in to the holes.
Good thing I have a sunroof...
I then proceeded to create some contraption made out of bits of old wood, packing plastic, some fire extinguisher holder/brackets, chicken wire, foam, and vinyl. 
It just slots in to the holes in the centre console.
Building it up...
Some time later it ended up like this:
I'm a bit disappointed with how they look, but then I've never tried to learn how to do these things properly so maybe there's a reason they always end up a bit ropey. They work though, which is all that really matters.
I also got a new air filter for the engine, as the old one was pretty black and full of dirt:
Then I won this on eBay, for many extra bassness:
Then I adorned the car with yet more stickers and some new number plates.

Now I'm driving it as my daily and the Mini is in the garage for a long sleep whilst I plan and build funds for future surgery.
I've done a few long trips in it now and the car is behaving superbly, especially on the motorways where it feels so "at home".
I felt a pleasurable spell of wafty French motoring ahead of me...
Another update to come shortly (this is still catching up to current time...)
#49
The Otter
-
- Members
-
- 620 posts
The artist formally known as j322overthetop
- Location: Midlands
Posted 23 August 2013 - 07:59 PM
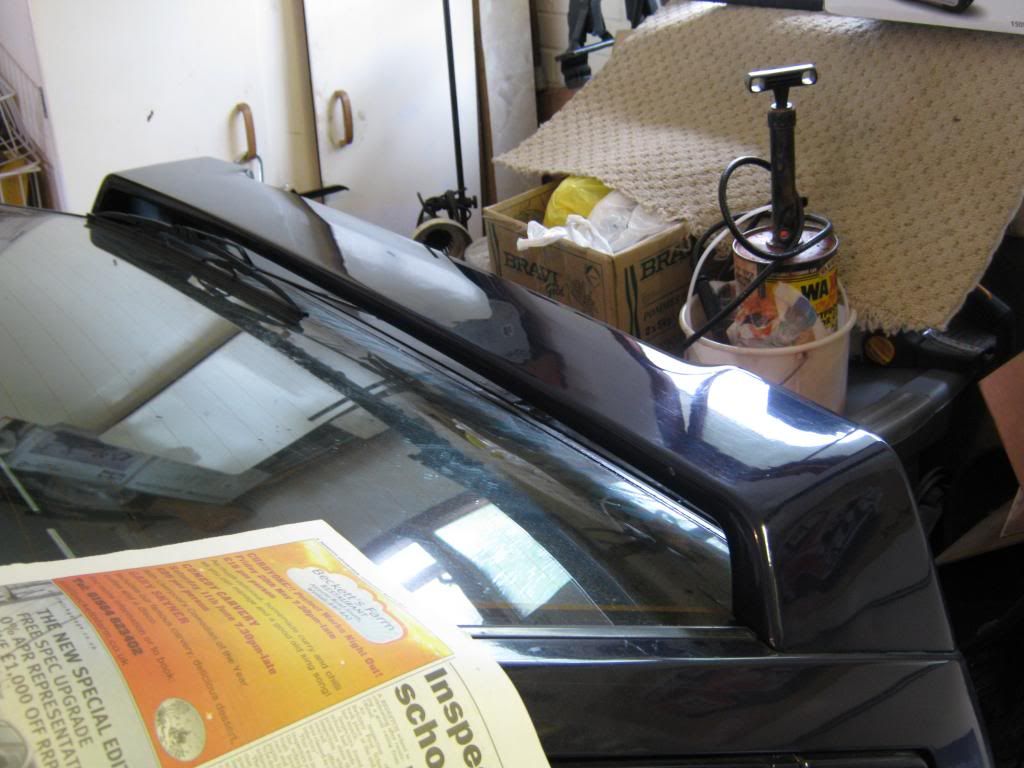
A couple of weeks back I was attempting to fix the rear demist on the car, by sticking back on the snapped off tabs for the spade connectors in the bottom corners of the rear screen. I tried doing this by first using a bit of super glue on each edge of the tabs, to physically stick them in place, and then painting on some conductive silver paint from eBay to make the electrical connection between the tabs and heating element. I tried to make this work but it was just making some funny fizzing and buzzing noises at the positive tab/terminal of the circuit and not making the element warm up, so I decided to pull off the connectors and leave it alone to fix it in a different way some other day. Five minutes later, as in five minutes after I'd pulled the connectors off and given up on it, I heard quite a loud pop and was greeted by this sight:

Yep, that's pretty toast... after some initial worry about being able to find a replacement tailgate and not thinking anyone would have any replacement glass for an old Citroen, I got something sorted very easily and quickly with a local window replacement company, Clearview Windscreens in Redditch (good for West Mids people). I'd initially tried sorting it through insurance and Autoglass, but they told me that these rear screens weren't available any more and they didn't have any in any of their warehouses across the country and it would take a "few weeks" to "try" and source one. I then phoned up the nearest windscreen company I could find (Clearview) after a quick google search, and within in a couple of minutes they'd sorted me with a rear screen in any factory tint colour of my choice (green, clear, or brown) and they could fit it the very next morning - a bit better than the response from Autoglass!
So, I took off the rear spoiler and wiper arm, and the next morning I had a new rear windscreen installed - bonus is that I now ironically have a brand new, fully functioning rear demist!

Whilst I had the spoiler off I decided to give it a lick of paint, as the original lacquer had failed a long time ago (as you could see in a pic up there ^) and there were little scratches and bits of fibreglass falling out of it on the sides. I basically ended up rubbing down to the original primer in most places as the top coat was so bad, and I also applied a slither of filler to the sides of the thing to fill in all the little dimples/chips from the degraded fibreglass.

After much sanding and some primer, on went the blue - it turned out a little more "blue" and not quite as purple as the rest of the car, but it's only as much of a mismatch as the bumpers are - so I'd say it's within factory paint match tolerances!
Then bolted back on the car - still needed to give it a rub down/polish some time to make it a bit shinier, which would happen soon.

Right, after a couple of days letting the paint harden on the spoiler I set about flatting it back with some 2000 wet and dry, then giving it a cut and polish to make it as shiny as one could expect a rattle can job to be - I was pretty impressed with the result.
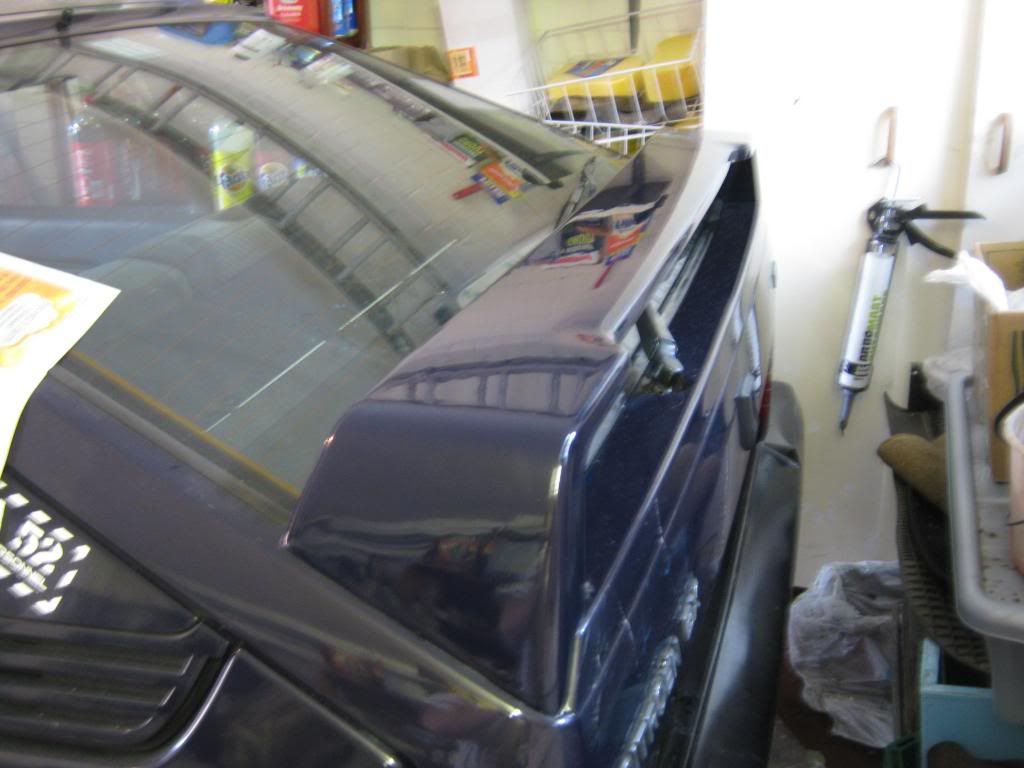
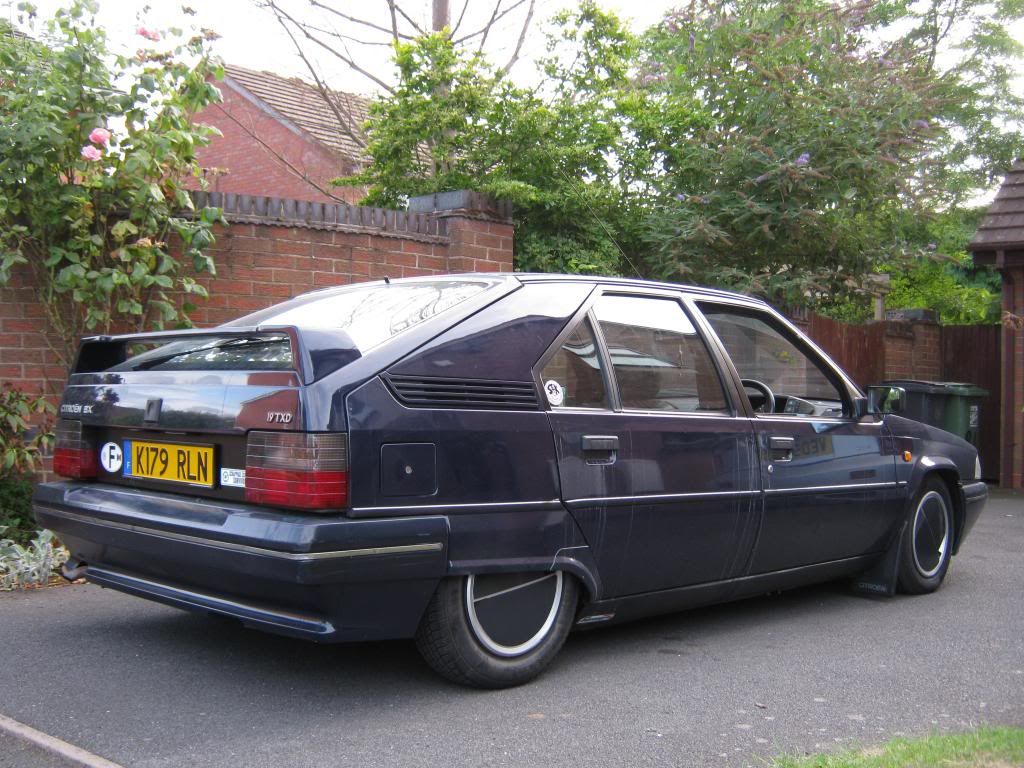
As you can just about see in those photos above, there was some newspaper masking taped to the car. Quite a lot of newspaper in fact, as I spent a couple of days doing both sides of the cars door surrounds, repainting them in satin black to get rid of the faded white/grey paint that was on there before.
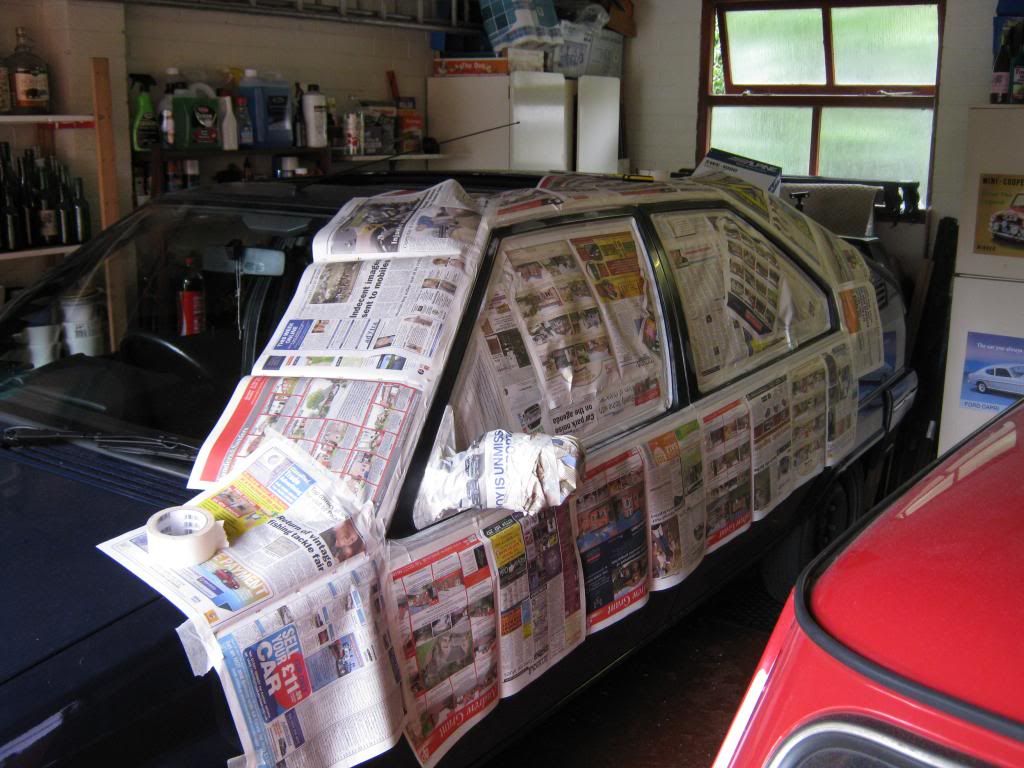
Boy that took a lot of masking, I was at it for hours!
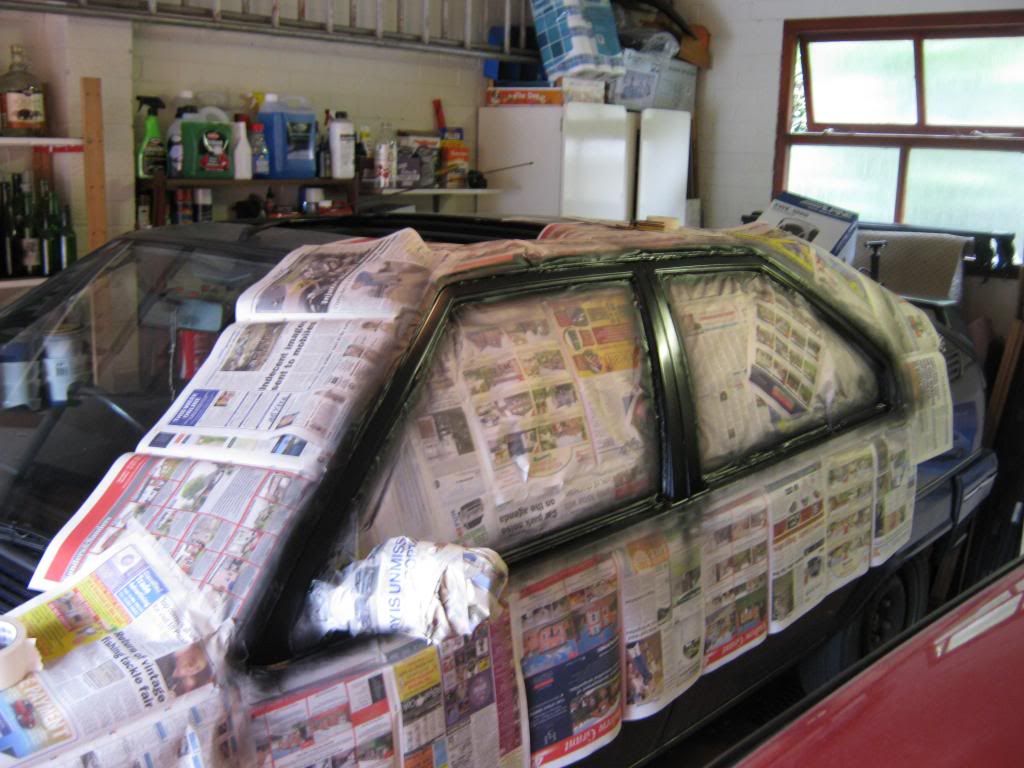
Not too bad, certainly smartened the car up I'd say. It's one of those things you don't really notice when it's been done, but I guess that's a good thing right?
Then the other side.
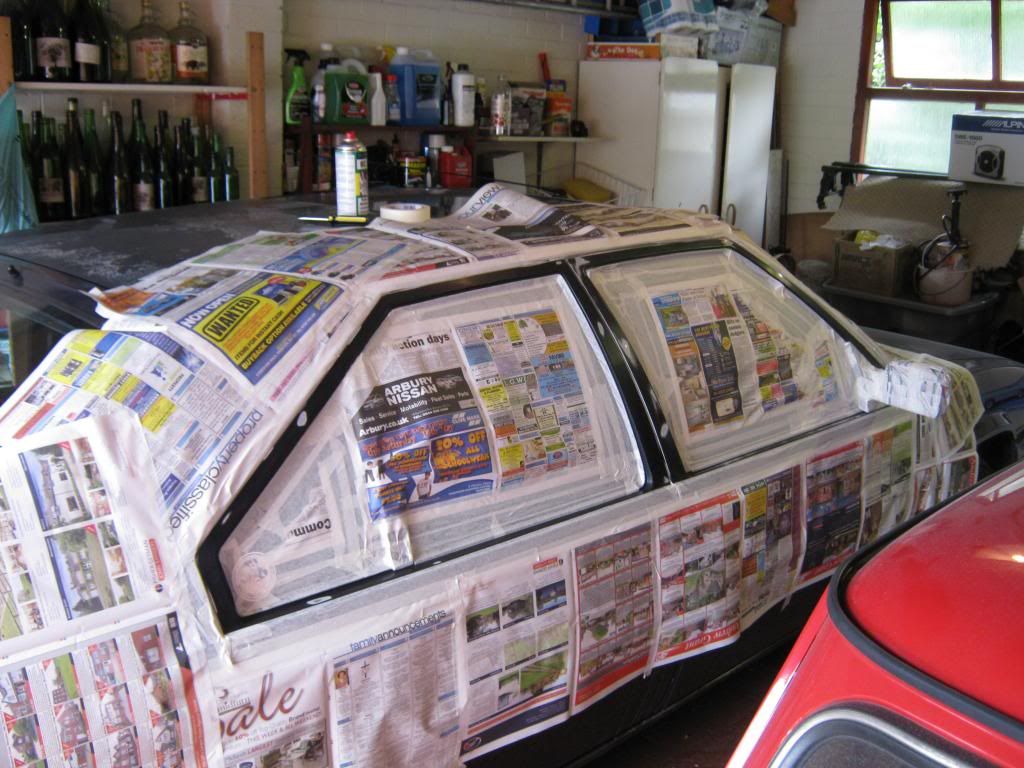
As you can also see in the photos above, I'd removed the wheel trims for a bit of a re-paint.
First thing was to try and smooth off any curbing marks - I wasn't bothered about making them look new again but I didn't want any sharp edges and obvious bits of damage. Then it was smooth out any scratches, rub down, primer and on with the Volvo dark grey for the centre panels.
Then, lots of very fiddly masking to be done! If only masking tape went round curves!
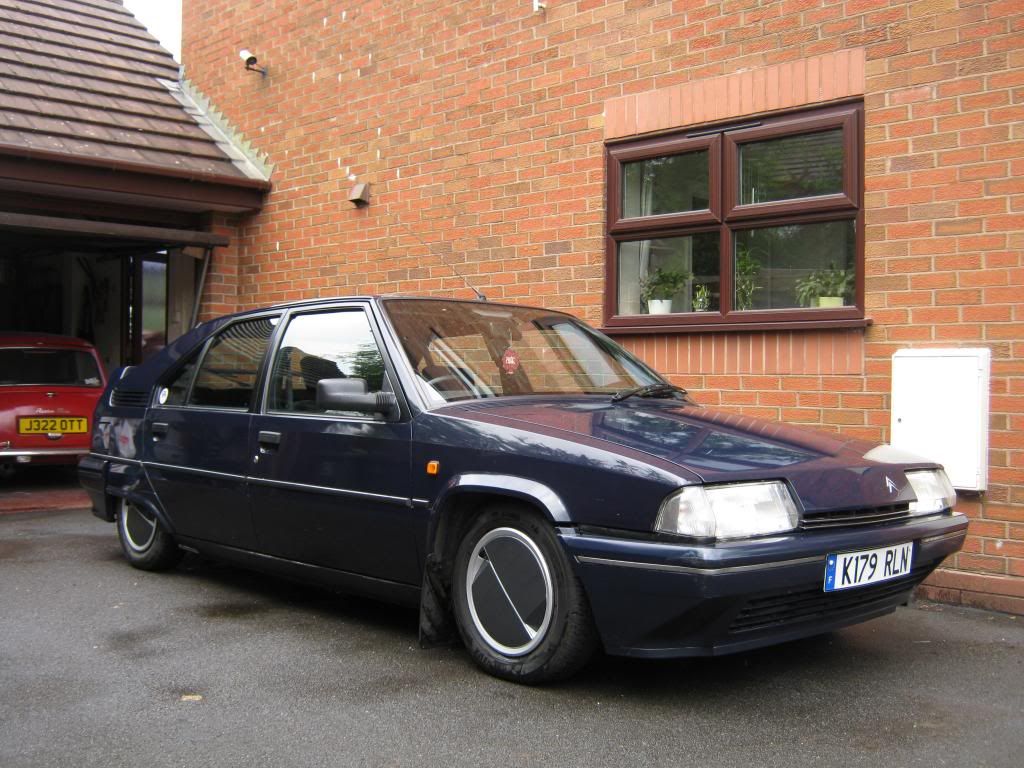
Then a coat of silver wheel paint for the outer edges/indented bits. Then I popped one on the car and I liked what I saw.
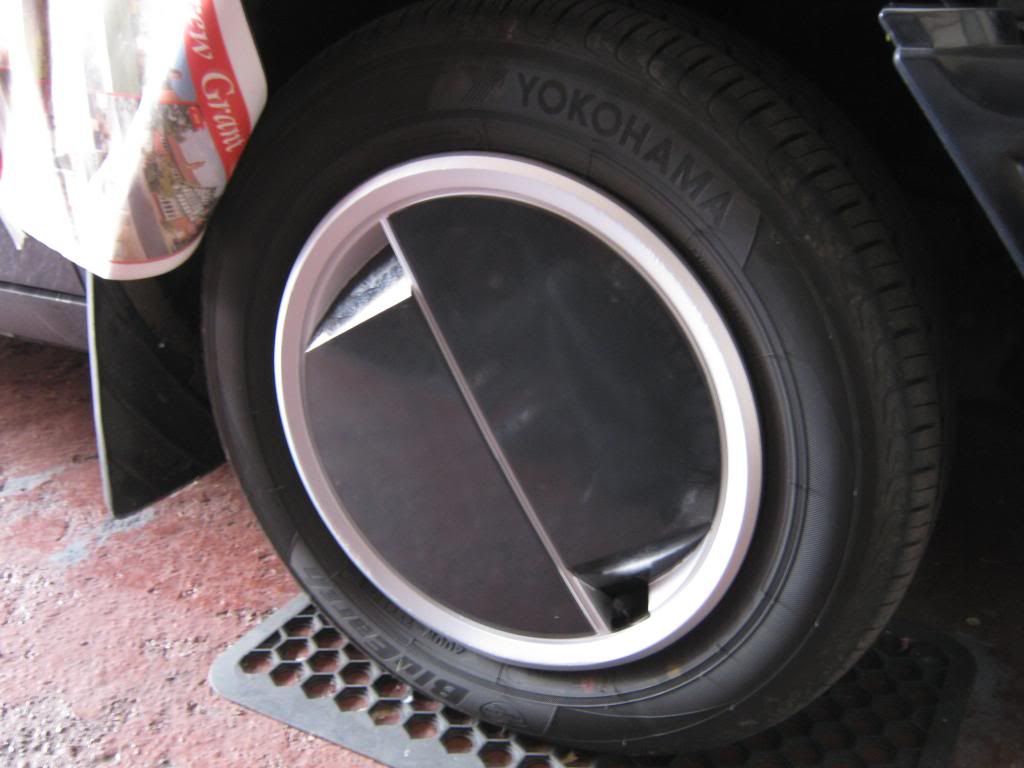
So, that was all finished the night before the Retro Rides Gathering - not exactly as stressful as some of the work people put in to their cars for the gathering, but it was still a rush to finish off the little things!
Wheeled the car back outside so my Dad could have his garage space back, and then I put all the trims back on - me likey.
Next morning I gave it a wash before the trip to Prescott Hillclimb for RRG13.


As you can just about see in those photos above, there was some newspaper masking taped to the car. Quite a lot of newspaper in fact, as I spent a couple of days doing both sides of the cars door surrounds, repainting them in satin black to get rid of the faded white/grey paint that was on there before.

Boy that took a lot of masking, I was at it for hours!

Not too bad, certainly smartened the car up I'd say. It's one of those things you don't really notice when it's been done, but I guess that's a good thing right?

Then the other side.

As you can also see in the photos above, I'd removed the wheel trims for a bit of a re-paint.
First thing was to try and smooth off any curbing marks - I wasn't bothered about making them look new again but I didn't want any sharp edges and obvious bits of damage. Then it was smooth out any scratches, rub down, primer and on with the Volvo dark grey for the centre panels.

Then, lots of very fiddly masking to be done! If only masking tape went round curves!

Then a coat of silver wheel paint for the outer edges/indented bits. Then I popped one on the car and I liked what I saw.

So, that was all finished the night before the Retro Rides Gathering - not exactly as stressful as some of the work people put in to their cars for the gathering, but it was still a rush to finish off the little things!
Wheeled the car back outside so my Dad could have his garage space back, and then I put all the trims back on - me likey.

Next morning I gave it a wash before the trip to Prescott Hillclimb for RRG13.

Pretty pleased with how it turned out really! Oh, and RRG13 was AWESOME! Look it up on the interwebs if you don't know about it, just to gawp at the stunning cars that were there and watch a few cars pounding it up the hillclimb (don't worry there were plenty of Minis there as well a very wide range of retro/classic cars!).
I was on a club stand for the show on Sunday, but I forgot to take any photos of my car on the stand... so if I find any interesting ones floating around the internet then I'll put something up here!
Thanks for reading!
#50
rally515
-

- Members
-
- 3,848 posts
Up Into Fourth
- Location: ask!
Posted 23 August 2013 - 08:00 PM
Haha great stuff Otter, suprised at how cool a boring french car is (othing on a mini though ofcourse ;))
Look forward (strangly) to another update
Cheers
Cliff
#51
steven
-

- Banned from Buying/Selling
-
- 1,195 posts
One Carb Or Two?
- Location: Uk
Posted 23 August 2013 - 08:20 PM
Great work looks sweet
#52
domdee
-
- Members
-
- 1,183 posts
Formally known as dominicdee
- Location: hull
- Local Club: hull clubs on FB
Posted 28 August 2013 - 11:35 AM
love this build! especially the drinks holder! hahaha
#53
tomb1992
-

- Members
-
- 490 posts
Speeding Along Now
- Location: Birmingham
Posted 28 August 2013 - 06:27 PM
The painted wheels and windows make it look ten times smarter!  never been keen on these but looks Ace when its low
#54
The Otter
-
- Members
-
- 620 posts
The artist formally known as j322overthetop
- Location: Midlands
Posted 26 March 2014 - 01:01 AM
I swear time is going faster as I get older, it only feels like five minutes ago I updated this thread! Anyway, I have a few retrospective updates to post up here for those that are interested, but the main thing to say is that I've now sold the BX (for a pittance I may add...) due to a very sneaky and annoying running issue and a lack of time/inclination to fix it... I do feel like I gave up on the car a bit, but I just didn't have the time to fix it with Uni commitments in the way and no time to be working on cars.
Anyway, here's the first of the catch-up updates, copy'n'pasted from Sep. 14th 2013:
Since the gathering I've been quite busy on the BX, mostly only doing one job though - repainting the roof.
First thing was to remove the old failed lacquer and paint, which I decided to do the lazy way with paint stripper, like so: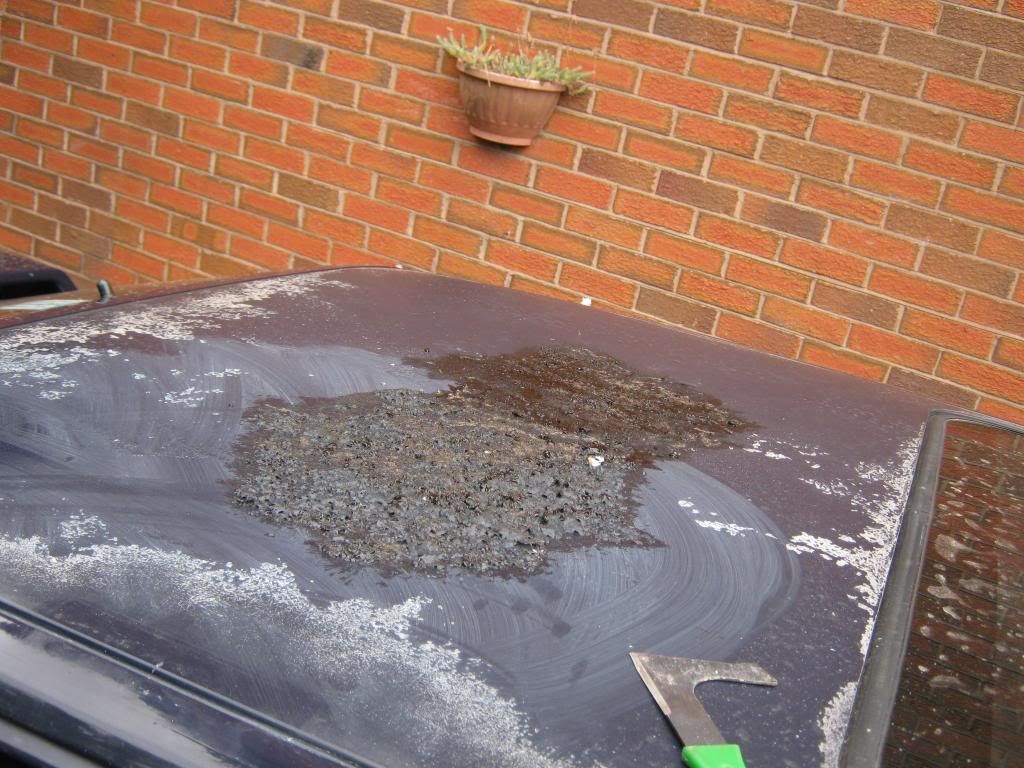
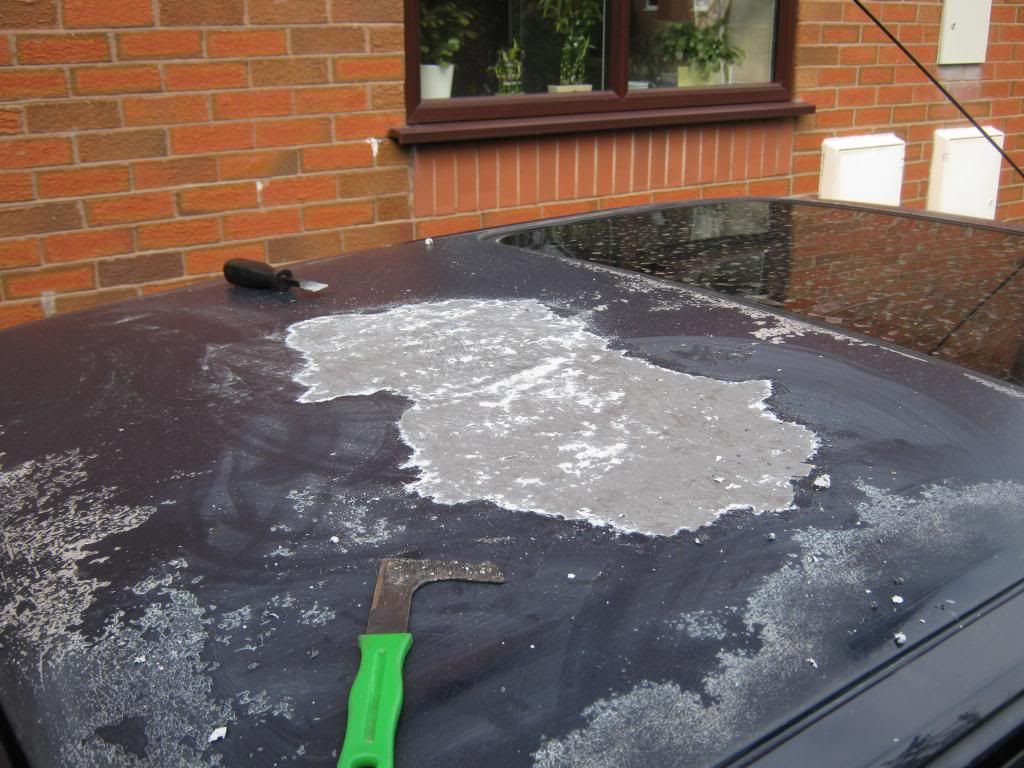
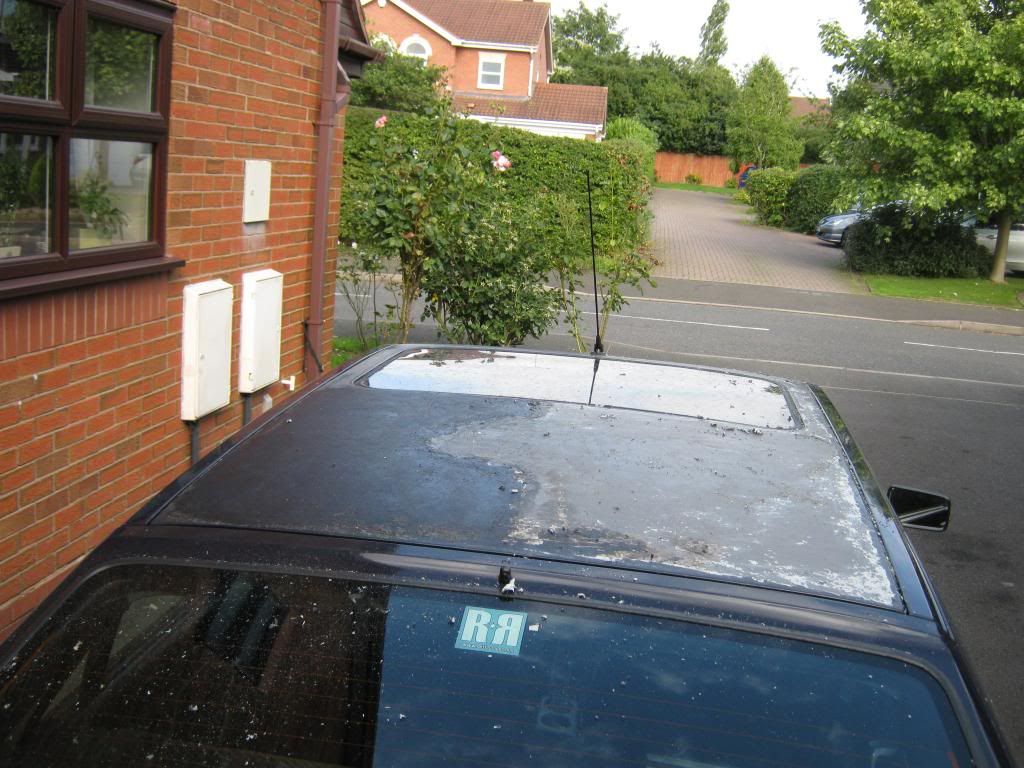
Unfortunately for me, this is where the tin of Ronseal paint stripper ran out. I really didn't want to spend any more money doing this budget roof respray, so I went to B&Q and found their cheapest paint stripper. Which of course was pretty rubbish, and only took off the crusty lacquer and left the blue paint behind. Oh well, at least I got half of the paint off! So I just decided to make do with what I had and just blend in the edges of the paint to the bare metal, which I had to do all round the edges of the panel anyway. So after a lot of sanding (days of sanding...), masked up: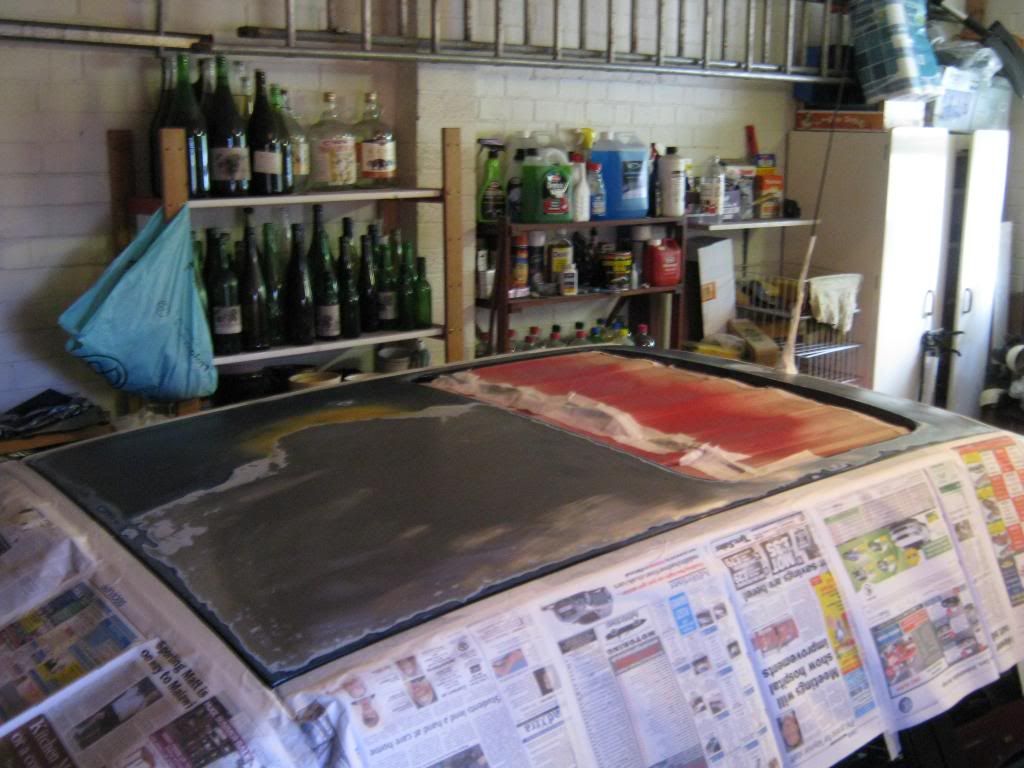
Filler primer: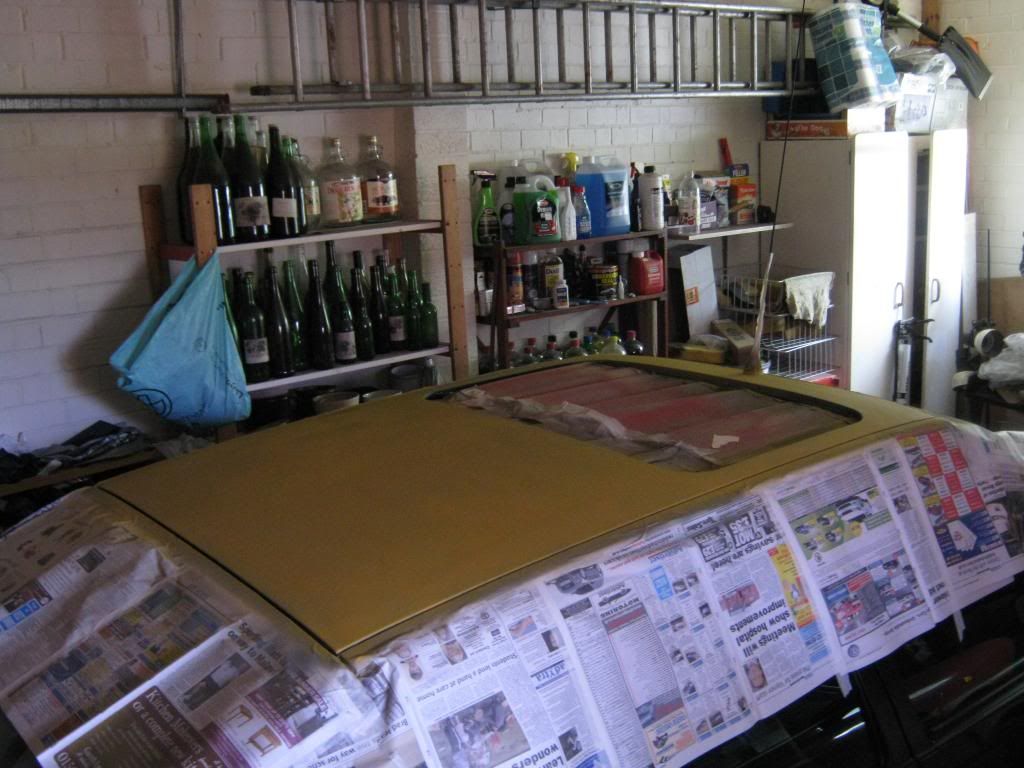
After lots more sanding, white primer: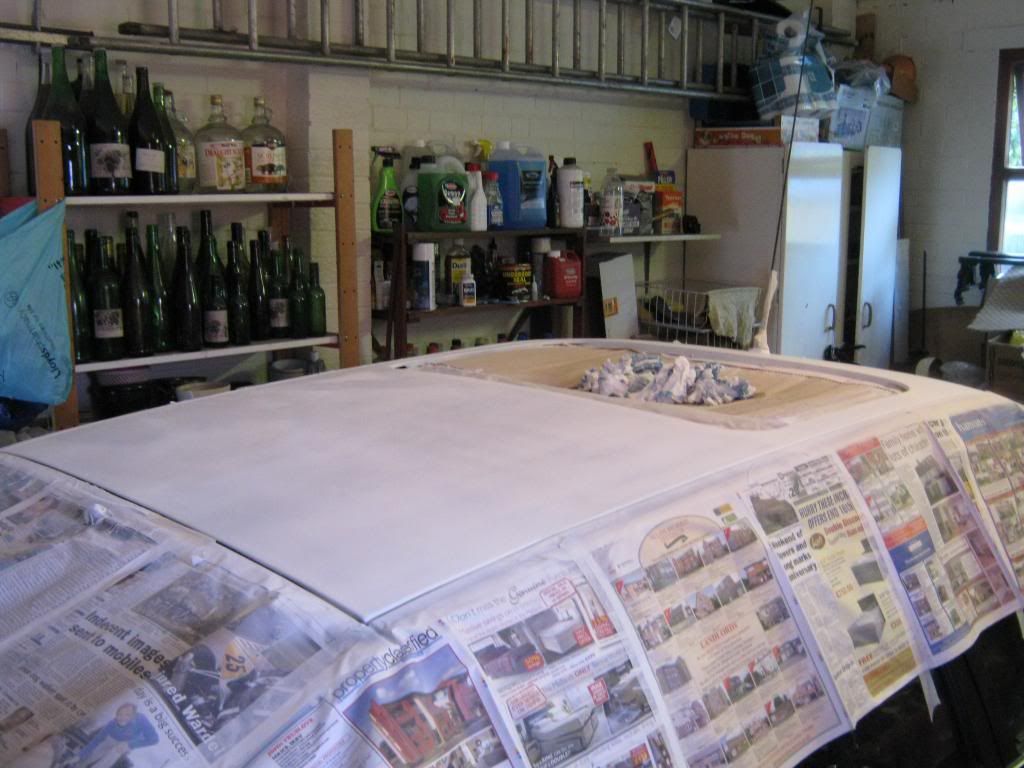
After even more sanding, first top coat of black (to try and darken the final blue, as I knew it would end up too light):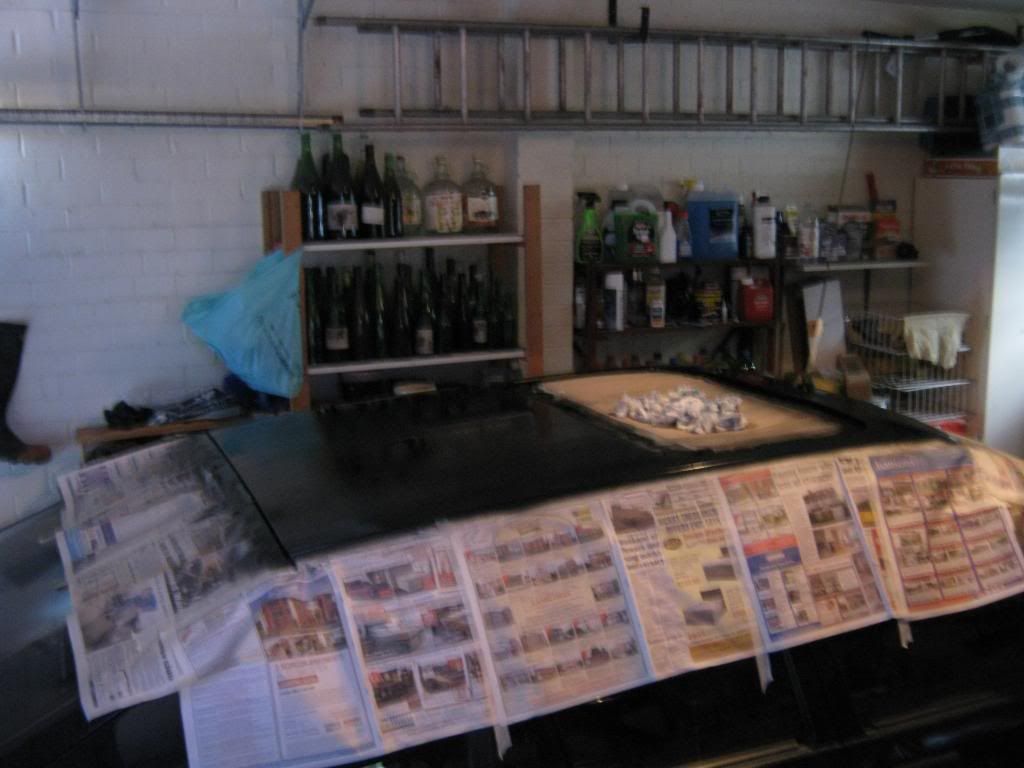
Then after more sanding, finally in blue - took about a week and a half to get to this stage from the beginning: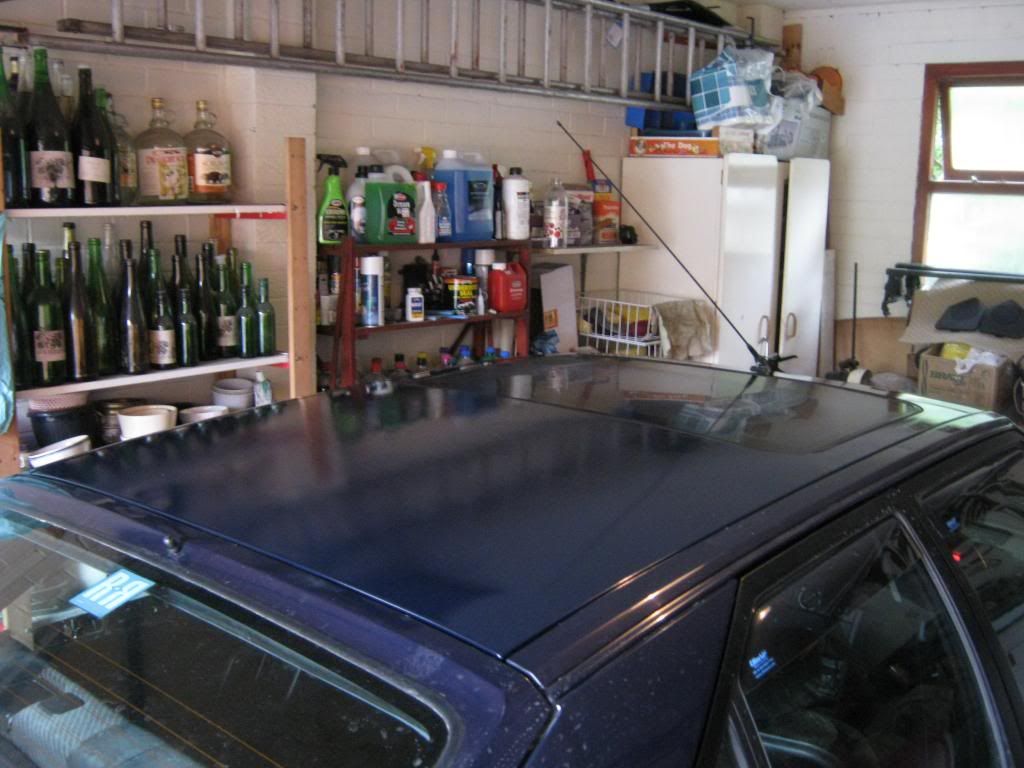
The damage...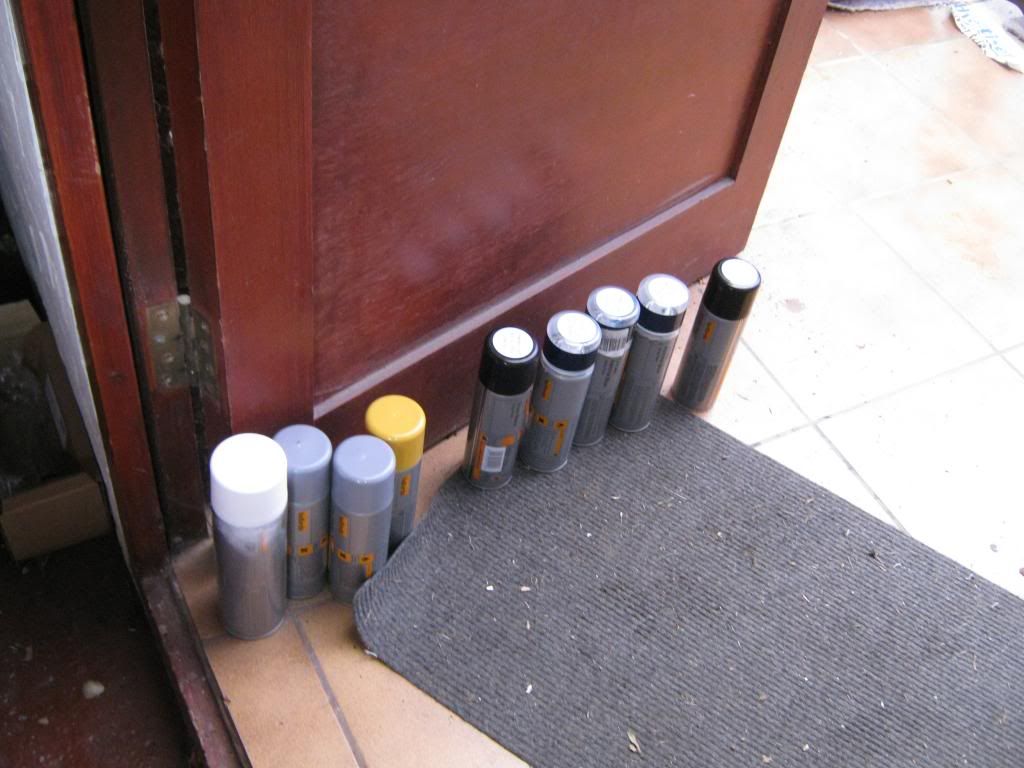
... about £50-£60 in Halfords paint.
So, whilst I let that blue settle in a bit, some wind deflectors arrived from Germany (apparently). Whilst the rear ones were very easy to fit, the front ones wouldn't go in place without removing the door mirrors first, which involved removing the door cards - bit of a faff but not too bad. I did also have to file down the corners of the mirror plinths as they were very tight up against the deflectors, which was a bit annoying.
Door cards off: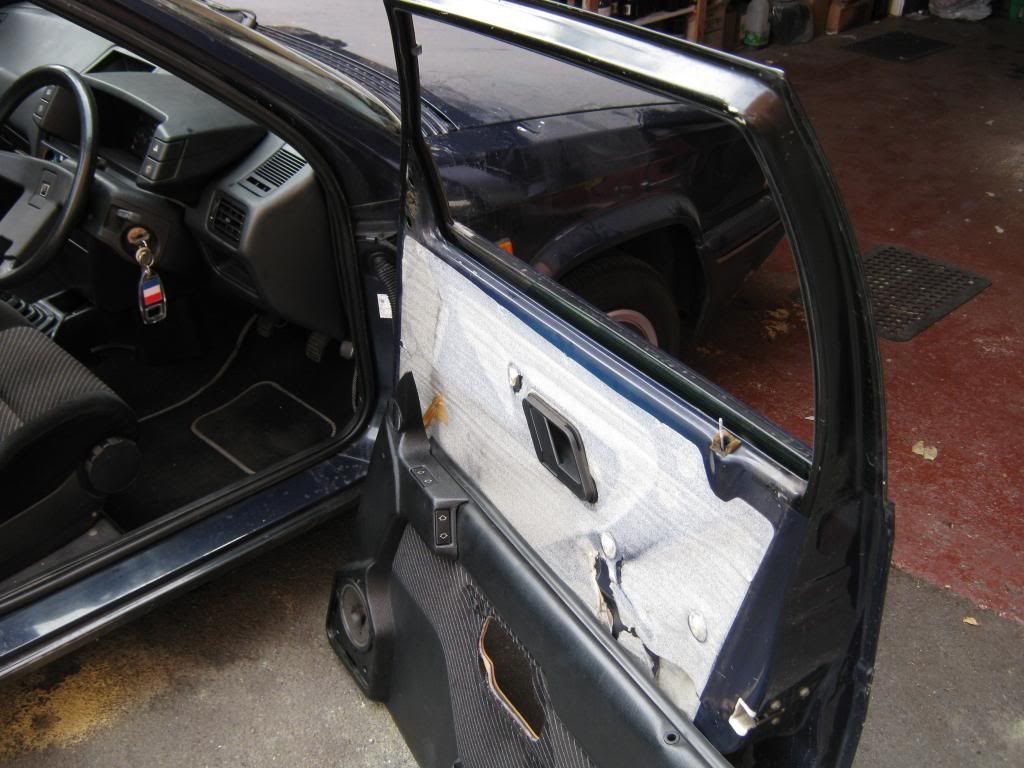
When I removed the drivers side mirror I found that it wasn't even bolted in and I couldn't find any traces of glue either - was pretty rock solid though, had to tap it out with a hammer/punch on the studs, no idea how it was held in!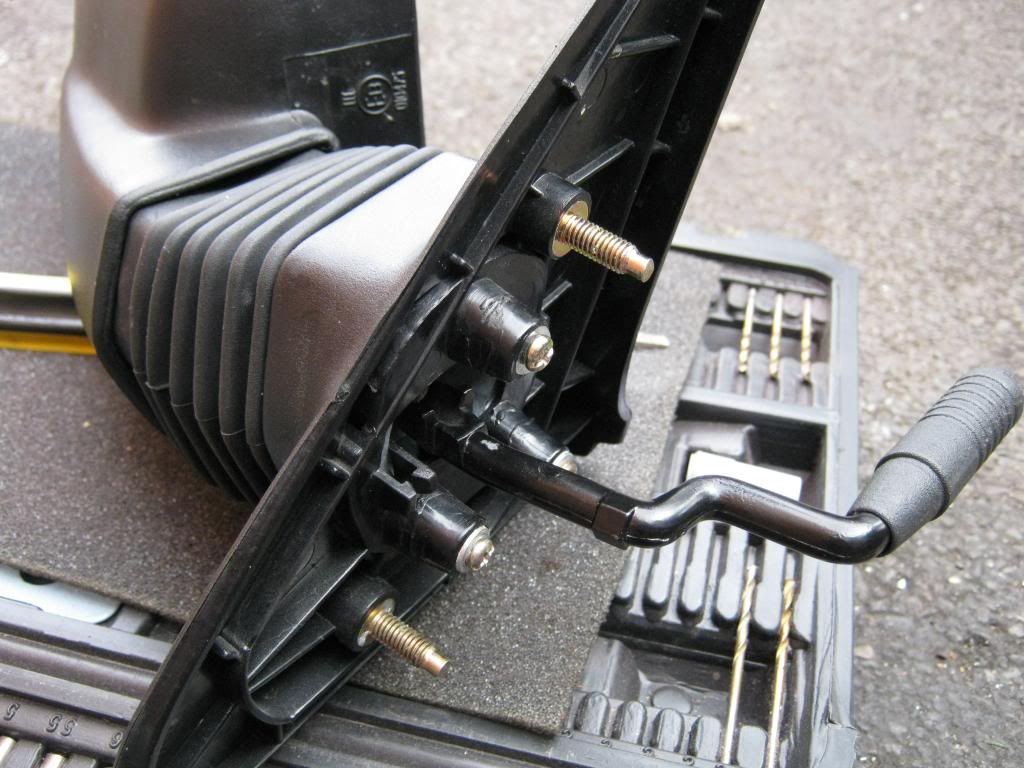
Finally got the deflectors all in, they work very nicely too.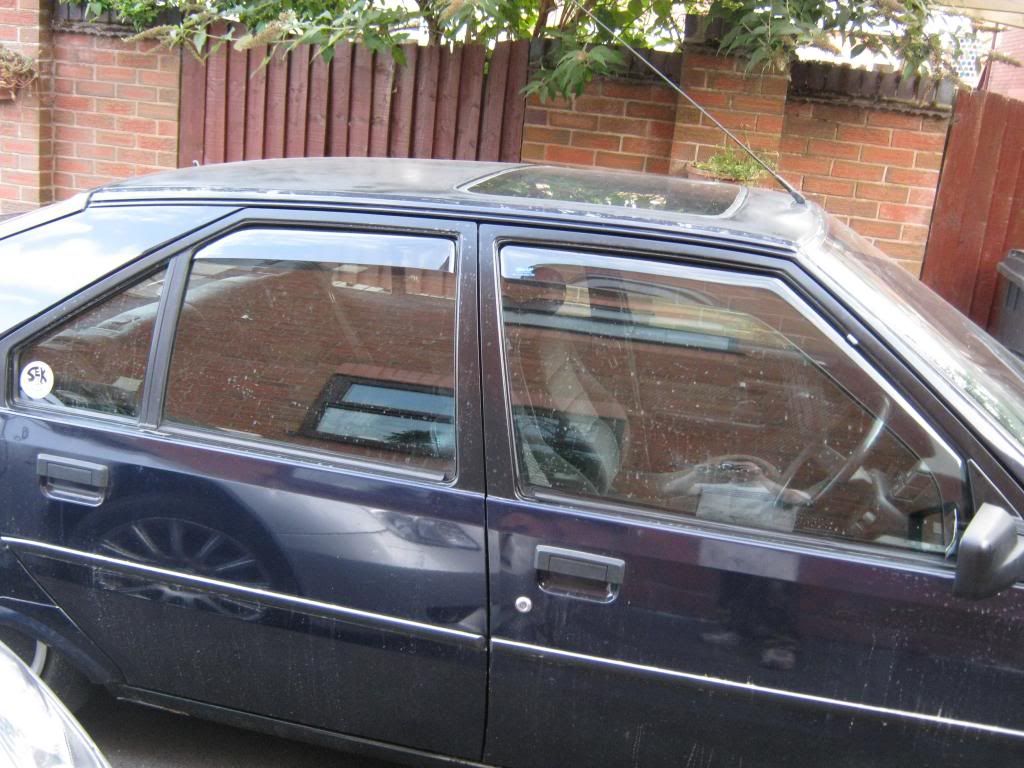
No pictures of this, but I also had to adjust the clutch as the car was getting increasingly hard to get it in to gear. This was because the locknut on the adjuster was loose, of course! Not difficult though and now the gear change is smoother and it no longer crunches going in to reverse.
I also bought and fitted some new front speakers, as the originals were starting to fall apart.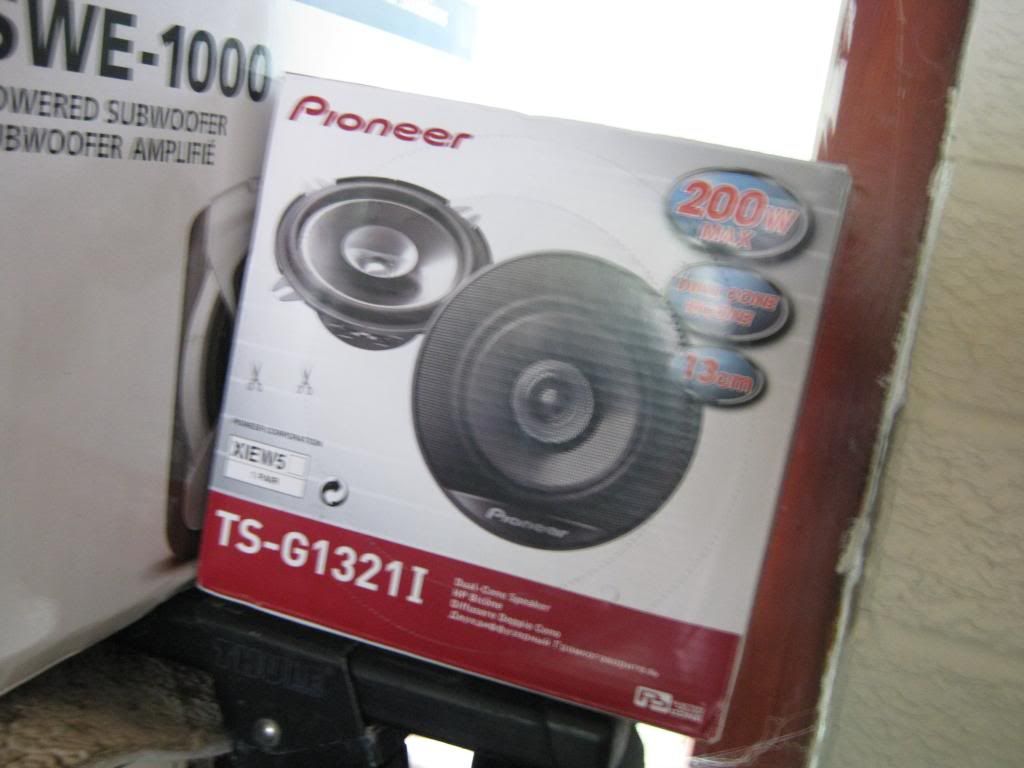
Then today I got on with a bit of wet flatting and polishing, which seems to have done the trick on the roof.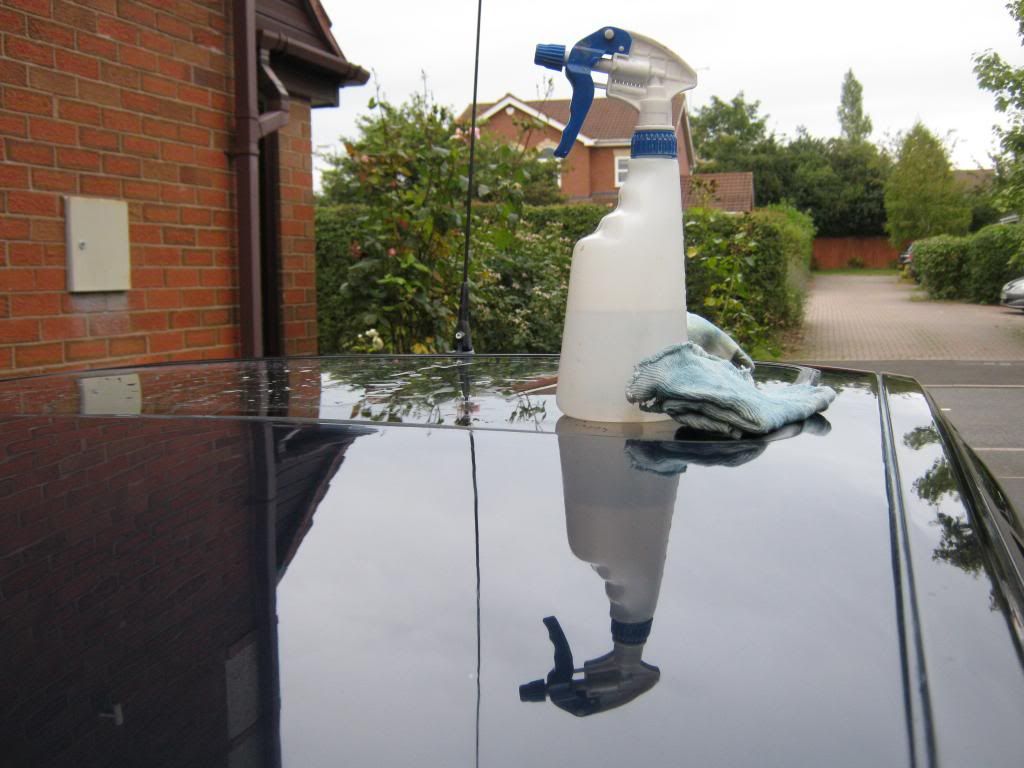

I really think I'm getting the hang of doing decent rattle-can spray jobs now...
I also fitted a replacement wiper motor that I very kindly got donated to me from a scrap BX. It took a friend of mine to point out that the current wiper motor had a lot of play in it, and comparing the two it was evident that mine was in very bad condition.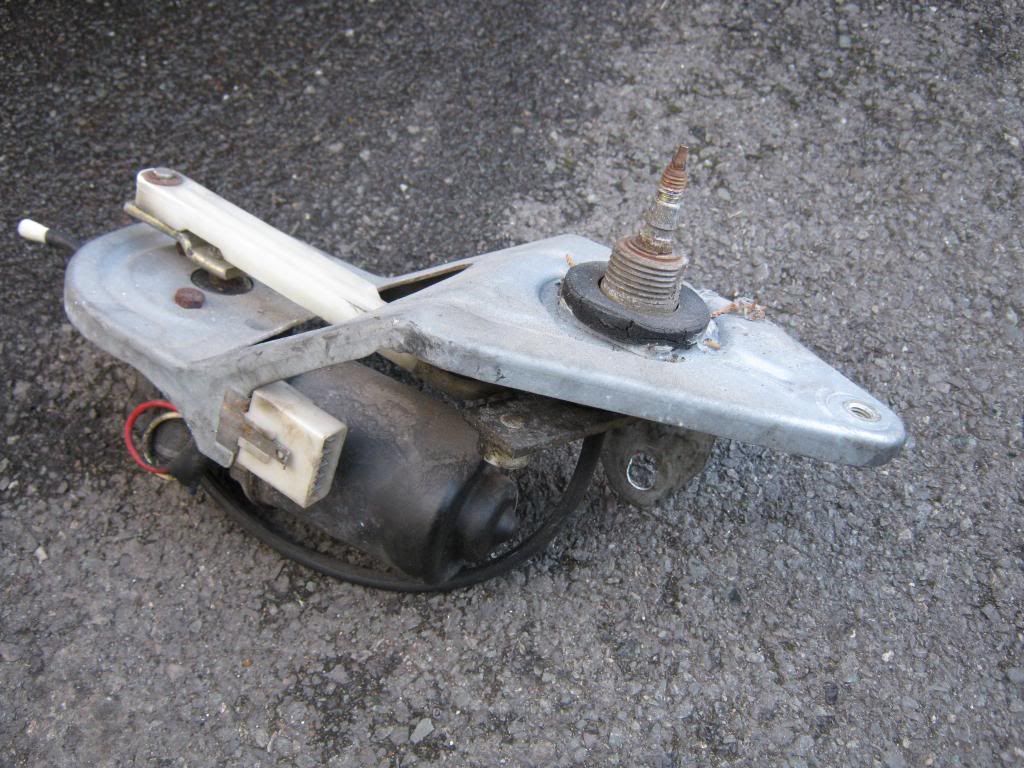
Gave the car a good wash at the end of the day after the last couple of weeks painting had given it a lovely coat of dust.
That's all for now folks!
#55
The Otter
-
- Members
-
- 620 posts
The artist formally known as j322overthetop
- Location: Midlands
Posted 26 March 2014 - 01:41 AM
End of September '13:
There wasn't much meat left on the front pads and the discs had quite a lip on the edges, so I fitted new front discs and pads.
Old:
Shiny:

All went fairly smoothly, only hampered slightly by a seized disc retaining screw that had to be drilled out. Lucky it's not really needed so the stub of what's left shall be in the hub forever.
End of October '13:
Little update - me and rob963 went to Harry Buckland's scrapyard in Gloucestershire, with a tip off of there being a red BX estate in there. Rob was interested in some parts because he also had a red BX estate, and I was just there because I knew I'd see something I wanted, even if I couldn't think of anything beforehand. You know how it is, you start looking at bits and think "oh yeah, I need one of those". So we got there and got told where the car was, and luckily we found that it was still pretty much in tact (minus the top half of the engine). After picking out a few little screws/clips that I knew I needed, I also pillaged the clocks and a rear seat belt. Not much, but hard bits to find when there aren't many of these cars left, and not too bad a price at £18 for the lot!
I bought the rear seat belt because one of mine is quite frayed - not dangerously so, but it was enough to be an advisory on the last MOT and it doesn't look very nice. The clocks I bought because the trip counter on this set actually worked! I'd never have known if it'd worked or not if someone had reset the mileage before it got to its final resting place, but luckily it was still on 900 something miles. I got in the drivers seat and looked in front of me and thought "hmm, I wonder..." so I pressed the button and the numbers magically pinged back to 0000 - bingo!
I got round to making use of those clocks a couple of weeks later. First thing I did was to go and get the original clocks out of the car, then remove the speedo unit (with broken trip counter):
Then I pulled apart the clocks from the scrapper and removed the speedo unit (with working trip counter). I then switched over the mileage counters, so I didn't add on 50,000 miles to my cars mileage! Counter out of fully functioning unit:
Then removing the counter from the original unit, using a bit of tape to keep all the wheels in the right place:
Screw it all back together, and ready to go back in the car:
So I then had a fully functioning trip counter - a luxury I'd never before experienced. Shame that the trip counter numbers didn't stay as straight as they should!
I fitted the rear seat belt a couple of weeks after this, and then did an oil change and coolant change (both well overdue!).
#56
The Otter
-
- Members
-
- 620 posts
The artist formally known as j322overthetop
- Location: Midlands
Posted 26 March 2014 - 01:48 AM
End of December '13:
Before I get on with todays update, I noticed I didn't mention that I bought some extra mudflaps on ebay a couple of months ago. I fitted them to the rear of the car so that I had flaps all round, as I'd always thought the car looked a bit odd with only front mudflaps. I know they don't match the front ones, but at least they say Citroen on them!

There was a guy breaking a 16v BX on Retro Rides, so I took the opportunity to buy a couple of bits off him that I've been wanting for a while, to freshen the car up a bit. The bits I bought off him arrived early December and I got round to fitting them a couple of weeks later.
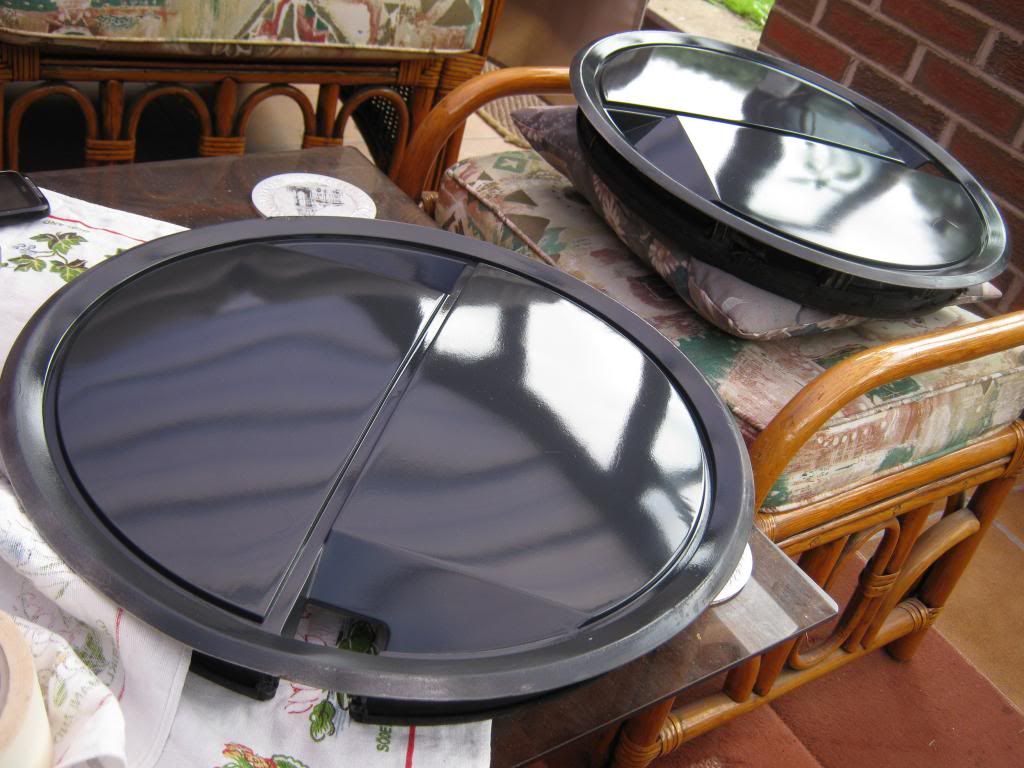
Firstly, is this rather random looking piece of rubbery plastic.
It sits on the top corner of the front bumper as a finishing piece - it's one of those small missing things that bugged me more and more as time went on. You can see here where it should sit, on the blue bit of plastic protruding from the top corner of the bumper.
It's just a push fit on there, so in about 30 seconds I had the replacement slipped on to the car - not exactly a transformation but it needed doing in my eyes!
I'd also got a replacement rear demister switch, as the one in the car originally always had very temperamental internal light bulb wiring which basically meant the bulb would never light up. This meant that I had no idea whether the heated rear window was on or not - again not a massive issue but one of those annoying little things.
Fitted in the car, and tested - yay it lights up! Fully working switch!
A slightly odd thing I noticed doing this was the switch I pulled out of my car had the connection on the back 90 degrees out of sync in comparison to the replacement switch. Not sure if that means one or other of the switches has been messed with in the past, but I just thought it was odd!
Then the final thing I got sent to me from the breaker was a nice little upgrade - a one-touch drivers window switch/loom. Only the top spec BXs came with these automatic window switches, and seeing as my car was a mid-spec model it only had the lowly window switch that you have to hold constantly, which of course is too much of an effort in this day an age. 
So, I got the switch itself, an enormous black relay box, and all the relevant wiring needed to make the switch work. It's all simple plug and play stuff, but the switch wiring and connector plug is different so needed swapping over.
So I pulled the door card off and split the front plastic section from the main card part to get at the wiring/switches.
Whilst I was there I remembered that I had something else to fix. The plastic section of the door card, shown above, is held on the rest of the card with three self-tapping screws through the card and in to raised mounting lugs on the back of the plastic section. The upper one of these has always been snapped off (but still there thankfully) meaning that the top of the plastic section has been free to flap about and stick out and be generally annoying/messy. I'd tried supergluing it in place in the past, but it just snapped off as soon as I tried to screw a screw in to it for the first time. None-the-less I thought I'd give it another go with the old super glue. Hopefully you can understand what I'm talking about from the pictures below, it's difficult to explain... The plastic lug was snapped off flush at the surface, and there's a clamp in place in the photo to hold the lug in place while the glue dried.

Whilst aimlessly waiting around for the glue to dry, I had an idea on how to fix the lug in place a bit more securely - fibreglass. I still had an old fibreglassing "kit" lying around that I'd bought from Halfords 3 or 4 years ago to cover up the rust holes on the Mini - bad habits short lived and long gone I can assure you! So I got to work and ended up with this monstrosity.
It worked though, the lug was held in place solid as a rock, so I'm quite pleased with myself for sorting that. It meant that the big plastic part of the door card was then seated flush against the top of the vinyl section of the card. Neat.
So, after that I had to finally install the wiring for that automatic window switch. The wiring itself was easy, just a straight swap for the old, however I needed to find where to mount the big black relay box. I'd read that there were factory mounting holes for it, that were obviously just left unused on the lower spec cars like mine. So I spent about 15 minutes examining the door itself and was quite confused when I couldn't find any spare holes, or anywhere that looked like it would fit. Then I wandered back over to the bench (where the door card was) and I noticed something...
Yep, that looks about right. The box sits on the back of the door card, not in the door! Silly me. So, three self tappers and that was in place too.
All assembled with the new switch in place.
It got dark by the time I'd gotten the door card back in the car, but I'm pleased to say it worked perfectly and gave me another avenue of laziness to explore now that I could watch the window go up and down all by itself!
#57
The Otter
-
- Members
-
- 620 posts
The artist formally known as j322overthetop
- Location: Midlands
Posted 26 March 2014 - 01:54 AM
Mid-January '14:
The engine knocked like crazy during start-up and at idle ever since I bought the car, and I'd only recently traced it to a disintegrated lower engine mount. I had a mission of a job changing the mount (actually more like an engine steady bush) over the Christmas holidays. It's a metalastic bush and a press fit into an alloy housing that's also some sort of support for the r/h drive shaft, with the shaft passing through the housing. The proper way to do this job is to pull the drive-shaft out of the diff, un-bolt the housing and use a press to get the old mount out and the new one in. However, it was apparently possible to do it in-situ underneath the car, without needing to remove the shaft, so thought I'd give it a go...
This is the new mount/bush.
I got the car up in high suspension mode and on to some ramps.
Then climbed underneath to have a look at what needed to come out. Not pretty...
So I unbolted the bracket that holds the engine to the subframe, and got a ratchet strap round the driveshaft and up to a hole on the front subframe to swing the engine out the way so I had room to get the bracket and the old mount out.

I then fashioned a flimsy "puller" to rip out the centre of the mount, which was already half delaminated from the outer metal band anyway.
I then spent many hours with a hacksaw, hammers and punches, etc. to get the outer ring out of the housing. It took a beating but I got it out in the end!


I'd frozen the new mount over night to try and make it a bit easier to get in place, but that turned out a bit pointless in the end - there's a reason you're meant to use a press to get the new one in...
I don't have any pictures of me getting the new one in, but it took me a couple of hours messing around with hammers and another flimsy puller I fashioned to try and squeeze the mount in. I got there in the end, winding up the puller as much as I dared before the threads fell off so I could get some pressure on the mount, then tapping it with a lump hammer to knock it in a bit at a time.
Funny thing is, the whole car then vibrated like a massage chair instead of constantly knocking at you. 
End.
That, I'm afraid, was the last job I did on the car before selling it on February 1st 2014. The engine developed an air leak in to the diesel system, and I can assure you that I tried and tried for about 3 months to fix it whilst driving the car daily, but I just couldn't sort it. The car would cut out every 10 minutes unless you were at constant full throttle, and I put up with that for 3 months - breaking down in traffic every 10 mins and having to drive on full throttle wherever I could, driving an undriveable car in the belief that I would eventually get to the bottom of the problem; but I never did...
I'm not sure the new owner has even fixed it yet, I need to give him a text and find out! Despite my failings, I'm very very interested to know what the hell the problem was!
Most ironic thing for me is that the complex hydropneumatic suspension never went wrong once, but the bullet-proof XUD engine...
Edited by The Otter, 26 March 2014 - 02:03 AM.
#58
JackF
-
- TMF+ Member
-
- 645 posts
Super Mini Mad
- Location: West Sussex
- Local Club: NSMOC
Posted 26 March 2014 - 01:06 PM
You better have something else lined up to replace this, I really enjoy reading your threads!
I hope the new owner gets to the bottom of the air leak and the car is back to its former glory.
#59
Ben_O
-

- Paint Doctor
-
- 9,794 posts
Mill Road Garage
- Location: Isle of Wight
Posted 26 March 2014 - 03:14 PM
That's a shame mate. The car was starting to look great. Hopefully the new owner will fix it and use it.
Cheers
Ben
#60
The Otter
-
- Members
-
- 620 posts
The artist formally known as j322overthetop
- Location: Midlands
Posted 26 March 2014 - 08:02 PM
You better have something else lined up to replace this, I really enjoy reading your threads!
I hope the new owner gets to the bottom of the air leak and the car is back to its former glory.
Way ahead of you there Take a looky at the new project thread I posted up yesterday, for some old BMWness --> http://www.theminifo...rs-e30-touring/
I'm glad you like reading them, cheers 
That's a shame mate. The car was starting to look great. Hopefully the new owner will fix it and use it.
Cheers
Ben
Yeah it was a shame to give up on it when I did, but I had to concentrate on my education and not let cars get in the way for a while 
The new owner seemed a really good chap for the car, he seemed to really appreciate all the work I'd done to it already and he knows his way round the old XUD lumps like the back of his hand but he'd never had a BX before, so he's well qualified to be diagnosing the engine problem! He was a car dealer from Lancashire and wanted to fix the car up and enjoy it himself for a while before selling it on  He said his unit was just across from an old Citroen specialist as well, so he's in a good place for any expert knowledge! I've given him a text today to find out how he's getting on, I'm really curious to find out what the problem was, so I'll post up here whenever I find out...


1 user(s) are reading this topic
0 members, 1 guests, 0 anonymous users


