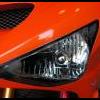
nice looking project there :)
for small bits of rust you can just cut them out and weld a patch in
thankyou  , ah brilliant that'll make things easier once ive got spare metal an a welder
The earths are common issues, I removed mine nd cleaned all of the contacts but also ran a separate wire for an additional earth.
Looking good though :)
right ill keep an eye out for broken or worn earths all over then an that explain's the spare battery terminal clamp in the 'glove' boot (must of been an old earth that rot through) , an cheers for the idea of a second earth 
I would chip out all of the bitumen floor insulation out first to see exactly what is what first before you start cutting out anything. At least it looks unmolested which is a good thing.
Good luck with the build. Any issues holler out.
thankyou thats my new next plan of action although what do you reccomend to use whilst working on / after i've chipped it all out and cut and replaced everything ( i dont want to leave the metal exposed incase more rust forms as my budget is very limited atm due to recent unforseen events ) ive thought of hammerite rust paint for the floor an i was thinking of using hammerite wax oyl for the inner sills / compainion bins etc ? , i may have seen you about as i ve seen a few edmc cars about over the years an nice sig '' impact tool size large ''
Now that is a well spent few quid - well done that man - ok a bit crispy in the usual places... the rear valance & front end look suspiciously good though - hopefully some recent metal.....bonus to have a 1275 already in place too....
Nice of your gran to come round to see it...
(I mean does anyone under 70 voluntarily drive a micra??? 
thankyou very much , yeah i thought the same after looking closer it may have been in a small rear accident as the chasis is still fine an original as far as i can tell but the boot ,rear valance are definately new metal ( no claimed accidents from background searchs i did so it may have been a self repair by a previous owner or wasnt declared etc ) , yeah saves me finding and fitting a 1275  , lmfao yeah thats my mums car
  for such an epically funny post
Looks nice! If you ever fancy selling the bumpers with corner bars let me know! :)
lol i hadnt seen them on many minis...so are they rare or something? an if i ever do think of selling ill keep that in mind ( i serioulsy doubt i will tho )
Looks like a good buy to me; well done.
As already mentioned I would remove the bitumen from the floor and see what the rot looks like. From the pics it looks like a lot of what you see may just be staining from small rust patches. You will prob just need a few small patches. I would also remove the mat under the spare wheel as this will be holding moisture on the boot floor. Also check the inner sills in the companion bins for rust and the rear wheel arches.
Jason
thankyou , yep thats the plan an im hoping there wont be any major holes i havent seen to be discovered , with the small patches etc ill cut an replace new metal but should i rub down the staining with sand paper or something (tho i've heard rubbing rust is a major no no so.....confused? ) , i have already removed the mat as is was malting everywhere ( the photo was before i did anything but thanks for the tip i hadnt thought of that  ) , i have had a look at the inner sills in the bins and rear arches but i forgot to take photos ( three times now :doh: ) they didnt look bad at all tho the cardboard bits that make the bottom of the bins are going so i wont be using them to store anything
photos to come of bins , arches and also a few videos of her running badly misfiring etc , when running better and a few random ones