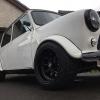
and tested my door poppers, click for vid
http://vid680.photob...0506EBFFB1B.mp4

Pro Motive Build In Sunny Scotland
#76

Posted 04 October 2014 - 07:53 PM
#77

Posted 01 September 2016 - 07:54 PM
Below is copied from my thread on scottish mini forum......
I redone the door catch linkage on one of the doors so it now works properly.
I fk farted around for ages trying to get some internal boot hinges to work then decided to sack that idea off and just stick with normal hinges.
Was gonna reskin the boot then managed to pick a new old stock genuine boot lid for cheaper than the skin so filled in the holes.
then made up a bracket to fit the catch which is the seat catch off the doner R1


back from work and some shiney shiney was waiting for me.

needs a bit of cleaning but was a lot cheaper than a brand new one

new wheel bearings fitted and drive shafts refurbed today.
right so I am moving house soon so have to get the mini in a state where I can put some wheels on it to move it so


arse end looking sexy!! and yes I know the rear subframe is all crusty but that will get refurbed when i take it off again.

All looks pretty groovy right? wrong!!!

KAD vented discs are hitting steering arms :-( not sure what to do about that. i'm pretty sure you shouldn't have to attack the steering arm with a grinder to get clearance for the discs. Anyone got any pearls of wisdom on this matter??
#78

Posted 01 September 2016 - 07:57 PM
Yep your right after a quick chat with the guys at KAD apparently its a common problem due to the inconsistency of the castings. So oot with the ginder
and hey presto, everything is peachy 
Well it took 2 vans a car trailer and a golf gti but that's oor Wullie in his new hoose 
Right then peeps I know it has been a while but I have not forgotten, honest!!!
so I started a new job and moved house then was forced against my will to re-decorate the entire house (even tho it didn't need it!!!) anyway, when I eventually got the garage unpacked and arranged in a sensible manner I decided to furnish it with a few more toys. So i found a coollittle parts washer that doesn't take up too much space.
I also bought a "pressure pot" type sandblaster off ebay but I needed a cabinet so I liberated some dexion shelving from work and made my self one, complete with extract fan and spot lights.


I also thought my porta power could be multipurpose so I made a frame to turn it into a press.

After doing all that I decided I needed rest so I made my "pondering chair" a place where I can relax and ponder my poor life choices.
after a wee rest i got back on the mini.
I spent a lot of time messing around with the bonnet qand came up with a solution that rotates it forward before rotating up. but i don't have any photos of that so you will need to take my word for it.
I then put the rear valance and exhaust on.

Now it was time for the engine
in the frame
in the car

now it's time for the interior. I never liked the way the mini seats were loads higher at the front than at the back so I decided to make another cross member to level them out a bit.

seats sit a bit high but I will see what it's like with headlining in before i weld it in.
Once I knew where the sets were going I could start making the dash and centre console using fleece and plenty of fibre glass resin and strengthened with fibreglass sheet.


A bit of double din action
instrument panel

and the view with the new steering wheel in
#79

Posted 01 September 2016 - 07:59 PM
minor update
centre console now had a coat of filler and sanded back.
Dash is undergoing a glovebox implant.
dash should be done in a week or so. (hopefully)
so i drilled out the centre console for my buttons

done a bit more filling and sanding on the dash. 
its pretty much finished apart from a couple of blobs of filler and getting it flocked or upholstered.
so after spending some time building a dog run and kennel, re-wiring my aunties garage, fixing the van, oh and working I have finally got back on the car.
I moved the filler neck on the fuel tank 
I also had a wee think and as the car has no door or boot handles I would be pretty screwed if the battery went flat. As I have used the seat locking mechanism off the R1 for the boot I thought I would hide the lock mechanism so it is accessible from the outside so in the event of a flat battery I could get into the boot by means of a key.
After reading a blog bout someone putting a hyabusa engine in a smart car where they said it went on fire twice due to overloading the electrics with toys I decided i'm going to run a dual battery system with a split charger, that way I can run the engine and lights off the battery in the boot and the electric windows, stereo, heater fan etc off an additional battery which i will fit behind the passengers seat. So to make it look nice i built a box with a hinged lid. think i'll put stereo amp in here too.

I then made my bits and bobs to tidy up the back seat area which are not going to be seats by the way.
and covered in fleece ready for some fibreglass resin.
just had a quick look and the one i've put theresin on has gone a bit ripply will have a proper look tomorrow and hope the other one doesn't do the same. then its on to the door cards which I am struggling to work out how to do.
just the one photo for today. sorry skivi!
Made a start on the door cards today.
#80

Posted 01 September 2016 - 08:02 PM
door card update!
so the switch housing that comes with the electric window kit looks a bit erm...... crap to be honest
so i had a look at what i had lying around and I found the clock fascia panel off the 206 dash I was gonna fit and thoughtI could use that to house the switches and use it as a door pull too. Cue the photos:

As I only had one I had to make another for the passengers side so I cracked out the fibreglass (just for a change!!!)

while they were drying I got going on the speaker pods
and wrapped in fleece ready for some resin
and sanded and fitted to the door.

and the passengers side
so the last few days have been spent making and fixing the brackets for the rear seat area which is pretty boring so no photos of that.
I went on a bit of a shopping spree and bought my aux battery and tray, split charge relay, heater and a few other bits. the battery and tray have been fitted in the box behind passengers seat.
The heater which is tiny!!!!
Is now fitted nicely in behind the centre console.
soon be time for wiring 
Hmm can't believe its been nearly a month since my last post!!!!
I've been in the garage every day but I don't seem to have achieved much.
Jobs I've knocked off the list are:
Boot release mechanism done
extended the internal door release handle square rod so the handles fit
moved the handbrake mount forward and upward to make it easier to reach
done the mounts for wing mirrors
blasted the bumpers to get the chrome off and welded some bolts in because the mounting brackets were rotten
made a grille
didn't like the way the door popper was sticking into the seat when the door was shut so made some new ones that don't really encroach in inside
cut off the steering lock and ign key switch and filled the hole in the column cowling
oh and I got the plain savage switch cut out by Terri Campbell Jewellery so it has an R on it for reverse 
right well notput an update on for a while but i have been doing well erm this..........
ive decided to put in a modular fuse box in on passengers side so lots of wiring!!!!
so i have eventually finished running the wires so tidied them up a bit and fitted everything just to see how it looked 
and here is the modular fuse box mounted on the underneath of the passenger side of the dash
just need to order a load ofconnectors and that is the wiring done. not sure what to do next!
#81

Posted 02 September 2016 - 12:53 PM
![]()
![]()
![]()
You have done some work there buddy, fair play to you. Good luck, and loving the garage!
#82

Posted 12 September 2016 - 08:33 PM
few more jobs off the list
front brake lines...done
clutch lines...done
heater hoses...done
rear brakes built up
handbrake...done
and finally the exhaust, got a bit of 2" stainless pipe ive cut it to fit just waiting on the hangers and joiner coming then i can make sure they fit.

I have also ordered the tyres so I can get them fitted to my wheels and start getting the arches fitted
#83

Posted 18 September 2016 - 04:02 PM
Had a bit of a mixed weekend as everything is in i wanted to start the engine just as a wee treat so filled her up with oil and water. after a few tries and a wee scoosh of some easy start she burst into life  then before my eyes the oil in the sight glass started turning into a baileys type liquid
  so i killed the engine. As I had never seen the engine running when i bought it I was now having a bit of a twitchy bum moment thinking something was very wrong with the engine. I thought id check the bits that I had taken out and the water pump outlet pipe runs through the sump so that was a prime candidate. as you cant get the pipe out with the engine in the frame I took the oil pan off
and managed to pull the pipe out enough to have a look at the o ring

As you can see the o ring was crushed a wee bit, so replaced it and put it all back together again.
then this
A few things to sort out when it goes back together the main being the throttle!!! you only need to sneeze near the pedal and it goes to 8000rpm!! any one any ideas on sorting this out??
#84

Posted 18 September 2016 - 04:52 PM
#85

Posted 18 September 2016 - 05:22 PM
I thought the same with mine but when your actually out on the road with the car its quite manageable. I am not sure how you are running your throttle cable but for my mini I used a bicycle selector cable that fits in the factory location on the carbs. Cut the cable to length and used a cable stop with grub screw to adjust the pedal
Yeah i'm doing the same except using the r1 cable that came with the engine luckily it fits
#86

Posted 15 October 2016 - 09:29 PM
been a few weeks and not done much to be honest. kind of lost my way a bit but managed to get a wee bit done. so i need to fit the arches, i originally bought some sportspack arches, i taped them on but the wheels didnt fill out the arches so bought some different ones from abs motorsport.
the first thing i had to do was set the ride height so i could put the arches on in the right place after loads of looking and reading my threads and a lot of posts of people moaning about 13's i set the ride height at 250mm from floor to sill seam all round, i figure that gives me room to play with settings. what do y'all set yours at???
so fitted the rear arches

not keen on how they are fixed as the amount of material between the screw hole and the edge is approx 2mm so i am going to fibreglass some studs in.
as for the front... the geometryis all to pot so i am waiting n a castor/camber gauge and trackace tracking thingy so i can get it roughly in the right place before fitting the arches. so just taped them on for now.


what settings are people running with 13's???
#87

Posted 17 October 2016 - 03:24 PM
Flares look good and congrats on getting the engine started!
Are you not running a baffle plate?
Edited by roadhouse, 17 October 2016 - 07:51 PM.
#88

Posted 17 October 2016 - 06:36 PM
Are you not running a baffle plate?
Wasn't going to. I will only be using it on the road so there wont be any prolonged fast cornering.
#89

Posted 17 October 2016 - 07:23 PM
Are you not running a baffle plate?
Wasn't going to. I will only be using it on the road so there wont be any prolonged fast cornering.
Hmmm I wouldn't bet on it. I felt the need for a baffle on a couple o cars in the past and I've never been near a track. Couple seconds on a corner is enough under load.
#90

Posted 17 October 2016 - 07:53 PM
Baffle plate is cheap insurance on your motor if you aren't going to run an accusump. Just a thought!
1 user(s) are reading this topic
0 members, 1 guests, 0 anonymous users


