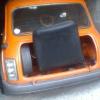
Oh well, only a minor set back

Mini 25 Full Rebuild
#1231

Posted 18 August 2015 - 05:11 PM
#1232

Posted 18 August 2015 - 07:44 PM
Hey Ben, is the subframe going to get sanded down (or sandblasted or acid dipped or something (don't know the correct protocol ![]() )) and powder coated (or painted or something) at some stage?
)) and powder coated (or painted or something) at some stage?
#1233

Posted 18 August 2015 - 09:13 PM
Hey Ben, is the subframe going to get sanded down (or sandblasted or acid dipped or something (don't know the correct protocol
)) and powder coated (or painted or something) at some stage?
Probably not.
i shall just fit it as it is ![]()
#1234

Posted 18 August 2015 - 09:23 PM
Hey Ben, is the subframe going to get sanded down (or sandblasted or acid dipped or something (don't know the correct protocol
)) and powder coated (or painted or something) at some stage?
Probably not.
i shall just fit it as it is
That should be your member description ![]()
#1235

Posted 18 August 2015 - 09:27 PM
Hey Ben, is the subframe going to get sanded down (or sandblasted or acid dipped or something (don't know the correct protocol
)) and powder coated (or painted or something) at some stage?
Probably not.
i shall just fit it as it is
That should be your member description
![]()
![]()
![]()
![]()
![]()
![]()
![]()
![]()
![]()
![]()
![]()
#1236

Posted 18 August 2015 - 09:28 PM
Hey Ben, is the subframe going to get sanded down (or sandblasted or acid dipped or something (don't know the correct protocol
)) and powder coated (or painted or something) at some stage?
Probably not.
i shall just fit it as it is
That should be your member description


Be careful,i can do yours too now ![]()
#1237

Posted 19 August 2015 - 11:11 AM

#1238

Posted 19 August 2015 - 11:19 AM
#1239

Posted 19 August 2015 - 11:24 AM
Now you just need to fit it ;) should be a quick 5 minute job you can crack off after dinner Ben
I still have loads of prep work to do first.i need to at least get the back panel repairs ground up and the little fillet piece removed from inside the companion bin n/s (the one that fills the gap between the front corner of the boot floor and heelboard etc)
It will be in by the weekend though.
#1240

Posted 19 August 2015 - 11:38 AM
Now you just need to fit it ;) should be a quick 5 minute job you can crack off after dinner Ben
I still have loads of prep work to do first.i need to at least get the back panel repairs ground up and the little fillet piece removed from inside the companion bin n/s (the one that fills the gap between the front corner of the boot floor and heelboard etc)
It will be in by the weekend though.
It's Wednesday, You'll have the car running by the weekend
#1241

Posted 19 August 2015 - 01:10 PM
Just to echo all the other comments and say your fabrication work is fantastic!
So glad you didn't sell it. Not long till the move now though, before you got the tent I was going to sujest speaking to the farmer about using some barn space :)
Keep up the good work, I'll be following along now.
Ps. What gas are you using/would recommend? I've only ever used the small expensive bottles of co2 and found them pretty bad for me anyway but need to get a larger bottle before I crack on with a rusty mini! 😝
#1242

Posted 19 August 2015 - 04:15 PM
Your build diary has kept me entertained for the past week! What an awesome project, I like how you want to keep it authentic and original!
Just to echo all the other comments and say your fabrication work is fantastic!
So glad you didn't sell it. Not long till the move now though, before you got the tent I was going to sujest speaking to the farmer about using some barn space :)
Keep up the good work, I'll be following along now.
Ps. What gas are you using/would recommend? I've only ever used the small expensive bottles of co2 and found them pretty bad for me anyway but need to get a larger bottle before I crack on with a rusty mini!
Thankyou for the kind words mate.
I am using hobbyweld argon/c02 mix. As far as i can remember, it is a £50 refundable deposit for the bottle and then about £36 for a refil. You also need to get a regulator and conversion hose which costs up to £50 depending on what you get.
i can show you the regulator and hose i have if it helps.
Cheers
Ben
#1243

Posted 19 August 2015 - 04:38 PM
Now that the boot floor is in my possession, i figured it was about time i got it in.
But before that,i needed to finish up cleaning the welds on the back panel repair.
As it was dry outside, i decided to put the Mini outside and give myself some more space to work.
After a tickle with the grinder with various stones, discs and what have you,it was all smoothed out. I was tempted to spend longer at this stage and get the finish better but that would be a waste of time right now so it will have to wait until another time.


And inside had a tickle too


Primer


I wrestled the boot floor into position but had a slight problem

It looks as thought the boot floor needs to go forward more but it lines up well everywhere else and fits snugly around the arch tub.
It seems the problem lies with the rear panel.....
I boshed this deathtrap together to move the rear panel out and in line

Which improved things a bit

But it needed more.
so an even more elaborate death trap was devised

Which got it more or less where it needs to be

The other side is spot on

The seat pan needed attention too

A block of wood and a jack had that sorted

So that's all now about right

next up i needed to fit the rear subframe to check the mounts all line up but that will have to wait until part 2 of this update as i need to pop out.
laters
#1244

Posted 19 August 2015 - 06:02 PM
I jacked the subframe up into position using a jack and a long piece of 2x4 and started bolting it up to the heelboard
This side fits well

the reason for only one bolt is that there is a snapped bolt in the other hole. That's ok though as it served as a locating pin to keep the trunion straight.
Here is the other side

It bolted up easily with no force needed at all.
The rear one on the n/s seems ok. It lifted straight into position

The other side not so good.

A bit of jiggling saw them both bolted up with no fuss


and then just some random photos of the fit.


Then i checked the bootlid again just to make sure my tweeks to the rear panel hadn't put anything out of line


It all seems good.
Next time,i need to pull it all apart again and prep for welding.
Ben
#1245

Posted 19 August 2015 - 10:27 PM
looks good ben. i had the same issue with the boot floor not lining up but mine is due to using a pattern repair panel and not the whole floor panel lol. glad the boot lip lined up everything will be in, in no time what so ever
6 user(s) are reading this topic
0 members, 6 guests, 0 anonymous users


