Jump to content


Photo
* * - - - 3 votes

Mini 25 Full Rebuild


  • Please log in to reply
1498 replies to this topic

#1066 Ben_O

Ben_O

    Mill Road Garage

  • Paint Doctor
  • PipPipPipPipPipPipPipPipPipPip
  • 9,793 posts
  • Location: Isle of Wight

Posted 10 June 2015 - 06:49 PM


Hi Ben, awesome as usual, only thing I don't understand is what is a dolly?


John

This is a dolly  :lol:


PalitoyTinyTears1970s_zpsjs1msdrn.jpg


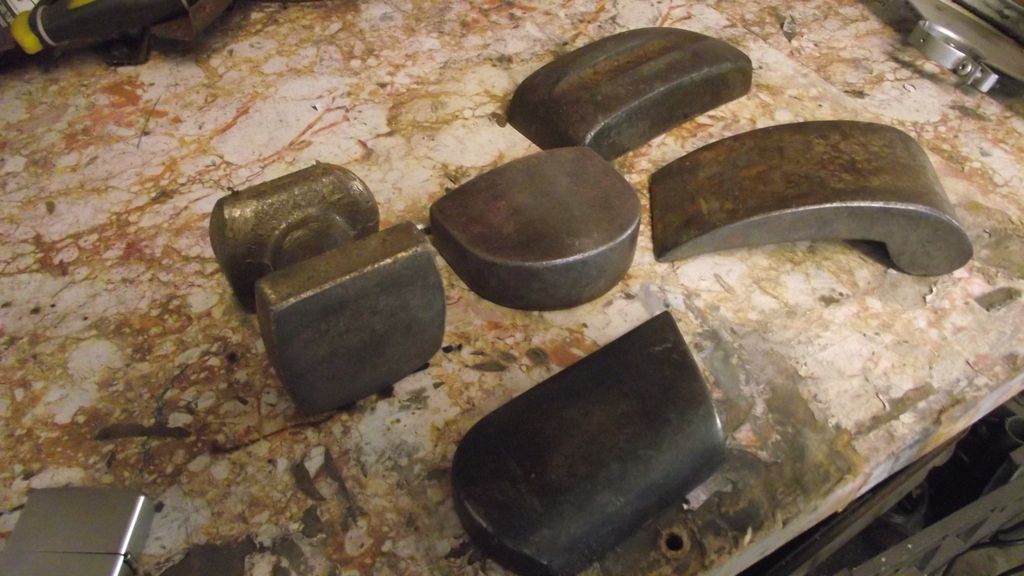
nah only joking, A dolly is a panel beating tool and is essentially a solid metal block available in different shapes, weights and sizes and is used for pretty much all metal bashing.


Here is some of my most used ones


DSCF0875_zpsdkhydhpp.jpg


Each one has it's own job and can be used in a multitude of ways.

The most common way is to hold it behind a bent panel so that when you hit it from the front with a panel hammer, it gives you something to brace the back and to help with regaining the shape.


In the case of above where i say using the edge of a dolly, i mean a corner point of one to push up the centre of the dent from behind whilst i plainish the front with the panel hammer.


Hope that explains it.


Ben


#1067 Hendred

Hendred

    Speeding Along Now

  • Members
  • PipPipPipPipPip
  • 484 posts
  • Location: Cleobury Mortimer Nr Ludlow, Shropshire Name: John

Posted 10 June 2015 - 06:57 PM

Ha ha, worrying thing is you had the pic of the doll a bit sharpish, joking..


Thanks Ben your step by step earlier all makes sense to me now.


#1068 Ben_O

Ben_O

    Mill Road Garage

  • Paint Doctor
  • PipPipPipPipPipPipPipPipPipPip
  • 9,793 posts
  • Location: Isle of Wight

Posted 10 June 2015 - 07:03 PM

Ha ha, worrying thing is you had the pic of the doll a bit sharpish, joking..


Thanks Ben your step by step earlier all makes sense to me now.

I have a huge stock of pictures of dollies on my hard drive. something like 42,000ish.


I have even more real ones  O_O  O_O  O_O  O_O  O_O


;D


#1069 Hendred

Hendred

    Speeding Along Now

  • Members
  • PipPipPipPipPip
  • 484 posts
  • Location: Cleobury Mortimer Nr Ludlow, Shropshire Name: John

Posted 10 June 2015 - 07:28 PM

Ha ha, each to their own.  You been burning that seam sealer and paint off again? lol.


#1070 spraybeater

spraybeater

    Speeding Along Now

  • Members
  • PipPipPipPipPip
  • 468 posts
  • Location: west yorkshire
  • Local Club: Mcr

Posted 10 June 2015 - 09:26 PM

Nice bit of panel beating! Stopper finish,for those of us that remember Cellulose Putty!

great to see somebody with skill and patience,keep up the good work


#1071 Ben_O

Ben_O

    Mill Road Garage

  • Paint Doctor
  • PipPipPipPipPipPipPipPipPipPip
  • 9,793 posts
  • Location: Isle of Wight

Posted 13 June 2015 - 01:22 PM

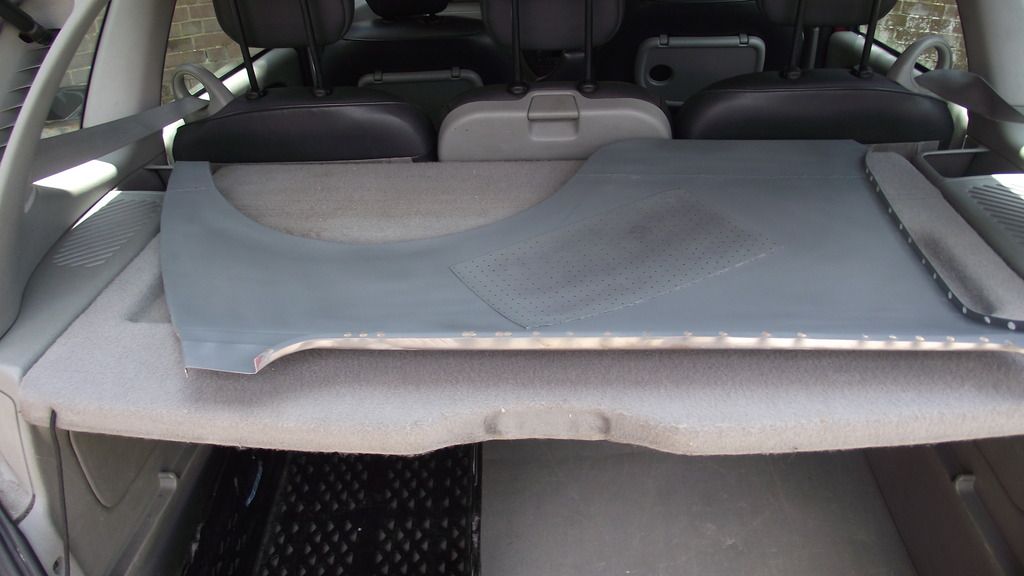
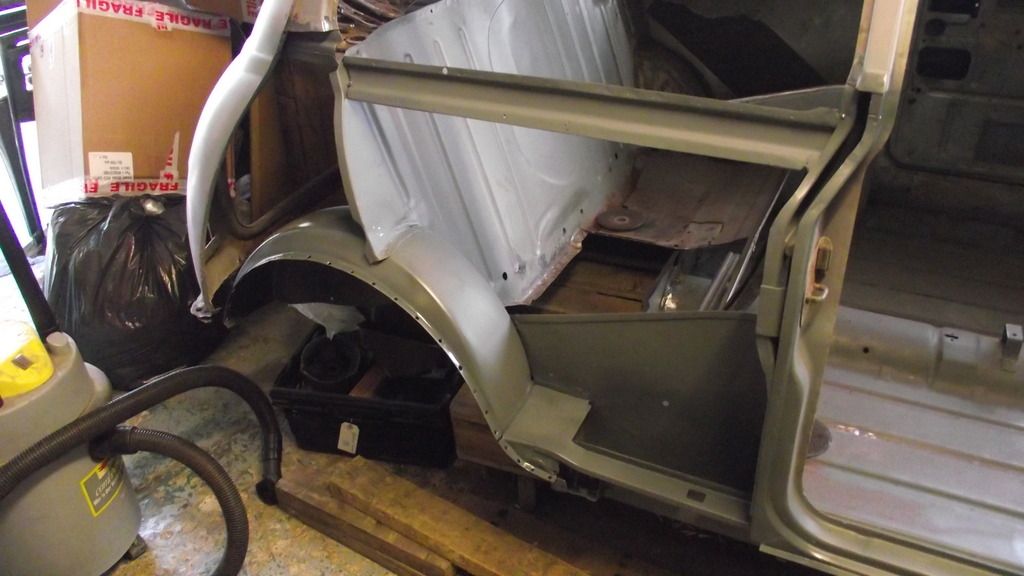
I took the quarter panel off again to prep it for fitting. This was basically just removing any paint and rust from the inside of the panel and then spraying it up with zinc.

I put it on the back shelf of my car to dry as it's quite windy


DSCF0878_zpsnzrhmrdc.jpg


and the car prepared too


DSCF0876_zpswn8aummz.jpg


DSCF0877_zps6hpiwaah.jpg


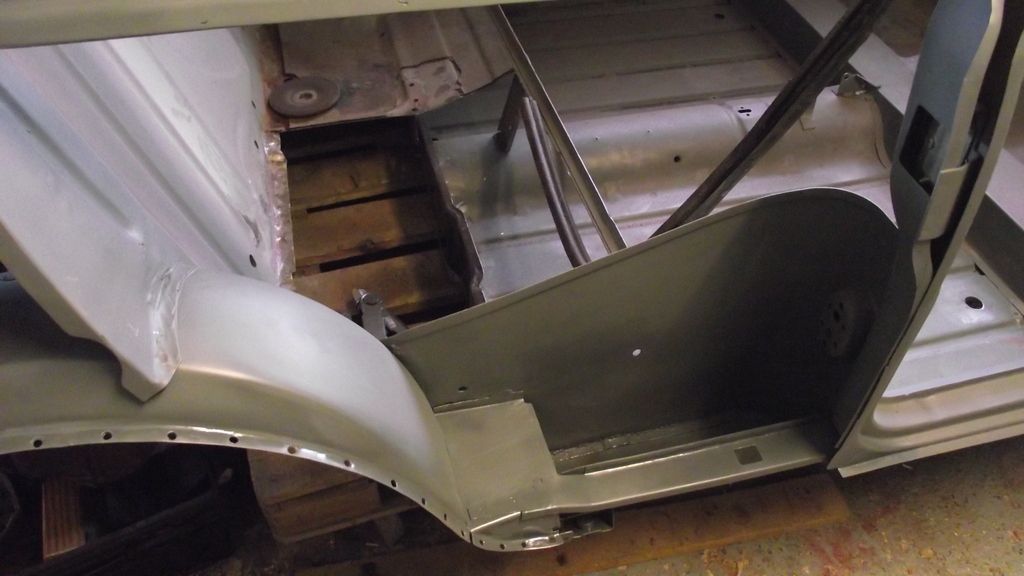
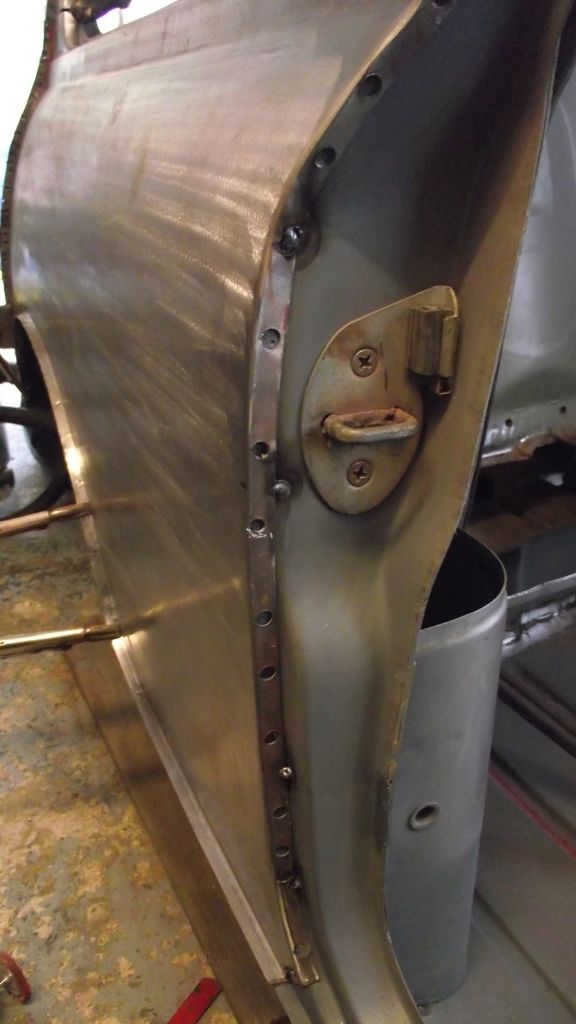
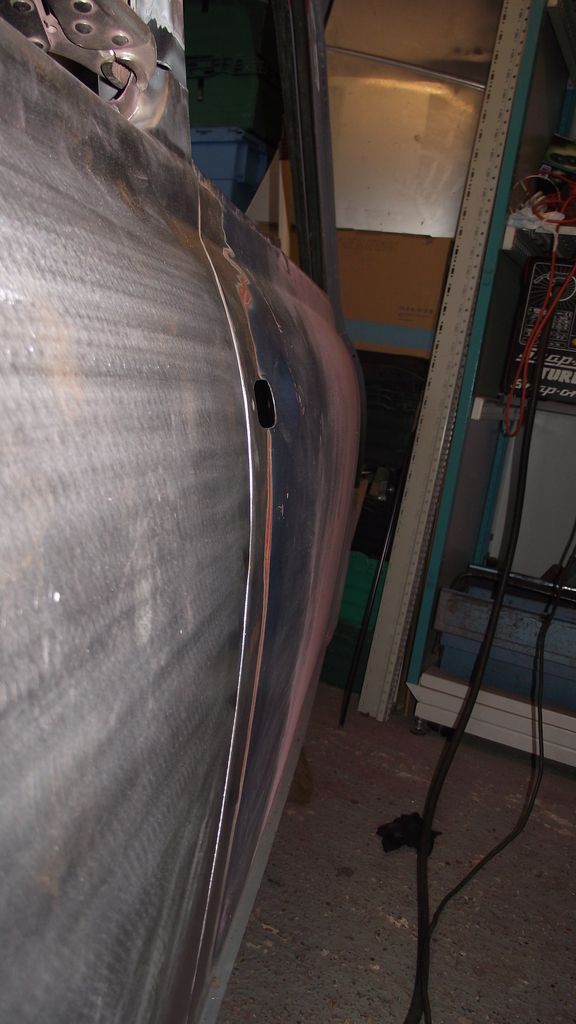
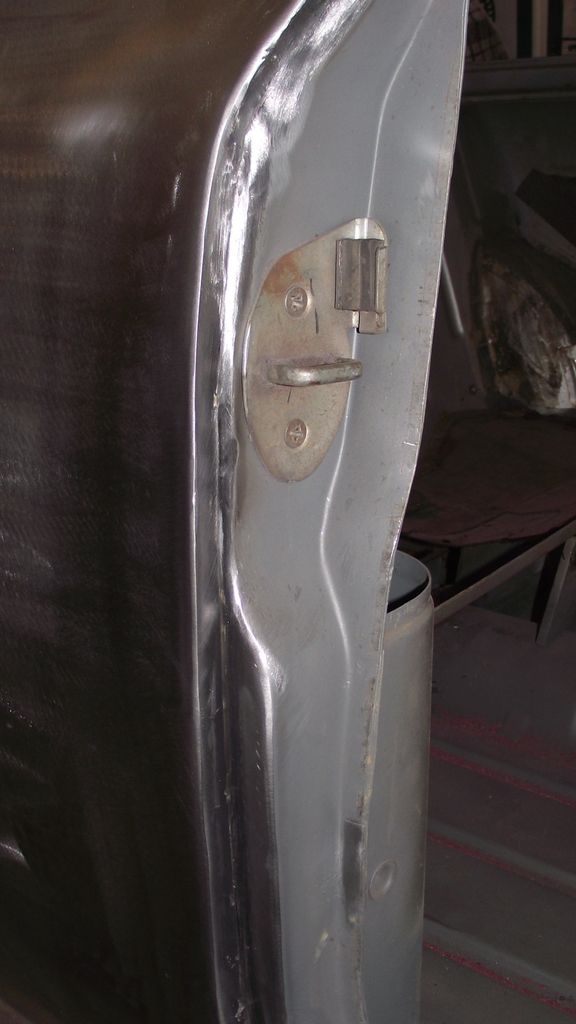
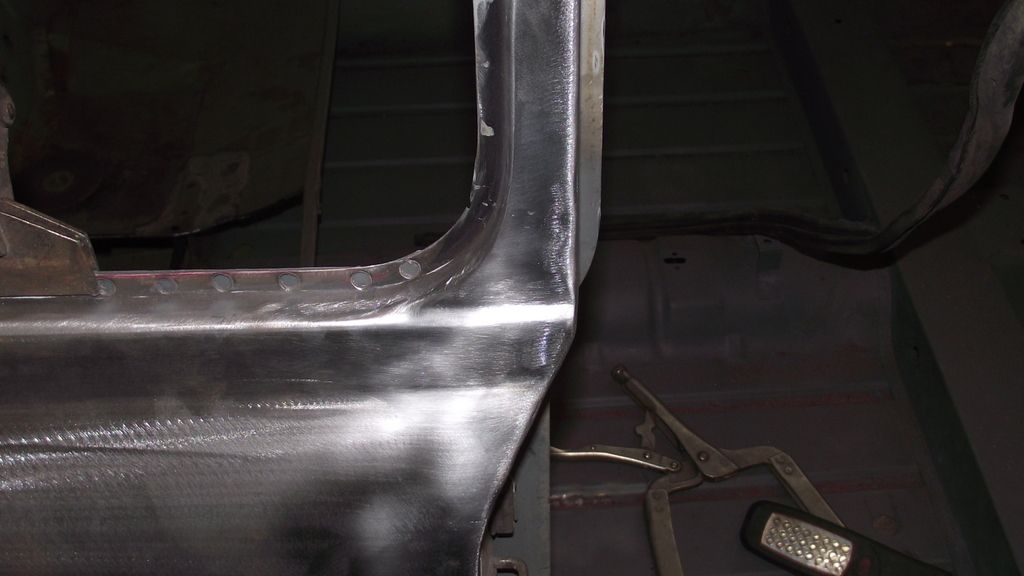
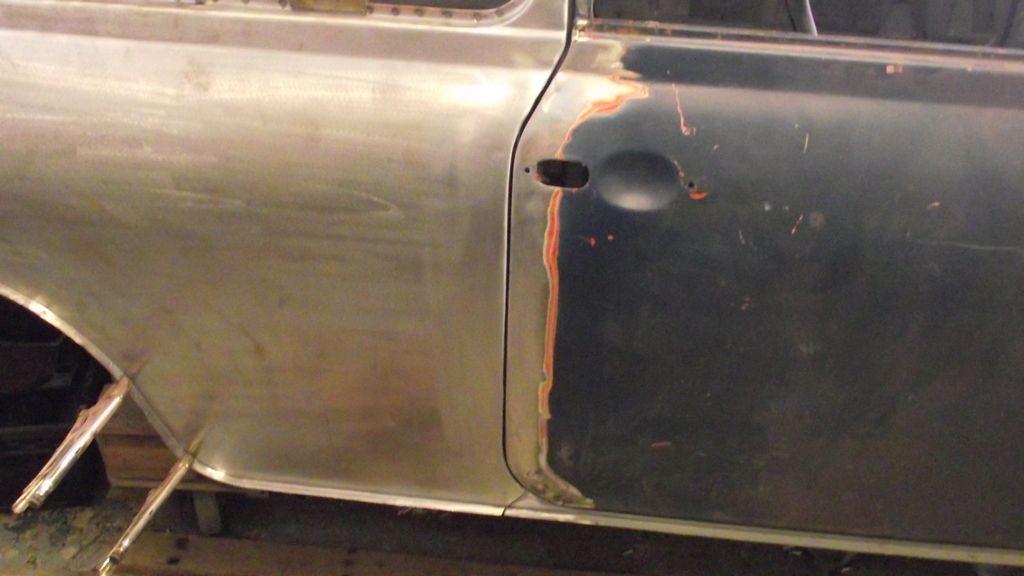
Next, i put the panel back on again but noticed a problem that i had down the front edge of the panel where it meets the door. It wasn't completely flush all the way up and down. In places, it was proud of the door and in others, the door sat proud of the quarter panel.

To resolve this, i marked where it was proud with a pen and then opened the door and tacked the edge of the panel to the B post and did the same where it sat back too.

After a few tacks, i had this


DSCF0880_zpsdxt3wefo.jpg


And the door now sits pretty much bang on


DSCF0882_zps0w6fxvq6.jpg


DSCF0885_zpsboda6ka5.jpg


Now i was happy with it, i plug welded up the edge of the panel to the B post and ground it back


DSCF0890_zpsbcqkakrt.jpg


And also seam welded the join on the B post and ground that back


DSCF0891_zpsm76i1ngs.jpg


So thats the front of the Quarter panel sorted


DSCF0894_zpsqqpnveq9.jpg


Just the rest to do now but i got fed up so gave up for today. I wasn't really feeling it..


Cheers


Ben


#1072 Tupers

Tupers

    Up Into Fourth

  • Members
  • PipPipPipPipPipPipPipPipPip
  • 4,128 posts
  • Location: Devon

Posted 13 June 2015 - 01:42 PM

Tidy.  :mrcool:


#1073 Ben_O

Ben_O

    Mill Road Garage

  • Paint Doctor
  • PipPipPipPipPipPipPipPipPipPip
  • 9,793 posts
  • Location: Isle of Wight

Posted 13 June 2015 - 02:04 PM

Tidy.  :mrcool:

cheers!


#1074 Vinay-RS

Vinay-RS

    Put's foolish ideas in peoples heads

  • Members
  • PipPipPipPipPipPipPipPipPip
  • 2,097 posts
  • Location: Cape Town

Posted 13 June 2015 - 04:40 PM

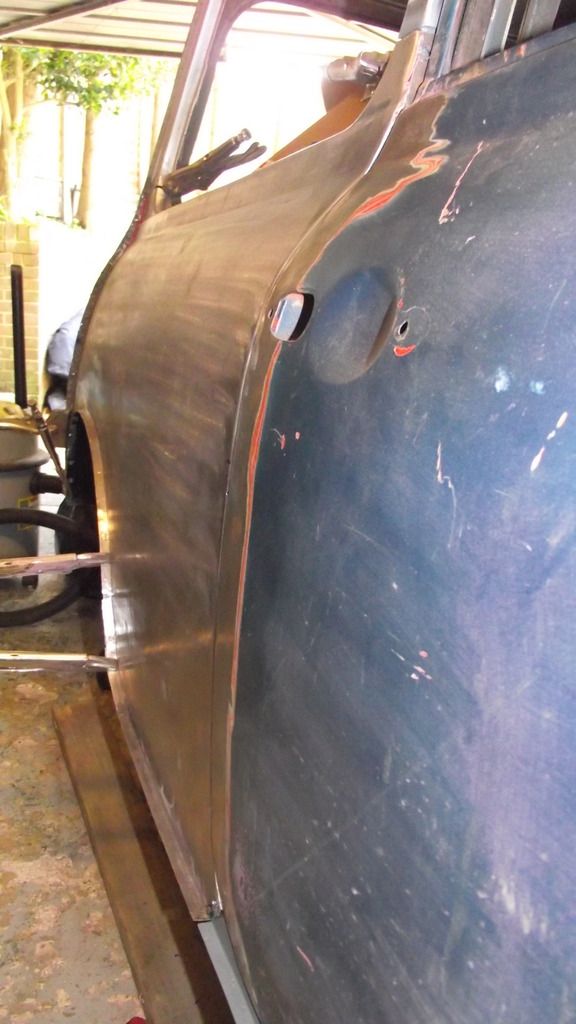
I know the plan is to restore this car to a better than original condition, but has anyone ever created a mini with a brushed metal finish? Looking at that quarter panel, the idea sounds quite cool. 


#1075 MrBounce

MrBounce

    Up Into Fourth

  • TMF+ Member
  • PipPipPipPipPipPipPipPipPip
  • 2,614 posts
  • Location: The Manroom in Ipswich

Posted 13 June 2015 - 08:46 PM

Excellent work Ben. I only wish I had similar skills! :gimme:


Oh by the way I've fixed my welder with a new swan neck :thumbsup:


#1076 Ben_O

Ben_O

    Mill Road Garage

  • Paint Doctor
  • PipPipPipPipPipPipPipPipPipPip
  • 9,793 posts
  • Location: Isle of Wight

Posted 14 June 2015 - 05:08 AM

I know the plan is to restore this car to a better than original condition, but has anyone ever created a mini with a brushed metal finish? Looking at that quarter panel, the idea sounds quite cool. 

I was chatting to my other half about that. I also considered the possibility of polishing the steel right up to  mirror finish. Not sure where you would stand with the law though. it would be highly reflective :lol:


#1077 Ben_O

Ben_O

    Mill Road Garage

  • Paint Doctor
  • PipPipPipPipPipPipPipPipPipPip
  • 9,793 posts
  • Location: Isle of Wight

Posted 14 June 2015 - 05:10 AM

Excellent work Ben. I only wish I had similar skills! :gimme:


Oh by the way I've fixed my welder with a new swan neck :thumbsup:

Cheers Dave.


Glad you got your welder sorted. perhaps try some anti splatter spray on the tip to help keep everything moving. Its really good stuff. I use it on the inside of my shroud and it stops splatter from sticking to the insides


#1078 SAL 821X

SAL 821X

    Camshaft & Stage Two Head

  • Members
  • PipPipPipPipPipPipPipPip
  • 1,890 posts
  • Location: Hinckley
  • Local Club: Leicester Mini Owners Club

Posted 14 June 2015 - 05:18 AM

Should start calling you the panel doctor now too.

#1079 grahama

grahama

    Up Into Fourth

  • Members
  • PipPipPipPipPipPipPipPipPip
  • 2,442 posts
  • Location: Warrington
  • Local Club: None in my area !!

Posted 14 June 2015 - 06:58 AM

Very nice work. Love your attention to detail.

#1080 Anthony30

Anthony30

    One Carb Or Two?

  • Members
  • PipPipPipPipPipPipPip
  • 1,466 posts
  • Location: Rainhill,Merseyside
  • Local Club: N/A

Posted 14 June 2015 - 07:00 AM


Hi Ben, awesome as usual, only thing I don't understand is what is a dolly?


John

This is a dolly  :lol:


PalitoyTinyTears1970s_zpsjs1msdrn.jpg


nah only joking, A dolly is a panel beating tool and is essentially a solid metal block available in different shapes, weights and sizes and is used for pretty much all metal bashing.


Here is some of my most used ones


DSCF0875_zpsdkhydhpp.jpg


Each one has it's own job and can be used in a multitude of ways.

The most common way is to hold it behind a bent panel so that when you hit it from the front with a panel hammer, it gives you something to brace the back and to help with regaining the shape.


In the case of above where i say using the edge of a dolly, i mean a corner point of one to push up the centre of the dent from behind whilst i plainish the front with the panel hammer.


Hope that explains it.


Ben


Don't be silly Ben. Below will explain all.

http://spinoff.comic...vampire-slayer/


4 user(s) are reading this topic

0 members, 4 guests, 0 anonymous users