Jump to content


Photo
* * - - - 3 votes

Mini 25 Full Rebuild


  • Please log in to reply
1498 replies to this topic

#601 Ben_O

Ben_O

    Mill Road Garage

  • Paint Doctor
  • PipPipPipPipPipPipPipPipPipPip
  • 9,785 posts
  • Location: Isle of Wight

Posted 31 December 2014 - 06:35 PM

Mine stuck out abit when I done mine i got the hammer and taped it in to the floor and then clamped in place I had to do some trimming here and there to get it to fit good tho. Also on the other side when I offered the wing on it had a finger gap all the way down the top edge where the bonnet sits I had to add a bigger piece in so the wing sat better and level with the other side. Test your wing before you weld it on . Looking good tho mate keep it up cheers Tom

Cheers Tom. Ill get it all screwed in place etc and then pop on the bonnet, scuttle and wing and see what i have got.


I have done so much work in that corner of the car, i am not surprised there are a few issues. Especially as i hand made all of the panels that it fits against.


Ill get there.. 


#602 ToM 2012

ToM 2012

    Up Into Fourth

  • Members
  • PipPipPipPipPipPipPipPipPip
  • 4,066 posts
  • Location: halesowen

Posted 31 December 2014 - 08:07 PM

you will get around it mate ino you will cheers tom 


#603 Ben_O

Ben_O

    Mill Road Garage

  • Paint Doctor
  • PipPipPipPipPipPipPipPipPipPip
  • 9,785 posts
  • Location: Isle of Wight

Posted 20 January 2015 - 03:50 PM

Not felt much like doing any panel work lately what with the eye injury followed swiftly with Flu which still hasn't completely cleared up.


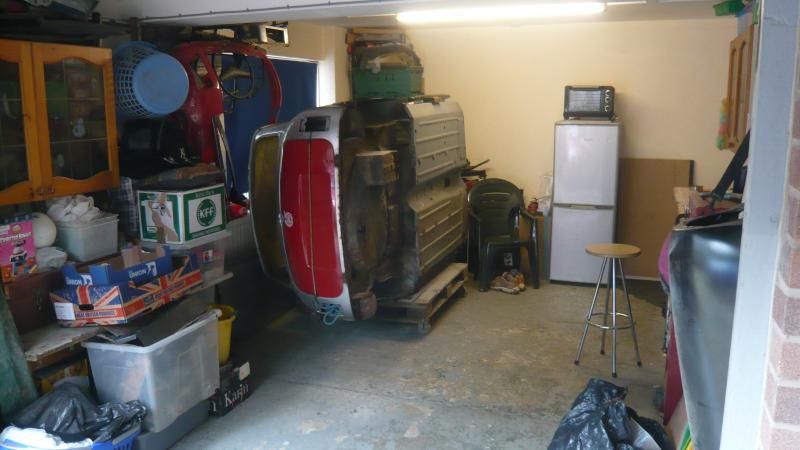
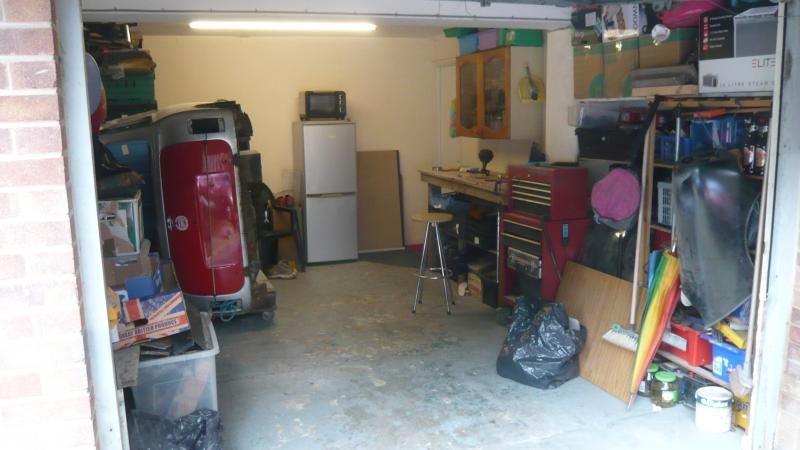
The stupid Brook beside our house has been plating up again and overflowing onto the footpath so in fear of a repeat of last years fun and games i decided i would prepare myself and with the garage being in it's usual chaotic mess, i decided to have a clear up and do it properly this time so several tip runs and boring hours later i had it much better and much more usable.


I also moved my work bench as with it where it was, i kept putting stuff in front of it meaning i couldn't get near it to actually use it  >_<


P1060368_zps4d8cd92a.jpg


P1060366_zps350470dd.jpg


I also made a makeshift shelving solution out of some scrap wood. Not pretty by any stretch of the imagination but it's got some floor space back
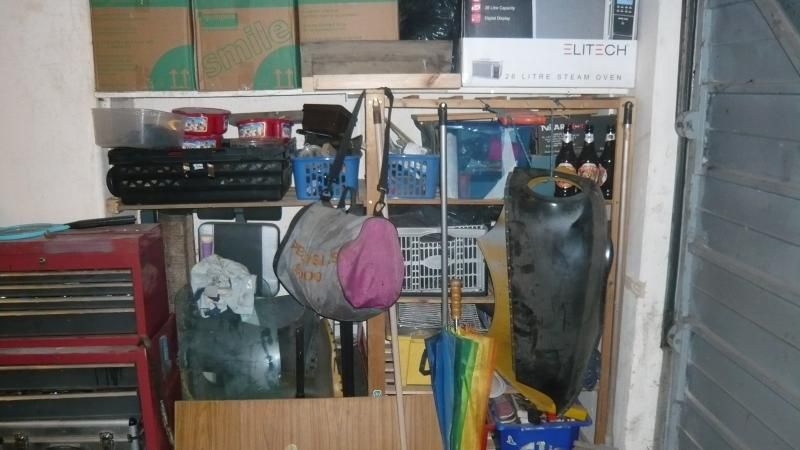
 

P1060370_zps1ccf656e.jpg


and the bench in it's new better position
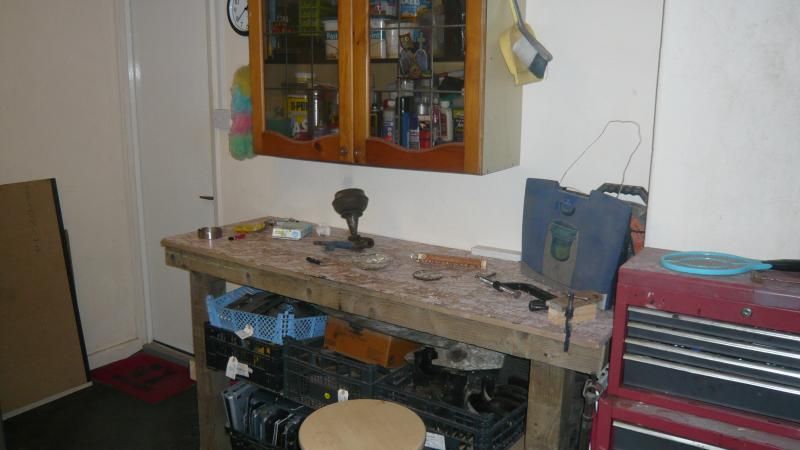
 

P1060372_zps4c5e0e64.jpg


Anyway, in the spirit of keeping this project going i decided to have a go at stripping the front suspension and get it cleaned up which led to a problem later on...


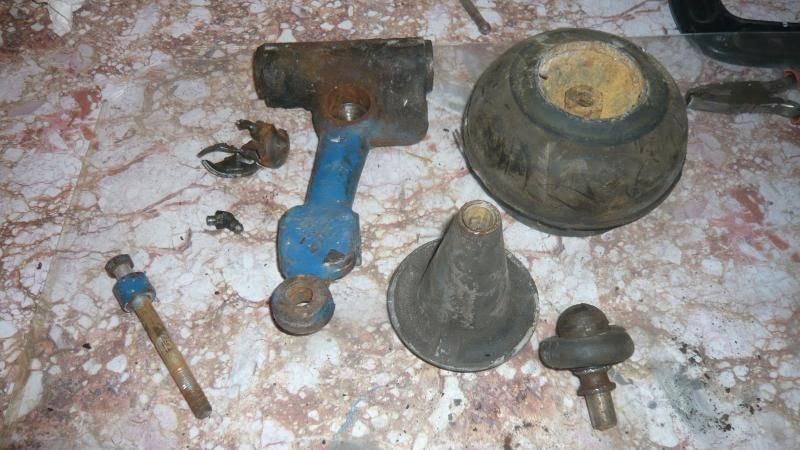
So here are the wonderful rusty top arms with trumpets
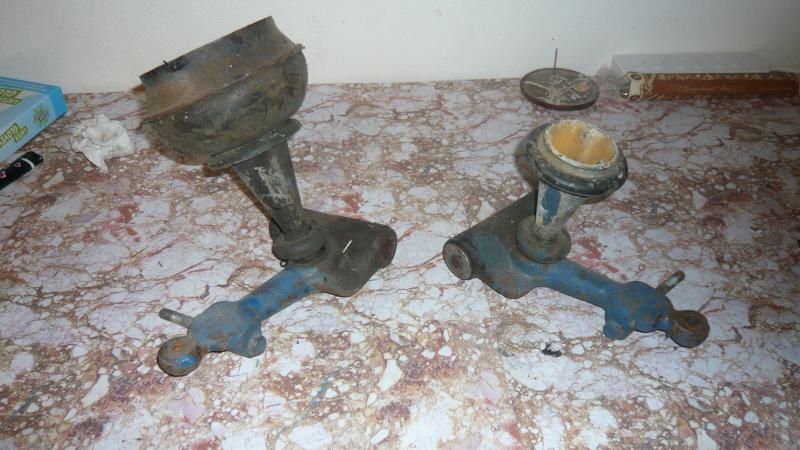
 

P1060373_zps98cfba70.jpg


One set stripped


P1060374_zps55e36793.jpg


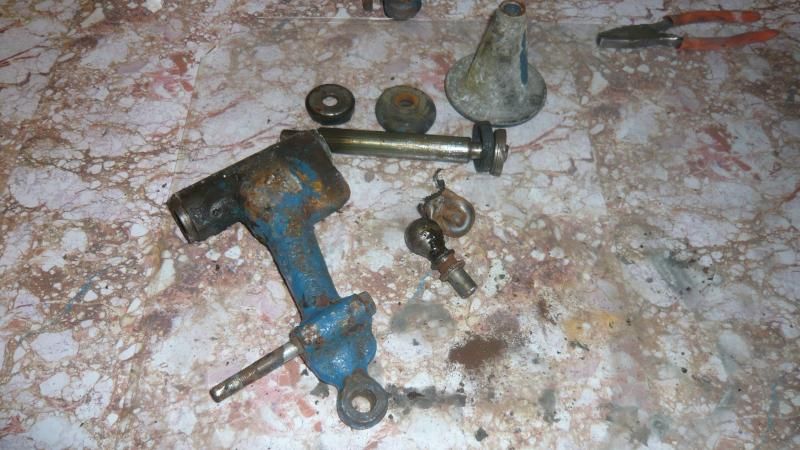
And the other


P1060375_zps283813c4.jpg


I will be replacing the Knuckle joints and cups as well as the shocker bolt and collar, the rest will clean up and be re-used. wel apart from the doughnuts obviously...


Here was the first problem...
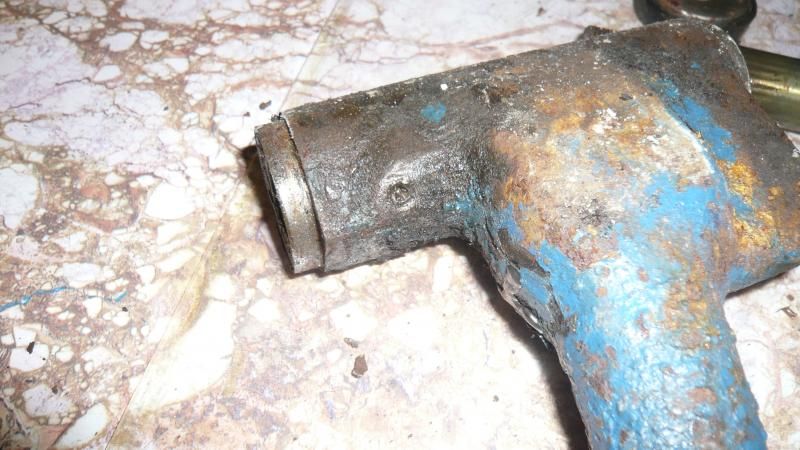
 

P1060377_zps5b9ce5b5.jpg


The grease nipple has been sheared off in the past so i will either drill and tap it or just use another arm.


So i cleaned up the 'good' arm which looks like this
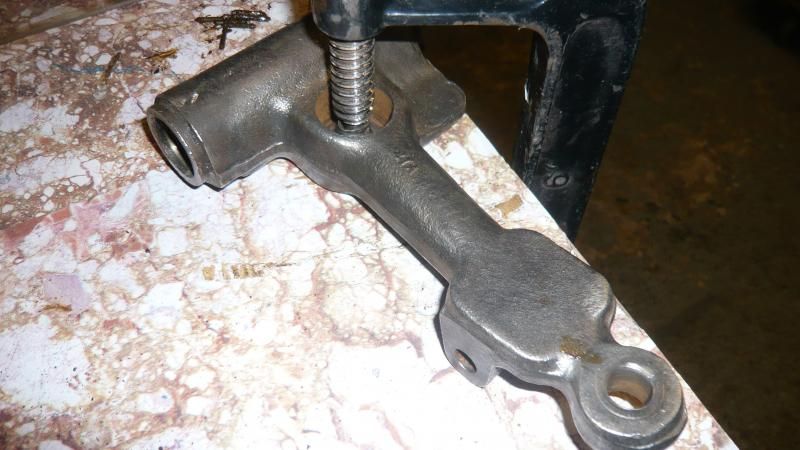
 

P1060380_zps2796b05b.jpg


Came up pretty well with minimal effort. It will have a soak in some vinegar to get at the rest of the rust before paint.


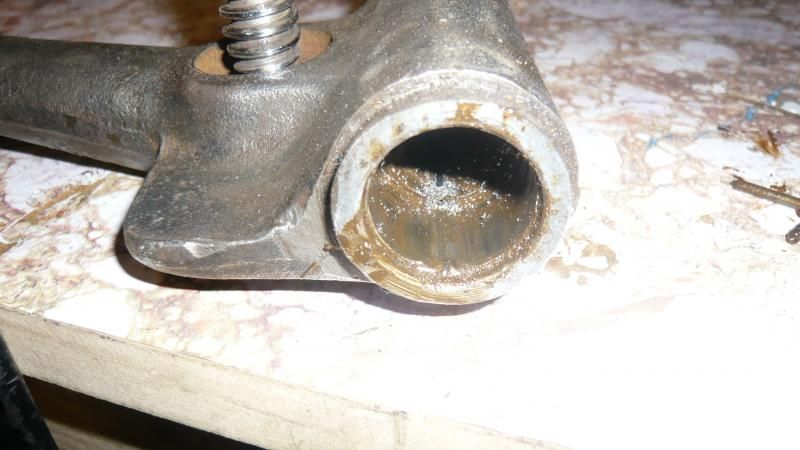
And here is the second problem.

I can't get the bloody needle bearing casings out.

The needles and outer collar came out
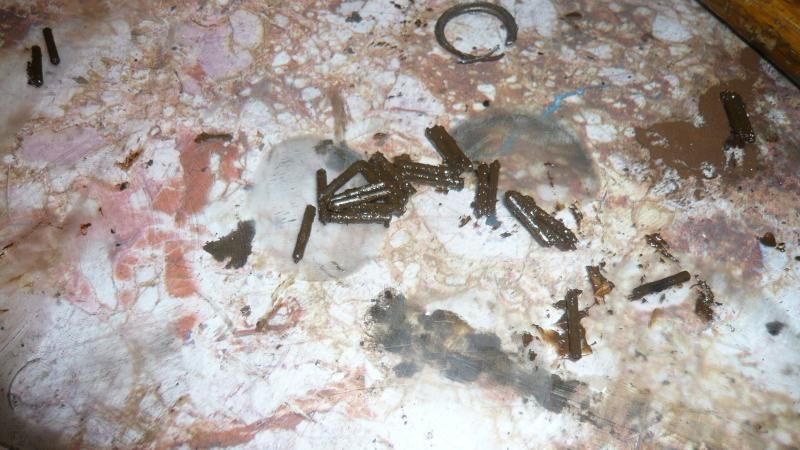
 

P1060378_zps707d8978.jpg


But i am left with this.


P1060379_zps760d84eb.jpg


Any ideas on how to remove them??


Cheers


Ben


#604 sonikk4

sonikk4

    Twisted Paint Polisher!!!

  • Admin
  • PipPipPipPipPipPipPipPipPipPipPip
  • 15,971 posts
  • Name: Neil
  • Location: Oxfordshire

Posted 20 January 2015 - 04:00 PM

Is there no way from the other end?? if not a sharp chisel may be the way forward or failing that a barrel carbide burr.


#605 Ben_O

Ben_O

    Mill Road Garage

  • Paint Doctor
  • PipPipPipPipPipPipPipPipPipPip
  • 9,785 posts
  • Location: Isle of Wight

Posted 20 January 2015 - 04:11 PM

Is there no way from the other end?? if not a sharp chisel may be the way forward or failing that a barrel carbide burr.

That was my first thought but they have these nylon (i think) tubes that line the inside between the outer shells of the needle bearings.


I have an air saw which i know would do the job but no compressor.


I tried a hacksaw but it won't cut the metal, it just slides around and barely scratches the surface.


#606 Covert

Covert

    Super Mini Mad

  • Members
  • PipPipPipPipPipPip
  • 526 posts
  • Location: Northampton

Posted 20 January 2015 - 05:03 PM

Ben knock off the bottom lip of the bearing housing , you only need to do a section of it not the whole thing and get a thin screwdriver and hammer it down the side of the casing and the arm, it will only work if you have taken a portion of the bottom lip off too, the casing material is surprisingly soft , you can then get a pair of needle nose pliers and pull the rest of the casing out
this has worked on all my radius Arm bearings and top arm bearings

#607 MINIMADrt

MINIMADrt

    Speeding Along Now

  • Members
  • PipPipPipPipPip
  • 465 posts
  • Location: oxford
  • Local Club: none at mo

Posted 20 January 2015 - 05:04 PM

An old push rod is put through and tapped removes them nicely if they move or a small shape chisel to split them. Carefully

#608 Carlos W

Carlos W

    Mine is purple, but I have been told that's normal

  • TMF+ Member
  • PipPipPipPipPipPipPipPipPipPipPip
  • 10,114 posts
  • Location: Sittingbourne, Kent

Posted 20 January 2015 - 05:22 PM

I've got a spare top arm, can't remember which side though

#609 Stu.

Stu.

    One Carb Or Two?

  • Members
  • PipPipPipPipPipPipPip
  • 912 posts
  • Location: My workshop.

Posted 20 January 2015 - 05:56 PM

I got mine out by grinding a flat on each side of a very thick washer so it'll just drop into the bore. If you can get it to sit on the rim of the needle bearing casing, and put some other thick smaller washers behind it, you can put a threaded bar through the hole with a nut on each side of the washers to hold it all in place, then hit the end of the bar to bash it out. It worked for me, but you'll need a thick washer to do it or it'll just bend it.


#610 Ben_O

Ben_O

    Mill Road Garage

  • Paint Doctor
  • PipPipPipPipPipPipPipPipPipPip
  • 9,785 posts
  • Location: Isle of Wight

Posted 20 January 2015 - 05:59 PM

Ben knock off the bottom lip of the bearing housing , you only need to do a section of it not the whole thing and get a thin screwdriver and hammer it down the side of the casing and the arm, it will only work if you have taken a portion of the bottom lip off too, the casing material is surprisingly soft , you can then get a pair of needle nose pliers and pull the rest of the casing out
this has worked on all my radius Arm bearings and top arm bearings

Thanks Covert, Ill give it a try tomorrow..


#611 Ben_O

Ben_O

    Mill Road Garage

  • Paint Doctor
  • PipPipPipPipPipPipPipPipPipPip
  • 9,785 posts
  • Location: Isle of Wight

Posted 20 January 2015 - 06:01 PM

I've got a spare top arm, can't remember which side though

I have got two others in a box somewhere, i just don't know where somewhere is..  >_<


Ill have to go through and find it


Cheers for the offer though mate


#612 Ben_O

Ben_O

    Mill Road Garage

  • Paint Doctor
  • PipPipPipPipPipPipPipPipPipPip
  • 9,785 posts
  • Location: Isle of Wight

Posted 20 January 2015 - 06:03 PM

I got mine out by grinding a flat on each side of a very thick washer so it'll just drop into the bore. If you can get it to sit on the rim of the needle bearing casing, and put some other thick smaller washers behind it, you can put a threaded bar through the hole with a nut on each side of the washers to hold it all in place, then hit the end of the bar to bash it out. It worked for me, but you'll need a thick washer to do it or it'll just bend it.

Sounds like a good idea.

Ill try Coverts suggestion first as it sounds about the easiest and then yours if that doesn't work.


I did get the ones out of the rear arms no problem but that was a few years back and i can't remember having any trouble. I'm sure i cut them with a hacksaw blade and bent them up and out but it won't work on these for some reason.


#613 Ben_O

Ben_O

    Mill Road Garage

  • Paint Doctor
  • PipPipPipPipPipPipPipPipPipPip
  • 9,785 posts
  • Location: Isle of Wight

Posted 20 January 2015 - 06:04 PM

An old push rod is put through and tapped removes them nicely if they move or a small shape chisel to split them. Carefully

Do you mean a Valve?

I can't imagine a pushrod would work??


#614 cookie4343

cookie4343

    **Caution: Do Not Feed Alcohol**

  • Traders
  • PipPipPipPipPipPipPipPipPip
  • 2,257 posts
  • Local Club: CV1 Mini's

Posted 20 January 2015 - 06:21 PM

Looking brilliant Ben, wish I had the patients of a saint to do the top quality restoration your doing.
Here's a video which may help with top arm bearing case removal, hopefully it works.


#615 Ben_O

Ben_O

    Mill Road Garage

  • Paint Doctor
  • PipPipPipPipPipPipPipPipPipPip
  • 9,785 posts
  • Location: Isle of Wight

Posted 20 January 2015 - 06:27 PM

Looking brilliant Ben, wish I had the patients of a saint to do the top quality restoration your doing.
Here's a video which may help with top arm bearing case removal, hopefully it works.

Cheers but i dn't think it will work now as i have smashed the needles etc out now.


Ill try that method on the other one for sure though!


Cheers


Ben


2 user(s) are reading this topic

0 members, 1 guests, 0 anonymous users


    Bing (1)