Jump to content


Photo
- - - - -

Austin Mini Mk1 Super Deluxe Restoration


  • Please log in to reply
1604 replies to this topic

#706 tractor

tractor

    Super Mini Mad

  • Members
  • PipPipPipPipPipPip
  • 662 posts

Posted 20 June 2014 - 08:52 AM

tom what I do is just DUST a coat of black or what ever you've got lying around (matt paints is best if you have to get some) over your filler work and primer, then just go over it with some wet and dry using a block where appropriate, what you'll find is the black will stay in the low spots and give you a good visual to what areas need more work.


and the other thing I would just say is always keep looking at the bigger picture I.E the whole door or what ever panel it is your working on and don't get caught up in just working on one focused area.


hope that helps a little? best of luck buddy


trac


#707 ToM 2012

ToM 2012

    Up Into Fourth

  • Members
  • PipPipPipPipPipPipPipPipPip
  • 4,066 posts
  • Location: halesowen

Posted 21 June 2014 - 06:47 AM

thanks ben pete and trac i will try these methods i am going to concentrate on the drivers side and passenger side today hopefully get them out the way today. ile upload some piccys tonight and let you no how i get on cheers 


#708 Ben_O

Ben_O

    Mill Road Garage

  • Paint Doctor
  • PipPipPipPipPipPipPipPipPipPip
  • 9,785 posts
  • Location: Isle of Wight

Posted 21 June 2014 - 11:55 AM

good luck with it mate


#709 ToM 2012

ToM 2012

    Up Into Fourth

  • Members
  • PipPipPipPipPipPipPipPipPip
  • 4,066 posts
  • Location: halesowen

Posted 21 June 2014 - 04:40 PM

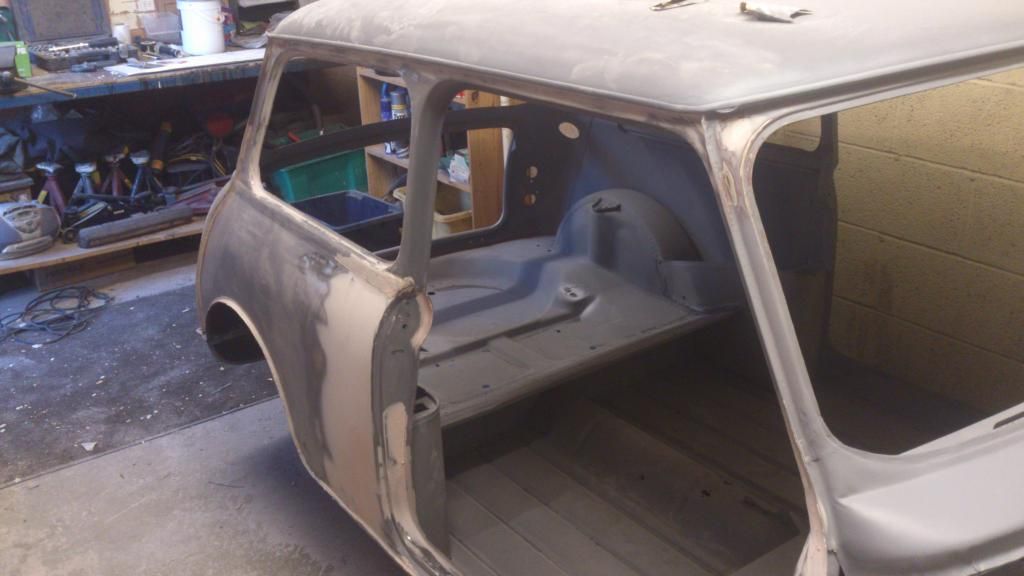
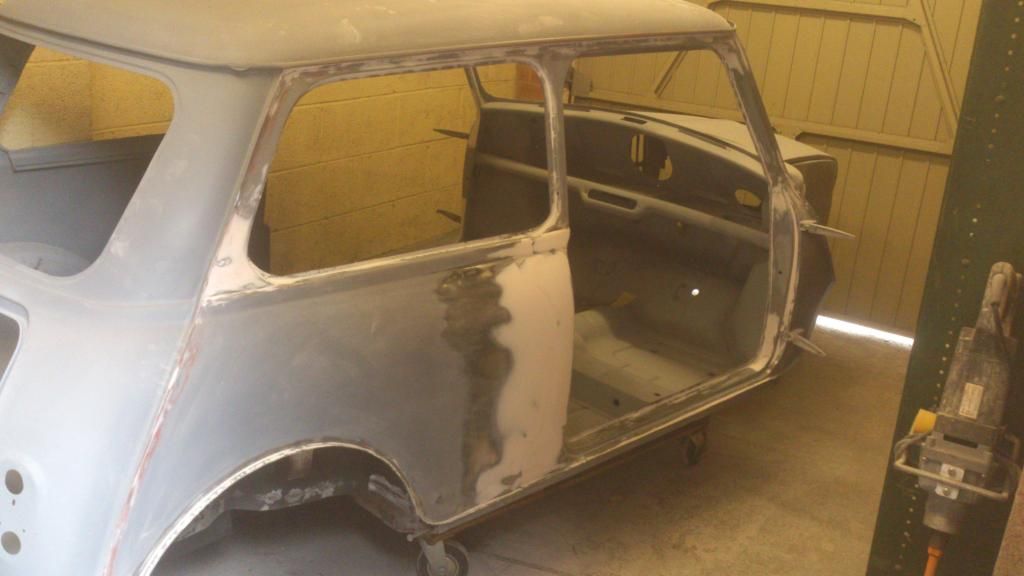
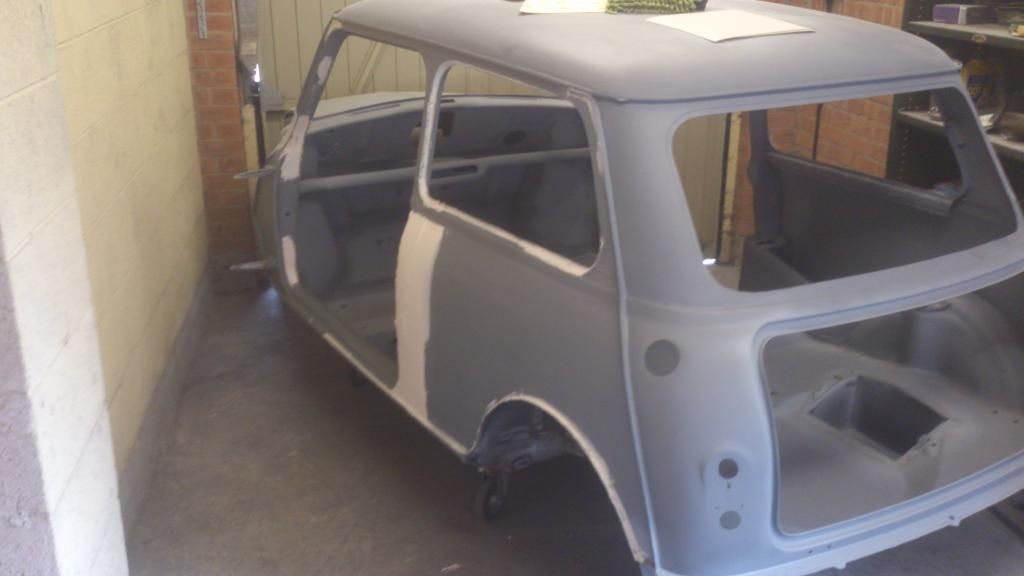
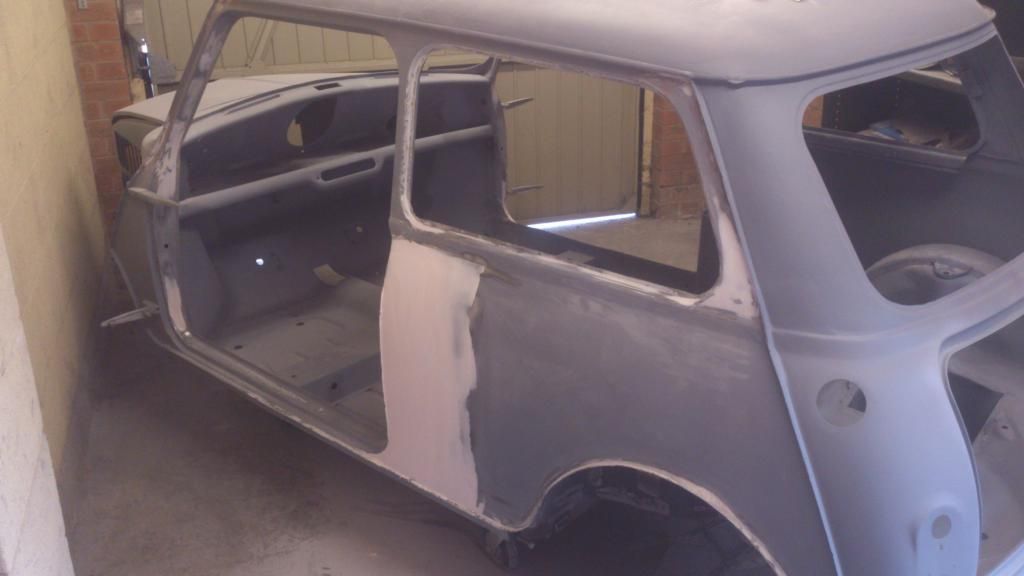
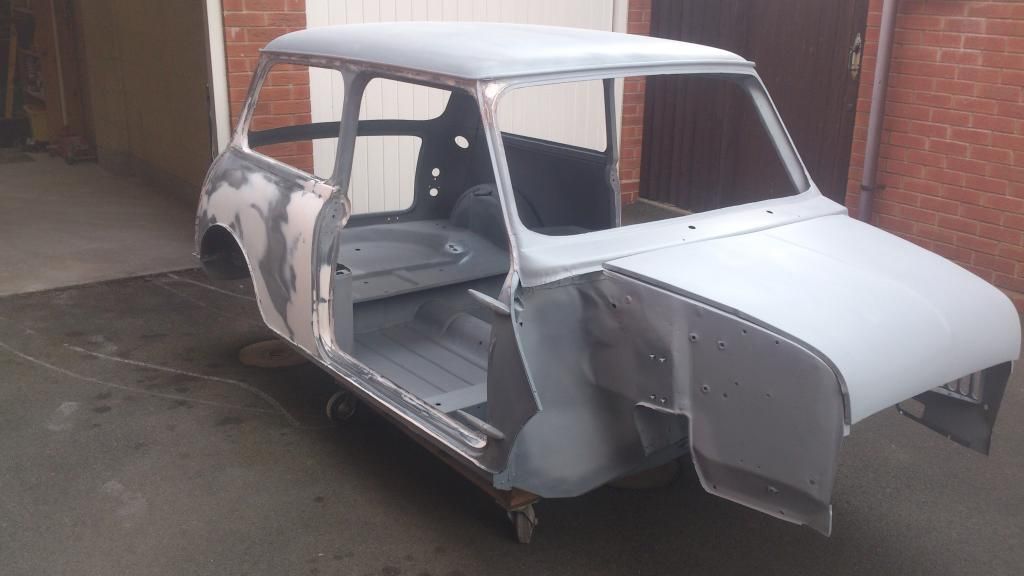
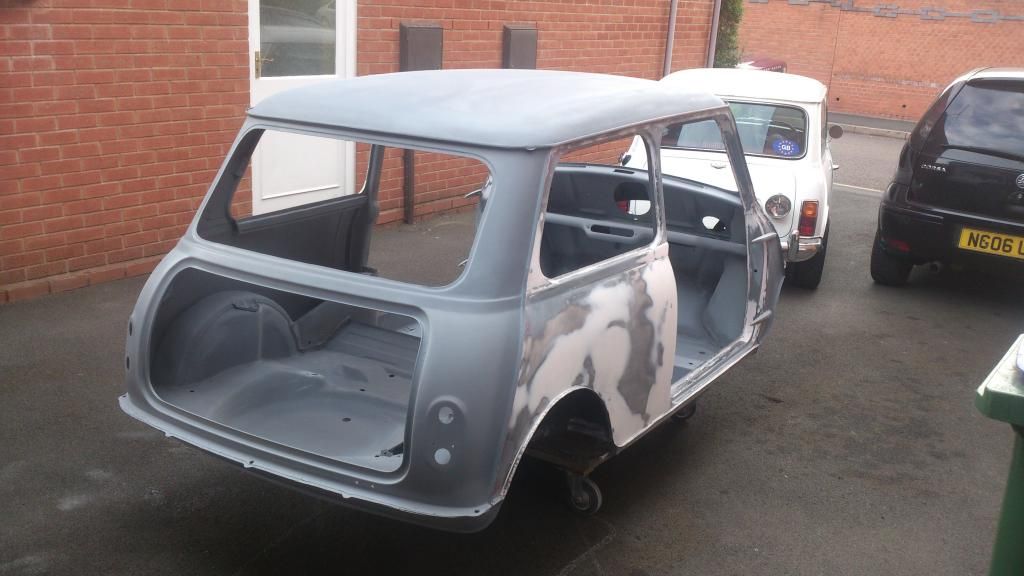
hi all had a day of fillering and prity much got the drivers side straight just needs a slight more filler on the bottom corner. i then made a start on passenger side it will all need slight over the top but its taking shape nicely. after all that i have taken my fingers down to the boon haha here is some pictures thanks tom 


DSC_2675_zps25e6ad95.jpg

DSC_2676_zpsb0bf22a7.jpg

DSC_2677_zpsb84b9f70.jpg

DSC_2678_zps4becd886.jpg


#710 Ben_O

Ben_O

    Mill Road Garage

  • Paint Doctor
  • PipPipPipPipPipPipPipPipPipPip
  • 9,785 posts
  • Location: Isle of Wight

Posted 21 June 2014 - 05:55 PM

nice going tom


#711 josh.goddard

josh.goddard

    Speeding Along Now

  • Members
  • PipPipPipPipPip
  • 398 posts
  • Local Club: Derbyshire Classic Mini Club

Posted 21 June 2014 - 06:20 PM

I'm looking forward to the filling when I have paneled up my prototype mini metro so will keep and eye and take note of everyone else's guidance.

Josh

#712 Palmer02

Palmer02

    Learner Driver

  • Noobies
  • PipPip
  • 16 posts
  • Location: Gravesend kent

Posted 24 June 2014 - 08:08 PM

Keep up the awesome work mate

#713 Daz1968

Daz1968

    Up Into Fourth

  • Members
  • PipPipPipPipPipPipPipPipPip
  • 2,058 posts
  • Location: Dudley

Posted 24 June 2014 - 10:49 PM

Looking good, I am no expert at filling but have learnt from a few mistakes when doing mine, I found secret is use the longest sanding board you can for each panel I have a 420 x 70 and a 198 x 70, I have found mirka abranet the best paper by far and on some curved areas a foam interface pad on the block helps. I used some satin black paint to help with sanding the high build primer but when I do another car will invest in some guide dust as it looks very good. I initially rough shaped filler with p80 followed by p120 and p240, I then applied 2 coats of high build and flatted this with a guide coat and p320 abranet, repaired with upol gold or filler as required and covered these areas with more high build. Once I was happy I applied a second guide coat and flatted this with p400 using an interface pad, then a few coats of 2k gloss. Not perfect as it's my first attempt but more than happy with results. Just take your time and don't put on any top coat till you are 100% happy with prep.

#714 ToM 2012

ToM 2012

    Up Into Fourth

  • Members
  • PipPipPipPipPipPipPipPipPip
  • 4,066 posts
  • Location: halesowen

Posted 25 June 2014 - 07:43 PM

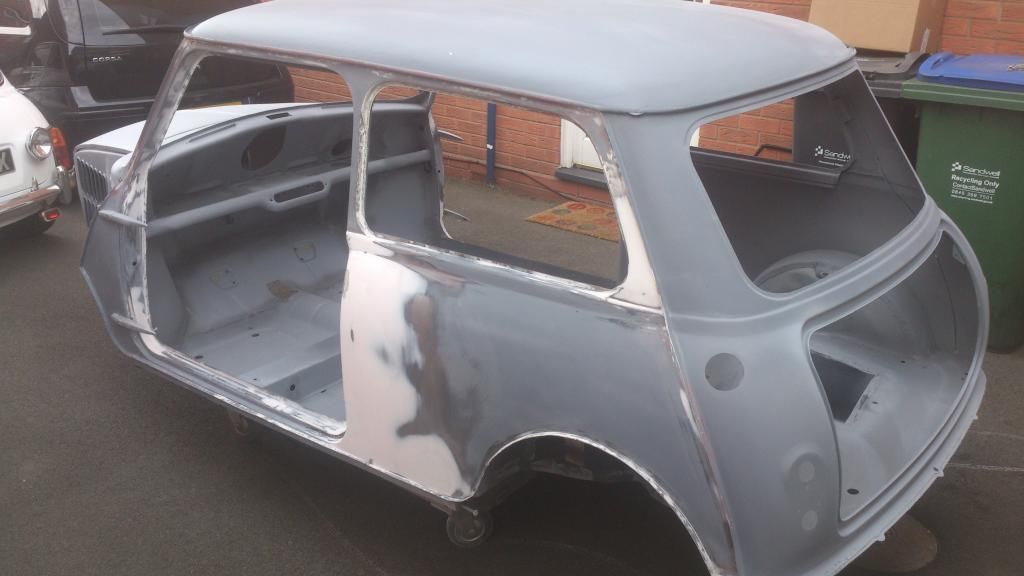
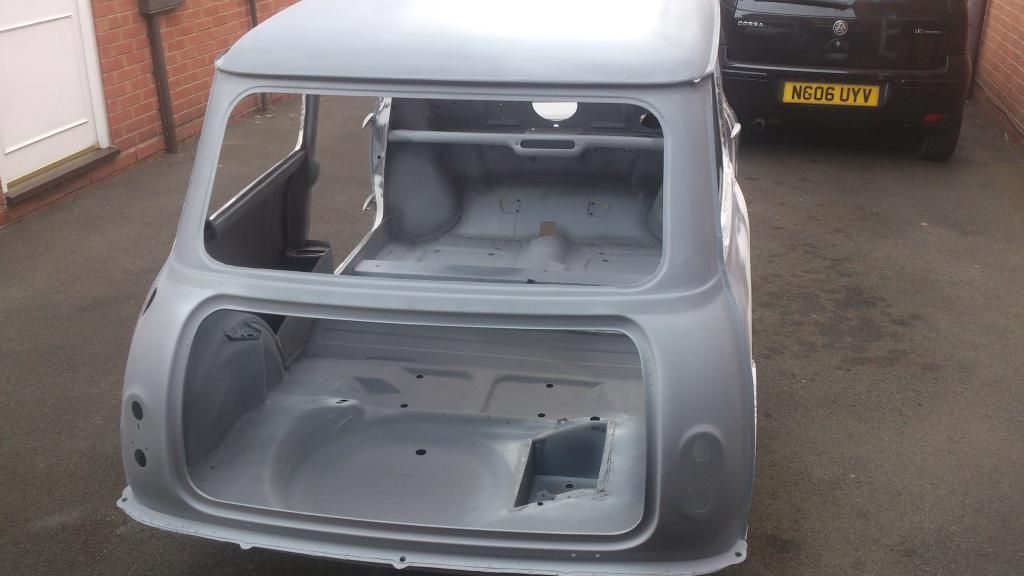
hi all finished fillering both sides but may need slight more after but i can not really tell untill i get some shine on there to see if they are straight. i pushed it out into the light to get some better pictures and cleaned my garage up a bit as there is filler dust everywhere. also as i was moving my mini out and cleaning my garage what took me 5 mins the neighbor come out moaning saying you can not do this put your minis like this??? i was cleaning my garage out it will take me 5 mins mate! can you see the probz for 5 mins?? here is some pictures for you all.. 


DSC_2684_zps4b8bb836.jpg

DSC_2687_zps46abd576.jpg

DSC_2685_zps6f6b06f5.jpg

DSC_2686_zpsd3a7cca0.jpg


#715 ToM 2012

ToM 2012

    Up Into Fourth

  • Members
  • PipPipPipPipPipPipPipPipPip
  • 4,066 posts
  • Location: halesowen

Posted 25 June 2014 - 07:46 PM

o i forgot to mention can you buy extra drip rails? as the previous owner come around saturday and said it looks excellent and mentioned it used to have a extra drip rail but he had it taken of as is was rotted. also he wants the mini back when its finished.. 


#716 ToM 2012

ToM 2012

    Up Into Fourth

  • Members
  • PipPipPipPipPipPipPipPipPip
  • 4,066 posts
  • Location: halesowen

Posted 25 June 2014 - 07:47 PM

Keep up the awesome work mate

thanks mate


#717 ToM 2012

ToM 2012

    Up Into Fourth

  • Members
  • PipPipPipPipPipPipPipPipPip
  • 4,066 posts
  • Location: halesowen

Posted 25 June 2014 - 07:50 PM

Looking good, I am no expert at filling but have learnt from a few mistakes when doing mine, I found secret is use the longest sanding board you can for each panel I have a 420 x 70 and a 198 x 70, I have found mirka abranet the best paper by far and on some curved areas a foam interface pad on the block helps. I used some satin black paint to help with sanding the high build primer but when I do another car will invest in some guide dust as it looks very good. I initially rough shaped filler with p80 followed by p120 and p240, I then applied 2 coats of high build and flatted this with a guide coat and p320 abranet, repaired with upol gold or filler as required and covered these areas with more high build. Once I was happy I applied a second guide coat and flatted this with p400 using an interface pad, then a few coats of 2k gloss. Not perfect as it's my first attempt but more than happy with results. Just take your time and don't put on any top coat till you are 100% happy with prep.

thanks mate did you put any kind of primer on just to see if its all flush and no dents? i was going to put some grey primer over the top now and as its wet look down it and see if there is any places that need touching up i would use a marker pen to mark all areas. thanks tom 


#718 Ben_O

Ben_O

    Mill Road Garage

  • Paint Doctor
  • PipPipPipPipPipPipPipPipPipPip
  • 9,785 posts
  • Location: Isle of Wight

Posted 25 June 2014 - 07:50 PM

Looking fantastic Tom!  :w00t:


Sod the neighbours, i used to get that alot. At one point i had to get rid of my mini's because of it (all 4 of them!) These days, i tell them where to go.


So its sold already then!


Ben


#719 Ben_O

Ben_O

    Mill Road Garage

  • Paint Doctor
  • PipPipPipPipPipPipPipPipPipPip
  • 9,785 posts
  • Location: Isle of Wight

Posted 25 June 2014 - 07:53 PM


Looking good, I am no expert at filling but have learnt from a few mistakes when doing mine, I found secret is use the longest sanding board you can for each panel I have a 420 x 70 and a 198 x 70, I have found mirka abranet the best paper by far and on some curved areas a foam interface pad on the block helps. I used some satin black paint to help with sanding the high build primer but when I do another car will invest in some guide dust as it looks very good. I initially rough shaped filler with p80 followed by p120 and p240, I then applied 2 coats of high build and flatted this with a guide coat and p320 abranet, repaired with upol gold or filler as required and covered these areas with more high build. Once I was happy I applied a second guide coat and flatted this with p400 using an interface pad, then a few coats of 2k gloss. Not perfect as it's my first attempt but more than happy with results. Just take your time and don't put on any top coat till you are 100% happy with prep.

thanks mate did you put any kind of primer on just to see if its all flush and no dents? i was going to put some grey primer over the top now and as its wet look down it and see if there is any places that need touching up i would use a marker pen to mark all areas. thanks tom 


Try not to use a marker pen mate. Could cause problems down the line if any is left behind. Use a blunt B pencil instead


#720 ToM 2012

ToM 2012

    Up Into Fourth

  • Members
  • PipPipPipPipPipPipPipPipPip
  • 4,066 posts
  • Location: halesowen

Posted 25 June 2014 - 07:56 PM

Looking fantastic Tom!  :w00t:


Sod the neighbours, i used to get that alot. At one point i had to get rid of my mini's because of it (all 4 of them!) These days, i tell them where to go.


So its sold already then!


Ben

falling out with neighbours is not good tho mate just makes it harder to live in your house. ino in a way what he is saying but i litrally pushed it out snapped a few photos and was about to quickly sweep up and then push it back in. with in 1 min he was out! he wasnt rude or anything hes about 80 odd so i didnt snap at him i just said im sorry mate i just wanted to clean my garage out quickley. i can see it coming when i start welding the front end in tomorrow he will be knocking the garage door saying your to loud and etc... 


1 user(s) are reading this topic

0 members, 1 guests, 0 anonymous users