Austin Mini Mk1 Super Deluxe Restoration
#46

Posted 15 April 2013 - 08:14 PM
#47

Posted 15 April 2013 - 08:17 PM
#48

Posted 15 April 2013 - 08:17 PM
sounds like a hard job allreadyPersonally id set the doors so the top window frames sit right and the back edges of the doors line up with the quarter panels, then weld bracing across the insides of the doors and across from each bin with maybe a few extra cross pieces.
Then once the shell is braced with a sort of square frame you can then use it to take measurements as a reference point for the new floor etc.
#49

Posted 15 April 2013 - 08:19 PM
will do just need to find somewhere that is nice to weld to. when i did abit of grinding today it didnt even go shiney just stopped black.I'd also do the bracing with it still on its wheels and then worry about removing the engine /subframes and tipping the shell.
#50

Posted 15 April 2013 - 08:21 PM
#51

Posted 15 April 2013 - 08:27 PM
Plus I suppose you do have to be a bit mad to chop sections off a rear end so it will fit in the back of the car lol.
#52

Posted 15 April 2013 - 08:32 PM
are you the chap that come and got the rear end today?I suggest getting the doors to fit roughly first, as I've had experience of replacing both inner flinches and outer a panels on a 66 riley elf with mk1 hinges along with fitting proper mk1 hinges to a later mini. as the panels are also were the door fits they need to be in the right place otherwise the door will never fit right, so effectively you have to build/replace panels using the door as a reference.
Plus I suppose you do have to be a bit mad to chop sections off a rear end so it will fit in the back of the car lol.
#53

Posted 15 April 2013 - 08:33 PM
are you the chap that come and got the rear end today?
I suggest getting the doors to fit roughly first, as I've had experience of replacing both inner flinches and outer a panels on a 66 riley elf with mk1 hinges along with fitting proper mk1 hinges to a later mini. as the panels are also were the door fits they need to be in the right place otherwise the door will never fit right, so effectively you have to build/replace panels using the door as a reference.
Plus I suppose you do have to be a bit mad to chop sections off a rear end so it will fit in the back of the car lol.
yep lol
#54

Posted 15 April 2013 - 08:35 PM
#55

Posted 15 April 2013 - 08:46 PM
lol can you please tell people what this mk1 is like?
and it got in the boot in the end lol did you get it back ok? and out? cheers tom
It's bad, but not the worst I've seen been restored, but is doable with time and patience, but then I didn't have too much a look and me poking at rust normally does end well lol.
And after a bit of cutting that rear panel did slide into the back of the car ok and came back out relatively easily at the other end. unfortunately now I have no excuses after I've fitted a new front panel, wings scuttle and a panels to remove the rear screen (before it falls out) and replace both rear quarters, rear panel in sections, rear seat back, boot floor sections, battery box, both arches and rear valance.
plus if that wasn't punishment enough I've got the second resto to start on the daily 25 lol.
Edited by 1984mini25, 15 April 2013 - 08:47 PM.
#56

Posted 15 April 2013 - 08:55 PM
#57

Posted 15 April 2013 - 09:11 PM
#58

Posted 15 April 2013 - 09:14 PM
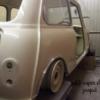
seriously though I do think it looks worse than it actually is with all the grime, dirt and greenery growing all over it, if you stick with the doors and bracing (like in the minitec link) plan, that's half the battle in keeping it square and cracking on with a new floor etc.
http://www.theminifo...-hornet-mintec/
#59

Posted 15 April 2013 - 09:20 PM
thanks. it needs alot of work but as its my first time doing something this bad! it makes me think it impossible to rebuildAfter seeing it earlier it does need some love, but it will be so worth the effort, especially being a Mk1!
#60

Posted 15 April 2013 - 09:22 PM
Dan
3 user(s) are reading this topic
0 members, 2 guests, 0 anonymous users
-
Bing (1)


