Mini Restoration Service, Northampton
#106
Posted 18 June 2013 - 11:27 PM
More work completed over the last week, campers all finished and has gone to the trimmers
few other modern accident repairs done, and these...
Leakys mini getting ready for primer
The yellow bodykitted mini is underway
The front bumper is now repaired and reattatched to the car
Sarahs mini is undergoing body prep ready for primer
Austin A35 we sandblasted
Mini cooper we have in for a full rebuild
This one came in today for a strip down, sand blast, repair and paint
Our paint mixing scheme is now up and running so we can mix our own paint!!!
#107
Posted 19 June 2013 - 08:34 AM
#108
Posted 19 June 2013 - 07:20 PM
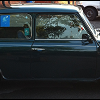
We also had this shell turn up for welding up, sand blasting, prep and paint
It needs all the usual places sorting, its pretty rough but definetly not the worse we have done!
The black 1 is also stripped enough to blast the outside, the engine bay and in the boot
Edited by olds_kool_lews, 19 June 2013 - 07:21 PM.
#109
Posted 21 June 2013 - 07:35 PM
The black shell is nearly all sand blasted too (external only)
Also more done on leakys mini, doors have been trial fitted after sorting them out, who ever reskinned them did an appalling job! The edges of the skins weren't folded over properly, the welds were poor, but now with some fettling and lots of panel beating there 100% improved!
#110
Posted 21 June 2013 - 07:43 PM
#111
Posted 21 June 2013 - 08:13 PM
Cheers
#112
Posted 21 June 2013 - 08:34 PM
#113
Posted 27 June 2013 - 08:08 AM
The outside has been painted now too, just needs laquering
#114
Posted 27 June 2013 - 07:27 PM
Also, the yellow body kitted mini we have in is a right mess, the wiring is so butchered and messed up it really needs a new 1...
A small example... Wires extended with bits of wire, just twisted together and electrical taped.. You do not want to see the rest... Surprised it hasnt gone up in flames before! As for the body work.. Its been T-boned at some point, the floor on the drivers side is pushed up at an angle (you can see the crease in the cross member!) its had a replacment B pillar, rear quarter and inner strengthening panel but by the look of it, stevie wonder did it....
State of the rear bin
Where the bin is "welded" to the B post..
And where the B post has been joined..
As for the blue shell we have in for work, i finished removing the last of the front end panels to reveal the true extent of the rust issues..
Doesnt look too bad really..
Its just waiting its turn in the blasting room so we have a nice clean bare metal shell to work with! Thats all for todays updates!
Thanks for looking! For quotes on painting, welding, mot work etc etc drop me a pm or leave a comment :)
#115
Posted 27 June 2013 - 08:28 PM
#116
Posted 28 June 2013 - 01:27 PM
#117
Posted 28 June 2013 - 06:23 PM
Rust in the typical areas, scuttle, door steps, front panel/wing seams etc he drove it here all the way from brussels.... today! Crazy! Lol
Edited by olds_kool_lews, 28 June 2013 - 06:24 PM.
#118
Posted 11 July 2013 - 06:55 PM
And the yellow body kitted mini went from this....
To this...
Its got blue pearl both on the body and the roof, in normal day light it just looks like a white mini with a black roof, but when the sun shines on it it sparkles like crazy!!
http://i945.photobuc...zps43c824e3.mp4
#119
Posted 11 July 2013 - 06:55 PM
#120
Posted 19 July 2013 - 07:39 PM
Hello - Really impressed with your work!
Im in Northampton and started to sort out my '89 Mini Red hot....Ive taken lots of it...but I think its now time for the experts to come in and weld it back with pukka panels (some I have already purchased).
So if poss - can you PM me to discuss what is best way to discuss the project?
Ill try and post pics etc. But I think we a need meet and see the car.
Cheers.
1 user(s) are reading this topic
0 members, 1 guests, 0 anonymous users