Another Big One, '68 Hornet @ Mintec
#16

Posted 18 March 2013 - 01:29 PM
Fabricating skills one could only dream of.
#17

Posted 19 March 2013 - 10:18 PM
Loving your work Tupers.
Fabricating skills one could only dream of.
Awesome, awesome, awesome!
Thanks again guys, practise makes perfect and one day I'll be super awesome.lovely work !
It can't be that bad, have you seen the Crayford thread?Seeing stuff like this makes me realise just how bad mine is gonna be
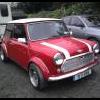
Don't worry about it Max you're not clogging it up just adding more cool stuff. I'd much rather have that Hornet than a cooper to be honest.That would be cool! Not seen a spaceframed Hornet/Elf before. Turbo, yes! I think if I had one, I would make it look like a period racer, Cooper S spec engine. S wheels or period Vortz Racing Rose Petals, Surf Blue paint. Similar to this basically
Now that would look sweet!
Anyway sorry for clogging your thread up, great progress as always, really looking forward to seeing what you do with this
Max
So how's about a little more progress. After lots of measure and welding the Hornet now has a heel board and side closing panels.

I've also got 99% of the plug weld holes drilled in the flitches and they just need a little fettling before I weld them on.

The half floors with outer sills and jacking points arrived as well and the O/S floor is all but ready to weld in. Note in the pic bellow the floor is just clamped up from bellow for marking up.


#18

Posted 19 March 2013 - 11:57 PM
is there anywhere that sells rear body panels for hornets?
#19

Posted 20 March 2013 - 09:59 PM


its minus a few items no engine, no interior....but never mini it only cost £400.....
#20

Posted 21 March 2013 - 01:32 PM
Once again your work astounds me the detail is fantastic .......I have a hornet as my next project......its not been on the road for 30 years but it was garaged
its minus a few items no engine, no interior....but never mini it only cost £400.....
looks like youve got a slightly easier project on your hands here.... :)
#21

Posted 23 March 2013 - 09:59 PM
Thanks Davey, it is a bit of an extensive one this. As far as I know nobody does rear panels for these it's all got to be fabricated.nice project tupers, for the amount of work needed it'll be interesting to watch it progress
is there anywhere that sells rear body panels for hornets?
Thanks Mark, it looks like yours is a little more complete than oursOnce again your work astounds me the detail is fantastic .......I have a hornet as my next project......its not been on the road for 30 years but it was garaged
its minus a few items no engine, no interior....but never mini it only cost £400.....
He has hasn't he, maybe we should swap.looks like youve got a slightly easier project on your hands here.... :)
I've been dotting around on a few other Mintec projects since I last posted but I have now got both floor pans welded in.


Nice wide welds all the way down the tunnel, these wont be going anywhere in a hurry.

#22

Posted 23 March 2013 - 10:01 PM
#23

Posted 27 March 2013 - 11:16 PM
Thanks Steven, it should only get better.looks great
The rear bumper rails on the Hornet are rather knackered all the way around and the solid spots are suspiciously full for weld so I made a start on replacing them today.


I made a card template for the corners and then transferred it onto some nice fresh steel.


When it came to the rear section I folded a long length of steel and then ran it back and forth through the stretcher to achieve the right bow.


I also folded up a new end for the seat crossmember as the old one was plated and rather nasty.

And a lovely front panel conversion panel arrived in the post.

#24

Posted 11 April 2013 - 07:05 PM

Sitting out in the rain had done some rather nasty things to the corners of the boot frame so after a bit of thinking on how to actually form the replacement sections I got the O/S replaced.


The N/S was a bit worse and took a little more time.

After folding two sections for the frame and running them through the shrinker/stretcher I clamped them together, trimmed and welded them together

I also made up the outer section and got everything clamped together, nearly there.

The salvaged door frame came back from blasting today as well so I stuck some more bracing in so I can chop the frame out tomorrow and get the new one welded in.

#25

Posted 11 April 2013 - 07:38 PM
#26

Posted 14 April 2013 - 10:12 PM

I cut the replacement frame down leaving 20MM more than I needed at each end. It's better to leave it long and pair it down than cut it to where you think it should be straight away and find it too short. I also painted the inside of the frame and the other areas on the body that wont be accessible once everything's welded.

Here it is paired down a little more and bolted in. All that's needed now is to punch holes for plug welding and then final fitment can begin.


I also put a few good coats of primer on the bonnet, boot and doors that where also blasted.


The bottoms of both doors need attention as do both front corners of the bonnet but all in all they're not too bad.


#27

Posted 15 April 2013 - 01:07 PM
#28

Posted 15 April 2013 - 08:23 PM
You Sir are my HERO!!!!! lol
I need to weld mine up but im soooo scared of boging it. But you inspire my to try!!!!!
Well I suppose everyone needs a hero, not sure if I'm really good candidate for one though.
The most important think is to just take you're time. Take a good look and how each repair will effect the other work around it and try to do it in an order that will simplify the next job.
I got stuck into the bonnet today while waiting for a second coat of paint on the door frame to dry.
I started out by marking how much of the original skin + repair I wanted to cut out.

A small section of steel was cut down to size and shaped to match the slight curve of the bonnet before being tacked in.

Then I welded both sides up and linshed them down, there's just a small amount of work left to be done with a panel hammer and spoon.


The A-pillar-post is also now officially in although I forgot to take picture of it welded as I was busy sweeping up so these pics of it pre welding will have to suffice.


#29

Posted 15 April 2013 - 08:33 PM
#30

Posted 15 April 2013 - 08:46 PM
Also lovely bit of work defo professional
Edited by miniman267, 15 April 2013 - 08:47 PM.
1 user(s) are reading this topic
0 members, 1 guests, 0 anonymous users


