Jump to content


Photo
- - - - -

What Makes Huey Tick? (Picture Heavy)


  • Please log in to reply
83 replies to this topic

#16 Teapot

Teapot

    TMF Legend

  • Members
  • PipPipPipPipPipPipPipPipPipPip
  • 5,010 posts
  • Location: Seaton, East Devon

Posted 11 December 2012 - 05:06 PM

Tis normal practice to run duplex without the tensioner, and they are nearly always a tad slack too. and a little noisy !!!

Yes, Huey rattled like a chain smoker. I'll be glad to get rid of that noise at least.
The head is being cleaned and we'll try to spruce the block up a bit.
More Friday, hopefully.
It's taken a month so far!
Thanks for your attention

#17 mattbeddow

mattbeddow

    Speeding Along Now

  • TMF+ Member
  • PipPipPipPipPip
  • 336 posts
  • Location: Warwickshire

Posted 11 December 2012 - 05:12 PM

+1 for crank position sensor. Thats the conclusion I came too when I asked the same of mine.
My pulley had another disk attached to it with 2 notches cut in it which ran perfectly in line with the extra bit

#18 steven

steven

    One Carb Or Two?

  • Banned from Buying/Selling
  • PipPipPipPipPipPipPip
  • 1,195 posts
  • Location: Uk

Posted 11 December 2012 - 06:26 PM

nice work ! will be watching this

#19 Teapot

Teapot

    TMF Legend

  • Members
  • PipPipPipPipPipPipPipPipPipPip
  • 5,010 posts
  • Location: Seaton, East Devon

Posted 14 December 2012 - 10:27 AM

Not much to report since the next lot of parts haven't turned up :( and we want to get the diff housing back on before stripping anything else off the block and cleaning it a bit. Also, despite putting nuts and bolts in separate boxes and trying to divide areas of the bench for different parts, we're in danger of getting muddled. So ....

Posted Image
As stated previously, the redundant servo was due to come out. We first stretched a bit of rubber glove on the reservoir to block the air vent in the cap and hopefully deter fluid from spilling everywhere.

Posted Image
The upper pipes to the servo had to be disconnected and the lower ones joined up ...

Posted Image
... like this. Hardly any fluid was lost and the brake pedal still felt firm. The brakes will be bled later.
(I wish my camera had a no-rust-colour setting)

Posted Image
The pipe on the inlet manifold has to be blocked off ...

Posted Image
... and since the fitment was a make-do mixture of threads, Doug will machine a new bolt

More next week, hopefully. Thanks for comments, especially clearing up the crank sensor puzzle.

#20 wolfie

wolfie

    One Carb Or Two?

  • Members
  • PipPipPipPipPipPipPip
  • 1,149 posts

Posted 15 December 2012 - 10:01 AM

You can buy a grub screw, in fact i have a couple floating around in my centre consol as they were like 10P each or something so bought a few

Edited by wolfie, 15 December 2012 - 10:01 AM.


#21 Ethel

Ethel

    ..is NOT a girl!

  • TMF Team
  • PipPipPipPipPipPipPipPipPipPipPip
  • 25,919 posts
  • Local Club: none

Posted 15 December 2012 - 02:00 PM

You might find the timing chain cover mismatch was because it's out of a Metro that carried an engine donor card. The Metro cover fouls the fan, afraid the one you fitted looks like a Metro one too :unsure:

Mini one showing fan clearing flatification, expect your mechanic mate can do a similar modification

http://www.minispare...50/LJR10168.jpg


p.s. the lil bracket remains a bit of a mystery, it's not used on Metros either. Best theory is it's used by the factory somehow O_O


pps the manifold bung should be 5/8unf, try the water temperature sensor to confirm.

#22 Teapot

Teapot

    TMF Legend

  • Members
  • PipPipPipPipPipPipPipPipPipPip
  • 5,010 posts
  • Location: Seaton, East Devon

Posted 18 December 2012 - 10:53 AM

You might find the timing chain cover mismatch was because it's out of a Metro that carried an engine donor card. The Metro cover fouls the fan, afraid the one you fitted looks like a Metro one too

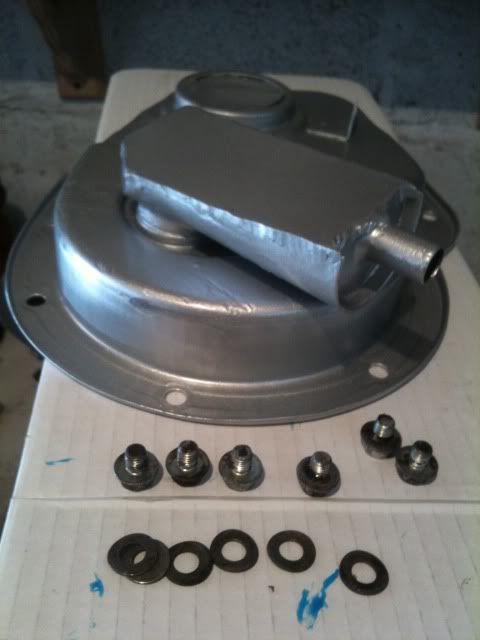
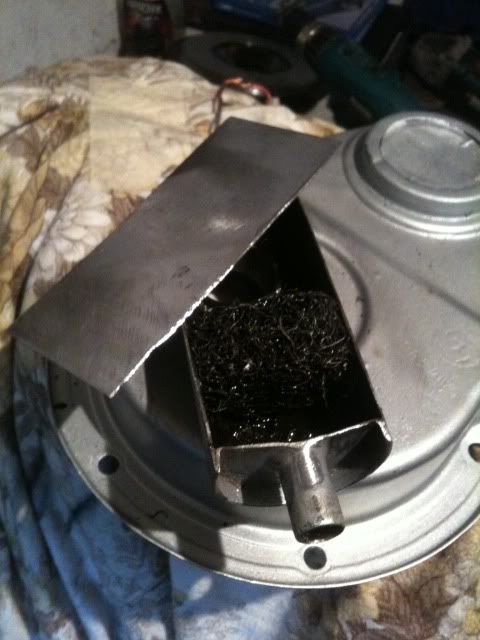
Cheers for that .. the fan already has a spacer washer (why? dunno unless there was originally a breather on the timing cover) Anyway, it doesn't appear to foul the breather

Posted Image

pps the manifold bung should be 5/8unf, try the water temperature sensor to confirm.

Correct!

#23 Teapot

Teapot

    TMF Legend

  • Members
  • PipPipPipPipPipPipPipPipPipPip
  • 5,010 posts
  • Location: Seaton, East Devon

Posted 18 December 2012 - 10:59 AM

Santa came to call :xmas:

Posted Image
Plus another exhaust valve somewhere makes 4

Posted Image
Also, the head looks a bit cleaner noiw

Edited by Teapot, 18 December 2012 - 11:01 AM.


#24 Badboytunes

Badboytunes

    Camshaft & Stage Two Head

  • Members
  • PipPipPipPipPipPipPipPip
  • 1,615 posts
  • Location: Northampton
  • Local Club: MINIS Unleashed

Posted 18 December 2012 - 12:00 PM

Great rebuild thread :)

#25 Teapot

Teapot

    TMF Legend

  • Members
  • PipPipPipPipPipPipPipPipPipPip
  • 5,010 posts
  • Location: Seaton, East Devon

Posted 18 December 2012 - 12:20 PM

Great rebuild thread :)

Thanks. Please bear in mind it's not The Ultimate And Total Truth, just me watching Douggie and recording what I think is interesting (in my anorakky way)

Posted Image
The new bearing on the pinion side is tapped into place

Posted Image
Cleaning old gasket off one drive shaft side cover (that's my job :proud: )

Posted Image
The new pinion and diff back in place

Posted Image
The gear linkage oil seal is replaced

Edited by Teapot, 06 January 2013 - 09:41 AM.


#26 Teapot

Teapot

    TMF Legend

  • Members
  • PipPipPipPipPipPipPipPipPipPip
  • 5,010 posts
  • Location: Seaton, East Devon

Posted 18 December 2012 - 12:31 PM

Posted Image
On goes the diff housing

Posted Image
Not forgetting the tensioner spring & piston ...

Posted Image
... or the gaskets top AND bottom

Posted Image
Taking the burrs off a rather battered driveshaft side cover

Posted Image
The first cover goes back on the side with the tensioner.
The oil seals are renewed both sides

Posted ImagePosted ImagePosted ImagePosted Image
measuring the gasket, shim & gap between cover & diff housing to work out the correct shim ... .15mm IIRC

Posted Image
All the bolts are then tightened in strict order to correct torque settings to keep the drive shafts located
and to avoid stressing the casing. Finally, the lock tabs are gently bent over.
Must be time for a cuppa :shifty:

#27 Teapot

Teapot

    TMF Legend

  • Members
  • PipPipPipPipPipPipPipPipPipPip
  • 5,010 posts
  • Location: Seaton, East Devon

Posted 18 December 2012 - 12:34 PM

Posted Image
Meanwhile, it's just me and my toothbrush to beat the grime ...

Posted Image
... and it's beginning to look better. The drill and wire brush isn't much help. NB Do not use on alloy

Posted Image
Starting to rebuild the head, the oilways are blown clear

Posted Image
But Dougie has decided to machine all the shoulders of the new exhaust valves
to the same satin finish to equalize performance ...

Posted Image
... and then spotted badly pitted rocker tips and worn shaft, so after debating the expensive option
of getting roller rockers to give an extra few bhp, decided to swap whole assembly for the upper one in the pic

Edited by Teapot, 18 December 2012 - 09:34 PM.


#28 Teapot

Teapot

    TMF Legend

  • Members
  • PipPipPipPipPipPipPipPipPipPip
  • 5,010 posts
  • Location: Seaton, East Devon

Posted 18 December 2012 - 09:37 PM

Posted Image
Removing the oil pressure relief valve retaining bolt to replace the bullet with a ball revealed ...
a ball already in residence. However, there were 3 washers on the bolt, reducing spring pressure, so 2 were removed.
This engine is such a mixture of good workmanship and poor finishing, I think it was built by a committee

Posted Image
Marking the distributor position against the block before removal. It's probably working at maximum advance but is coping ok,
so we'll decide whether to change it when we get Huey back together and rolling roaded

Posted Image
One way of getting extra leverage ... but only for undoing, never tightening!

#29 AndyMiniMad.

AndyMiniMad.

    Up Into Fourth

  • Members
  • PipPipPipPipPipPipPipPipPip
  • 3,295 posts
  • Location: Under The Bonnet.

Posted 18 December 2012 - 10:09 PM

I had to modify my breather due to the fan hitting it on both my 1380 builds. Im surprised yours is not hitting!! here are a couple of pics of what I needed to do..

Posted Image

Posted Image

#30 Teapot

Teapot

    TMF Legend

  • Members
  • PipPipPipPipPipPipPipPipPipPip
  • 5,010 posts
  • Location: Seaton, East Devon

Posted 19 December 2012 - 07:39 PM

I had to modify my breather due to the fan hitting it on both my 1380 builds. Im surprised yours is not hitting!! here are a couple of pics of what I needed to do..


Yep, I saw that in your excellent build thread pinned in this section. We must be missing something and need
to find it before the engine goes back in.

Stop Press: Dougie Has An Idea
Watch this space

Edited by Teapot, 21 December 2012 - 10:39 AM.


1 user(s) are reading this topic

0 members, 1 guests, 0 anonymous users