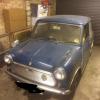
I can only imagine how daft that cover would have looked just pulled over and fastened with a drawstring ![]()
Mini Cooper 998 Screamer Nut And Bolt Rebuild
#1261

Posted 29 September 2017 - 10:08 PM
#1262

Posted 29 September 2017 - 10:42 PM
I am a little sad that im up to date now though...... i feel a little bit like i do waiting for the next season of game of thrones.
Great work sir.
#1265

Posted 07 October 2017 - 08:28 AM
What gun do you use Pete?
#1266

Posted 07 October 2017 - 08:48 AM
Wow! look's like you could just dive in.
#1267

Posted 07 October 2017 - 08:41 PM
What gun do you use Pete?
Nothing special. This Devilbiss which I've had about 10 years
I don't go for big buck guns Ben as I don't think they are necessary. Technique is everything especially with 2K paints. It's all about timing. First coat is a dust coat then build on that. Many make the mistake of too much too soon. You have to let the the coats go tacky before you apply the next. When you put a wet coat over a tacky coat it melts into the tacky coat and eventually the whole thing flows out to a decent finish
Wow! look's like you could just dive in.
The flies did! It was wet when I took the pic
I prefer these clips to split pins - handbrake clevis pin
Attention to detail is important if you want things "proper"
I use towels to protect paintwork when fitting big items
Foam pad on fuel tank
MK 6 (or is it 5) shell and a 5 1/2 gallon tank..... I don't plan going far in it.
Stainless cap screws in everything
This build has been very challenging. Nothing fits, everything has to be made to fit and it's mega problems all the way. Iv'e had problems with more or less everything from minisport from a tapered crank grind to a windscreen that's far too big. Wheel bearings that don't fit, oil temp gauges that read 50% over, radius arm shafts, subframes, seat belts......... The list goes on and on. I'm tired of paying good money for sub standard parts so now I'm using Minispares for parts.
I hate to mention this on a public forum but it's a heads up for people abroad who are paying for delivery.
My advice is, don't buy from minisport
#1268

Posted 07 October 2017 - 09:42 PM
This build has been very challenging. Nothing fits, everything has to be made to fit and it's mega problems all the way. Iv'e had problems with more or less everything from minisport from a tapered crank grind to a windscreen that's far too big. Wheel bearings that don't fit, oil temp gauges that read 50% over, radius arm shafts, subframes, seat belts......... The list goes on and on. I'm tired of paying good money for sub standard parts so now I'm using Minispares for parts.
I hate to mention this on a public forum but it's a heads up for people abroad who are paying for delivery.
My advice is, don't buy from minisport
Having just tried to rebuild a mini that had just been painted (dry but still soft) from a rolling shell in 3 days, I can honestly say it's not just isolated to Minisport, But unfortutaly nearly all of the mini specialists.
I've had a new laminated windscreen from minisport that very nearly didn't fit. A headlining kit were the c pillar trims were of the wrong fabric to the headlining, and also weren't the correct shape. Plastic push in plugs for the doors from minispares that didn't fit, as the holes are 1/4" (6.4mm) but the plugs minispares sell are 7mm. If I'd had known I could have bought the same from eBay from some random seller for a 3rd of the price, and still had to file out holes in the freshly painted doors. Window trim from old skool minis witch out of both rolls were an inch too short for the front windscreen. A boot seal from old skool minis again, that once pushed onto the lip doesn't stay in place or grip. And a load of others, Just about the only parts that did fit and work without issue were the original items or original second hand stuff that I'd bought.
Personally i think it's a ******* joke at some of the crap these mini specialists are passing off and selling.
#1269

Posted 07 October 2017 - 09:59 PM
#1270

Posted 08 October 2017 - 08:20 PM
I have 3 jap cars which I've owned for some time now. They are all in various states of tune but I've never had major problems fitting aftermarket parts
1997 Nissan 200SX S14a
1991 Nissan 200SXS13
2003 Honda S2000
I appreciate that Mini's were hand built and it takes a lot of time and patience to rebuild them.
A 2 -3 thou taper on a big end or main bearing journal is completely unacceptable though. The machine had never been checked and was out of alignment. They moaned at me when I took the crank back. I thought they would appreciate me bringing the problem to their attention and some customer feedback.
I dread to think how many Mini cranks they have fecked up!
Rant over
Lesson learned……
Fitted the boot today,
Needs a bit of tweaking as expected but good progress. I might have to slot the holes in the back panel to move it to the right and up a bit
It's hard to close the boot because the seal in new. I have used a bungee to pull it closed a bit to "shape" the seal
No doubt I will have to do the same with the doors
#1271

Posted 09 October 2017 - 08:50 PM
These are the front seat brackets I made. One of the problems of fitting aftermarket seats is the rear floor pan buckles.
The reason they are so hefty is to give additional strength to the shell. It's a long way from the X member to the heel board
Masked up as a guide
Then applied panel adhesive
6 bolts and fully bonded will give a lot of extra stifness
#1272

Posted 10 October 2017 - 08:54 AM
#1273

Posted 10 October 2017 - 12:18 PM

HI, I know this picture is pretty old now but would anyone be able to tell me where the last part in this picture goes? Mine was sitting in the boot when I got the car and I haven't been able to find its home yet.
Thank you
#1274

Posted 10 October 2017 - 12:37 PM
HI, I know this picture is pretty old now but would anyone be able to tell me where the last part in this picture goes? Mine was sitting in the boot when I got the car and I haven't been able to find its home yet.
Thank you
Can’t see clearly on my phone but is it not the Petrol tank mounting bracket?
#1275

Posted 10 October 2017 - 12:42 PM
If you talking about the part on the right, it is the battery clamp down bracket.
1 user(s) are reading this topic
0 members, 1 guests, 0 anonymous users


