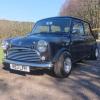
Mini Cooper 998 Screamer Nut And Bolt Rebuild
#916

Posted 27 February 2015 - 10:35 PM
How goes is the bike hamber stuff in your opinion? I'm guessing you like it as you seem to use a fair amount of it, picked up some bits and bobs from them to give them a try.
#917

Posted 27 February 2015 - 10:40 PM
I must say your step by steps are awesome and really useful, hoping to use a good few of them myself when I finish stripping my mini down and start rebuilding her.
How goes is the bike hamber stuff in your opinion? I'm guessing you like it as you seem to use a fair amount of it, picked up some bits and bobs from them to give them a try.
Have a look at page 53 ![]()
Pete
#918

Posted 27 February 2015 - 11:22 PM
Typical to lose something small this far into the build, Pete. It'll end up being located just as you get a replacement ![]()
#919

Posted 27 February 2015 - 11:39 PM
Also there isn't a washer missing from the trunnion pin.
Looking good by the way, been watching this build for months.
Edited by cookie4343, 27 February 2015 - 11:40 PM.
#920

Posted 27 February 2015 - 11:54 PM


Edited by cookie4343, 27 February 2015 - 11:56 PM.
#921

Posted 28 February 2015 - 09:42 PM
Typical to lose something small this far into the build, Pete. It'll end up being located just as you get a replacement
I keep putting things in safe places Steve - That safe I can't find em! ![]()
Hi pete just a heads up, the trunnion bush is the wrong way round, the bigger circle face of the bush goes on the inside not the outside.
Also there isn't a washer missing from the trunnion pin.
Looking good by the way, been watching this build for months.
Top man, thanks ![]() I looked at this illustration which shows the bush the wrong way round and a big washer
I looked at this illustration which shows the bush the wrong way round and a big washer ![]()
http://www.minimania...1/Rear-Subframe
Took advantage of some fine weather and cleaned up a radius arm
[/URL]
These have been fitted with refurb kits. To prevent dirt getting inside I used a length of screwed bar
 [/URL]
Primed
Pete
Edited by Petrol, 28 February 2015 - 09:45 PM.
#922

Posted 01 March 2015 - 10:42 PM
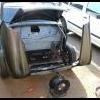
Fitted the rear subframe bare. It's probably quicker to assemble everything off the car but didn't want to risk chipping the paint due to the weight. Jacked it up into position
I didn't tighten anything which made alignment easy
Bolts went in without any persuasion or a podger
Bit more room in the garage now ![]()
Pete
#923

Posted 02 March 2015 - 01:24 PM
Hello Pete, Excellent build.
I have one quick question though? Are stainless cap bolts sufficient for the rear trunnions as stainless bolt by there very nature cannot be high tensile as per the original (Rust prone) steel ones?
Totally understand your reasons for doing it, but if it's gonna be a screamer, I wonder what forces those bolts could withstand?
Paul.
#924

Posted 02 March 2015 - 09:26 PM
Hello Pete, Excellent build.
I have one quick question though? Are stainless cap bolts sufficient for the rear trunnions as stainless bolt by there very nature cannot be high tensile as per the original (Rust prone) steel ones?
Totally understand your reasons for doing it, but if it's gonna be a screamer, I wonder what forces those bolts could withstand?
Paul.
Hi Paul, good question and I thought long and hard about it. Initially I bought a steel nut and bolt kit and wondered if they were high tensile - you never know these days. Stainless has 80% the tensile strength of HT steel but I took a judgement considering a number of things. The back subframe doesn't take that much load, unlike the front where all the weight is. Lots of people offer stainless kits including Minisport and the mounting trunion is made of cast steel which is quite brittle. I also think the captive nuts would come out of the heelboard before the bolts failed.
It's worth a mention that using stainless bolts into mild steel can be a source of rust so I sprayed the threads with dynax before assembly. I also used a plain washer to spread the load, and a spring washer to stop the bolts coming out. It's important that the trunion mount sits perfectly flush to the heelboard. You can see where the dynax has come out of the joint
Where nyloc nuts are used, spring washers are not necessary though I did put an extra washer in front of the large washer on the rear mount
When I fitted the front top shock mounts, I used HT bolts and will be doing the same with the steering arms.
Pete
#925

Posted 03 March 2015 - 12:20 AM
#926

Posted 12 March 2015 - 10:28 PM
Thanks slidehammer.
After taking some advice from Cooperman  Decided to use a solid front subframe mounting kit.
Alloy bushes go on the turret tops
Space is a bit tight so I slid the subby in sideways
Top mount solid washers
Same where the subby mounts to the front panel
HT plated bolts to fasten the rear of the front subby to the toe board
Doing this will stiffen up the front of the shell as the subframe will now brace it. This is how Mini's were originally designed.
Does anyone know what size of split pins are used for the handbrake clevis pins? IIRC there's 2 for the quadrants and 2 for the end of the cable where it fastens to the lever.
Thanks,
Pete
#927

Posted 13 March 2015 - 09:49 AM
#928

Posted 13 March 2015 - 01:52 PM
I presume the drawback of solid mounting is increased noise and vibration in the cabin? Probably not important depending on the intended use for the car of course but I am curious just how much of a drawback that really is, I'm some way of having to make a decision on this for mine but it is something I've been giving some thought to.
#929

Posted 13 March 2015 - 10:30 PM
Looks ace. I am eventually planning to do this but was told I need to reinforce front toe board to prevent cracking. Have you done this?
When I took the toe board stiffeners out to get rid of the rust behind, I put twice as many plug welds in it and stitch welded around the outside. I didn't take any pics but you get the idea if you look on page 21/22. At this stage of the build, I had no intention of fitting solid mounts but am now glad I beefed it up a bit. I guess time will tell how it goes. There's also a risk of the seams cracking between the wings and scuttle, and the wings / front panel.
I presume the drawback of solid mounting is increased noise and vibration in the cabin? Probably not important depending on the intended use for the car of course but I am curious just how much of a drawback that really is, I'm some way of having to make a decision on this for mine but it is something I've been giving some thought to.
The downside is as you rightly point out, increased noise and vibration. This a quote from another thread.......
"The rubber mountings were introduced in an attempt to make the NHV (noise, harshness, vibration) less for a new primary target market of middle aged ladies rather than young drivers"
That's fair enough if your looking for some comfort but this build is all about seat of yer pants driving. A full on road car do-er. Go Kart handling and road holding is what I'm looking for and if I get it right, there will be that much grip, it will slow down in the corners due to lack of power. Talking of power, the engine build is about to start. I now have the pistons but to keep the thread in a kind of orderly manner, I'll stick with the suspension build.....
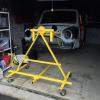
The height of the suspension cone even with Hi Lo's is too much to fit the front upper arm assembly without a cone compressor. (Note I painted the metal ring on the rubber cone as these can corrode and work loose)
Cone compressor - Massive thanks to Phil who lent me this on a Friday night with 10 Mins notice. Some people are just legends!!! 
Front arm fitted
Pete
#930

Posted 15 March 2015 - 10:11 PM
I'll have to look into what I need to do to strengthen the mounting points on the toe board to keep my options open.
1 user(s) are reading this topic
0 members, 1 guests, 0 anonymous users


