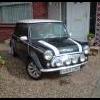
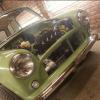
Pete, i have been thinking about it alot and i would like to formally invite you to come and paint my Mini ![]()
Mini Cooper 998 Screamer Nut And Bolt Rebuild
#661

Posted 07 August 2014 - 08:52 PM
#662

Posted 07 August 2014 - 09:11 PM
Wow thats a very nice colour, looks ace!
Nice job Pete, and as above, come and paint mine cars aswell ;)
#663

Posted 07 August 2014 - 09:14 PM
paint mine first! Mine is actually going to be ready for paint this weekend ;)
Can't wait to mess it up with paint runs and orange peel ![]()
This is going to be a show winning car!
#665

Posted 08 August 2014 - 09:55 PM
It’s not that difficult to get a reasonable finish when spraying. I posted up a how to when I did the arches. If it helps, I can post up some more pics with a detailed explanation.
This is going to be a show winning car!
LOL, if this car was shown, the judge would have a heart attack! “non originale” probably best describes it - It’s going to end up being a Mk 2.3.4.5 It was an MPI shell but will end up looking more like a Mk3 with the slotted inner wing for the radiator, 5.5 gallon tank and all the rest of it. Head is from a 68’ 998 cooper, roof is from the early 80’s I think. Dash top rail, and bulkhead. Hmmm can’t remember. Might of mentioned it before but the plan is to build a Mini using (what I consider) to be the best bits from over the years – Bit of a hybrid.
Pete
#666

Posted 09 August 2014 - 07:30 AM
Superb paint job
#667

Posted 09 August 2014 - 06:36 PM
The idea of cherry picking the best bits from the best years is exactly the idea Singer use when making their 911s. This should be a great car.
#668

Posted 09 August 2014 - 08:51 PM
It's just a case of picking all the right bits ![]()
Biggest masking up job I've ever done ![]()
It's not a good idea to stone chip on areas where parts are bolted to the shell. particularly suspension pic up points. These were masked out properly
3L of 3M 08868 and it's instant bling
Mentioned before that Terta and budget underseals / stonechips don't last as they flake off after a while. 3M is OEM spec and lasts ![]()
Pete
#669

Posted 09 August 2014 - 08:55 PM
very nice!
#670

Posted 10 August 2014 - 08:48 AM
Looks really neat that!
#671

Posted 11 August 2014 - 05:00 PM
Truly magnificent, I like the OEM feel to it, perfect ![]()
#672

Posted 13 August 2014 - 09:13 PM
Uprated front suspension mounts & HT plated bolts
Seam sealed the bolt head and drilled out the drain hole at the bottom to spray some zinc paint into the void.
To prevent this happening again
I applied seam sealer to the shock mount before fitting
Fitted
It's important to tighten the bolts in stages when doing this. This enables the sealant to ooze out. I probably nipped them up about 6 times over an hour to ensure good mechanical contact to the shell.
Pete
#673

Posted 14 August 2014 - 06:17 AM
Holy moly, thats impressive............. I bow down to your attention to detail.
Top work, looking forward to seeing the end result.
#674

Posted 14 August 2014 - 06:38 AM
i can see you setting a trend with this build
i for one will definitely use several of you methods!
#675

Posted 15 August 2014 - 12:02 AM
Keep it upmate and it Will be on the road in no time...
1 user(s) are reading this topic
0 members, 1 guests, 0 anonymous users


