Mini Cooper 998 Screamer Nut And Bolt Rebuild
#46

Posted 07 December 2012 - 01:08 AM
#47

Posted 07 December 2012 - 06:29 PM
I'm in the same boat, all I'm going for is a whats on there now, which as far as I know is a Alloy Inlet manifold and A exhaust, probably the rest of a stage 1 kit as well. I love SX's. My favorite has to be a S14a the facelift one with the more angular headlamps. (Of course with ridiculously oversized exhaust and ridiculously low coilovers)
Pete's S14a build lasted around 6 years and was only just finished not long ago. I tried getting into it but being a 14 year old lad, my attention span was about 10 seconds. You might spot it in the "bubble" at the back of some of the Mini shots.
Thread linky:
http://www.sxoc.com/...ive-S14a-refurb


Similar but not-so-anal treatment was then applied to the S13:
http://www.sxoc.com/...ect-56K-warning

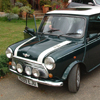
We intend for the Mini to be as close as to the 14 as we can :)
such a cool project, cant wait to see more of it. I love Tahiti Blue on minis! You keeping it that colour?
Yes ;)
Edited by MikaRaymond, 07 December 2012 - 06:30 PM.
#48

Posted 08 December 2012 - 06:53 PM
Pete's S14a build lasted around 6 years and was only just finished not long ago.
Thread linky:
http://www.sxoc.com/...ive-S14a-refurb
I'm on page 26, I think it might take me a while to view it all. :)
#49

Posted 09 December 2012 - 04:12 PM
We intend for the Mini to be as close as to the 14 as we can :)
No pressure then
Did a black paint run today, some bits are OK

Some not good, I couldn't fill the pitting but parts as bad as this will have to be flatted and resprayed

Pete
#50

Posted 12 December 2012 - 12:09 AM
I would welcome your comments as welding is something I have little experience in
Butt weld on a boot floor piece

Other side to show penetration (or lack of it)

I am looking for some help please
Thanks
Pete
#51

Posted 13 December 2012 - 01:24 PM
Mika is a bit concerned with the standard of welding that I have done. I know the theory but putting it into practice is a different story....
I would welcome your comments as welding is something I have little experience in
Butt weld on a boot floor piece
Other side to show penetration (or lack of it)
I am looking for some help please
Thanks
Pete
Slow your welding down, kinda looks like you went a bit too fast so it didnt get enough penetration. Slow and steady works best.
#52

Posted 13 December 2012 - 10:44 PM
Slow your welding down, kinda looks like you went a bit too fast so it didnt get enough penetration. Slow and steady works best.
Thanks though I do find it very difficult. Might try pulse welding as it might be a bit easier for me.
Progress so far - checking the panel fit of the boot floor repair and NS wheel arch

#53

Posted 14 December 2012 - 01:01 PM
I will be following this :)
Hope everything goes to plan for you!
#54

Posted 14 December 2012 - 01:14 PM

#55

Posted 15 December 2012 - 11:49 PM
Good progress today, Mika picked up some proper blasting media- 100KG of glass bead. We will probably need some more but should get us going for now. When I came home from work I removed the bearings from the radius arms and the top arms....


Radius arms took some time, they were full of grease and a bit messy. Good progress though
#56

Posted 18 December 2012 - 11:23 AM
Tacked on

Pulse welded


Penetration

I would appreciate any feedback on the welding as I have very limited experience of it.
Thanks
Pete
#57

Posted 23 December 2012 - 11:01 PM
Took full advantage of the weather today. Rear seam is almost done

Cut a plate to weld into the door frame

"Welded"

Then started blasting to get rid of the rust

If you look on the left had side of the door frame you can see some corrosion. Despite blasting it at 120 PSI (about 8 bar) the rust wouldn't budge. The only way of blasting it off is to up the game with the blast media - steel shot for example. Whilst this is OK on thick metal it's not the best idea on sheet steel.
The corroded area looks black and there's a reason why. As rust gets a grip it turns to carbon. Carbon is a very hard material and can be very difficult to remove. The bottom line is that underneath the carbon is yes you have guessed it - more rust. The easiest way to remove it is chemically - here I am using Bilt Hamber Deox gel

This will be soaked for about 2 - 3 days and will sort it.
Thanks for looking
Pete
#58

Posted 23 December 2012 - 11:03 PM
Is the glass still in the window? It looks like it is in the pictures.
Noah
#59

Posted 23 December 2012 - 11:28 PM
WOW, the attention to detail is great!
Is the glass still in the window? It looks like it is in the pictures.
Noah
Thanks Noah, we are going for rust removal rather than using rust convertors. If you know it's gone you're not relying on a rust converter doing it's job. When you look at the carbon sat on top of the rust, it makes me wonder if a rust convertor is capable of penetrating through it to get to the rust behind.
Also notice that we have blasted around every hole / welded areas in the door frame including captive nuts. This is where rust always forms.
The glass has been removed, the shell is 100% bare. That's blast media on the flags
I am sure I have a lot to offer this forum in terms of techie stuff - especially rust! I have done trials on box section wax and rustproofing
I just wish this forum was a bit more interactive
Edited by Petrol, 23 December 2012 - 11:30 PM.
#60

Posted 23 December 2012 - 11:39 PM
So hit me (Don't actually hit me
What do you mean by interactive?
1 user(s) are reading this topic
0 members, 1 guests, 0 anonymous users


