It's amazing where the rust can hide . . .
Mini Cooper 998 Screamer Nut And Bolt Rebuild
#316

Posted 28 August 2013 - 07:05 AM
#318

Posted 29 August 2013 - 09:42 PM
![]() Jesbus man!!!!!!!!!!!!, thats an absolute ton of media haha
Jesbus man!!!!!!!!!!!!, thats an absolute ton of media haha
Looks like a beach interior creation Pete ![]()
Good thorough work as always, pointing out all the bits i'l be attending to on my build and no doubt a load of other TMFer's builds ![]()
Cliff
#319

Posted 31 August 2013 - 10:17 PM
I'm trying to get rid of every bit of rust and carbon Cliff, my compressor is a bit short of balls really and it's taking a lot of blasting.
Mika is now back on the project and with 2 of us at it, progress is much quicker. Bit all over the place with the job at the mo, trying to get all the welding done for the add on's and mods....
Front speaker pods only bolt to the dash lower rail. Thought it best to fasten them to the flich panel
Bracket welded on
I split the boot opening seam some time ago. Mika blasted the rust out, filled it with zinc primer, then closed the seam
Decided to get rid of all the seam sealer that Rover used and replace it with proper stuff
Back seat upright being prepped for welding the new boot floor in
Thanks for looking
Pete
#320

Posted 01 September 2013 - 10:15 AM
Its looking great Pete :)
#321

Posted 01 September 2013 - 10:55 PM
Thanks puggered.
Mika spent a good few hours blasting the back seat upright and companion bins today. This was followed by a good dose of weld through primer
I bought a Heritage pair of pocket fillers (and a boot floor) and was very disappointed to find some "spiders webs" on the pocket fillers. After scraping the E Coat off I found rust behind. E Coat is great when done properly as it offers great adhesion, superb rust protection and a good base for paint. By the looks of things, the pocket fillers have been E coated over rusty metal so the whole process was a waste of time. I'm not very impressed with Heritage
Pete
#322

Posted 02 September 2013 - 06:35 PM
Heritage aren't all that. I'll be honest. - Their presses are getting worn out and often this means panels don't fit. Problem is they make panels, and not cars. So they refuse to believe that it's wrong because 'These are the original presses'. Despite this every time I pick up a genuine panel I always seem to end up with cut up hands from where they simply don't take the time to de-burr edges. A great example is their rear subframes, the weld splatter is lethal on those things. Watch out.
#323

Posted 02 September 2013 - 08:47 PM
I just watched the entire thread and this is such an amazing job you're doing.
I wish I could do the same ![]() !
!
Anyway, good luck for the rest of the car. I'm waiting for the engine to be in :)!
Regards.
#324

Posted 03 September 2013 - 08:09 PM
Heritage aren't all that. I'll be honest. - Their presses are getting worn out and often this means panels don't fit. Problem is they make panels, and not cars. So they refuse to believe that it's wrong because 'These are the original presses'. Despite this every time I pick up a genuine panel I always seem to end up with cut up hands from where they simply don't take the time to de-burr edges. A great example is their rear subframes, the weld splatter is lethal on those things. Watch out.
I'm not surprised the presses are worn out and it’s unlikely they will replace them. I did consider a new shell but since they are made from bare metal sheets, welded and then primed, it just screams of lack of protection in the seams. I guess this type of fabrication would only last about 10 years before the rot sets in.
I just watched the entire thread and this is such an amazing job you're doing.
I wish I could do the same
!
Anyway, good luck for the rest of the car. I'm waiting for the engine to be in :)!
Regards.
It’s not difficult AndyFrenchMan. This is my first shell rebuild but it does take a lot of time. Engine and gearbox will be rebuilt over winter so will be ready to fit once the shell is finished.
I like to mask up before applying seam sealer as it's a much neater job
Masked up the boot floor where the welds will be then sprayed some gloss on
I can't get the gun in to spray the back of these brackets once they are welded in, so I sprayed these as well
Pete
#325

Posted 03 September 2013 - 08:13 PM
Those seem seals looks very neat, what sealer are you using?
#326

Posted 03 September 2013 - 08:34 PM
Great work as always Pete.
Those seem seals looks very neat, what sealer are you using?
Thanks Chris. I'm using Sikaflex but 3M is just as good.
Pete
#327

Posted 03 September 2013 - 09:04 PM
Great work as always Pete.
Those seem seals looks very neat, what sealer are you using?
Thanks Chris. I'm using Sikaflex but 3M is just as good.
Pete
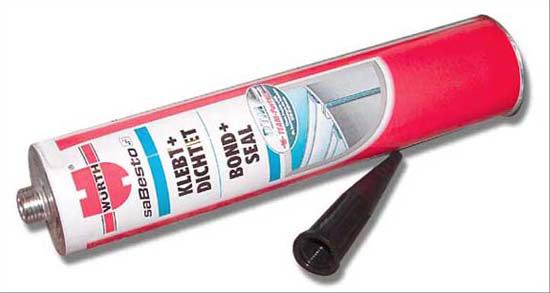
Is that the Wurth sikaflex Pete? If so we used to use that at work (accident repair centre) and I can vouch that it is very good and very durable.
I shall be using it on mine.
Cheers
Ben
#329

Posted 03 September 2013 - 10:09 PM
Its probably the same sort of stuff Pete.
This is the one we used to use
It has very strong bonding properties. I worked for Vauxhall and we used to use this to bond on the Irmscher body kits on the new cars. Wonderfull stuff.
Also it is very good for bonding on Fibreglass body kits as well as sealing.
While I am thinking about it there is a product you might be interested in as you have a spot welder. We used this too as a lot of the new models coming out at the time (Insignia, new Vectra etc) had bonded seams that were also spot welded. It came as an adhesive that you put directly on the mating surfaces of the seams, fitted the panel and clamped it causing the sealer to squidge out and then you spot weld the seam as usual. It is specially formulated so you can weld through it and it was very good. I went on a course about it. Not only do you get a stronger joint, but it will keep rust away from the seam.
I cant remember what we used but I remember it was 2K and mixed itself as you squeezed it from the nozzle.
After a quick browse online I found this which seems to be the same thing.
http://www.lord.com/...or-Products.xml
Cheers
Ben
#330

Posted 03 September 2013 - 10:19 PM
This is the stuff we used and a data sheet on how it works.
http://www.3m.com.au...g_Wallchart.pdf
Hope its useful
or at least good reading.
Cheers
Ben
4 user(s) are reading this topic
0 members, 2 guests, 0 anonymous users
-
Bing (2)


