1964 Mk1 Austin Super De-Luxe
#16

Posted 13 November 2012 - 06:20 PM
#17

Posted 13 November 2012 - 08:12 PM
#18

Posted 13 March 2013 - 04:05 PM


Next I moved onto the suspension and discovered a lot of knackered parts...
Front drop stop:

Lower arm bushes:

Front shocks old vs. new:

Front tie-bars (actually not too bad!):

Front cones (these were a real b...... to remove, both from the subframe and then from the hi-los:

Shock mounts old vs. new:

and how I left it at the weekend:

#19

Posted 14 May 2013 - 11:46 PM
The mini went in a couple of weeks back for its MOT and failed on a worn steering rack, worn rear bearings and front brake efficiency. One order from Minispares later and I have the parts I need!
As I already have a set of original Lockheed Cooper S 7.5" discs I decided to fit them after first giving them a nice new coast of paint.

I was also trying to find some more information about my lower gearbox/engine steady, and couldn't find anything. This is a picture of the underneath of the car, hopefully someone can identify it!!

#20

Posted 15 May 2013 - 05:20 AM
I don't remember a lower gearbox steady being fitted. What is that cross bar also?
#21

Posted 15 May 2013 - 07:24 AM
Never seen that steady before. I've had a few MK1 & MK2 minis. Great looking mini though.
Edited by jagman.2003, 15 May 2013 - 07:25 AM.
#22

Posted 16 May 2013 - 12:07 PM
That's a real gem of a car - still on it's original full width front panel!
Looks great, well done ![]()
#23

Posted 20 May 2013 - 09:06 PM
Thank you!
The cross bar is the gearbox steady. There are two bars that go from the bottom of the gearbox (underneath where the magic wand goes into the box) to the side of the subframe. The stud on the bottom of the gearbox is part of the plate, and it looks like it always was that way??
#24

Posted 20 May 2013 - 09:29 PM
The mini went in a couple of weeks back for its MOT and failed on a worn steering rack, worn rear bearings and front brake efficiency. One order from Minispares later and I have the parts I need!
As I already have a set of original Lockheed Cooper S 7.5" discs I decided to fit them after first giving them a nice new coast of paint.
I was also trying to find some more information about my lower gearbox/engine steady, and couldn't find anything. This is a picture of the underneath of the car, hopefully someone can identify it!!
I once bought (and later sold on) an SPQR Speedograph gearbox steady kit for a direct-change mini, this looks a bit like half of that kit. If I remember correctly it had two slightly wonky bars fitted with rubber bushes at either end. One end would attach to the gear lever extension casing and the other to the under side of the front subframe, through drilled holes.
#25

Posted 21 May 2013 - 08:09 AM
#26

Posted 02 June 2013 - 08:46 PM
Yeah, the carpet is from Newtons - really good quality, couldn't be happier!
I also rebuilt my metal Quinton-Hazell type driveshaft joints as they didn't appear to be working smoothly. I took it apart, and it was obvious why:

Luckily, the internet informed me that this is actually a standard GKN part for the Triumph TR 4/5/6 propshaft and halfshaft, so I ordered a fresh set.

I pressed the old cups out with a vice, leaving just the metal shell:


and then re-assembled the joints:

Once I have pumped in some more grease the grease nipples will be replaced with blanking plugs.
#27

Posted 03 June 2013 - 08:20 AM
#28

Posted 03 June 2013 - 08:55 AM
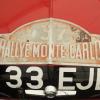
I see that number plate and all I can think of is Nixon from Futurama.
#29

Posted 01 July 2013 - 05:02 PM
This is how he looked at the start of the weekend, with all the suspension components removed for refurbishing:

The radius arms didn't look very tidy, but apart from the stub axle which I mangled when removing the stubborn bearings, they were actually in pretty good condition:

I gave it a clean with a rotary wire brush, and pressed out the old stub axle (an Atlas No. 6 Vice in the picture above is *just* big enough):

The old back plate didn't look great so I replaced that too:

I pressed in the new stub axle and then gave the radius arms a lick of fresh paint and reassembled the radius arms with new brake pads and springs, new backplates (the old ones had rusted away) and new knuckle joints:

Finally I moved onto the steering column and discovered why it all felt so loose:

The steering column had been crushed out of round, and then the top bearing had the high points shaved off, and the low points packed with electrical tape. I'm in the process of straightening it out, and it looks like it will come out looking nice and round.
That's all for now, but it is always satisfying to be making progress!
Edited by Henry8601, 01 July 2013 - 05:06 PM.
#30

Posted 22 July 2013 - 08:44 AM
After putting it all back together I sent the mini off to Somerford for an MoT and full tracking and alignment.
Slightly annoyed as Sommerford broke the front badge and put the bonnet back on so tight that the first time I opened it, it left a massive scrape in the corner of the scuttle panel.They also broke the choke cable....
But it was nice to have the car back, so I took in to Slark Race Engineering for a rolling road session. It was terrifying hearing how high he was being revved!! The first run revealed that it was really rich on the bottom end, and then really, really lean at the top end. The needle was swapped from an EB to a 4, and with a few more adjustments and tweaks to the timing, we managed to go from 27.3 Bhp to 32.8 Bhp (corrected at the engine). It might not sound much, but before there was a massive flat spot at ~60mph which was really noticeable.
Waiting on the rollers, ready to go:

Here is the graph: (red = before, black = after)

I have a few to tweaks to do, but it's good to see him back on the road ![]()
1 user(s) are reading this topic
0 members, 1 guests, 0 anonymous users


