Jump to content


Photo
- - - - -

1979 Van - Patch Or Replace Whole Floor / Worth Using A Rollover Jig?


  • Please log in to reply
12 replies to this topic

#1 hairyhammie

hairyhammie

    Learner Driver

  • Noobies
  • PipPip
  • 16 posts
  • Location: Surrey

Posted 03 October 2012 - 07:36 PM

Hi,

I’ve just started a thread in the any other projects area for some restoration work i'm starting on my 1979 Mini Van. http://www.theminifo...ration-project/

I would really appreciate some advice on how to approach the project as I have never welded or worked on bodywork before!

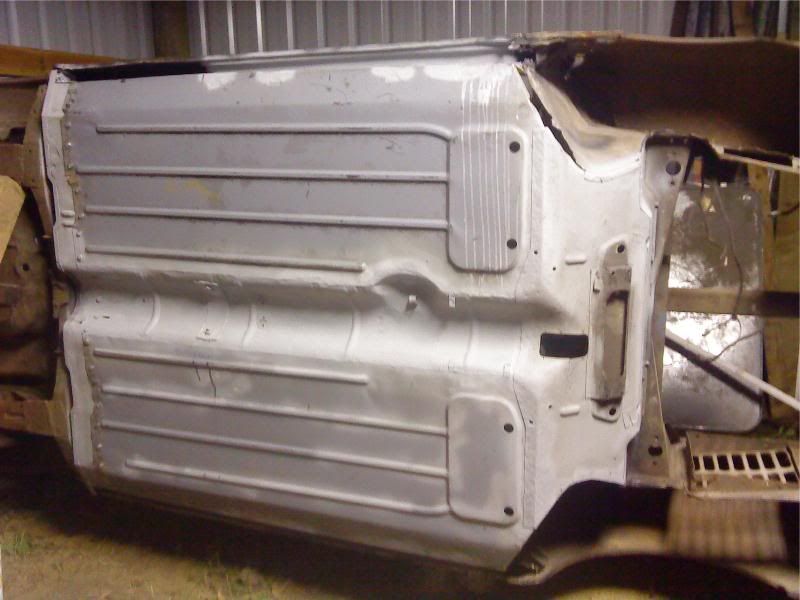
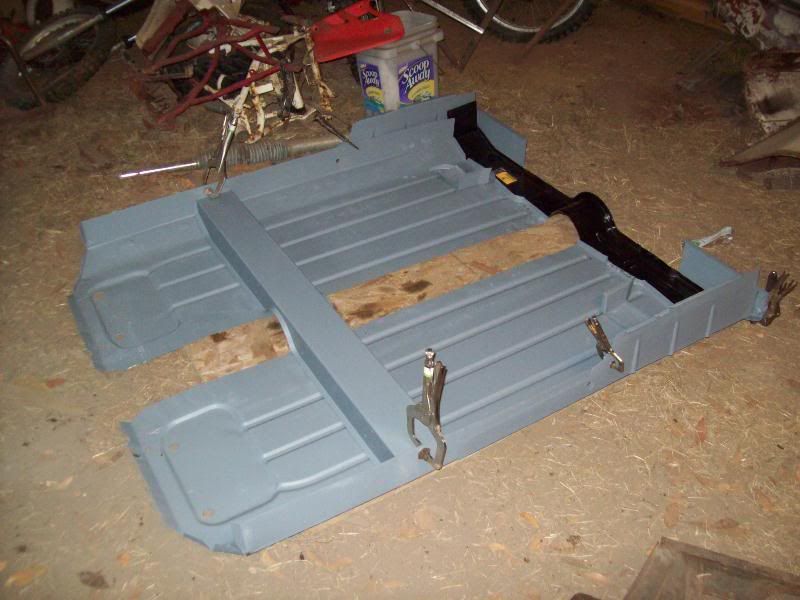
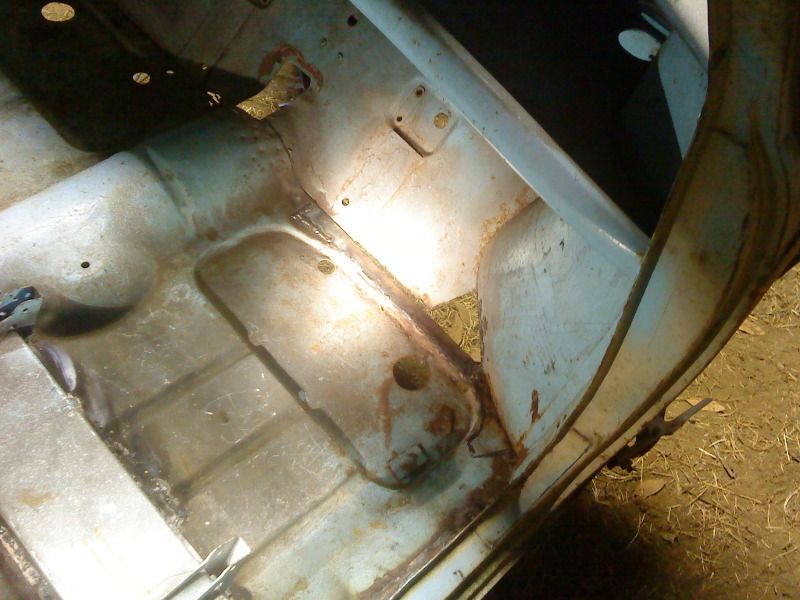
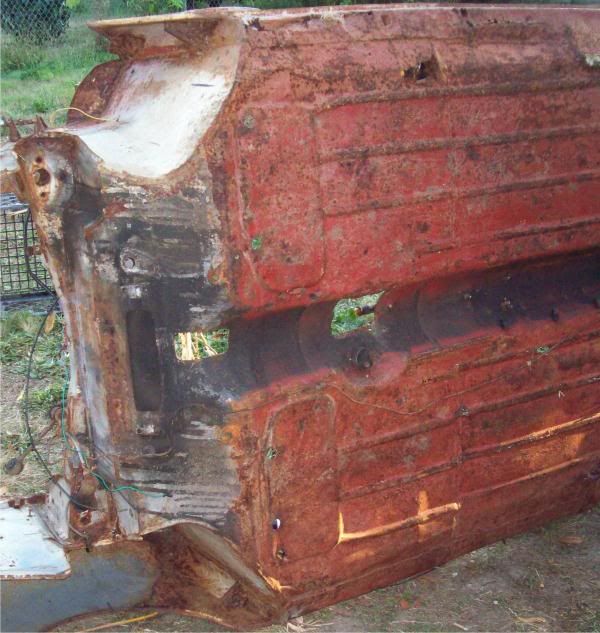
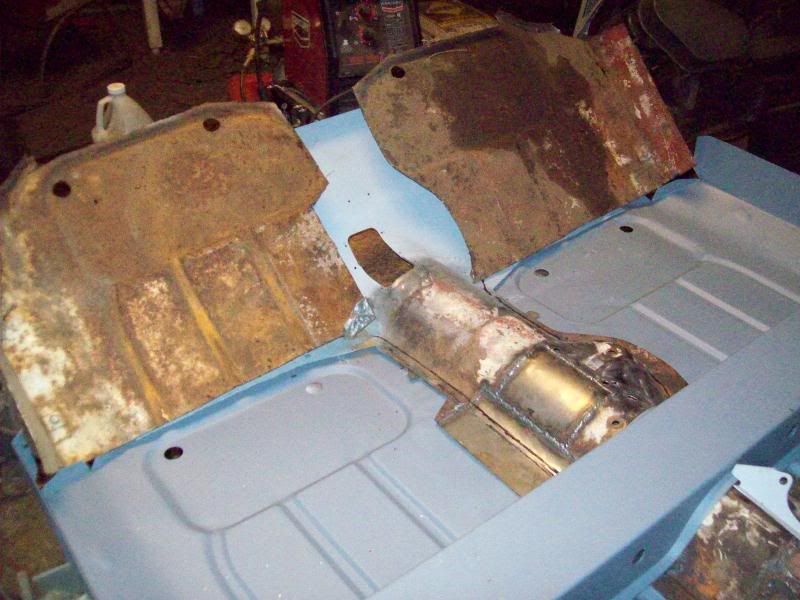
I have found these problem areas…so far:
  • Underside of box-section under front seats
  • Front of sill adjacent to front wing
  • Various points along inner sill (sloping part of the floor pan)
  • Corner and underside where rear floor pan meets heel board underneath load bed
  • Large hole (with bodged metal plates from previous owner) on panel to the side of the heel board under load bed (which is a nightmare to access!).
There are more photos in the project thread but assuming I need to do the above to both sides, what would you recommend as the best way to tackle it?
  • Cutting out the bad areas one at a time and patching them up with repair sections?
  • Cutting out all bad sections at once and providing some bracing to the body?
  • Cutting out the entire RHS floor pans front to rear and replacing them with new (then repeating for LHS) bracing the body beforehand?
Also, I have been contemplating buying a rollover jig (spit) to aid the preparation and welding, would this job justify working in this way or is it a bit of overkill?! If I do use the rollover jig, can I leave the subframes in place whilst I work? I understand I’ll have to pretty much dismantle the whole car beforehand too!

All help and advice would be greatly appreciated and I’ll try to update the project blog as I progress.

Thanks :)

Attached File  DSC_0853.jpg   54.57K   7 downloads


Attached File  DSC_0854.jpg   54.16K   7 downloads

Attached File  DSC_0862.jpg   59.16K   6 downloads

#2 WolfsMinis

WolfsMinis

    Learner Driver

  • Noobies
  • PipPip
  • 18 posts
  • Location: Witbank, Mpumalanga
  • Local Club: None at Present

Posted 05 October 2012 - 09:58 PM

Hi,

I'm very new to restorations and completely new to minis...

However, I'd say if you had the money/means of getting a spit rather do so, as you'll be able to access a whole lot more and make repairs easier I suppose.
As for the flooring I'd go with replacing anything which my budget allowed me to.

I wish I could say the same but I'm going to have to go with the lesser... Getting underneath her and welding in replacement panels where needed, and I'm already regretting not being able to get her stripped completely and up in the air.
If you can afford it do it.

Least that way everything will be ready for when you get your second project mini... ;D
Good Luck.

#3 CLM

CLM

    One Carb Or Two?

  • Members
  • PipPipPipPipPipPipPip
  • 817 posts

Posted 05 October 2012 - 11:38 PM

If you decide to replace the whole floor get a heritage floor pan and floor extension and build up from there, they are not at all bad price wise and your floor will start out square from the pressing. Building it up you will get the chance to paint inside all the box sections before assembly. If you get a built up floor assembly they are generally two floor halfs welded to a tunnel pressing and are lacking a bit in appearance along the welds along the tunnel. That and all you get paint wise inside the box sections will be a basic primer that might not fully seal it well against rust in the long term.

Chris

Edited by CLM, 05 October 2012 - 11:39 PM.


#4 olds_kool_lews

olds_kool_lews

    Up Into Fourth

  • Traders
  • PipPipPipPipPipPipPipPipPip
  • 3,601 posts

Posted 08 October 2012 - 03:08 PM

As said by CLM, get a full floor and extender piece, best to do the lot in 1 go than patch up an old floor, as tge bits that havent been replaced will soon need to be, so a whole floor is best bet, just make sure u brace the shell from distorting/twisting when removing such ablarge amount of the car

Edited by olds_kool_lews, 08 October 2012 - 03:08 PM.


#5 hairyhammie

hairyhammie

    Learner Driver

  • Noobies
  • PipPip
  • 16 posts
  • Location: Surrey

Posted 08 October 2012 - 10:16 PM

Thanks for the responses guys :-)

Sorry, I'm new to this, but what is the extension piece? i've seen you can buy a front floor, rear floor, or whole side, is the extension to the side somehow? I agree, if I'm doing the job, I don't want to have to redo it in 2 years time when the other panels start corroding too!

I was hoping to be able to keep the existing box section where the seats mount too if possible, I take it I can cut the old floor out then seam weld the new one to it?

Do you have any advice on bracing? How much and where is necessary and what sort of tube should i use? Apologies if there's a thread about this.

I've started looking for a spit and in the meantime i've started clearing some space in the garage. Then I'll start dismantling the rest of the shell! O_O

#6 CLM

CLM

    One Carb Or Two?

  • Members
  • PipPipPipPipPipPipPip
  • 817 posts

Posted 08 October 2012 - 10:50 PM

Well if your floor is original you will see where the large front section laps over a 4 inch section at the back, this section

http://www.minispare...ty=pb&pid=38609

Using that section along with

http://www.minispare...ct.aspx|Back to

Will give you a complete floorpan including tunnel to fit in your vehicle.

Originally every long wheel base mini (van pickup estate) used a standard saloon floor pan with the rear seam flat, and this extension piece welded on. This is something of a telltale if you look under the car and it's not there. This is my estate I am turning into a pickup, I purposely ordered the saloon length floor halves as you can't order a one piece saloon floor anymore which was a real pain trying to get the halves lined up to weld them.

Posted Image

I tried to locate a picture of the built up floorpan that someone had bought but couldn;t find the pictures, they tend to have large seam welds alo9ng the overlapping panels and do look a bit unsightly.

Chris

#7 tiger99

tiger99

    Crazy About Mini's

  • Members
  • PipPipPipPipPipPipPipPipPipPip
  • 8,584 posts
  • Location: Hemel Hempstead

Posted 09 October 2012 - 02:01 PM

I recall that on my old van (1962) the floor extension appeared to have been butt welded by machine, not lapped. I am not sure if that is always the case.

#8 jackso11

jackso11

    Learner Driver

  • Noobies
  • PipPip
  • 13 posts

Posted 13 October 2012 - 07:19 PM

Hi, I am new to the forum too..first post in fact :)

Today I picked up a 1963 countryman which has had 2 owners and covered 67k miles up to 1998, then been sat in a garage since then. Project is to restore it and use it as my company show piece (I run a bodyshop in Norwich). I have never welded in a floor pan either so this is a perfect thread for me to follow, sorry hairyhammie I don't mean to hijack at all but think we are both looking for the same advice :highfive:

Just wondering on the floor pan as its been mentioned original estate/van/travellers/countrymans had the standard saloon floor pan and an extension section, does that mean all the floor pans should be compatible? I looked on the minisport site and there seem to be loads of different ones available for the same year cars.

#9 CLM

CLM

    One Carb Or Two?

  • Members
  • PipPipPipPipPipPipPip
  • 817 posts

Posted 13 October 2012 - 07:39 PM

For a 63, the floor pans you can get are the long style which is basically original floor pan with the extension as part of it, or the saloon length which would be the way the factory built it and use the floor extension. You will have to flatten out the rear seam or call m-machine to make a pan and not fold that seam which likely would be a better idea.

Posted Image

However... The foot depression will be wrong. I was talking to a friend about this the other day, the commonly available floors have mk3 style depressions or rover style depressions.

Original 59 had the depressions that mostly covered the floor the 59 mini register has remade those.

the Late 59-61? The pressing that was commonly in the wrap around floor cars had straight ribs and basically went from where the sill starts bending up to tunnel.
Posted Image

The ones made with mk1 tunnel and the separate outer sills had the outside edge of the floor depression move in to make room for the slinging shoes, the inside edge still fits right up to the tunnel
Posted Image

After that you got the floor with the rod change box, the square tunnel required shrinking that depression again, this time the inner edges came inward to make room for the wider square rod change tunnel. This is the style generally found in all the reproduction floors. It works fine but a quick glance tells it is not correct for the floor.
Posted Image

After that I believe it stayed the same up untill the fuel injection cars received the pressings for the fuel injection pipes.

Chris

#10 jackso11

jackso11

    Learner Driver

  • Noobies
  • PipPip
  • 13 posts

Posted 13 October 2012 - 10:45 PM

Thanks CLM!

So basically I need these:

http://www.minispare...px|Back to shop

but I will need to modify/flatten the rear seam. Is that correct?

#11 CLM

CLM

    One Carb Or Two?

  • Members
  • PipPipPipPipPipPipPip
  • 817 posts

Posted 14 October 2012 - 04:24 AM

It all depends on how perfect you want the repair, the full length is giving up originality for ease of installation which as the original floor depressions are wrong for a mk1 won't make it totally original anyways.

Chris

#12 jackso11

jackso11

    Learner Driver

  • Noobies
  • PipPip
  • 13 posts

Posted 14 October 2012 - 09:13 AM

and the floor depresions will be wrong on the shorter floor with extensions anyway, right? so there is no way I can get it 100% unless I find a doner with perfect condition 50 year old floor pans I guess

#13 CLM

CLM

    One Carb Or Two?

  • Members
  • PipPipPipPipPipPipPip
  • 817 posts

Posted 14 October 2012 - 10:41 AM

Or modify the new floor to the older shape, but I doubt you are making a perfect museum piece, fix it and have fun. I went with the extension because the work plans will have me moving some panels between an 80 van and a scrap mk2 wagon. I wasn't too bothered with floor pan shape because this rotten mk2 wagon is turning into a mk1 pickup eventually so will in no means be anything resembling original... floors are the least of my worries :)

As for right shape, that one I pictured for late 59 is going to donate it's very nice condition floor to an actual late 59 car... or a 61 wagon so good old floors are out there :)

Chris

Edited by CLM, 14 October 2012 - 10:46 AM.


1 user(s) are reading this topic

0 members, 1 guests, 0 anonymous users