Not sure what u got with it, but when I sold it it had fully adjustable geometry (all set at neg1.5 degrees) 10x6 wellers wrapped in a008 rubber, adjustable GAZ shocks, brand new rubber doughnuts and GENUINE hilos.
It would handle like it was on rails, I was doing 70ish round roundabouts with ease.

1967 Morris Mini Van - Flubber? :s
Started by
ryan22_lgm
, Aug 15 2012 10:28 PM
712 replies to this topic
#31

Dog
-
- Banned from Buying/Selling
-

- 9,550 posts
Deathwish Fairy
- Local Club: Shatrats.com
Posted 14 September 2012 - 12:52 AM
#32
ryan22_lgm
-
- Traders
-
- 1,478 posts
One Carb Or Two?
- Location: woolacombe, north devon
- Local Club: north devon mini register
Posted 21 September 2012 - 10:56 PM
Not sure what u got with it, but when I sold it it had fully adjustable geometry (all set at neg1.5 degrees) 10x6 wellers wrapped in a008 rubber, adjustable GAZ shocks, brand new rubber doughnuts and GENUINE hilos.
It would handle like it was on rails, I was doing 70ish round roundabouts with ease.
well all it has left is the rear hi los and front adjustable tie bars :)
#33
ryan22_lgm
-
- Traders
-
- 1,478 posts
One Carb Or Two?
- Location: woolacombe, north devon
- Local Club: north devon mini register
Posted 21 September 2012 - 11:08 PM
UPDATE
Right so i been doing little bits to the van when i have 5 mins :/
I got most of the floor welded in just a bit at the front left to do so i decided to start on the rear quarter repair panel/ door step panel to make it look a bit more mini shaped again.
So first of all i drilled a few holes
Then got it all clamped up and cut some slots in the doorstep to help make it fit correctly as its a very poor quality panel. The back edge took a bit of pushing and hammering to get it to line up with the inner sill but got there in the end!

Once the sill joint and the innersill was welded up 1 double cut the line across the rear quarter to help reduce any heat distortion from overly tight gaps between pieces of metal. Then i tacked it together!
Thats as far as i have got! And im sorry about the fat welds the wire feed is giving me issues on the welder :/
Thanks for looking guys! i will get some more done sometime soon!
Right so i been doing little bits to the van when i have 5 mins :/
I got most of the floor welded in just a bit at the front left to do so i decided to start on the rear quarter repair panel/ door step panel to make it look a bit more mini shaped again.
So first of all i drilled a few holes
Then got it all clamped up and cut some slots in the doorstep to help make it fit correctly as its a very poor quality panel. The back edge took a bit of pushing and hammering to get it to line up with the inner sill but got there in the end!
Once the sill joint and the innersill was welded up 1 double cut the line across the rear quarter to help reduce any heat distortion from overly tight gaps between pieces of metal. Then i tacked it together!
Thats as far as i have got! And im sorry about the fat welds the wire feed is giving me issues on the welder :/
Thanks for looking guys! i will get some more done sometime soon!
#34
scotty_1987
-

- Members
-
- 874 posts
One Carb Or Two?
- Location: Dublin, Ireland
- Local Club: MiniBallers
Posted 21 September 2012 - 11:16 PM
looks a good job so far lad...keep it up man  !! liking the ideas for when its at the finishing stage
  !
!
Nathan
!! liking the ideas for when its at the finishing stage !Nathan
#35
ryan22_lgm
-
- Traders
-
- 1,478 posts
One Carb Or Two?
- Location: woolacombe, north devon
- Local Club: north devon mini register
Posted 22 September 2012 - 05:46 PM
looks a good job so far lad...keep it up man
Nathan
Cheers mate yeh i think the grey, black and red colour scheme is what im gunna go for! i will have a look round at castle combe for inspriration and buy loads more panels XD
#36
ryan22_lgm
-
- Traders
-
- 1,478 posts
One Carb Or Two?
- Location: woolacombe, north devon
- Local Club: north devon mini register
Posted 11 October 2012 - 03:11 PM
Update!
Been working on the van a bit over the last couple weeks but nothing worth updating for. Grinding and finishing areas of welding on the new floor. I will soon be putting it back on its bottom to weld the floor from the inside and fit the new inner wing.
Today as i have bought a new rear valence i decided to start cutting off the old one to see what horrors were underneath it !
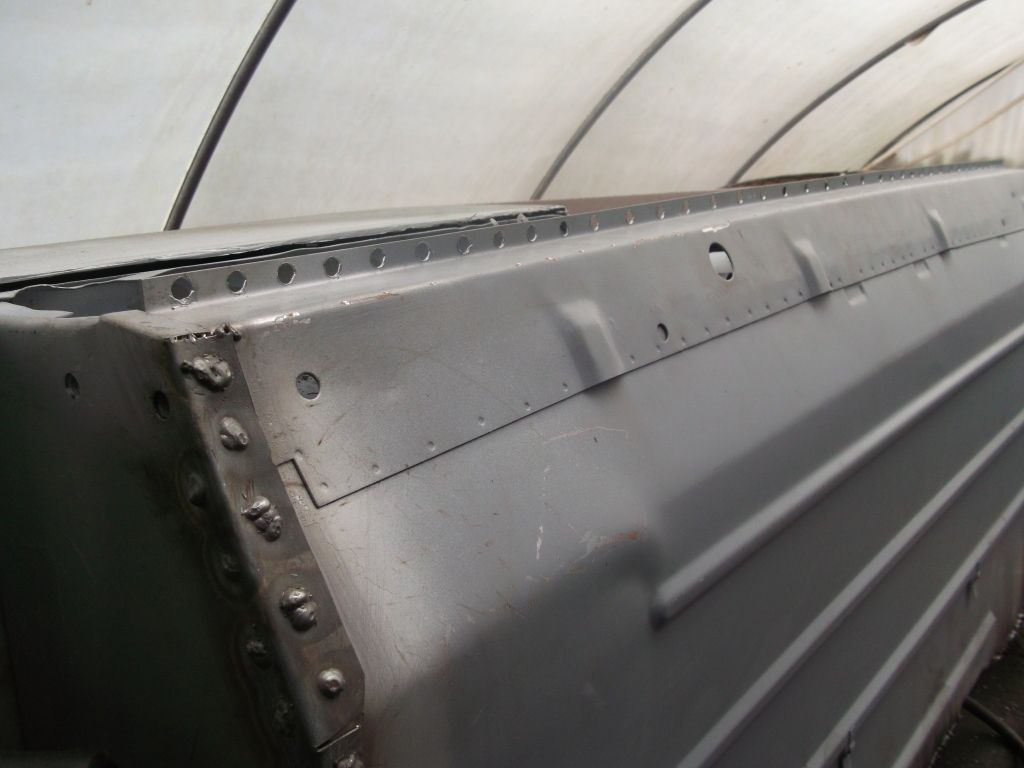
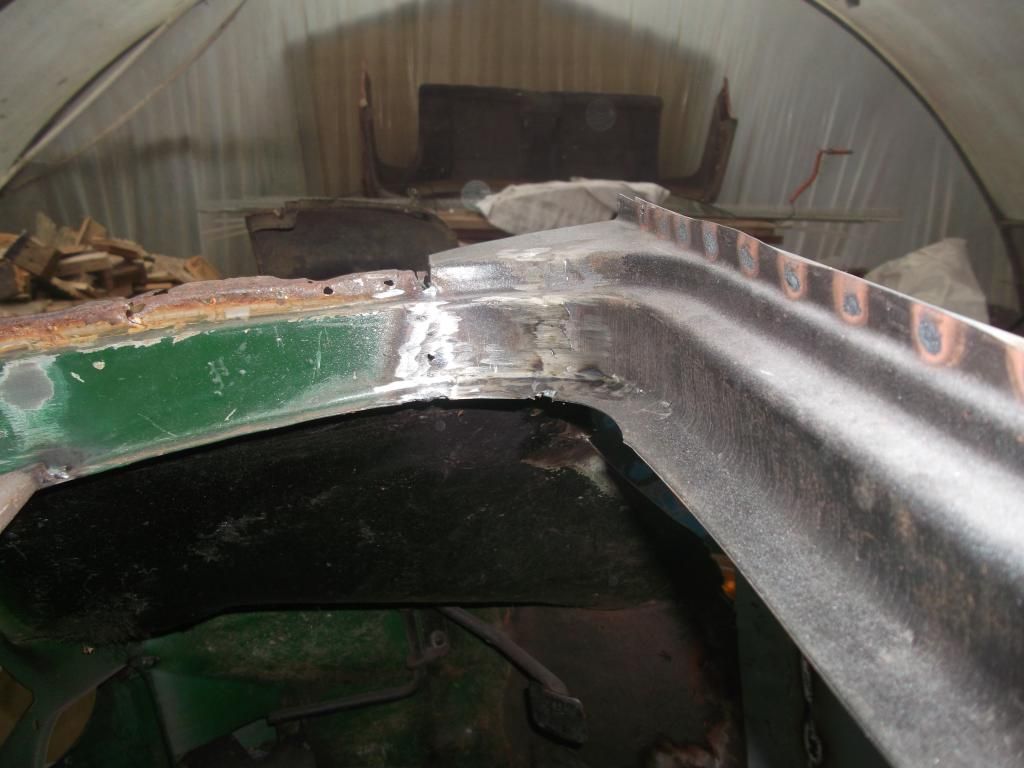
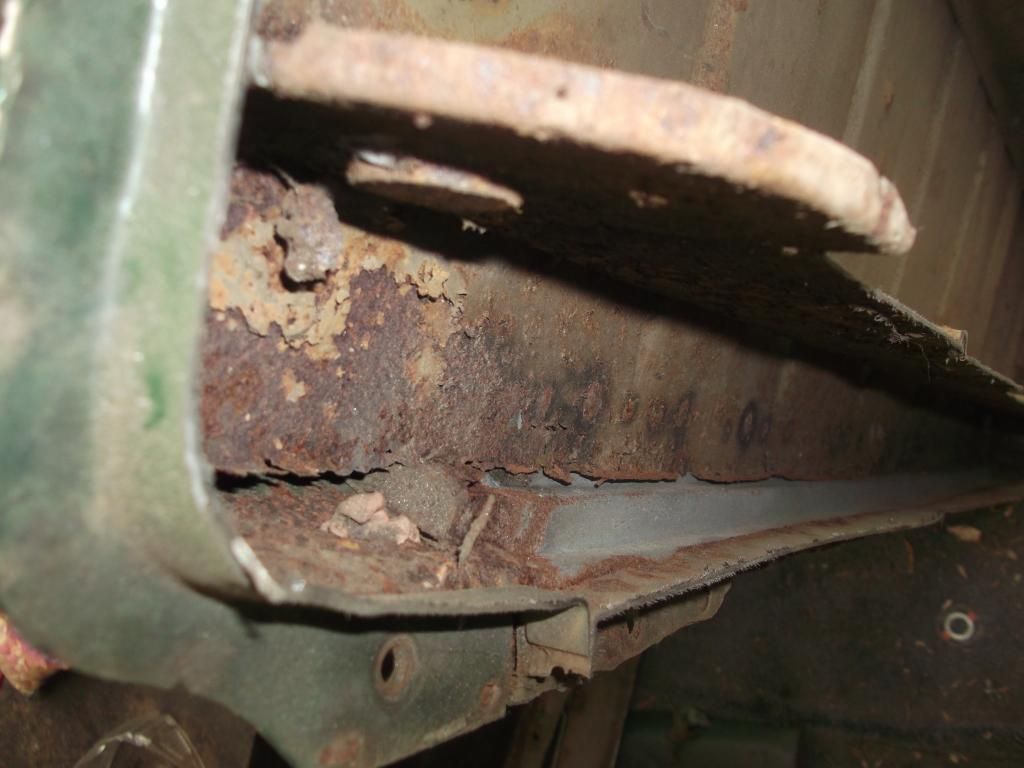
Here is a pic of the door step fully welded in and welds ground off
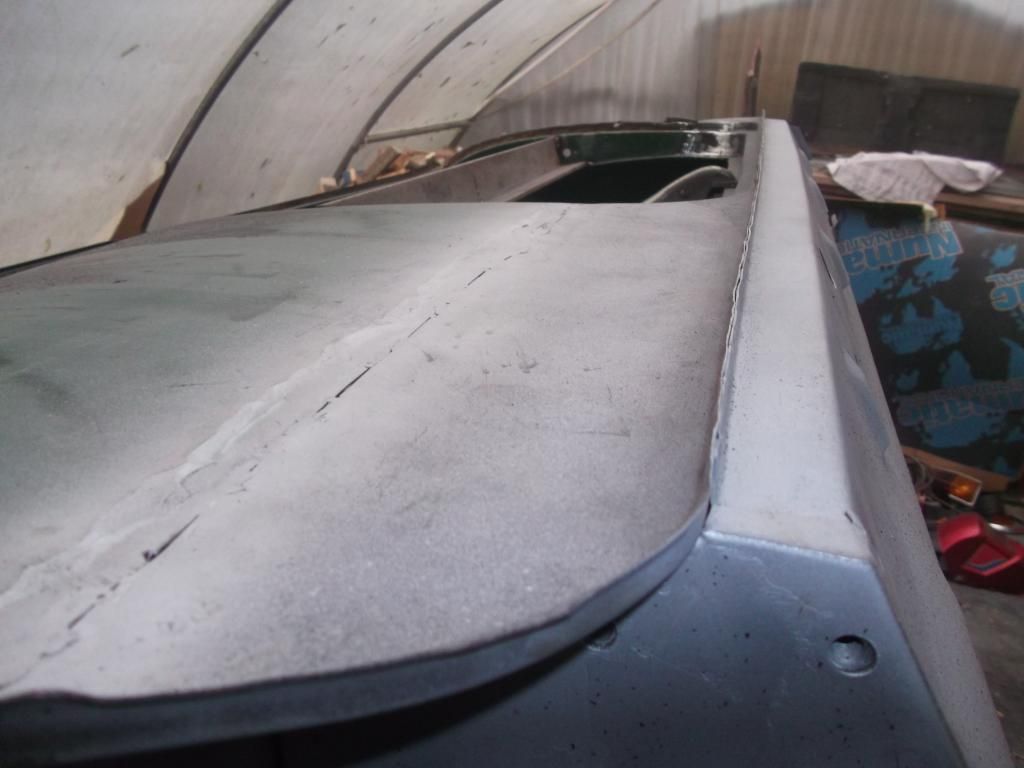
Top of doorstep at the front as you can see i had to make a cut in this for adjustment then weld it back up
Rear of doorstep. Another cut was made as these non-gen panels are a bit iffy!
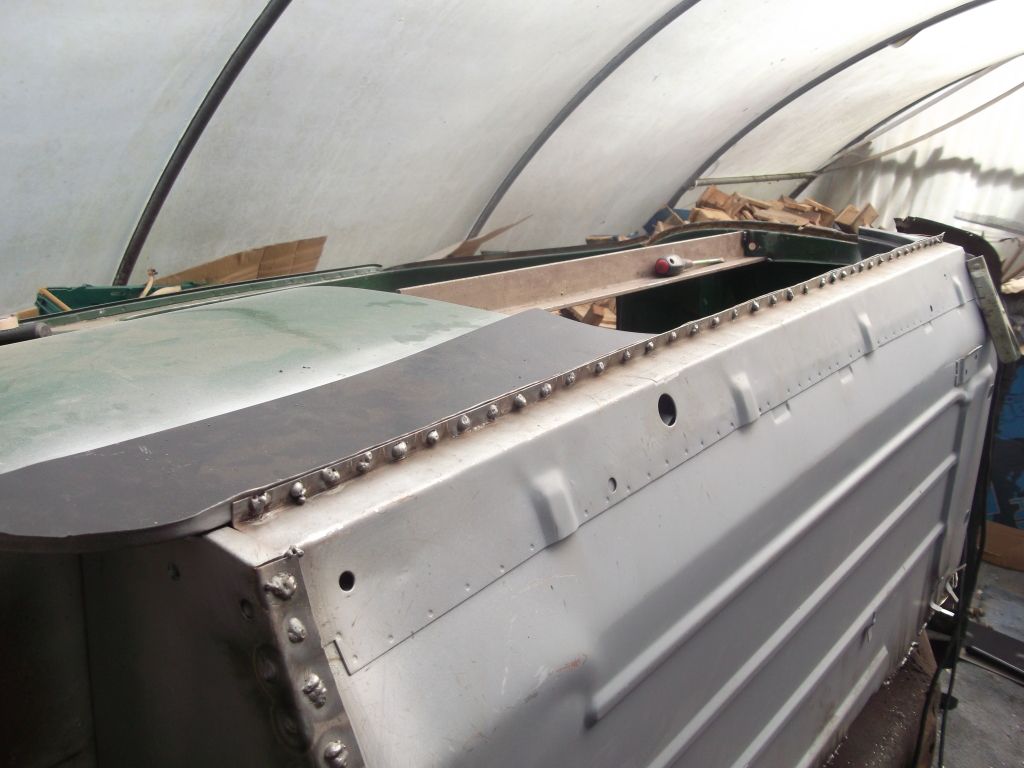
Cut away the bulk of the rear valence to reveal a newish looking rear step!
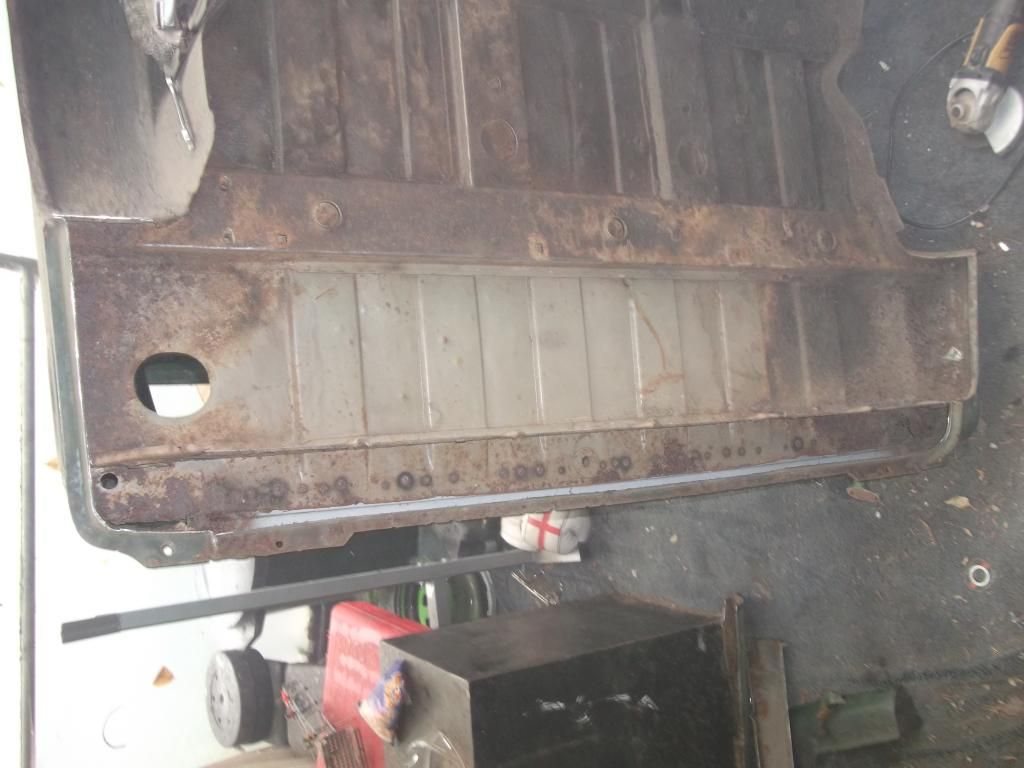
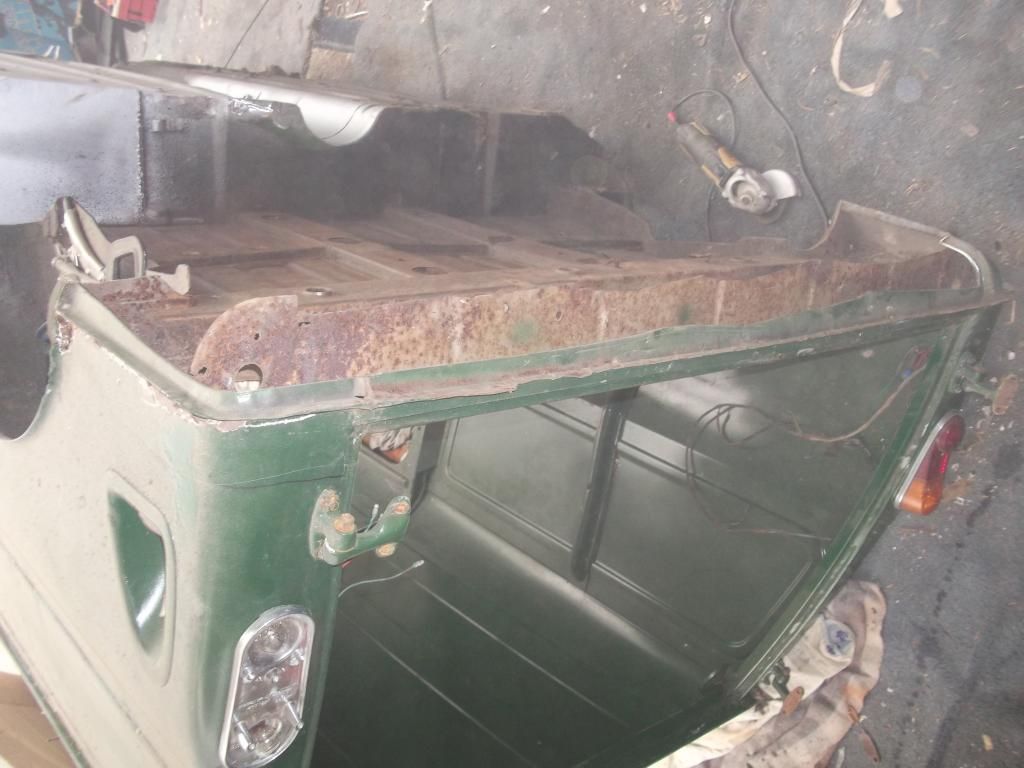
Rust in both corners of the load bay ! i have bought the repair panels for these now!
The newish looking rear step will be replaced aswell as it has been fitted incorrectly and is not in the right position.
Once i recieve some more spot weld drill bits i will remove the rese of the valence and begin to replace it! I need to get a move on with this as i only have untill my car runs out of MOT in august 2013 ! XD
Cheers guys!
Been working on the van a bit over the last couple weeks but nothing worth updating for. Grinding and finishing areas of welding on the new floor. I will soon be putting it back on its bottom to weld the floor from the inside and fit the new inner wing.
Today as i have bought a new rear valence i decided to start cutting off the old one to see what horrors were underneath it !
Here is a pic of the door step fully welded in and welds ground off
Top of doorstep at the front as you can see i had to make a cut in this for adjustment then weld it back up
Rear of doorstep. Another cut was made as these non-gen panels are a bit iffy!
Cut away the bulk of the rear valence to reveal a newish looking rear step!
Rust in both corners of the load bay ! i have bought the repair panels for these now!
The newish looking rear step will be replaced aswell as it has been fitted incorrectly and is not in the right position.
Once i recieve some more spot weld drill bits i will remove the rese of the valence and begin to replace it! I need to get a move on with this as i only have untill my car runs out of MOT in august 2013 ! XD
Cheers guys!
#37
ryan22_lgm
-
- Traders
-
- 1,478 posts
One Carb Or Two?
- Location: woolacombe, north devon
- Local Club: north devon mini register
Posted 15 October 2012 - 06:19 PM
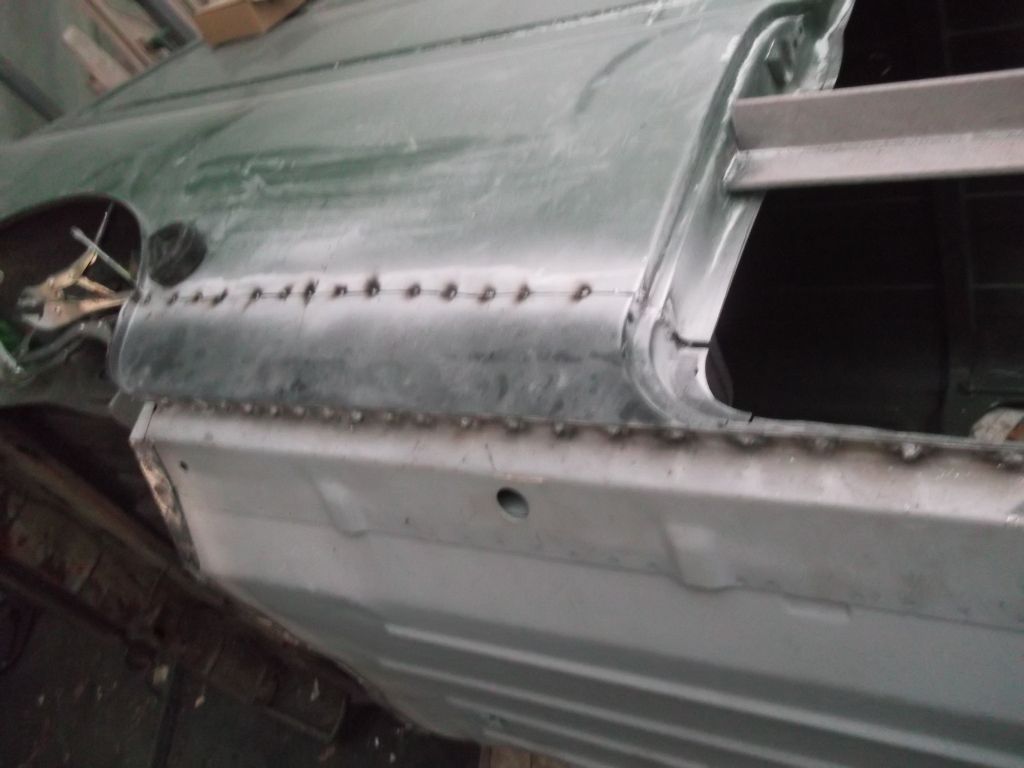
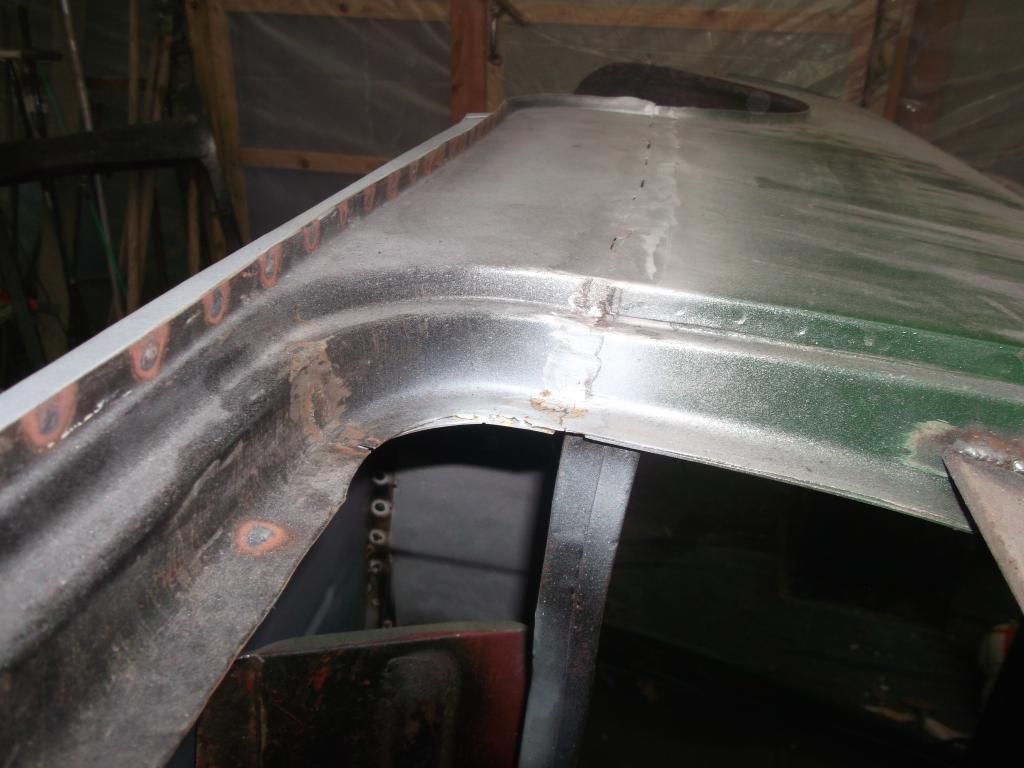
The van is now back on its bottom and i am welding up the inside of the new floor. i have already welded up the rear quarter panel that just needs grinding down. I will update with pictures soon was to dark to take any tonight!
#38
alex-95
-

- Members
-
- 6,021 posts
I am THE CLAMP MAKER
- Location: l
Posted 15 October 2012 - 06:42 PM
Look's great ryan, doing a good job 
#39
ryan22_lgm
-
- Traders
-
- 1,478 posts
One Carb Or Two?
- Location: woolacombe, north devon
- Local Club: north devon mini register
Posted 15 October 2012 - 06:45 PM
Look's great ryan, doing a good job
Cheers mate! thank god someones watching this!
#40
Risky
-

- Members
-
- 213 posts
Mini Mad
- Location: Zegge (The Netherlands)
Posted 15 October 2012 - 07:03 PM
Good progress, and to be honest, it looked horrible when you got it!
Now it's going to be fine again fortunately! Would like to buy a Van project myself, but I can't seem to find any here in the Netherlands!
Pics are always welcome
Now it's going to be fine again fortunately! Would like to buy a Van project myself, but I can't seem to find any here in the Netherlands!
Pics are always welcome
Edited by Risky, 15 October 2012 - 07:04 PM.
#41
SAL 821X
-

- Members
-
- 1,890 posts
Camshaft & Stage Two Head
- Location: Hinckley
- Local Club: Leicester Mini Owners Club
Posted 16 October 2012 - 08:03 AM
Look's great ryan, doing a good job
Cheers mate! thank god someones watching this!
I'm watching with great interest Ryan.....
I need to re do a few bits I had done at a garage that you've just done so its helping me.
#42
ryan22_lgm
-
- Traders
-
- 1,478 posts
One Carb Or Two?
- Location: woolacombe, north devon
- Local Club: north devon mini register
Posted 16 October 2012 - 10:58 PM
Good progress, and to be honest, it looked horrible when you got it!
Now it's going to be fine again fortunately! Would like to buy a Van project myself, but I can't seem to find any here in the Netherlands!
Pics are always welcome
cheers mate! Get one they need to be saved from the tin worm!
Look's great ryan, doing a good job
Cheers mate! thank god someones watching this!
I'm watching with great interest Ryan.....
I need to re do a few bits I had done at a garage that you've just done so its helping me.
Oh right i hope im doing them right haha ! :S watch for more updates soon!
#43
CLM
-

- Members
-
- 817 posts
One Carb Or Two?
Posted 16 October 2012 - 11:48 PM
Just noticing, rubber mounted front subframe and rod change floor, wouldn't that make this a 1976+?
Chris
Chris
#44
ryan22_lgm
-
- Traders
-
- 1,478 posts
One Carb Or Two?
- Location: woolacombe, north devon
- Local Club: north devon mini register
Posted 17 October 2012 - 10:44 AM
Just noticing, rubber mounted front subframe and rod change floor, wouldn't that make this a 1976+?
Chris
Yep! It's had a re-shell sometime in its life! But I will be restoring it to look as early as possible. Solid mounted front subframe minimal interior and basic engine bay. I would try to smooth the roof but that would be an epic task lol!
#45
CLM
-
- Members
-
- 817 posts
One Carb Or Two?
Posted 17 October 2012 - 11:38 AM
Well no need to smooth the roof a 67 would have had ribs :)
Chris
Chris


3 user(s) are reading this topic
0 members, 3 guests, 0 anonymous users


