Jump to content


Photo
- - - - -

'cherry' The Red Mini Thirty.


  • Please log in to reply
205 replies to this topic

#76 joezone2001

joezone2001

    Speeding Along Now

  • Members
  • PipPipPipPipPip
  • 332 posts
  • Location: kirkby in ashfield

Posted 26 August 2012 - 11:59 PM

Hi all
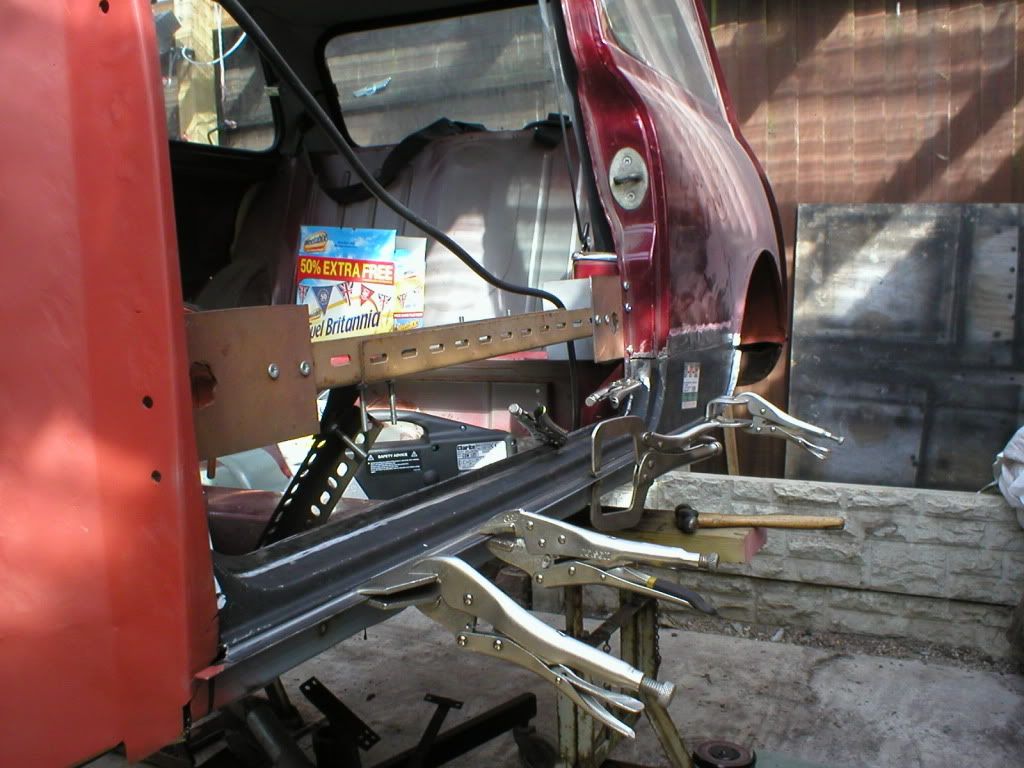
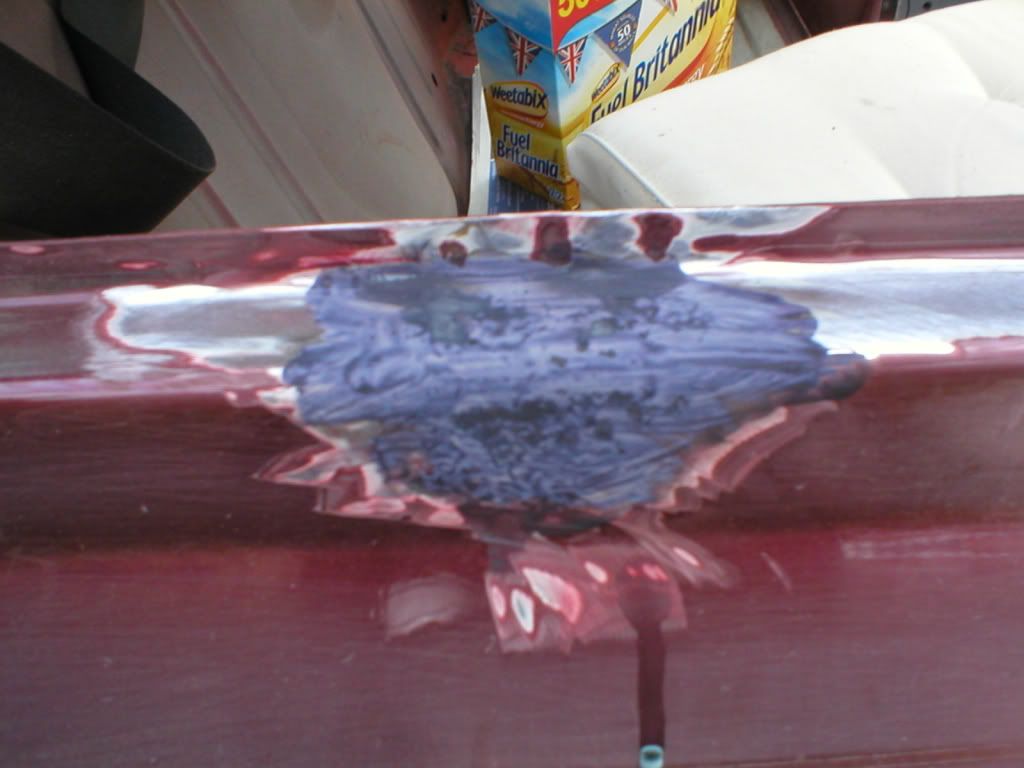
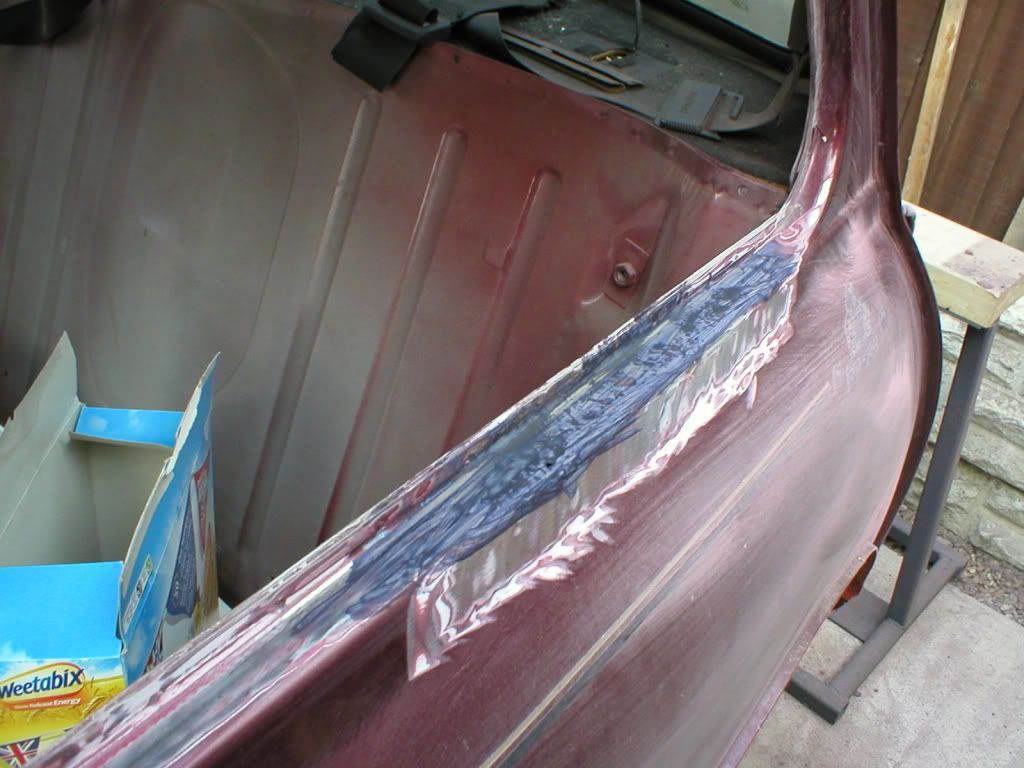
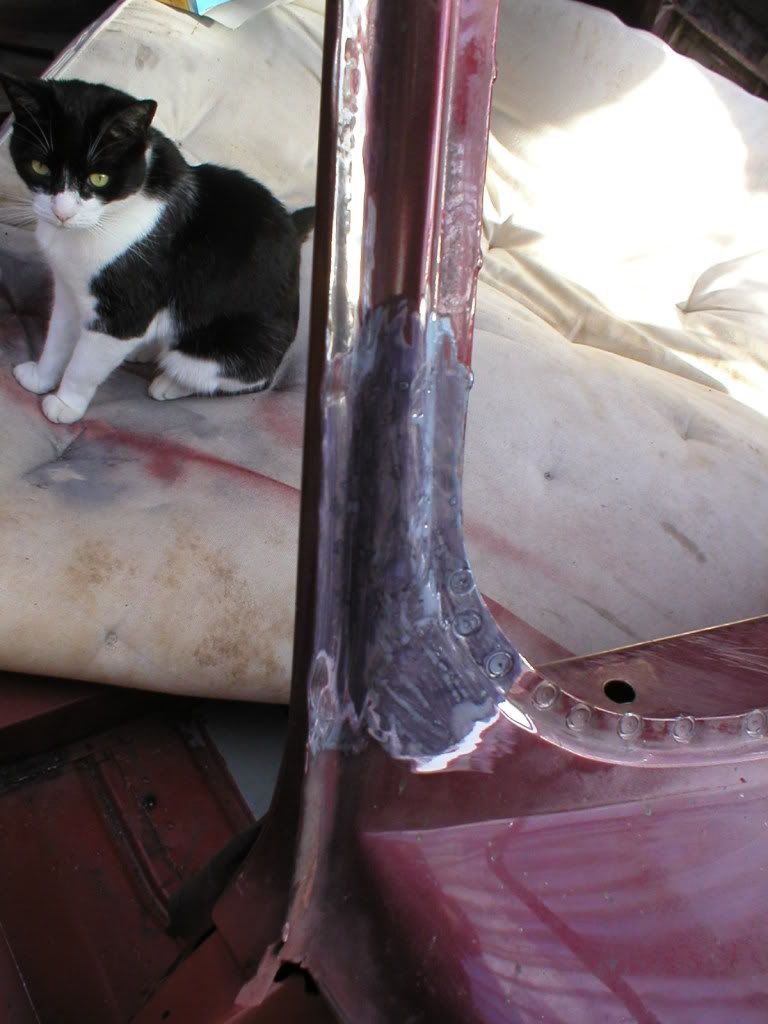
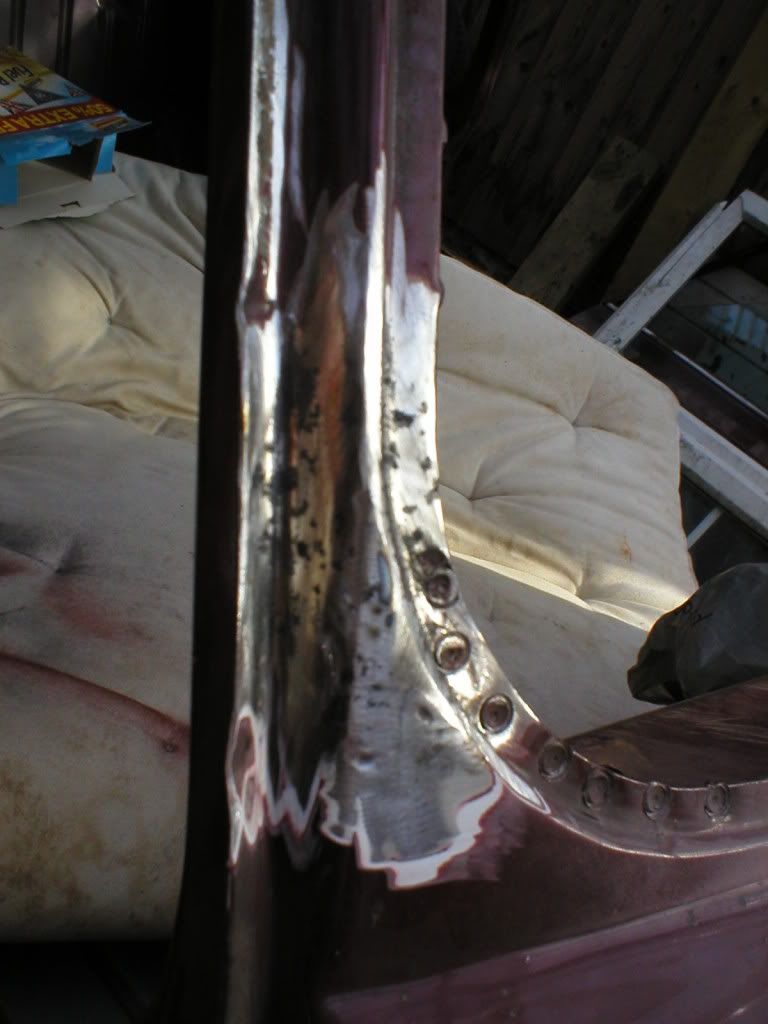
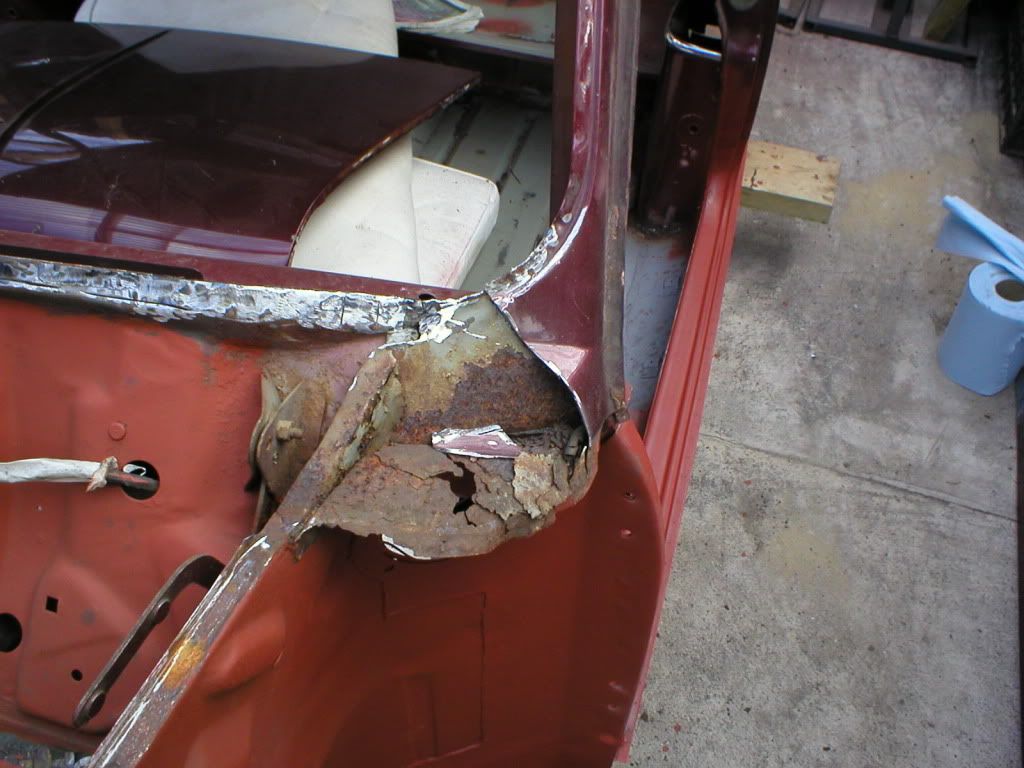
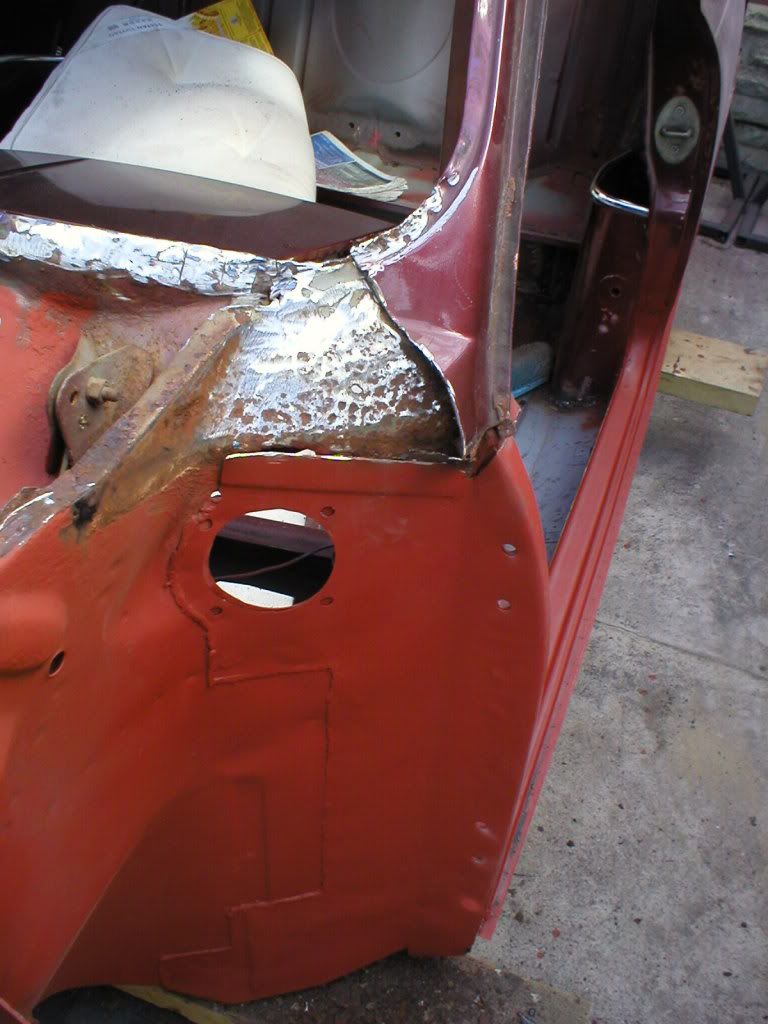
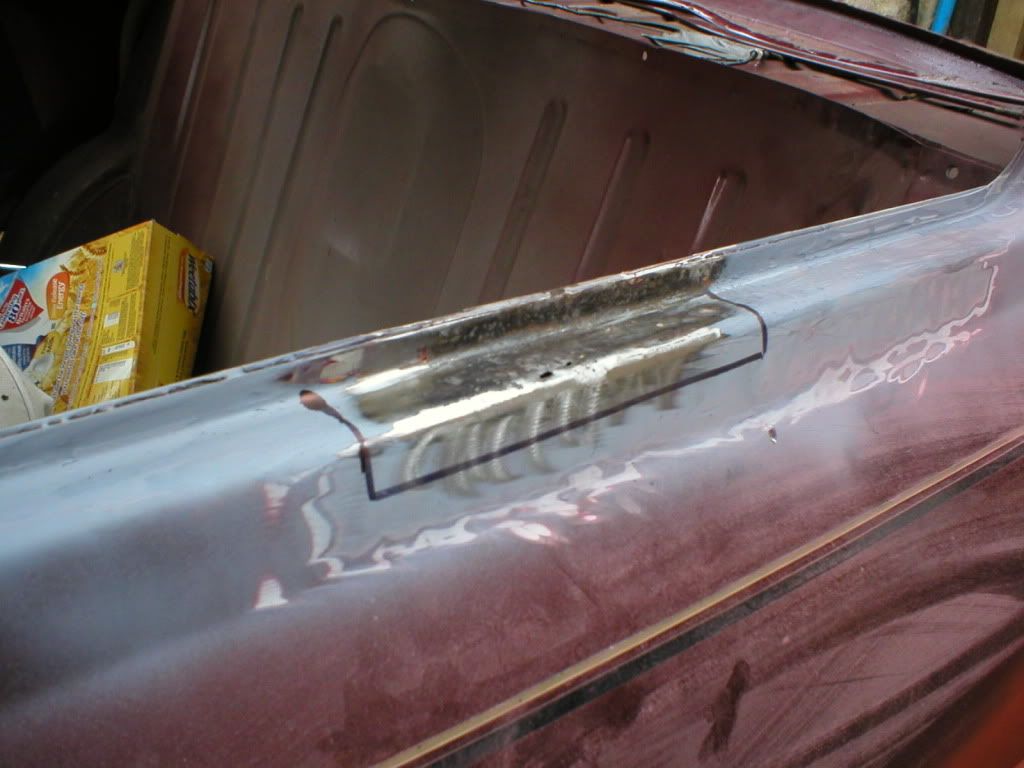
Not a fantastic update. I have welded the bit that the subframe rests on onto the repair piece that I did the other day. The picture is rubbish though.

Posted Image

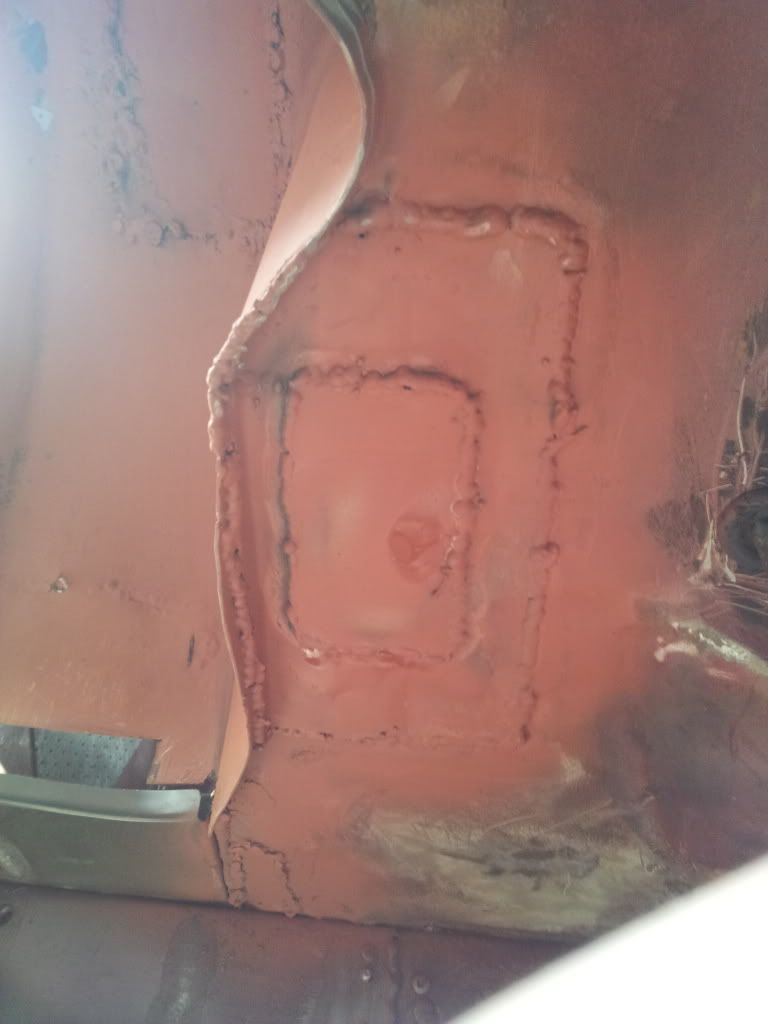
I seam welded round the edge as before it was just welded on at each end and all round the sides had gone rotten as that was where all the road crap had gathered. I think it should be better protected now though. I will grind it all down when the car is on its side. It should look 100x better.. (hopefully)

Hope everyone's had a great weekend!
Joe

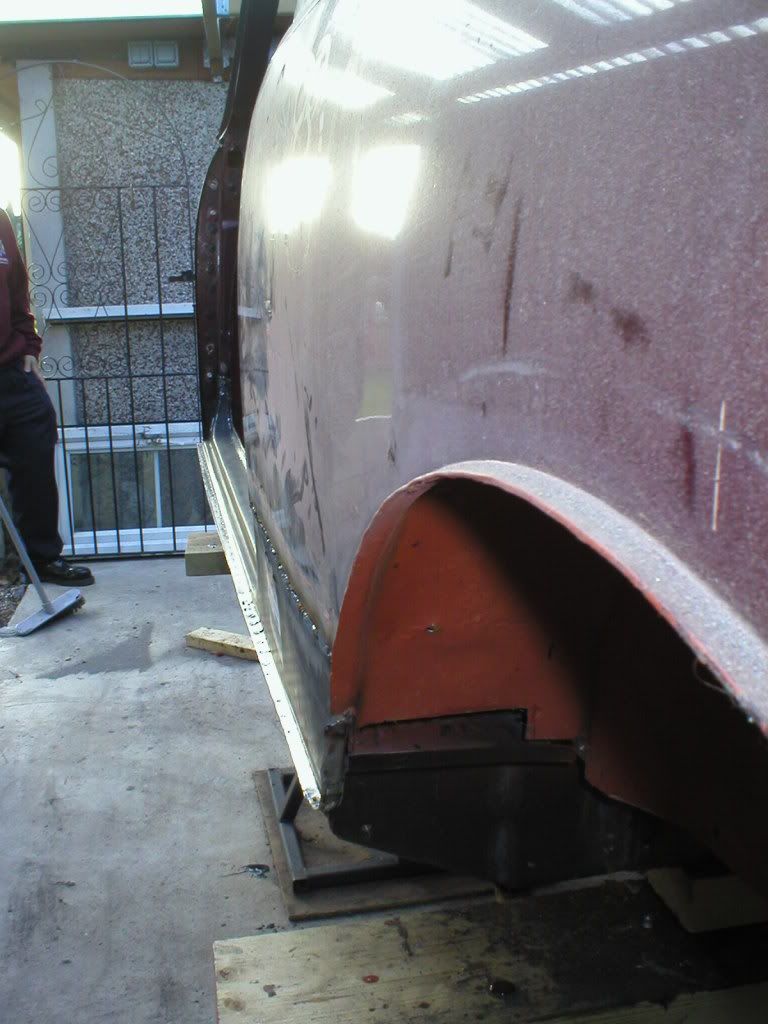
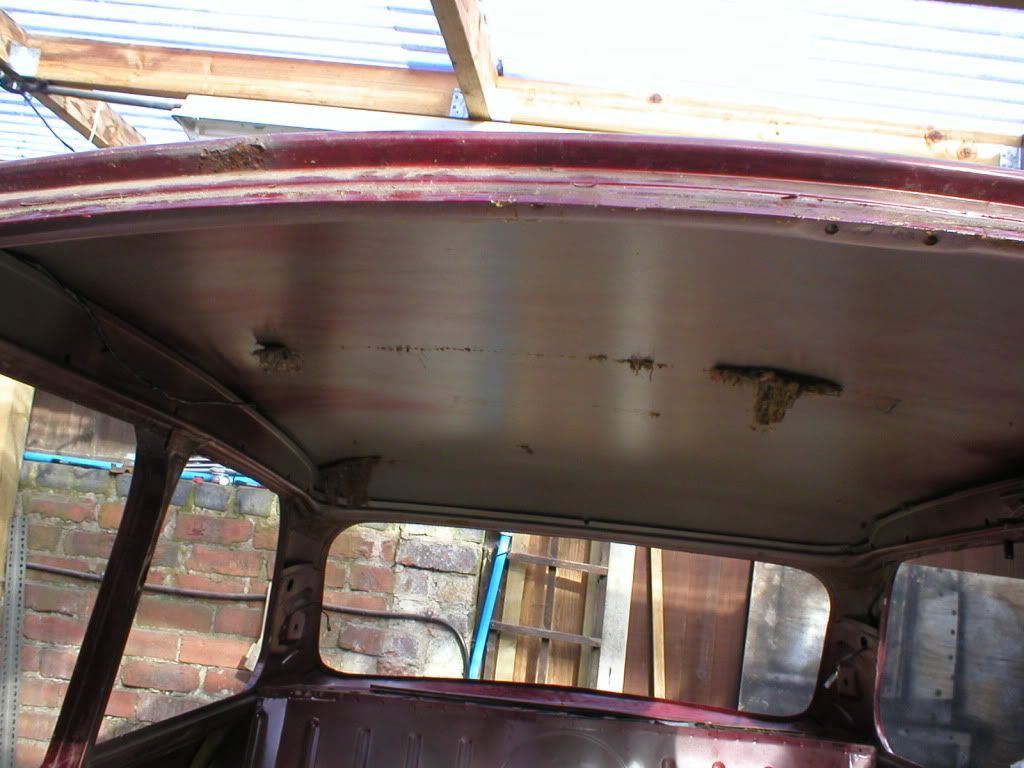
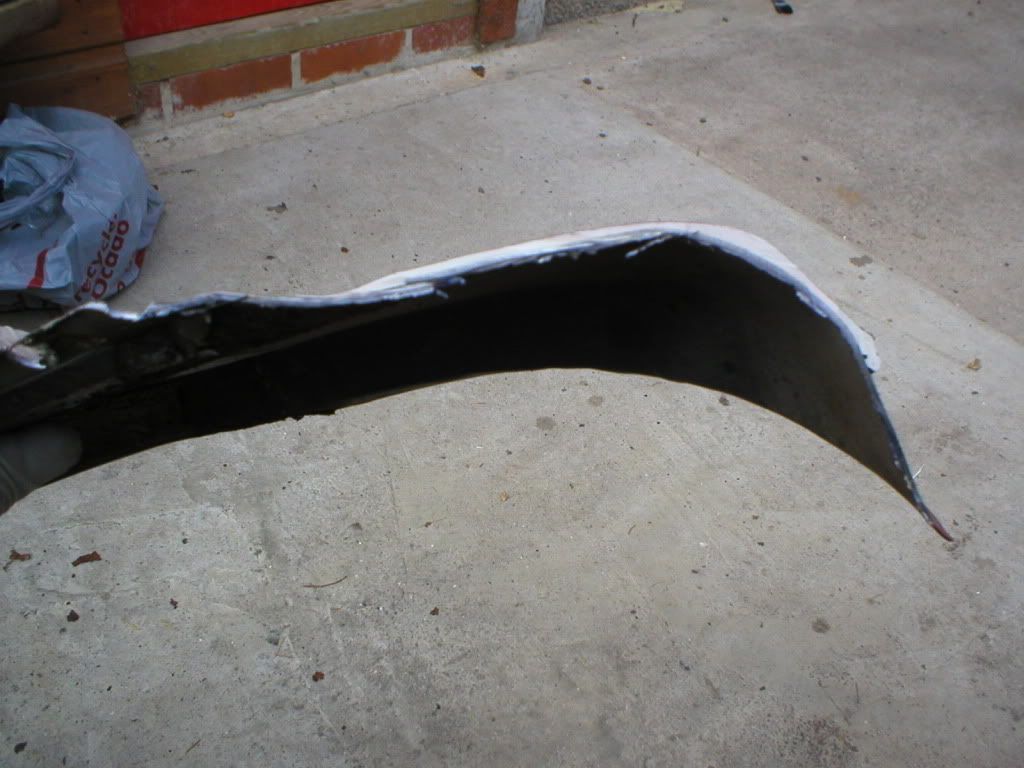
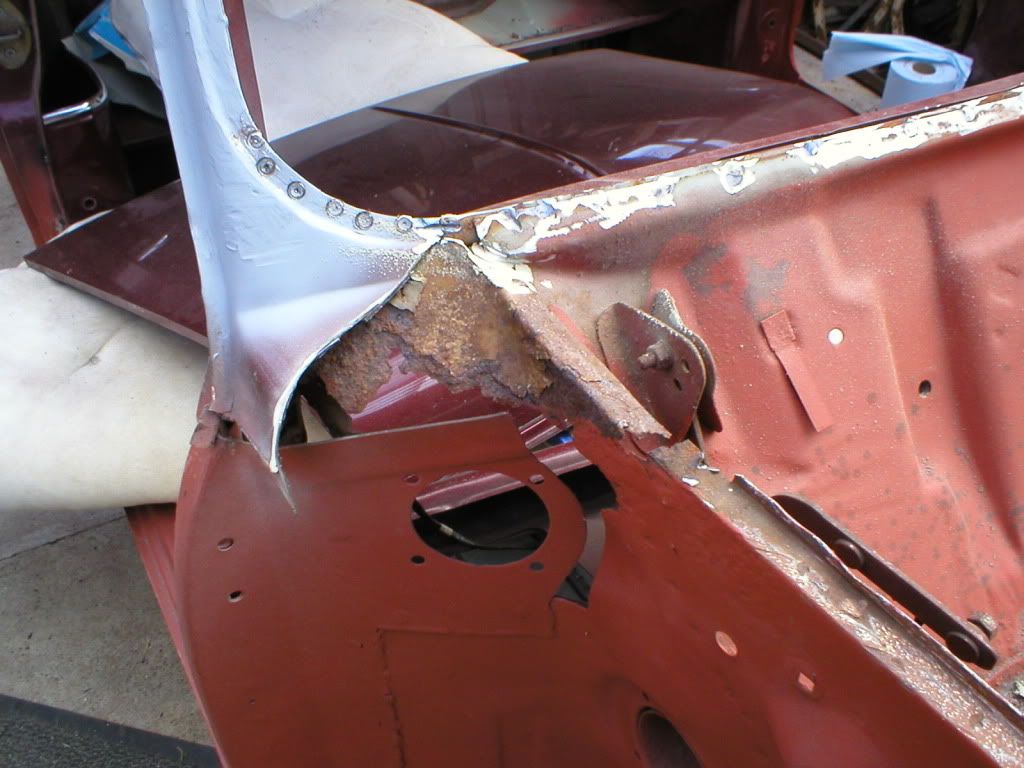
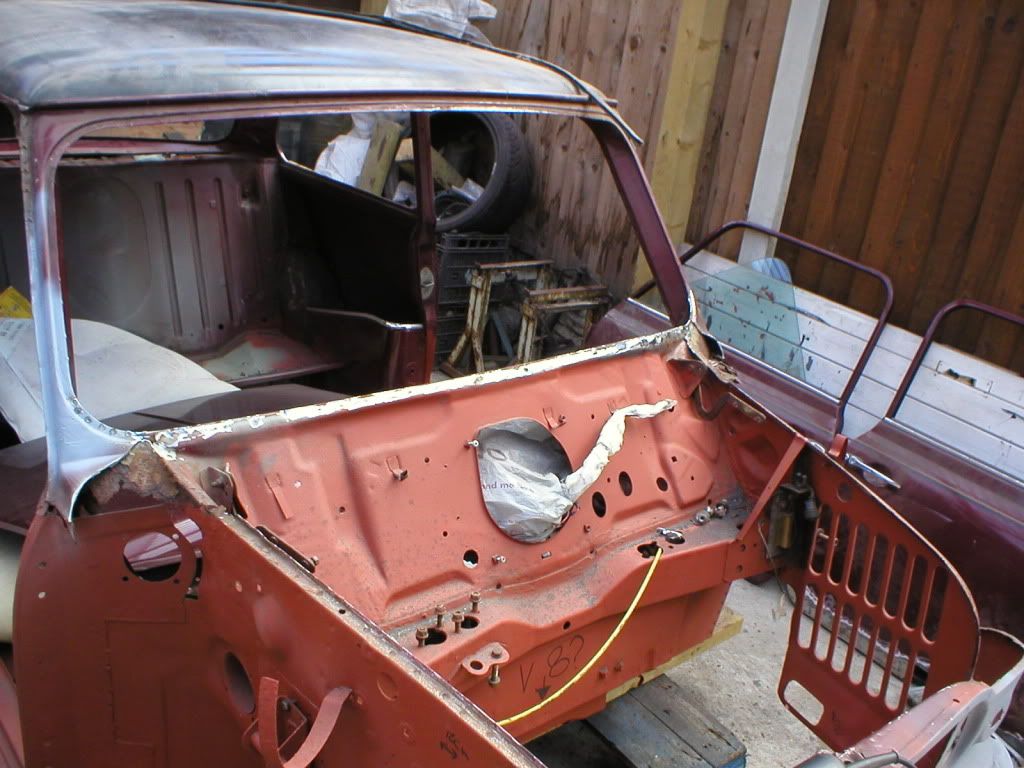
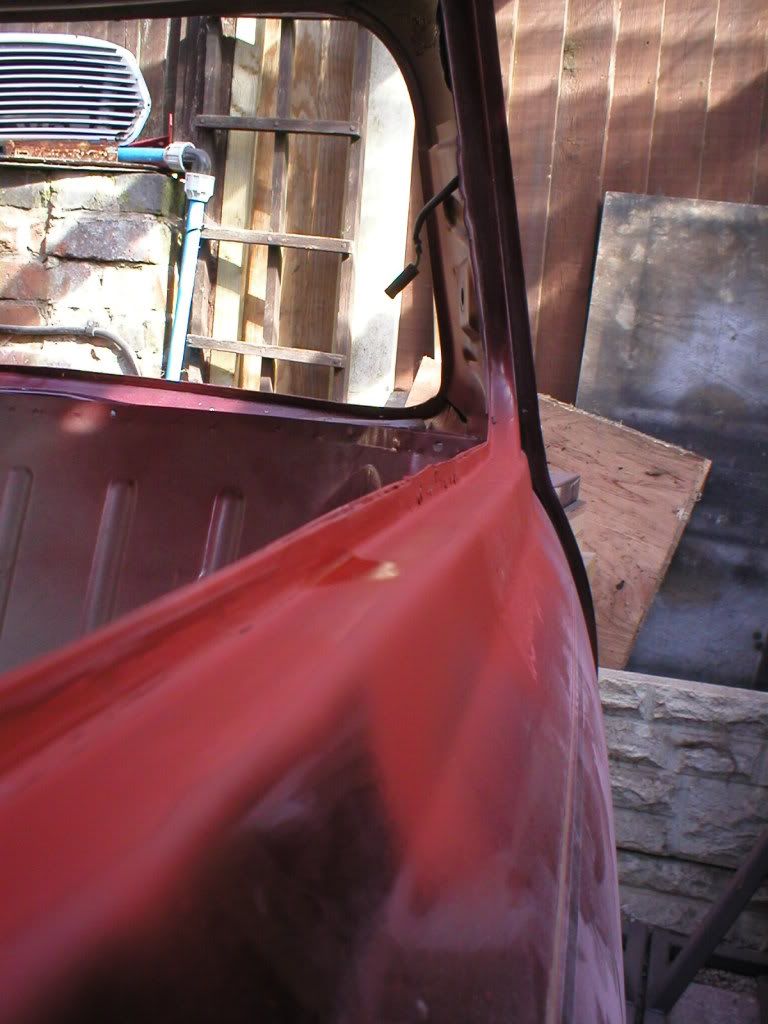
Oh, by the way the shocking wheel arch repair isn't mine.. It was on the car when I got her. I have yet to investigate properly.. Doesn't look too bad from the top so im unsure why the patch is so big.. The mind boggles.. Haha.

#77 joezone2001

joezone2001

    Speeding Along Now

  • Members
  • PipPipPipPipPip
  • 332 posts
  • Location: kirkby in ashfield

Posted 01 September 2012 - 08:50 PM

Hi All.
Today we fitted the new door step and rear quarter repair section on the passenger side. It went ok but I think that a genuine repair section would have been a better idea due to fitment etc.

We have checked the door gaps and they seem really good.

Clamped on
Posted Image

Welded on
Posted Image

Posted Image

We also dropped the car down from the stands onto a pallet. My camera is now on the blink though so no pictures. My next bit to tackle is the scuttle and roof area.
Thanks for looking. Comments always welcome
Joe

#78 Jasonc

Jasonc

    Mini Mad

  • Members
  • PipPipPipPip
  • 183 posts
  • Location: Hampshire

Posted 03 September 2012 - 09:04 AM

Welded on
Posted Image


Looks like someone had their Weetabix!

:D

#79 joezone2001

joezone2001

    Speeding Along Now

  • Members
  • PipPipPipPipPip
  • 332 posts
  • Location: kirkby in ashfield

Posted 03 September 2012 - 09:33 AM


Welded on
Posted Image


Looks like someone had their Weetabix!

:D

haha. yes.. best meal of the day.
joe

#80 joezone2001

joezone2001

    Speeding Along Now

  • Members
  • PipPipPipPipPip
  • 332 posts
  • Location: kirkby in ashfield

Posted 03 September 2012 - 09:34 AM

Hi All. Today I have been doing some more stripping. I removed the rest of the windows, the headlining and the rear seatbelts. I shouild

have done this ages ago but didn't gete round to it.

Posted Image

I also ground down the rust round the rear windows.. 1 hole found.... Bonus! haha. thought it was going to be much worse.. Posted Image Posted Image

There was a bad looking piece round the front windscreen that I was worried about. Turns out it was just surface rust! I treated

it and etched over to protect.

Posted Image Posted Image

I also did some playing about with my new panels and mocked up one of my new wings.. A LONG way off but it's nice to have a bit of

inspiration... Posted Image

Lol.

Tomorrow I will work towards removing the scuttle panel. Comments always welcome.

Thanks for looking, Joe.

#81 joezone2001

joezone2001

    Speeding Along Now

  • Members
  • PipPipPipPipPip
  • 332 posts
  • Location: kirkby in ashfield

Posted 04 September 2012 - 04:16 PM

Hi Everyone.
Today I have removed the scuttle and found that it had been 'fixed' before.. When I say fixed I mean bodged.. Never mind I was cutting it off anyway.. I also ground all the welds back that we did at the weekend and etch primed the new doorframe.

The old scuttle looked worse for wear so I knew I had to replace it. I drilled out the spotwelds and started to prize it away from the car. All went well actually. I had an idea that the drivers side had been repaired before but I almost laughed when I saw how it had been done. Someone had actually BONDED a new piece over a rusty hole and then slapped filler over the top!
Posted Image
Posted Image

Drivers side.. Gulp... The closing plate wasn't there anymore so I knew it would be bad..
Posted Image
Passenger side.. Not too bad..
Posted Image
Posted Image

Overall view
Posted Image

So overall I don't think its too bad. Shouldn't take too much to put the new one on.

The new side panel and door frame.
Posted Image
Posted Image
Posted Image

I also welded up all the holes that we had bolted the door frame brace through.

Thanks for looking. Comments/advice always welcome.
Cheers, Joe


#82 Jasonc

Jasonc

    Mini Mad

  • Members
  • PipPipPipPip
  • 183 posts
  • Location: Hampshire

Posted 06 September 2012 - 09:11 AM

Can't wait to see the finished mini! All this hard work you are putting in will be worth it :)

#83 joezone2001

joezone2001

    Speeding Along Now

  • Members
  • PipPipPipPipPip
  • 332 posts
  • Location: kirkby in ashfield

Posted 06 September 2012 - 09:29 AM

Can't wait to see the finished mini! All this hard work you are putting in will be worth it :)

hi. thanks for the comments. glad to know someones reading lol. I can't wait either. ordered new scuttle and closing panels yesterday. got to get some more metal to sort out the tops of the flitch/ inner wings.. will get there though..
cheers.
Joe

#84 Jasonc

Jasonc

    Mini Mad

  • Members
  • PipPipPipPip
  • 183 posts
  • Location: Hampshire

Posted 06 September 2012 - 08:51 PM

Hi Joe, I'm following it, only problem is I am getting increasingly jealous lol

#85 joezone2001

joezone2001

    Speeding Along Now

  • Members
  • PipPipPipPipPip
  • 332 posts
  • Location: kirkby in ashfield

Posted 06 September 2012 - 09:36 PM

Hi Joe, I'm following it, only problem is I am getting increasingly jealous lol


haha thanks but don't be jealous.. I honestly have no clue what I'm doing lol.
today I ground down some rust patches round the body, treated them and etch primed them. she is getting there slowly.. you will get there with yours. I recently purchased a welder and things are progressing a bit quicker now.
thanks for the comment. joe


#86 sonikk4

sonikk4

    Twisted Paint Polisher!!!

  • Admin
  • PipPipPipPipPipPipPipPipPipPipPip
  • 16,026 posts
  • Name: Neil
  • Location: Oxfordshire

Posted 06 September 2012 - 09:45 PM

You are cracking along with it but i would seriously recommend you chop out the area you have treated along the top of the rear quarter panel. Its pitted so will rust again. It will be the same for a lot of the other areas as well. Remember the metal is less than 1mm thick on 90% of the panels on the car.

I maybe went over the top with Project Erm chopping out all of the pitted metal but at least i know the rust will not come back.

#87 joezone2001

joezone2001

    Speeding Along Now

  • Members
  • PipPipPipPipPip
  • 332 posts
  • Location: kirkby in ashfield

Posted 07 September 2012 - 12:22 AM

You are cracking along with it but i would seriously recommend you chop out the area you have treated along the top of the rear quarter panel. Its pitted so will rust again. It will be the same for a lot of the other areas as well. Remember the metal is less than 1mm thick on 90% of the panels on the car.

I maybe went over the top with Project Erm chopping out all of the pitted metal but at least i know the rust will not come back.


thanks for the comment. I know the bit you're on about. I think you're right. I had already mostly decided to chop it out. just building up the courage haha. my panel making skills aren't up to scratch yet. I'm sort of building up to it till I'm ready. I think the passenger side has been bodged before as there is a long dint under the window that was filled with filler. its easily get out-able though so I don't understand why someone has filled it.. the mind boggles. I suppose its good to have all these previous bodges to sort out.. it teaches me how NOT to do things lol.
thanks for the advice I value people's opinions as I am a total novice. I have also decided to take all the paint off the car as I have stripped paint back before with no visable blemishes and found rust. so I'm not chancing it.
cheers. Joe

#88 joezone2001

joezone2001

    Speeding Along Now

  • Members
  • PipPipPipPipPip
  • 332 posts
  • Location: kirkby in ashfield

Posted 17 September 2012 - 05:00 PM

hi All.
this isn't a fantastic update.. I've been busy these past few weeks on other things ie, garden, house and stuff. not really done much to the mini.
I have now bought all the materials needed to make the spit. I got a long tube from parkside steel in Mansfield that'll do the job nicely. well priced too. I also got plenty of sheet metal. 18guage and 20guage.
today I made a piece to repair under the passenger side rear window. its come out OK. just needs cutting out and welding in. that will be tomorrows job.
Posted Image

thanks for looking.
Joe

Edited by joezone2001, 17 September 2012 - 05:04 PM.


#89 joezone2001

joezone2001

    Speeding Along Now

  • Members
  • PipPipPipPipPip
  • 332 posts
  • Location: kirkby in ashfield

Posted 18 September 2012 - 02:46 PM

Hi All.
Today I welded the repair piece in for the rear passenger window.It's not come out too bad. There will be filler needed but for my first cosmetic repair I don't think it's too bad.
Posted Image
Posted Image
Posted Image

Comments always welcome.
Cheers, Joe

#90 stretch tech

stretch tech

    One Carb Or Two?

  • Members
  • PipPipPipPipPipPipPip
  • 1,363 posts
  • Location: Tamwoth
  • Local Club: A5 & Mini Mainiacs

Posted 19 September 2012 - 06:48 PM

Hi joe, some cracking work here since I last checked, great job :) this is really weird how your 30 has rotted exactly same as mine :0 I had virtually non existent scuttle closures and a pitted rear quarter window frame too :L lol

Keep up the great work mate, don't worry, it won't be long before you are fitting the arches ready for paint prep haha

Rhys


1 user(s) are reading this topic

0 members, 1 guests, 0 anonymous users