The Wifes Worst Nightmare 83 Full Resto
#31

Posted 23 August 2012 - 05:07 PM
#32

Posted 23 August 2012 - 05:31 PM
Hi, nice work there! U are making nice Job! I like to ask that how much usually project minis pay in uk?
Hi thanks for the compliment it's moving along slowly. I paid just over £400 for mine but have spent four times that now. It all depends on the state of the mini and what it comes with a bare shell may sell for as little as 200 but a complete car may go for 800-1200 homie that helps cheers Darren
#33

Posted 23 August 2012 - 05:35 PM
Was that bare metalling done with a knotted wire wheel per chance? i find normal wire wheels take years.
#34

Posted 23 August 2012 - 06:18 PM
Superb work.
Was that bare metalling done with a knotted wire wheel per chance? i find normal wire wheels take years.
Cheers down&out it was indeed done with a knotted wire cup but in a drill not a grinder and run in reverse against the grain of the wire cup as I find the ones in a grinder just polish the surface and leave it with a murky look. Most of the large sections were done with a strip disc with really light pressure does a beautiful job I will be stripping all of the car not being replaced in this way. For the really tight spots I used one of the really small wire brushes in the drill but not knotted to keep the flexibility
Cheers Darren
#35

Posted 23 August 2012 - 08:20 PM
doesn't matter about being straight as the vents will still work fine lol !! Remember to spray a shed load of waxoil in the cavity before going on the road to add some protection.
Graham
#36

Posted 23 August 2012 - 08:24 PM
Cheers Darren
#37

Posted 27 August 2012 - 06:55 PM
so this weekend i moved on the the boot floor and took most of it back to bare metal/rust it was fairly rusty and a few areas were to pitted to just rub down and treat so i removed them and treated the rest with a well known rust killer
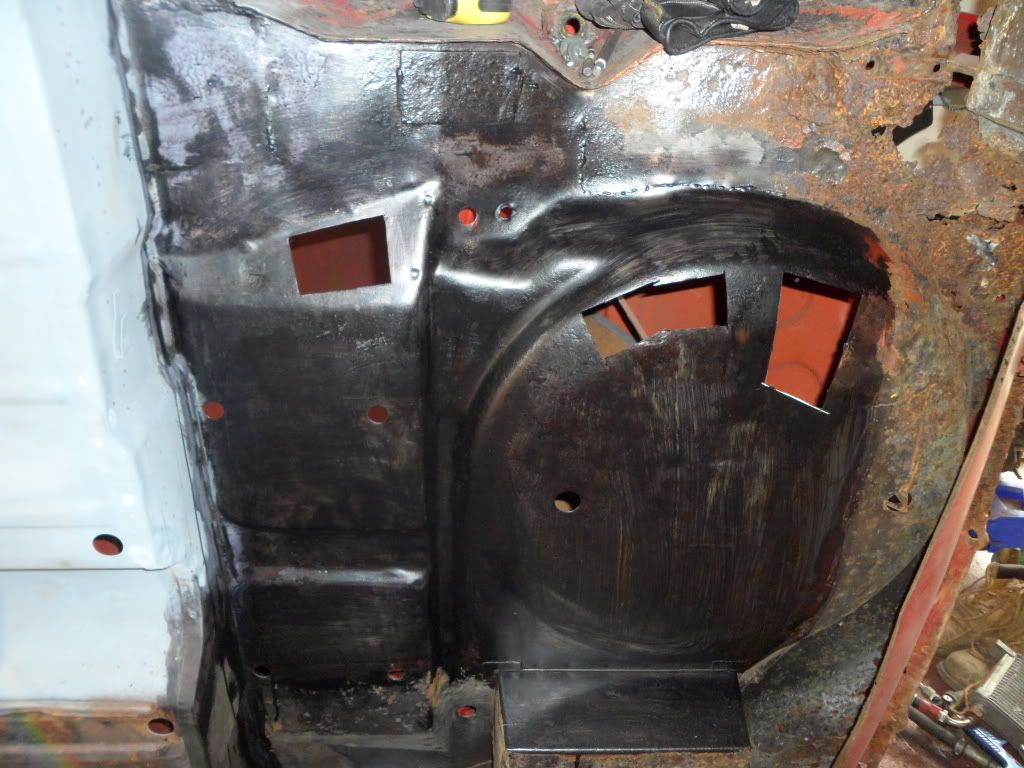
ive left the part closest to the floor for when i turn it around and also the bits that are goint to be replaced as i could not wear my sweaty dust mask any longer for parts that will be chopped off
So then i got started on making up and fitting the repair patches starting with the one on the seat base
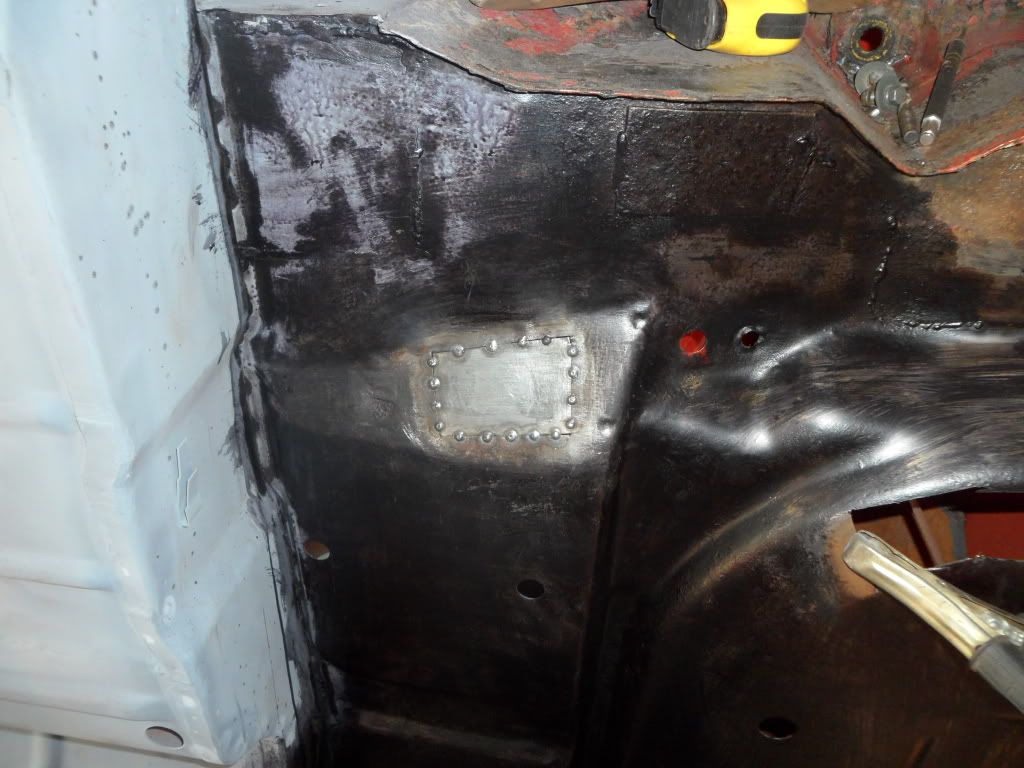
plenty of tacks to stop it warping and this is probably my best fitting home made panel so far so making advancments in my abilities finaly
then fully welded in i an trying a slightly higher power setting on the mig for single pass penatration which is working well just have to pulse more and move faster
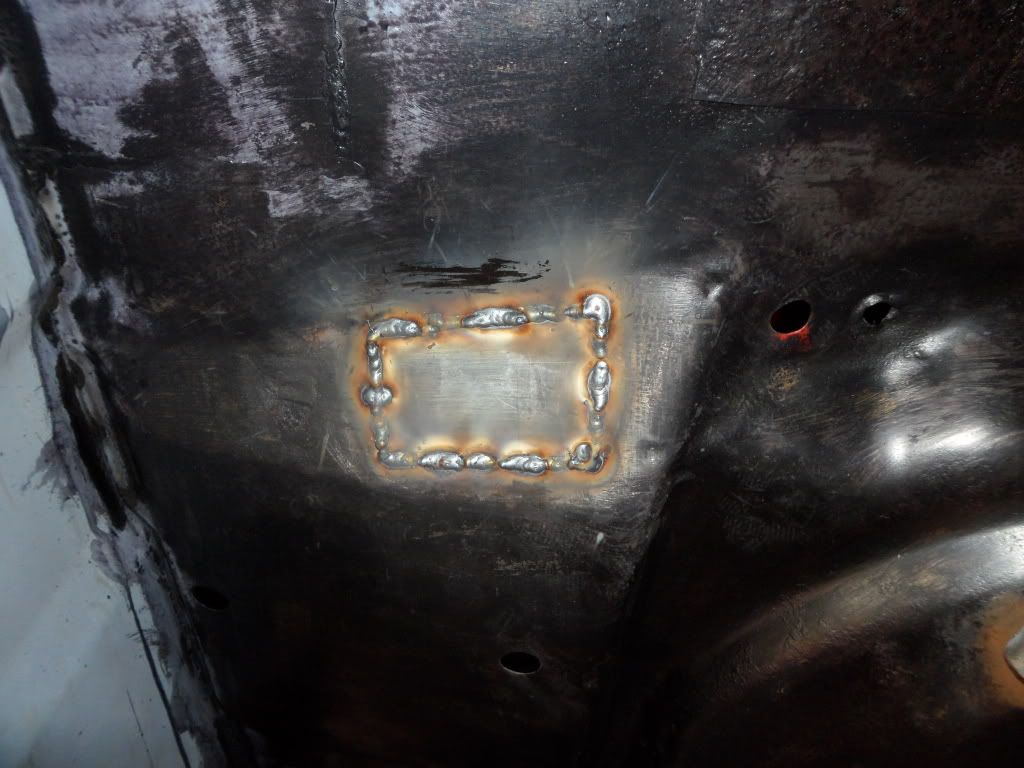
then all cleaned up and primed then seam sealed
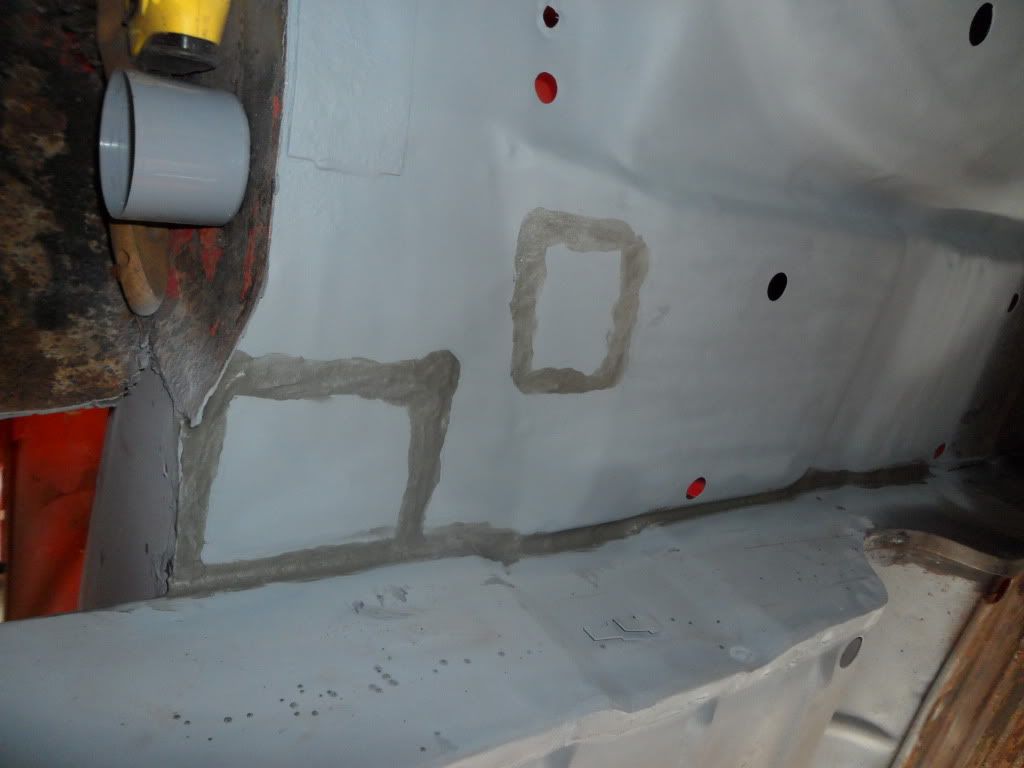
also seam sealed my heel board joint as far down as i have cleaned and learned tthe smooyhing trick a wet finger with a little fairy in there
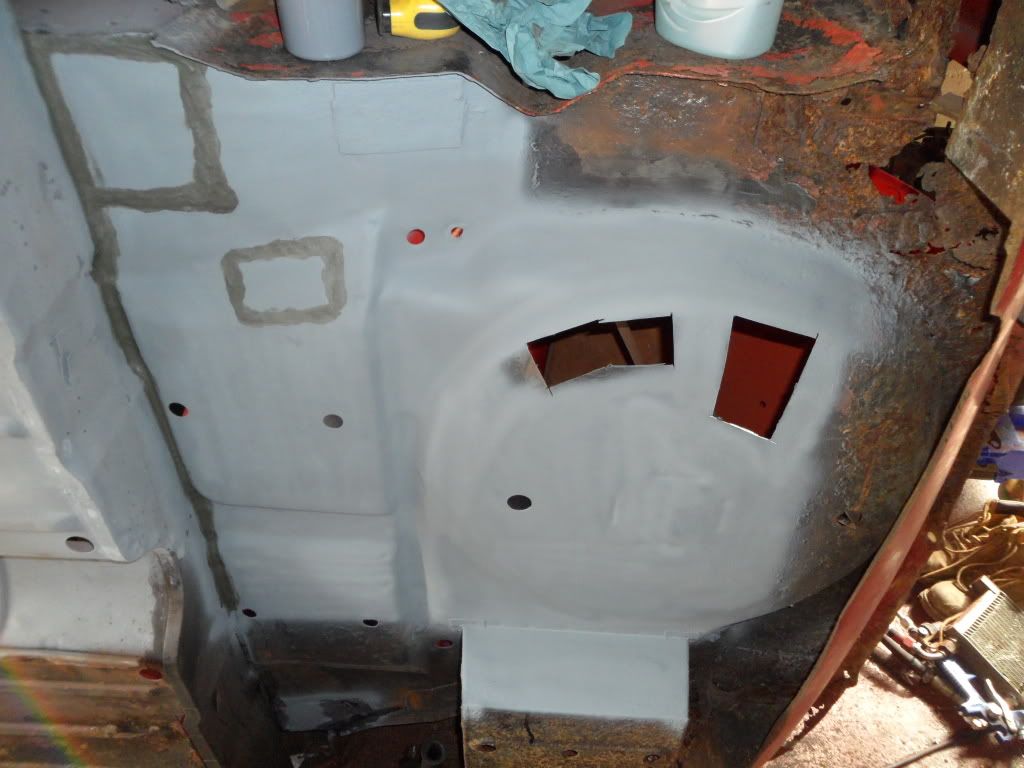
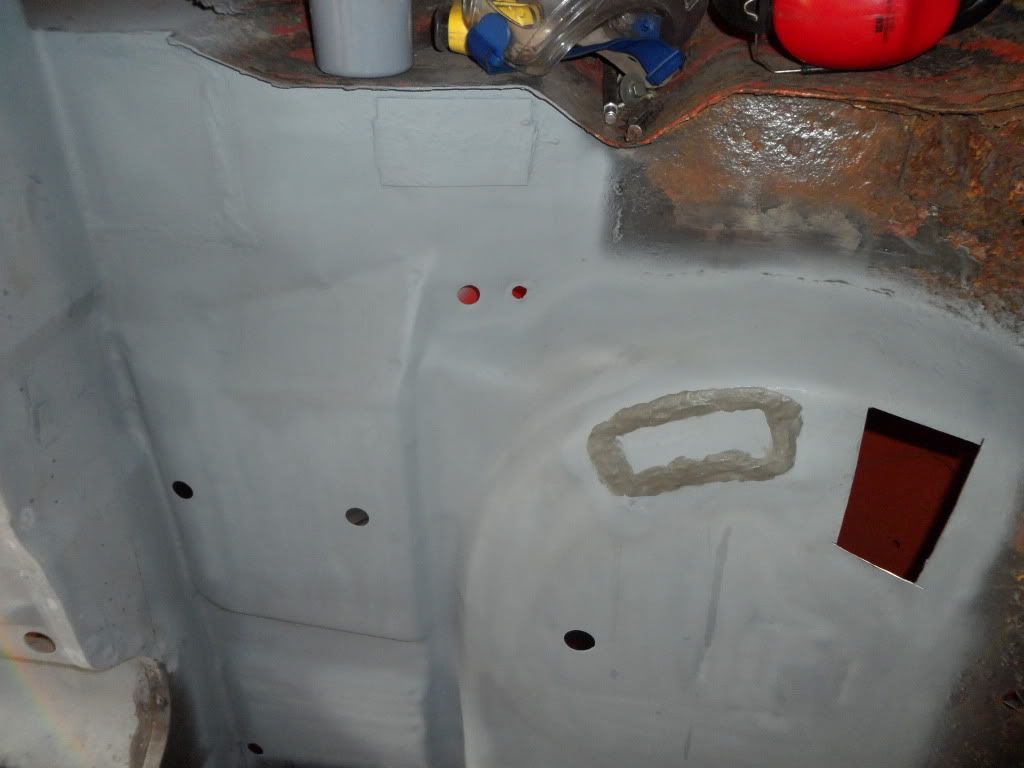
and then primed when dried and also cut and fitted the next patch but it was ugly so only showing a pic of it all cleaned up seam sealed
i then decided it was time to remove the rear valance but a little more came away than i wanted i only had to cut about an inch to remove it all and i was left with this
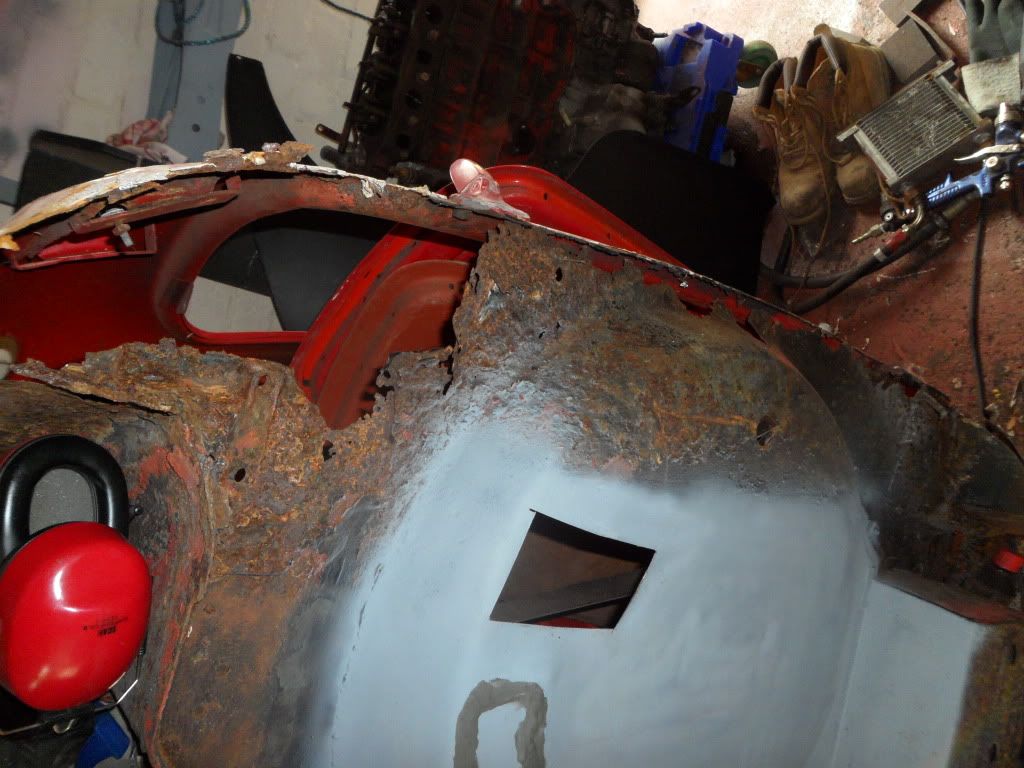
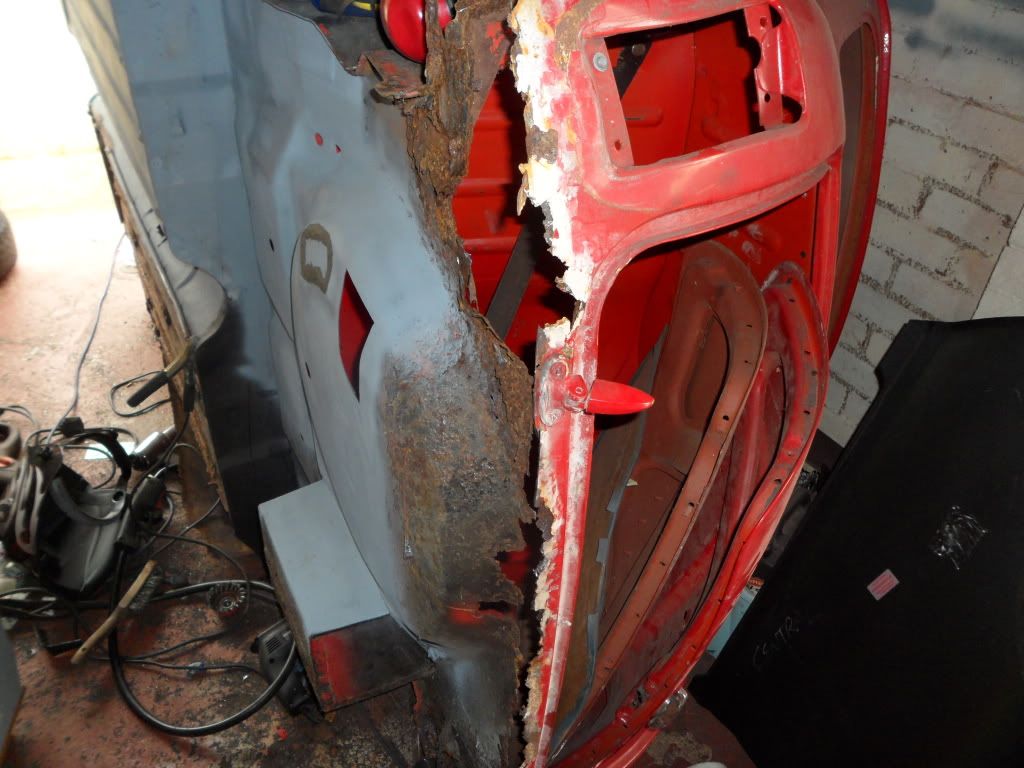
it is a right mess the rear panel is almost non existant and the boot floor is rotted all the way along and is attatched only to the arches.
i plan on getting the floor done first leaving the subframe mounts in place with the arch to maintain the hole location then once the floor is in place i can then sort the rear panel i have waiting to fit and then replace the arch and rear quarter that i have waiting to fit but this will be done when the shell is back level as i feel it will be easier as im only short..
also during the week i am going to clean up my work bench and split the block and box down and see if i can make sense of the very tight crank at mid stroke but thats for later so for now thats all
cheers darren
Edited by Minidarren83, 27 August 2012 - 06:58 PM.
#38

Posted 27 August 2012 - 07:49 PM
Hugh
#39

Posted 27 August 2012 - 08:51 PM
Darren
#40

Posted 28 August 2012 - 08:38 PM
#41

Posted 29 August 2012 - 04:28 AM
Looks like some nice tidy work mate! will keep an eye on this one :)
Cheers mate I do try
#42

Posted 29 August 2012 - 08:51 AM
ncie patching but I do wonder how far the rot has gone on the floor of the boot. The patch closest to the rot looks a little too close to me and if it has gone there it may well be ready to go in other places near the rot. Only you know how the metal feels and how far the rot is reaching but I thought I'd mention it.
I presume you are putting in a complete half floor in place?? Does it not reach to where the patch I was talking about to, which would account for the patch ??
Either way, the progress is looking good well done.
Graham
#43

Posted 29 August 2012 - 09:18 AM
As always your input is appreciated cheers
Darren
#44

Posted 29 August 2012 - 09:25 AM
Congratulation on your recent marriage as well, I've just got married (start of August), but sorting the kitchen is top of my list atm instead of the mini!
#45

Posted 29 August 2012 - 09:42 AM
Thanks for advice on my thread.
:)
1 user(s) are reading this topic
0 members, 1 guests, 0 anonymous users


