I can understand people having the complete floor done. I wish i had done that with Project Erm but i went the really hard way of doing it to keep costs down but that is life.
If only the inner and outer sills are shot then why change the complete floor. If your welding skills are good enough then doing either a half floor or the complete inner sill replacement will be fine. Plus like Jagman said the shell has to be properly braced and a fistful of measurements taken to ensure nothing goes out of kilter.
We have seen one picture of a rusty sill and not the whole car so to make a proper assessment all of the damage needs to be seen.

Complete Floor Pan Replacement?
Started by
Lee_bash
, Jun 05 2012 10:19 PM
28 replies to this topic
#16

sonikk4
-

- Admin
-

- 16,033 posts
Twisted Paint Polisher!!!
- Name: Neil
- Location: Oxfordshire
Posted 06 June 2012 - 01:47 PM
#17
Lee_bash
-
- Members
-
- 345 posts
Speeding Along Now
- Location: Sutton Coldfield.
- Local Club: sutton coldfield
Posted 06 June 2012 - 01:51 PM
I won't hold my breath that the rest of it aint rusty, as you say the bits at the front on the flitch are abit crusty 
Do the companion bins have to come out to do the sills?
Might plug my jacking point up aswell, I always use the thicker bits on the subbies for jacking.
Do the companion bins have to come out to do the sills?
Might plug my jacking point up aswell, I always use the thicker bits on the subbies for jacking.
#18
sonikk4
-
- Admin
-
- 16,033 posts
Twisted Paint Polisher!!!
- Name: Neil
- Location: Oxfordshire
Posted 06 June 2012 - 01:54 PM
No the companion bins can stay in place, it does make things awkward but can be done. As much as i have said in the past to block off the jacking point DON'T it does make up part of the structure and the replacement ones from M machine are very good and provided you have done the inner sill replacement they will be fine to use. I have not had one fail yet on the four minis that my family have had over the years.
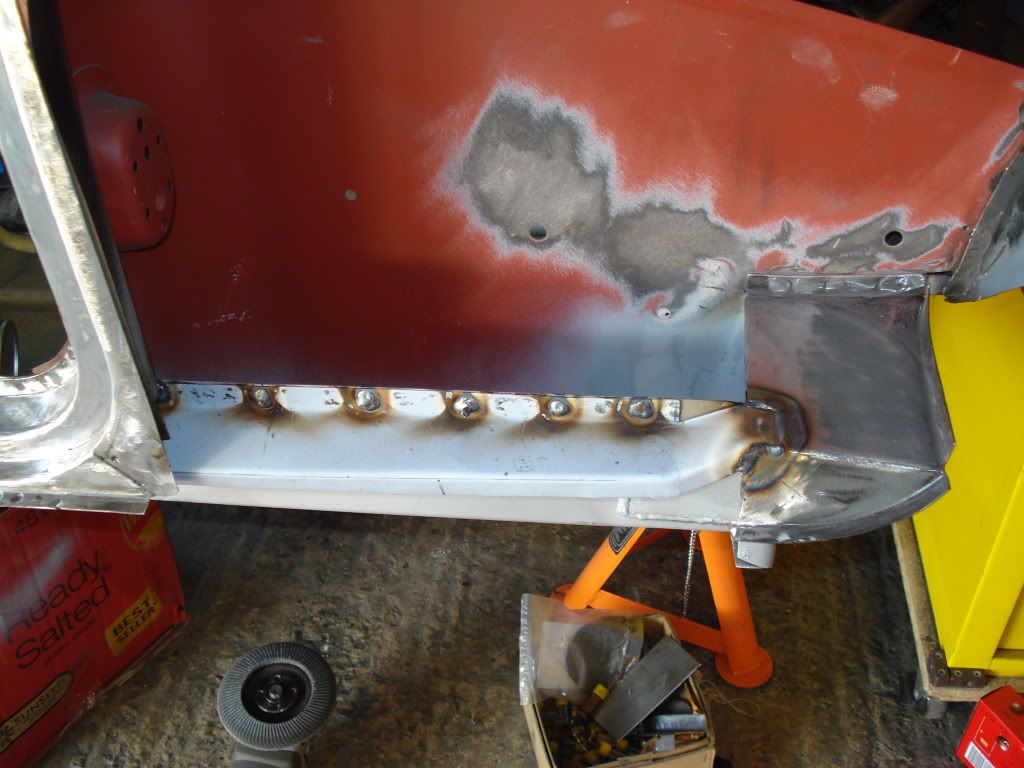
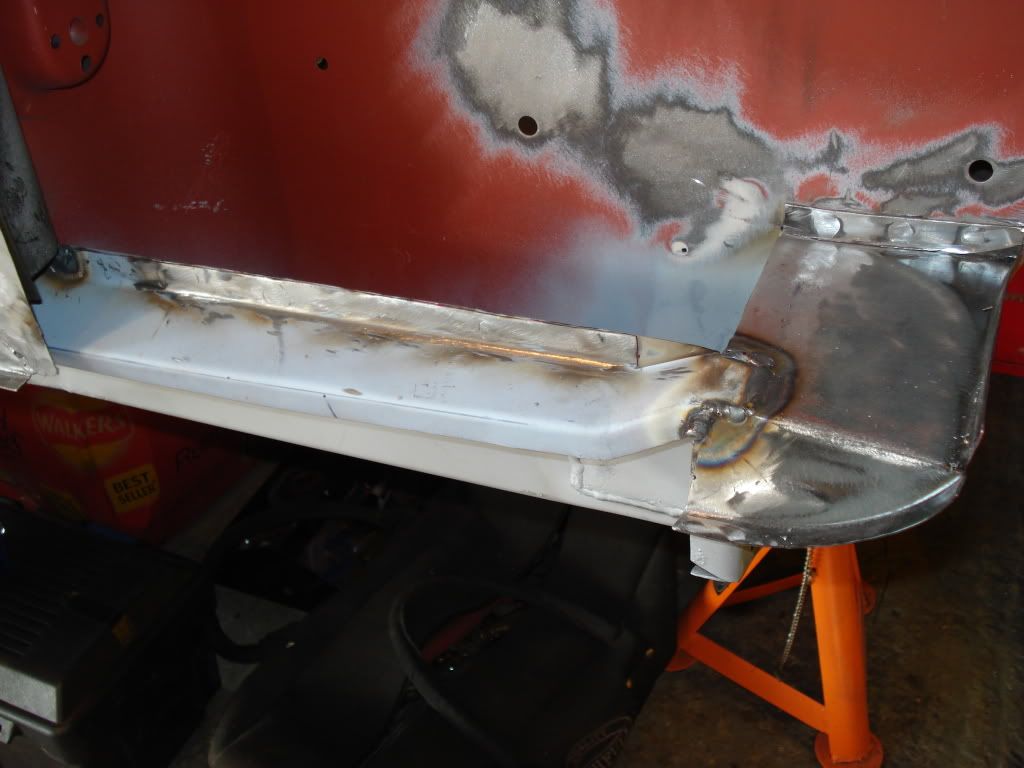
Paddys new jacking point
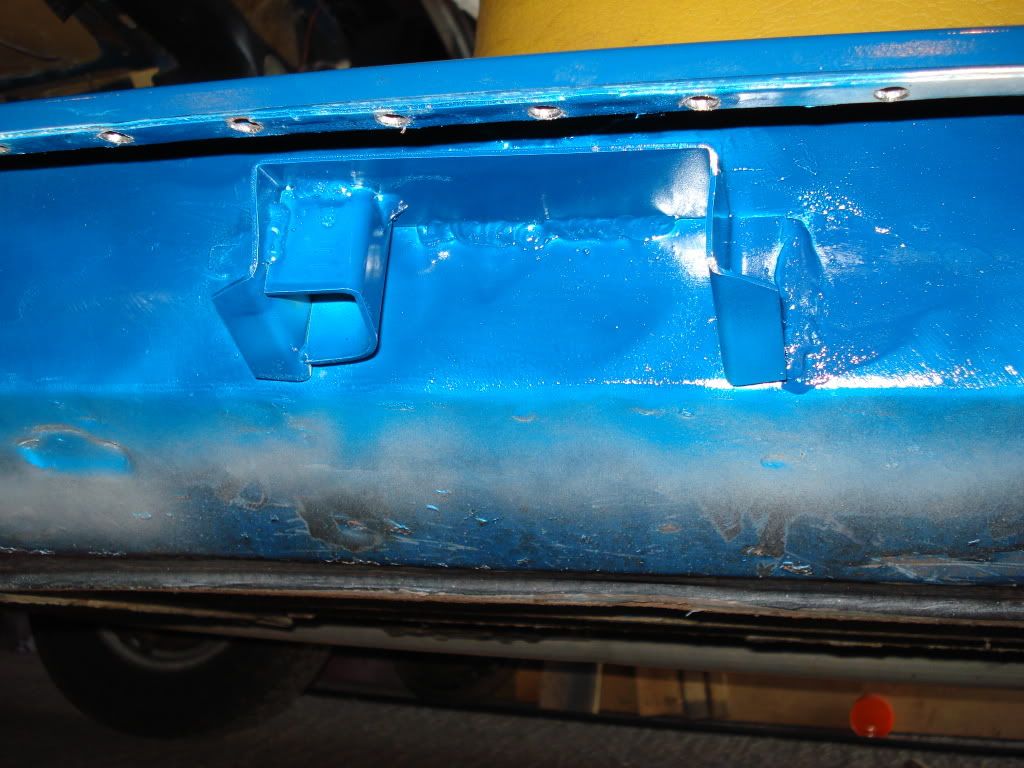
Flitch damage
Paddys new jacking point
Flitch damage
#19
Lee_bash
-
- Members
-
- 345 posts
Speeding Along Now
- Location: Sutton Coldfield.
- Local Club: sutton coldfield
Posted 06 June 2012 - 02:02 PM
Right, I'll leave that as is then and just wack a new one on.
If I were to do it to mine, I don't have a spot welder- would plug welds do in place of spot welds?
If I were to do it to mine, I don't have a spot welder- would plug welds do in place of spot welds?
#20
sonikk4
-
- Admin
-
- 16,033 posts
Twisted Paint Polisher!!!
- Name: Neil
- Location: Oxfordshire
Posted 06 June 2012 - 02:08 PM
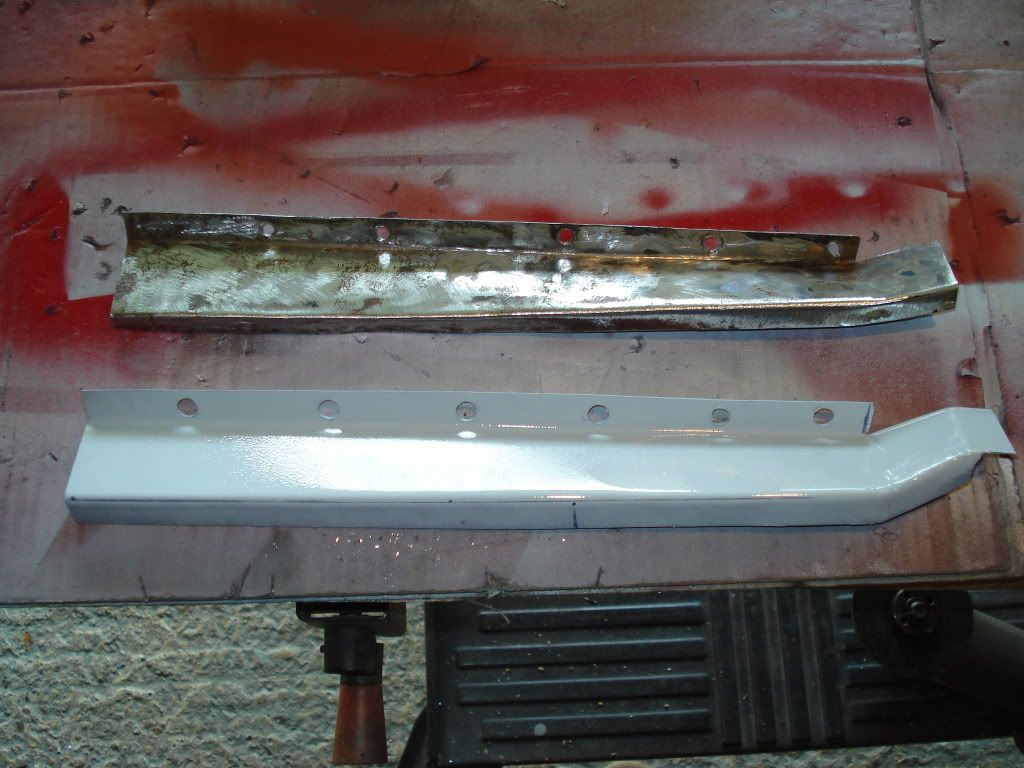
Just to give you an idea of the inner sill area in the companion bin here's a few pictures with the rear quarter panel off. I can't find the picture of the inner sill stiffener but have look at the Project Erm link and you will see it in there.
Inner sill repair section
And yes plug welds will be fine.
Inner sill repair section
And yes plug welds will be fine.
#21
sonikk4
-
- Admin
-
- 16,033 posts
Twisted Paint Polisher!!!
- Name: Neil
- Location: Oxfordshire
Posted 06 June 2012 - 02:26 PM
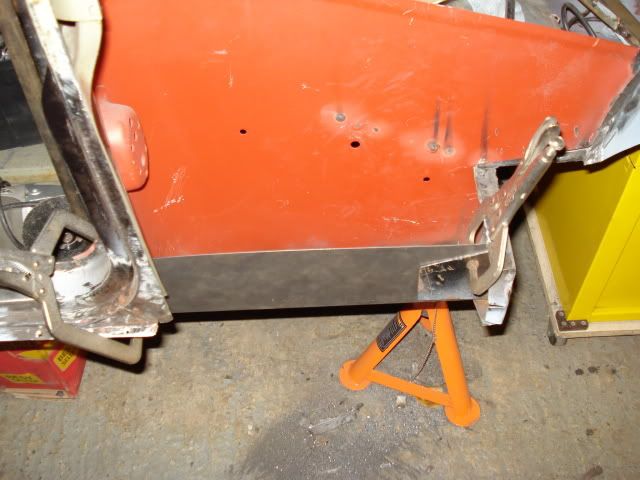
Upwards and onwards,went to refit the l/h inner sill stiffener but found that Mr Rust had perforated it in several places, very inconsiderate so 15 mins later fabricated a new slightly shorter version
very happy with it so in it went after i had fitted the heel board close out panel
all ground down
Also sorted the 1/2" extension piece for the outer arch needed at the front of it so that will be fitted tomorrow then lashings of paint before i move onto replacing the waist rail and installing the rear quarter panel.
I copied this from Erms thread and it shows the inner sill stiffener.
#22
Lee_bash
-
- Members
-
- 345 posts
Speeding Along Now
- Location: Sutton Coldfield.
- Local Club: sutton coldfield
Posted 06 June 2012 - 02:39 PM
thanks for all the info, this is really helpful :)
I've just gone out and took some pictures of the seam and oversills etc, I'll get them up here in abit- the seam looks abit bubbly on one side
I've just gone out and took some pictures of the seam and oversills etc, I'll get them up here in abit- the seam looks abit bubbly on one side
#23
Lee_bash
-
- Members
-
- 345 posts
Speeding Along Now
- Location: Sutton Coldfield.
- Local Club: sutton coldfield
Posted 06 June 2012 - 03:20 PM
Here we go-
front of the passenger side (note, theres a hole that leaks water out when you rock the car )
)

rear of the passenger side:

passenger side seam:

More of the passenger side seam:

Another shot of the front of the passenger side:

Drivers side front:

drivers side seam:

drivers side rear:

And finally the welding underneath:

pretty much the same all the way accross.
Theres water in the big hole I pictured earlier, it comes and goes dependant upon weather, and theres a crack/hole a few mm's wide and about 100mm long midway up on the passenger side door step. Both of these leak water into the footwell.
front of the passenger side (note, theres a hole that leaks water out when you rock the car
)rear of the passenger side:
passenger side seam:
More of the passenger side seam:
Another shot of the front of the passenger side:
Drivers side front:
drivers side seam:
drivers side rear:
And finally the welding underneath:
pretty much the same all the way accross.
Theres water in the big hole I pictured earlier, it comes and goes dependant upon weather, and theres a crack/hole a few mm's wide and about 100mm long midway up on the passenger side door step. Both of these leak water into the footwell.
#24
sonikk4
-
- Admin
-
- 16,033 posts
Twisted Paint Polisher!!!
- Name: Neil
- Location: Oxfordshire
Posted 06 June 2012 - 06:18 PM
Judging by your pictures the oversills are covering the old sills or they have not bothered to trim off the old sill flange, whichever has been done its toast.
The bottom of the quarter panel will need to be replaced as well as the A panel. Door skins will need doing as well.
With the A panel gone i would whip that off as that will allow you to work on the flitch panel if required. If you decide to replace the lower sections of the quarter panels then this will give you good access to the inner sill behind the companion box and the inner sill stiffener.
None of it is good news but none of it is the end of the world. Its just going to take time to sort it all out.
#25
Lee_bash
-
- Members
-
- 345 posts
Speeding Along Now
- Location: Sutton Coldfield.
- Local Club: sutton coldfield
Posted 06 June 2012 - 08:25 PM
Right. Now you mention it, my seams do seem abit thick...
Time for a crash course in welding and to borrow an angle grinder I think.
Time for a crash course in welding and to borrow an angle grinder I think.
#26
Shifty
-

- Admin
-
- 13,138 posts
Sponsored by Fosters (tm)
- Name: Sean
- Location: Shropshire(sunny)
- Local Club: TMF
Posted 06 June 2012 - 09:17 PM
Learn to weld quickly!!
Thats about a grands worth of work easily!!
Thats about a grands worth of work easily!!
#27
mini-luke
-

- Traders
-
- 2,362 posts
Postman Pat
- Location: Hereford
Posted 06 June 2012 - 09:33 PM
Machine mart do good reasonably priced welders if you want to go down that route.
#28
Lee_bash
-
- Members
-
- 345 posts
Speeding Along Now
- Location: Sutton Coldfield.
- Local Club: sutton coldfield
Posted 06 June 2012 - 10:03 PM
I popped down there, about £180.
Starter kit on ebay for £150 with everything I need bar a decent helmet, think I'll be getting that.
If my MOT is due august 25th, what would you guys advise? I'm yet to drive it/insure it, and I'm itching to do so but I'm reluctant to pay insurance if it'll be pulled off the road within a couple of months. Should i wack a sorn on it once I'm ready and get welding?
Edited by Lee_bash, 06 June 2012 - 10:09 PM.
#29
mini-luke
-
- Traders
-
- 2,362 posts
Postman Pat
- Location: Hereford
Posted 06 June 2012 - 10:06 PM
Do not get gasless, it's not as good as gas. Also, the helmets supplied are useless, get a decent auto dimming one, it'll make life much easier. One last thing, the little CO2 cylinders they use don't last very long at all, best to get a regulator and rent a bottle, it'll save money in the long run.
Post up a link of what you're after before you buy.
Post up a link of what you're after before you buy.


1 user(s) are reading this topic
0 members, 1 guests, 0 anonymous users


