
How easy was it to remove the door card material from the old backs? I have spoken to Bert about doing the same thing but he wasn't sure how well the old ones would seperate due to them being stuck together during manufacture.

236 replies to this topic
#61

GraemeC
-

- TMF+ Member
-

- 7,438 posts
Crazy About Mini's
- Location: Carnforth
Posted 15 April 2008 - 03:10 PM
#62
sherly
-
- Members
-
- 704 posts
One Carb Or Two?
- Location: Saaaa'fend
Posted 18 April 2008 - 11:42 AM
I'm a little concerned about putting all the effort into polishing them up and then they corrode really quickly. My plan is not to laquer them and keep them coated in wax polish on a very regular basis. I've seen polished/laquered rims corrode very quickly due to stone chips allowing water to creep under the laquer - at which point it's a case of stripping it all back and starting again. At least if it's not laquered then all I'll need to do is re-polish.OOh nice and shiny alloys, heres so you can get an idea what anthrcite revos will look like well gray revos anyway
I spent ages getting the lips on those shiny and now look at them, never were as shiny as yours tho.
#63
sherly
-
- Members
-
- 704 posts
One Carb Or Two?
- Location: Saaaa'fend
Posted 18 April 2008 - 12:18 PM
On the two occassions that I've repaired doorcards it's been really easy. The vinyl isn't glued all over, only where it folds round onto the back of the doorcard and where there are pressed "features" on the front of the doorcard. So if you peel back the vinyl all round the edges of the doorcard on the rear (prise out the staples and use something like a stanley knife blade to lift the vinyl) you'll then find that the majority of the vinyl/foam isn't stuck down. Where it is stuck you'll just need to use the stanley blade to carefully separate it from the backing board.How easy was it to remove the door card material from the old backs? I have spoken to Bert about doing the same thing but he wasn't sure how well the old ones would seperate due to them being stuck together during manufacture.
#64
sherly
-
- Members
-
- 704 posts
One Carb Or Two?
- Location: Saaaa'fend
Posted 22 April 2008 - 09:40 AM
Day 2 of my days off last week - started with a little trip to DSN classics to collect a few bits and pieces, namely roof aerial, windscreen rubbers, fillet strips and door seals.
I had enlisted the help of my dad to fit the headlining - both of us had no prior experience of fitting headlinings so it had the possiblility of being a very long day! Anyway - sun was shining so we decided to work outside.
I fitted the new aerial as the old one I had was knackered, fed the cable down the a-pillar and tied it off in the dash space for use at a later date. I then proceeded to heat up the can of waxoyl ready to inject all the areas around the roof that would be impossible to get to once the headlining was fitted.
Then, making sure everything was clean, we laid out the headlining upside down and transfered the bars across from the old one I had from a donor car, making note of the order front to back using Southys guide (cheers mate )
)
Whilst trying to keep everything clean and avoiding touching the headlining on anything dirty we manouvered the headlining into place by locating the bars. Then, following the guide, we secured the bars with foam blocks and started to pull the headlining tight whilst clamping in place with bulldog clips and old screen seal.
Then the glueing began! Strong stuff that Evostick - no wonder they lock it away in our local B&Q.....
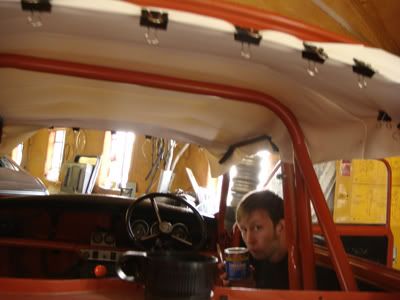
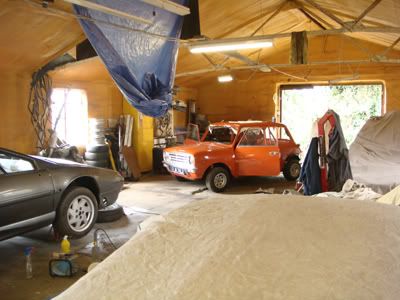
We did get caught out by the April showers so decided to finish off inside the workshop.
Got the 'lining fitted without cutting the sunroof hole. Will tackle this soon when I've decided what to do with my roof!
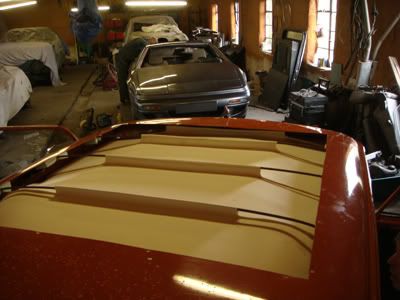
Having glued everything bar the sections around the a-pillars we walked away for the day to let the glue cure fully. Onto day 3.......
I had enlisted the help of my dad to fit the headlining - both of us had no prior experience of fitting headlinings so it had the possiblility of being a very long day! Anyway - sun was shining so we decided to work outside.
I fitted the new aerial as the old one I had was knackered, fed the cable down the a-pillar and tied it off in the dash space for use at a later date. I then proceeded to heat up the can of waxoyl ready to inject all the areas around the roof that would be impossible to get to once the headlining was fitted.
Then, making sure everything was clean, we laid out the headlining upside down and transfered the bars across from the old one I had from a donor car, making note of the order front to back using Southys guide (cheers mate
)Whilst trying to keep everything clean and avoiding touching the headlining on anything dirty we manouvered the headlining into place by locating the bars. Then, following the guide, we secured the bars with foam blocks and started to pull the headlining tight whilst clamping in place with bulldog clips and old screen seal.
Then the glueing began! Strong stuff that Evostick - no wonder they lock it away in our local B&Q.....
We did get caught out by the April showers so decided to finish off inside the workshop.
Got the 'lining fitted without cutting the sunroof hole. Will tackle this soon when I've decided what to do with my roof!
Having glued everything bar the sections around the a-pillars we walked away for the day to let the glue cure fully. Onto day 3.......
Edited by sherly, 22 April 2008 - 09:47 AM.
#65
sherly
-
- Members
-
- 704 posts
One Carb Or Two?
- Location: Saaaa'fend
Posted 22 April 2008 - 03:27 PM
OK - day3 of my mini hols. The glue had set on the headlining which left me free to start trimming and fitting c-pillar trim/rear window trim/rear window seal and glass. Again, with plenty of hand washing to avoid fingerprints, I started to trim the headlining around the rear screen area. Also I fitted the c-pillar trim panels, the bit of trim on the underneath of the screen and then placed the rear window seal in place.
The previous day I had dug the rear screen out of storage in the workshop (it's been a long time since I've needed it!) and given it a clean down so it was ready to drop into the rubber seal. First time I'd ever attempted to fit screens of any sort so again I was at the bottom of a learning curve......
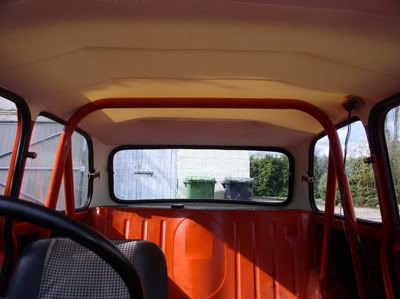
Rear screen went in surprisingly easily using a couple of plastic spatulas/fish slices to persuade/guide the rubber over the glass all the way round......
Once this was complete I had the fun of fitting the fillet strip. After faffin' for about 10 mins trying to use the tool I'd just bought I resorted to looking in the Haynes for some pointers on how to actually use it properly. Once I'd worked it out the fillet strip went in relatively easily (with the aid of a little lube).
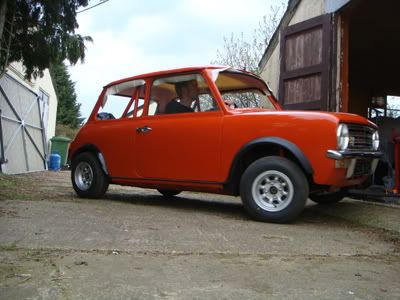
The sun was shining so I drove it outside for a few piccies (literally a few minutes prior to a massive hailstorm....bloody April weather!)
Just need to trim the headlining around the a-pillars and then fit the brand new windscreen I've bought.
Mart
The previous day I had dug the rear screen out of storage in the workshop (it's been a long time since I've needed it!) and given it a clean down so it was ready to drop into the rubber seal. First time I'd ever attempted to fit screens of any sort so again I was at the bottom of a learning curve......
Rear screen went in surprisingly easily using a couple of plastic spatulas/fish slices to persuade/guide the rubber over the glass all the way round......
Once this was complete I had the fun of fitting the fillet strip. After faffin' for about 10 mins trying to use the tool I'd just bought I resorted to looking in the Haynes for some pointers on how to actually use it properly. Once I'd worked it out the fillet strip went in relatively easily (with the aid of a little lube).
The sun was shining so I drove it outside for a few piccies (literally a few minutes prior to a massive hailstorm....bloody April weather!)
Just need to trim the headlining around the a-pillars and then fit the brand new windscreen I've bought.
Mart
#66
fatmini
-

- Members
-
- 735 posts
One Carb Or Two?
- Local Club: no
Posted 24 April 2008 - 07:42 PM
going well mate !!! are you going to l2b ? because u will see me there and all being well the minus to !!! if it survives the run to newquay next weekend !!!lol
#67
sherly
-
- Members
-
- 704 posts
One Carb Or Two?
- Location: Saaaa'fend
Posted 29 April 2008 - 11:57 AM
'fraid not. I though about getting a ticket as motivation for getting it finished. Wish I had as I think I would've made it.....going well mate !!! are you going to l2b ? because u will see me there and all being well the minus to !!! if it survives the run to newquay next weekend !!!lol
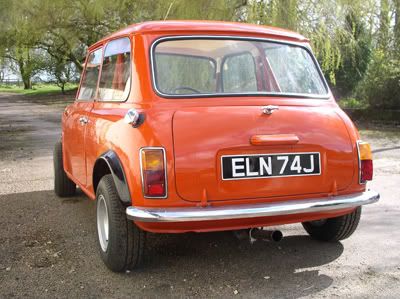
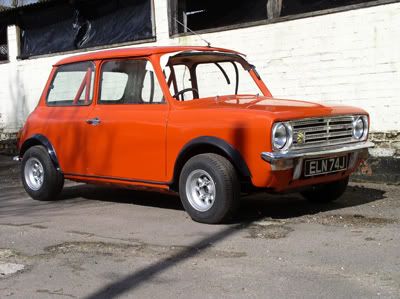
For the first time in years the Mini actually now looks like a proper car (from certain angles and if you squint a little bit
 )
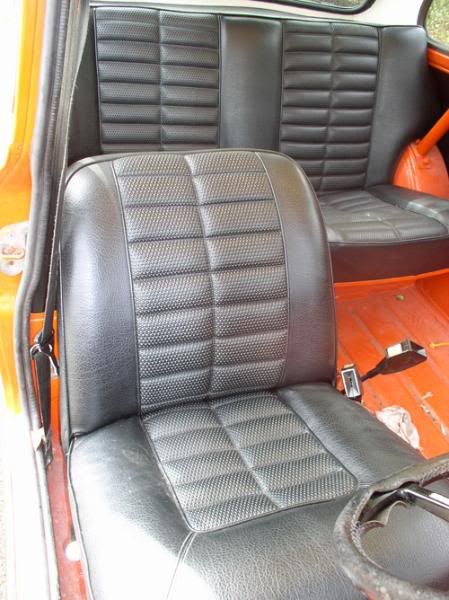
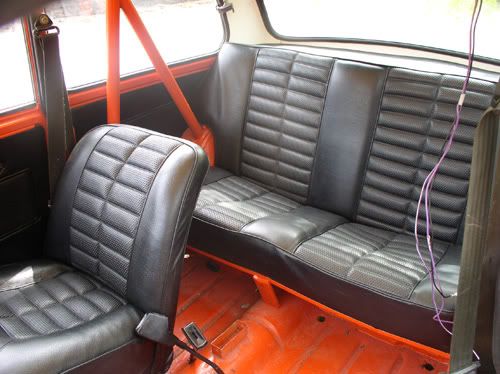
)I've managed to cobble together a set of original GT seats (with the perforated style centre panels) - thanks to Kel and Steve.
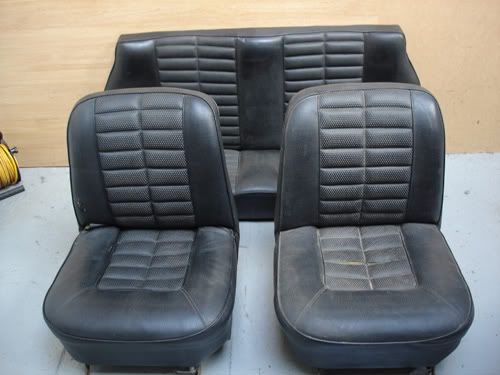
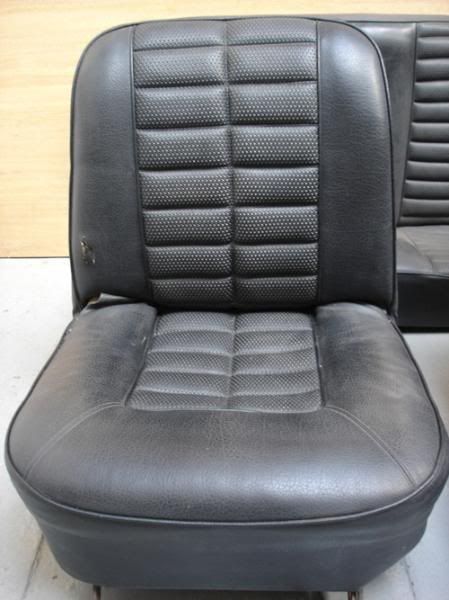
I've had a set of reclining frames sandblasted/powdercoated in gloss black and have repaired one of the front seats and rebuilt it onto the reclining frame - restitched some loose stitching and repaired some splits in the vinyl using a handy vinyl kit from Frost.
One of the front seat base covers is too far gone to repair though so after payday I will be investing in a new base cover from Newton commercial to finish off the passenger seat and complete the interior.
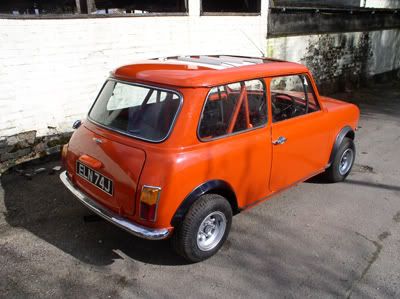
Over the weekend I managed to finish off the headlining and a-pillar trim ready to fit the windscreen. I bought a new windscreen (green tint and blue top tint) which I managed to crack whilst trying to fit it

 so I ended up fitting my spare non-tinted screen, which is used and has a few scratches. I'll swap it over for a new one at a later date, post MOT!
I am a little concerned that the screen rubber doesn't quite push into the corners of the scuttles though.... I did replace both of these but they seem to line up OK with the rest of the windscreen aperture. I guess it doesn't really matter as long as it all seals up OK.....?

Anyhow - I also fitted the seatbelts, the wing mirrors, the rear view mirrors and the wipers so its starting to look like a finished car (apart from the big hole in the roof
)
I've still got a long list of niggly jobs to get done before MOT time but I'm hoping that in a couple of weeks (money permitting) there'll be another mini reunited with the road!
#68
Juju
-

- TMF+ Member
-
- 3,620 posts
Up Into Fourth
- Location: UK
- Local Club: Antisocial club (members = 1)
Posted 29 April 2008 - 12:08 PM
I've still got a long list of niggly jobs to get done before MOT time but I'm hoping that in a couple of weeks (money permitting) there'll be another mini reunited with the road!


I love what you've done with this, Sherly
 .
. I think I just messed my pants.
#69
sherly
-
- Members
-
- 704 posts
One Carb Or Two?
- Location: Saaaa'fend
Posted 29 April 2008 - 05:25 PM
I couldn't have asked for a better reaction - cheers JuJu!
I've still got a long list of niggly jobs to get done before MOT time but I'm hoping that in a couple of weeks (money permitting) there'll be another mini reunited with the road!
I love what you've done with this, Sherly
I think I just messed my pants.

Just realised that payday has actually been and gone! *runs off to find Newton Commercials 'phone number* Woo Hoo...
#70
fatmini
-
- Members
-
- 735 posts
One Carb Or Two?
- Local Club: no
Posted 01 May 2008 - 05:21 PM
Im sure some one will have a spare ticket or if not get a lift with some one else whos going !
was the Frost kit any good? as ive been aware of them for some years but never had anything from them ,would u recamend them/the repare kit ???
was the Frost kit any good? as ive been aware of them for some years but never had anything from them ,would u recamend them/the repare kit ???
#71
Lt-SilverDragon
-

- Members
-
- 724 posts
One Carb Or Two?
Posted 01 May 2008 - 05:30 PM
Looking good, kinda like mine well it will be once I've fitted my bullet mirrors and W&P arches or should that be mine is kind of like yours 
#72
lewis
-

- Traders
-
- 2,322 posts
Up Into Fourth
- Location: Jersey C.I
- Local Club: Mini Club Jersey
Posted 01 May 2008 - 06:07 PM
that is a minter! are those genuine wood and pickett arches?
i love it, bet your proud
i love it, bet your proud
#73
sherly
-
- Members
-
- 704 posts
One Carb Or Two?
- Location: Saaaa'fend
Posted 02 May 2008 - 12:55 PM
Im sure some one will have a spare ticket or if not get a lift with some one else whos going !
was the Frost kit any good? as ive been aware of them for some years but never had anything from them ,would u recamend them/the repare kit ???
Yeah it did the job, combined with scuffmaster leather dye I managed to create a repair which hides the original split well. I should've practiced a bit first though and the grain paper that the kit provides isn't coarse enough to match the grain on the GT seats. I'll get a few pics up of the repair in progress later......
that is a minter! are those genuine wood and pickett arches?
i love it, bet your proud
Cheers!
Not W&P arches but done in the same style (bought them from DSN quite a few years ago) made by a company called RAVE alledgedly! http://www.dsnclassi.../info_2619.html
Not sure if they're quite wide enough though now I've fitted different wheels - I originally had 13" wellers.....
I must admit I'm starting to love how it looks - especially now the glass is in it actually looks like a car again. I'm getting a bit fed up with constantly working on it now though, I just want to drive it but still have a long list of niggly jobs to sort out before MOT.....
#74
Retro_10s
-

- Members
-
- 10,138 posts
Moderator
- Location: Bromsgrove
Posted 03 May 2008 - 10:59 PM
that sir,.. is one of the nicest minis on the forum. Congrate 
#75
mini_kel
-

- Members
-
- 2,851 posts
Up Into Fourth
- Local Club: EMC/No pub mini club
Posted 05 May 2008 - 05:03 PM
Looks stunning!!! can`t wait to see it for real
window rubber should be fine Mart!
window rubber should be fine Mart!


Also tagged with one or more of these keywords: clubman
Projects →
Mini Saloons →
Black 1979 1275GtStarted by StuaR32t , 15 Feb 2025 |
|

|
||
Projects →
Mini Saloons →
Cape Town 🇿🇦 1275HleStarted by JAYO , 28 Feb 2021 |
|

|
||
Projects →
Mini Saloons →
Budget Mini Clubman Shell Restoration For £1500Started by minimissions , 13 Nov 2019 |
|

|
||
Projects →
Mini Saloons →
1275Gt Tarmac Rally Car - From ScratchStarted by KRM_Simon , 26 May 2019 |
|

|
||
Projects →
Mini Saloons →
1275Gt Resto - From Flip To FactoryStarted by Verderad , 12 Mar 2018 |
|

|
1 user(s) are reading this topic
0 members, 1 guests, 0 anonymous users


