Roller Painting With Hammerite
#181

Posted 26 August 2012 - 10:34 PM
1, what primer did you use?
2, did you use foam rollers?
3, was it white spirit you used for thinning?
I am sure the answers are already in there but saves me reading it back again and i have just spent the last few hours reading up on rollering so have loads of stuff in my head right now.
Thanks for info and great stuff so far
#182

Posted 26 August 2012 - 10:51 PM
Rollers are 4" high density foam rollers, you can get from B&Q although I got a 10 pack from ebay for a pretty good price. You can get 2 coats per roller if you wrap it up in between but they're cheap as chips anyway.
White spirit indeed for thinning.
Mix wise I've moved upwards towards about 70% paint, from the start point of 50%. Getting a great finish still, mostly due to improving technique I think. With a light rub down between coats and more careful flatting back after every 4 or so.
The only unproven element so far for me is durability. But given it's been used by coach painters and the like it would seem to be up to the task.
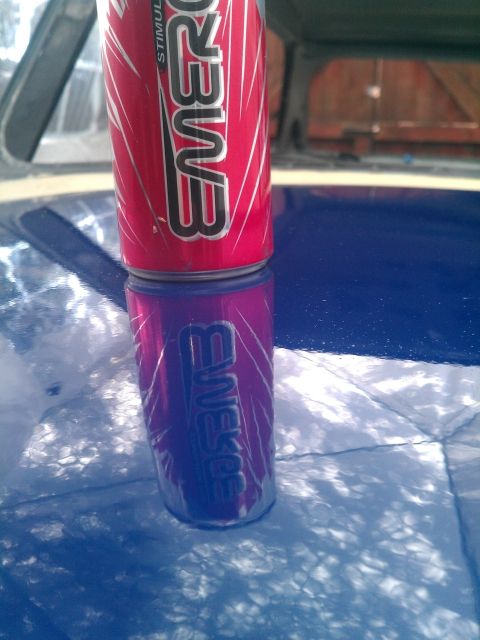
As it happens I took a quick snap over the weekend. This is coat number 2 on the bonnet.
No sanding or whatnot, this is just how it's dried.

#183

Posted 27 August 2012 - 10:29 AM
Is that finish typical of what you have been achieving, or an example of the best bit haha
When I finally get round to painting mine, if its half as good as that before sanding I will be very happy :)
#184

Posted 27 August 2012 - 10:57 AM
The rest of the car has more coats so the overall level is better.
Another 5 coats and I'll leave it to set a few weeks before some proper polishing.
#185

Posted 27 August 2012 - 02:54 PM
Cracked open a new pack of rollers today, loaded one up with paint and got cracking.
Covered the bonnet okay, they're a lot more dense than the b&q ones and tend to hold the paint in a bit too much but countered with elbow grease and it seemed ok... That was until I changed position briefly holding the roller vertical and the sponge part sliding clean off!
A quick inspection showed it wasn't fitted wrong but the glue had given up, seems It's not resistant to spirits, not a great property for a paint roller.
Managed to get a coat over the car at the cost of 3 rollers, off to b&q tomorrow needless to say.
Moral here, don't buy yorbrush rollers, they're crap.
#186

Posted 27 August 2012 - 04:19 PM
Keep it up, and more pics
#187

Posted 27 August 2012 - 06:05 PM
#188

Posted 27 August 2012 - 06:17 PM
You could probably get an 'okay' finish in 2 or 3 coats but I'm not sure it would give enough depth of paint for real flatting and polish. Could get it done over a weekend though.
The real test remains to see how well it will flat and polish after a few weeks.
I'm also looking for a clear coat that's compatible, Dulux have a couple of products but will have to wait until tomorrow and speak to them and maybe do some experiementation. I'd really like to have a clear coat but the paint itself is so easy to blend and lay down that repairs (when needed) shouldn't be difficult at all.
#189

Posted 29 August 2012 - 03:04 AM
Primer I used was Upol high build, just to aid a level surface after sanding back the original paint and filling stone dings etc.
Rollers are 4" high density foam rollers, you can get from B&Q although I got a 10 pack from ebay for a pretty good price. You can get 2 coats per roller if you wrap it up in between but they're cheap as chips anyway.
White spirit indeed for thinning.
Mix wise I've moved upwards towards about 70% paint, from the start point of 50%. Getting a great finish still, mostly due to improving technique I think. With a light rub down between coats and more careful flatting back after every 4 or so.
The only unproven element so far for me is durability. But given it's been used by coach painters and the like it would seem to be up to the task.
As it happens I took a quick snap over the weekend. This is coat number 2 on the bonnet.
No sanding or whatnot, this is just how it's dried.
Did you prime the whole car with the u pol or was there any areas of original paint surfaces that were good enough to just be keyed and or flatted back?
Did you lay the primer down from a can or from a gun or roller that as well? If you canned it how many did it take to do the car?
Edited by jetblack81, 29 August 2012 - 06:31 AM.
#190

Posted 29 August 2012 - 09:46 AM
Definitely not an issue as it turns out.
Most of the paint was more than good enough to paint onto, sanding through the clear coat took a while though, haha!
I primed from a can, as I wasn't going to be using much. Including the few dents and marks I had to fill / sand / prime / sand / fill / prime, I used 3 cans. That was everything bar the roof (couldn't reach).
On talking to the Dulux lady today, they have a product called weathershield high gloss which is apparently an exterior only version of the trade high gloss. It's totally compatible so I might grab 0.5L and use that on the last coats, as it's supposedly more durable.
#191

Posted 29 August 2012 - 10:11 AM
#192

Posted 29 August 2012 - 10:49 AM
Hopefully tomorrow I'll be on track, some weathershield from the decorator centre, rollers from screwfix and it'll be back to work.
Had a little total up and I reckon, if you were to go with a single colour and say 8 coats. Sanding back the original paint so you didn't have to prime. 1L of paint is plenty, if you chose white (cheapest) it's about £10. Add to that rollers and head £5, 1L of spirits £5 and a few packs of wet & dry to taste £5. You could on a massive budget get a good finish on your motor for under £30.
#193

Posted 29 August 2012 - 12:37 PM
#194

Posted 29 August 2012 - 06:51 PM
Thanks for all the info on this thread, i was always sceptical of roller painting when i first heard about it a while back but seeing some of your pics has converted me. Just need to find some time to drag my arse back in the garage to finish the front end and then get prepping and decide on the colour. Would be good to see some pics of the finished articles when there done.
#195

Posted 29 August 2012 - 07:38 PM
if you want a rough finish i found the best thing to do is to wait till the paint has gone tacky, then go over it again with a pretty dry roller, this lifted the flat paint and made it more textured.
perfect for rat look!
1 user(s) are reading this topic
0 members, 1 guests, 0 anonymous users


