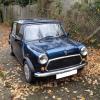
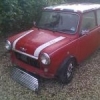
New Build, All The Gear No Idea.
#61

Posted 15 August 2012 - 07:46 PM
#62

Posted 15 August 2012 - 07:47 PM
#63

Posted 16 August 2012 - 07:59 PM
finally got round to properpley fitting the pedal box.. i used rivet nuts to secure it to the car...
 pedalboxditted2.jpg 53.43K
23 downloads
pedalboxditted2.jpg 53.43K
23 downloadsalso finished the throttle cable attachment on the top of the pedal...
 throttlepedal.jpg 59.81K
38 downloads
throttlepedal.jpg 59.81K
38 downloadsgot my mate to help me to some welding on the door hinge plates. thats the last of the welding hopefully. rust wise.
 doorhinges.jpg 38.69K
21 downloads
doorhinges.jpg 38.69K
21 downloadsand there she is all mounted.
 pedalboxfitted.jpg 44.91K
33 downloads
Edited by mrthumb, 16 August 2012 - 08:02 PM.
#64

Posted 17 August 2012 - 01:35 PM
#65

Posted 18 August 2012 - 10:12 PM
I extended the honda gearstick by 50mm so its more mini like and easier to reach...
its been welded and sanded and painted so you cant really tell.
 gearnobextenction.jpg 43.62K
16 downloads
gearnobextenction.jpg 43.62K
16 downloadsI also moved the gearstick back as far as i could so i could reach it easier. and capped off the large hole that would otherwise let water and crap spray inside the gatier and make it go rusty like the original one.
 gearposition.jpg 31.48K
24 downloads
gearposition.jpg 31.48K
24 downloadsand finally got the final position of the steering rack sat between the pedal box pistons things and its directley in line with the seat... i had to modify the existing steering rack bracket to go well with my new dash bar. all secured with new rivet nuts...
 steeringbracket.jpg 68.71K
24 downloads
steeringbracket.jpg 68.71K
24 downloadsIv gone to alot of trouble to make this car fit me and be nice to drive. :)
and iv been doing some spending..
a friend of mine told me its such a pain in the arse to run copper lines all over the car, so me and my mate measured all the distances and went to earls http://www.earls.co.uk/index.php and had all the brake lines for the car made to measure in stainless braided rubber coated hoses so when they arrive it will be a case of screwing up the threads with some PTFE and no more worries!....
another snag i found was that the old heater matrix was soo large and fowled on the pedal boxes new postion. so i got a lightweight modular heater matrix from http://www.t7design.co.uk/

this will tuck up nicley under the dash and i can just have it on a pot resistor to increase and decrease the heat for the car. it will be blowing on the windscreen only. keep it simple. if i want cold air i open the window :)
Edited by mrthumb, 18 August 2012 - 10:30 PM.
#66

Posted 19 August 2012 - 01:14 PM
#67

Posted 19 August 2012 - 01:48 PM
#68

Posted 19 August 2012 - 02:27 PM
#69

Posted 19 August 2012 - 05:34 PM
#70

Posted 21 August 2012 - 10:28 PM
Or, one of these - a remote fan controller for car/bike cooling fans - http://www.amazon.co...V/dp/B002XKZ97O Place the thermo probe in the air stream from the fan!
OR - This thing off an electric fire... http://hobbyparts.co...12v-Fan-control
#71

Posted 22 August 2012 - 04:04 AM
#72

Posted 22 August 2012 - 08:22 PM
now with that heater matrix. it sucks in the radiator side and blows out the ducts at the back... now i didnt want to recirculate the air in the car or moisture would build up. so i had to build a aluminium inlet duct that bolted to the front of the matrix. I installed the heater matrix into some 25x10 ERW box section with some riv nuts inside and welded them to the bulkhead... next i fitted the inlet duct. sorrt for the poor pictures but i left my camera at work.
 heatermatrix.jpg 60.97K
26 downloads
 heatermatrixinlet.jpg 62.22K
29 downloads
 heatermatrixinlet2.jpg 49.45K
23 downloads
heatermatrixinlet2.jpg 49.45K
23 downloadsthis will then goto the left hand side of the car via a ducting and ill make up some sort of water catch/filter system..
#73

Posted 22 August 2012 - 09:05 PM
#74

Posted 22 August 2012 - 09:53 PM
#75

Posted 22 August 2012 - 09:58 PM
1 user(s) are reading this topic
0 members, 1 guests, 0 anonymous users


