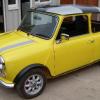
New Build, All The Gear No Idea.
#16

Posted 27 April 2012 - 01:41 PM
#17

Posted 27 April 2012 - 04:39 PM
#18

Posted 27 April 2012 - 05:05 PM
its a nice design tank mate, but with that length and only a small reservoir on the outlet do you think fuel surge could be an issue? im no expert but when i had mine made for my old rs it looked bigger, i can get a pic if you like?
keep up the good work
dave
#19

Posted 27 April 2012 - 05:07 PM
With your skill you could have saved a fortune on the subframe, get your self the dvd of the honda build it will help you, i made mine from the metro subframe. just by watching the dvdthanks buddy, I hope to have the subframe and all the parts within a month or 2. then the mini will be sand blasted and repainted to get rid of the rust thats bubbleing up everywhere. then hopefully assembeled before the end of the year :)
#20

Posted 28 April 2012 - 09:00 AM
some good work mate and lovely project
its a nice design tank mate, but with that length and only a small reservoir on the outlet do you think fuel surge could be an issue? im no expert but when i had mine made for my old rs it looked bigger, i can get a pic if you like?
keep up the good work
dave
i think it will work because, theres a 24mm hole that the fuel has to fall into, to get into that little box on the bottom. if i go round a corner theres no way it can all swash out and if it does, it will be because im on my last few drops of fuel. but i guess if i do have problems i can make a header tank ? also im going to put some barriers inside to prevent it from swashing from 1 end to the other!
Edited by mrthumb, 28 April 2012 - 09:15 AM.
#21

Posted 28 April 2012 - 05:20 PM
great project, looking forward to updates
dave
#22

Posted 28 April 2012 - 07:23 PM
Only time where it might matter is if you are having trouble fitting your alternator during the build up or upgrading later (super charger turbo etc) or just find you need to use one of the other pulley wheels for clearance - you never know whats gonna come up during build up!
#23

Posted 03 May 2012 - 06:47 AM

RX2n 10k RPM Multifunction
http://www.digital-s...edition-1-p.asp
#24

Posted 17 June 2012 - 04:30 PM
I got the watsons subframe and with some small modifications i managed to get it to fit nicley.
The car will soon be stripped down to its shell the engine will be dry fitted and any modifications and reinforcements will be made then before it gets sand blasted (with glass media) and then welded up and painted.
It now has a S9B gearbox with a LSD does anyone have any experience of these gearboxes? i gathered their suppost to be good as they are longer geared.
also is anyone after a standard mini engine ? got one spare soon :)
Attached Files
#25

Posted 01 July 2012 - 01:06 PM
heres some pics.
thats what i started with.
Then it goes in the tank for 2 days on 6 volts at 1 amp.
then it comes out and you just crap off the flakey rust with a wire brush then your good for priming and painting.
I used compressed air to pop the piston out which sounded like a gun going off, i ran it though the lathe and tidied it up. putting it back in with copper slip.
a coat of enamel later and you have a good reconditioned caliper :)
I also fitted the subframe to the car and cut out the inner wings and cut the front valance now it stick outs quite a bit.
Attached Files
#26

Posted 09 July 2012 - 08:03 PM
Attached Files
#27

Posted 17 July 2012 - 05:35 PM
I had some of the afternoon off due to docters appointment, so i started cutting holes in it in preperation for the indicators grill etc. All the openings i made were done with a holesaw in the corners to prevent cracking later on as a corner is a stress point. Ill let pictures do the rest. Still got to cut the headlights out. I plan on reinforcing the all the parts with aluminium backing plates and also go over the whole lot with some more resin. any more tips on stiffening this thing up lads?
My plan is to fabricate some mini tek style hinges that lift the entire front up in the air. and make this a 1 piece lid.
Attached Files
Edited by mrthumb, 17 July 2012 - 05:42 PM.
#28

Posted 17 July 2012 - 10:35 PM
Im sure once you bond the two parts together, it will become rigid enough without any reinforcements.
You'll definitely need some kind of spreader plates, where the hinges are going to be bolted to the front end.
#29

Posted 18 July 2012 - 08:47 PM
I done a bit more tonight.
anyone thinking of doing this.. its comes blank for a reason its fiddley and hard to get perfect. :)
There is hardley enough room for the lights in that gap. so i had to trim away at the bottom edge to get them in there. I also think i have to trim some of the head light shrowd away so thats i can get a better fitting. but its going well so far. next job is to cut and fit the aluminium backing plates so that the lights have good plate to fix into.
sandblasting this weekend hopefully then its full steam ahead with welding and painting!
Attached Files
#30

Posted 30 July 2012 - 08:28 PM
The follow up to rust removal... quite a bit found in little places all over. I find myself being completley unsatasfied as i can allways see another bit that i want to cut out. but my friend whos been restoring minis for years said iv gone beyond what alot of mini owners would do in some respects.
this is before its been to sand blasting so i got a bit more to go yet!
Attached Files
1 user(s) are reading this topic
0 members, 1 guests, 0 anonymous users


