Jump to content


Photo

1960 Mini Van


  • Please log in to reply
280 replies to this topic

#61 minimikej

minimikej

    Speeding Along Now

  • Members
  • PipPipPipPipPip
  • 347 posts
  • Location: Derbyshire

Posted 20 December 2012 - 09:21 PM

Posted Image

Inner wing is now on, scuttle repair is in place. Mock fitted all the other panels to check gaps - it looks good!


I'm at a similar position with my mini. I'm shocked at just how badly the inner wing wants to sit with the A pillar box. With the sill end tabs all clamped together, when I offer up the inner A panel it is a good inch too far forwards! The outer one sits fine, there's just no way on earth it's going to line up. Neither inner nor outer A panels are genuine, I couldn't buy any new at the time - all the usual suppliers were out of stock. Maybe they are to blame, I don't know. The inner wing itself is sitting well on all the seams apart from the A post. I think the car may have been stuffed at some point :-/

#62 ChrisCityE

ChrisCityE

    Speeding Along Now

  • Members
  • PipPipPipPipPip
  • 418 posts
  • Location: Bristol

Posted 20 December 2012 - 09:42 PM

The panels have taken a lot of adjustment and manipulation to fit "correctly"...

#63 PNL629G

PNL629G

    On The Road

  • Noobies
  • PipPip
  • 48 posts

Posted 24 December 2012 - 12:00 AM

Great project. I do like a van! Loving the attention to detail. Thanks for posting the progress! :proud:

#64 ChrisCityE

ChrisCityE

    Speeding Along Now

  • Members
  • PipPipPipPipPip
  • 418 posts
  • Location: Bristol

Posted 28 December 2012 - 03:28 PM

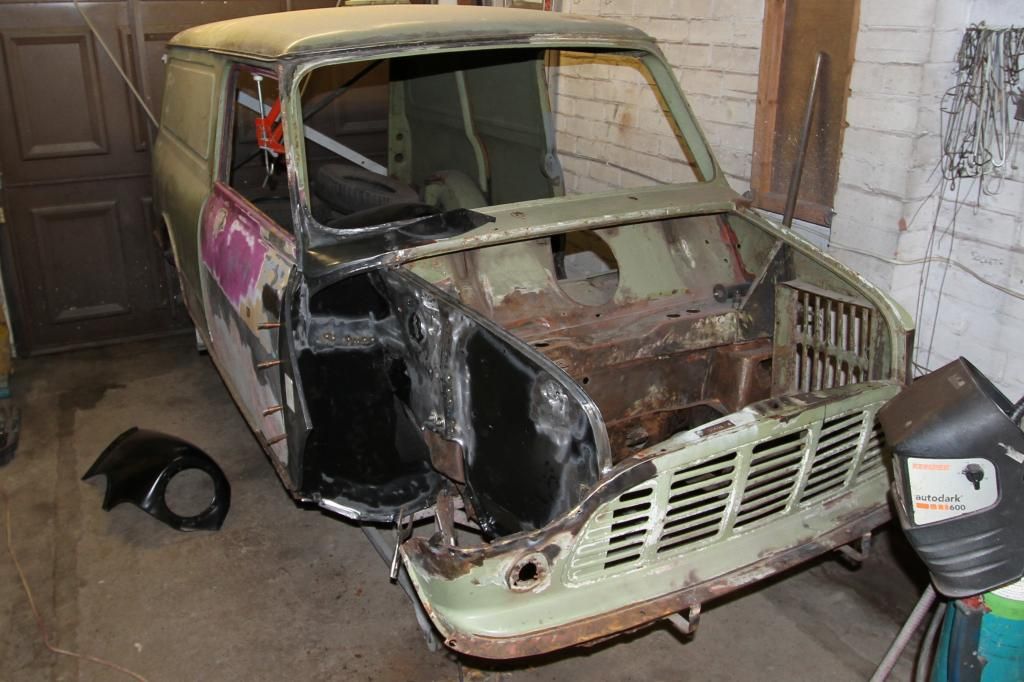
Here are a few little taster shots of what has been going on:

The Van was looking like this:

Posted Image

Then it was like this:

Posted Image

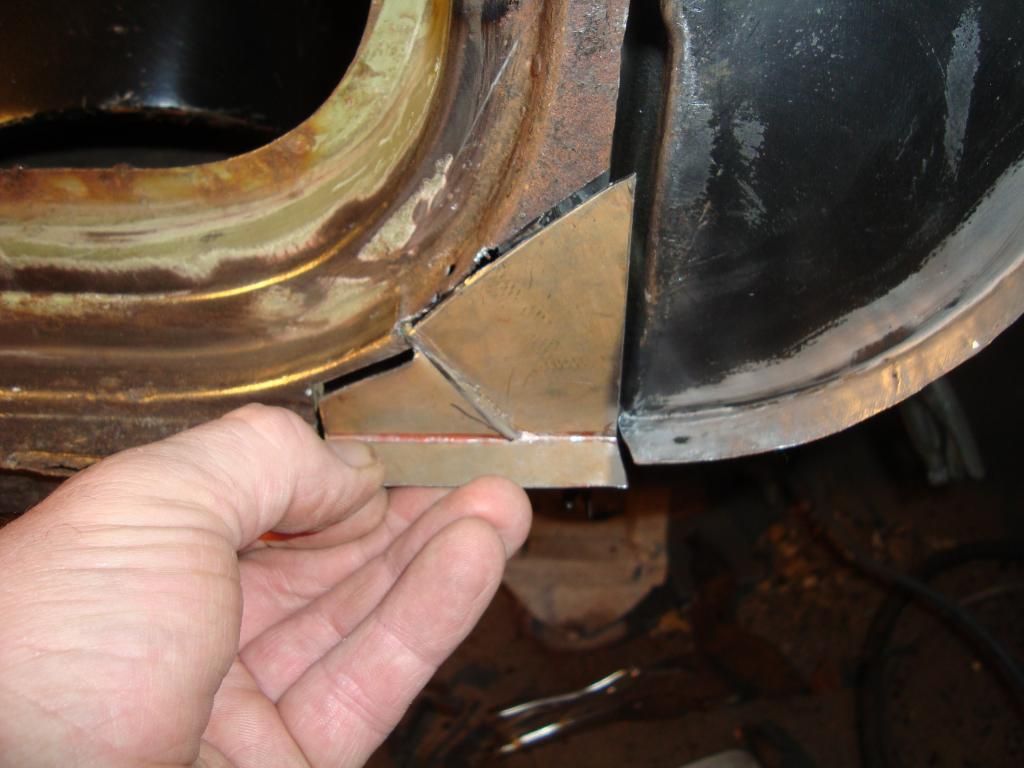
But with various repairs like this:

Posted Image

It is now looking a lot more like this:

Posted Image

Front panel is now looking really good in places thanks to the above repairs. A Panel in place, repairs around the door pillar are looking good... getting exciting!

Check out the large pics below:

http://www.flickr.co...ustin_mini_van/

Edited by ChrisCityE, 28 December 2012 - 03:28 PM.


#65 ChrisCityE

ChrisCityE

    Speeding Along Now

  • Members
  • PipPipPipPipPip
  • 418 posts
  • Location: Bristol

Posted 03 January 2013 - 11:21 AM

I never seem to get replies, but here is another update!

Posted Image

This mess has been repaired:

Posted Image

Just the passenger side wing, front panel and floor to go in terms of big jobs.

Edited by ChrisCityE, 03 January 2013 - 11:24 AM.


#66 Gazza211

Gazza211

    Stage One Kit Fitted

  • Noobies
  • PipPipPip
  • 77 posts

Posted 03 January 2013 - 12:07 PM

Hi, you are doing a great job there, the attention to detail is amazing, also its good that you are repairing the hard to get panels instead of just replacing with what is available, this should be stunning when its finished, would love a van myself but have too many projects on the go at the moment,
All the best, i will certainly keep my eye on this one, Gaz

#67 nuclear_mini

nuclear_mini

    On The Road

  • Noobies
  • PipPip
  • 46 posts

Posted 03 January 2013 - 12:48 PM

Well done mate! This is a lovely job to watch in progress. Keep it up!

#68 Tomlad

Tomlad

    Passed Test

  • Noobies
  • PipPip
  • 34 posts

Posted 03 January 2013 - 07:04 PM

that is a real nice job! I would love to be able to do something like that keep it up. People might not comment all the time but they will be looking and I'm sure impressed! Nice work

#69 Chriss

Chriss

    Mini Mad

  • Noobies
  • PipPipPipPip
  • 107 posts
  • Location: Kent

Posted 03 January 2013 - 09:50 PM

Good job! I really like the van are you keeping it original or modify it to your own taste?

#70 minimikej

minimikej

    Speeding Along Now

  • Members
  • PipPipPipPipPip
  • 347 posts
  • Location: Derbyshire

Posted 03 January 2013 - 10:21 PM

Yes, great work. I could do with some pictures to see how the inner wing flitch should join onto the A pillar, I'm not 100% sure. The old Lindsay porter book is pretty vague on this bit. Did you attach your outer A panels first before the inner in order to correctly position the flitch to the A post?

Cheers

#71 Tanya

Tanya

    Snuggle-Buddy

  • TMF+ Member
  • PipPipPipPipPipPipPip
  • 1,334 posts
  • Local Club: Abingdon Mini Owners Club

Posted 04 January 2013 - 12:00 AM

I'm following this and really enjoying it. I know the quality of Minis that your family produce so I really can't wait to see it finished. It's going to be a real treat for Mini enthusiasts - keep up the great work :D

#72 SAL 821X

SAL 821X

    Camshaft & Stage Two Head

  • Members
  • PipPipPipPipPipPipPipPip
  • 1,890 posts
  • Location: Hinckley
  • Local Club: Leicester Mini Owners Club

Posted 04 January 2013 - 10:09 AM

Ive not had time for my van let alone getting onto TMF at the moment. But when I do I'm sure to drop in this thread, I've been watching your progress on flickr more also now.

#73 andybnova

andybnova

    Learner Driver

  • Noobies
  • PipPip
  • 10 posts

Posted 04 January 2013 - 10:51 PM

I'm keeping an eye on this project and idea's on how stuff needs to be done on my own Van project. Your doing a cracking job!

#74 ChrisCityE

ChrisCityE

    Speeding Along Now

  • Members
  • PipPipPipPipPip
  • 418 posts
  • Location: Bristol

Posted 16 January 2013 - 11:03 AM

Did you attach your outer A panels first before the inner in order to correctly position the flitch to the A post?


My Dad did that so I don't know sorry...

BIG UPDATE TIME!!!

Loads of progress since I last updated the thread - just put 20 photos on the Flickr page.

The inner sills are almost sorted, the load floor is almost done, the floor is nearly ready to go on.... it's all go go go!

http://www.flickr.com/photos/austin_mini_van/

#75 ClubbyAsh

ClubbyAsh

    Mini Mad

  • Noobies
  • PipPipPipPip
  • 149 posts
  • Location: Lincolnshire

Posted 16 January 2013 - 11:13 AM

Liking the way your van is shaping up! I am a huge van of the old vans so can't wait to see it when it's complete, i like the idea of repairing the old panels as opposed to simply replacing them, good job! Doesn't get much more heritage than that if you ask me! ;D Good look with the rest of the build!


5 user(s) are reading this topic

0 members, 5 guests, 0 anonymous users